Introduction
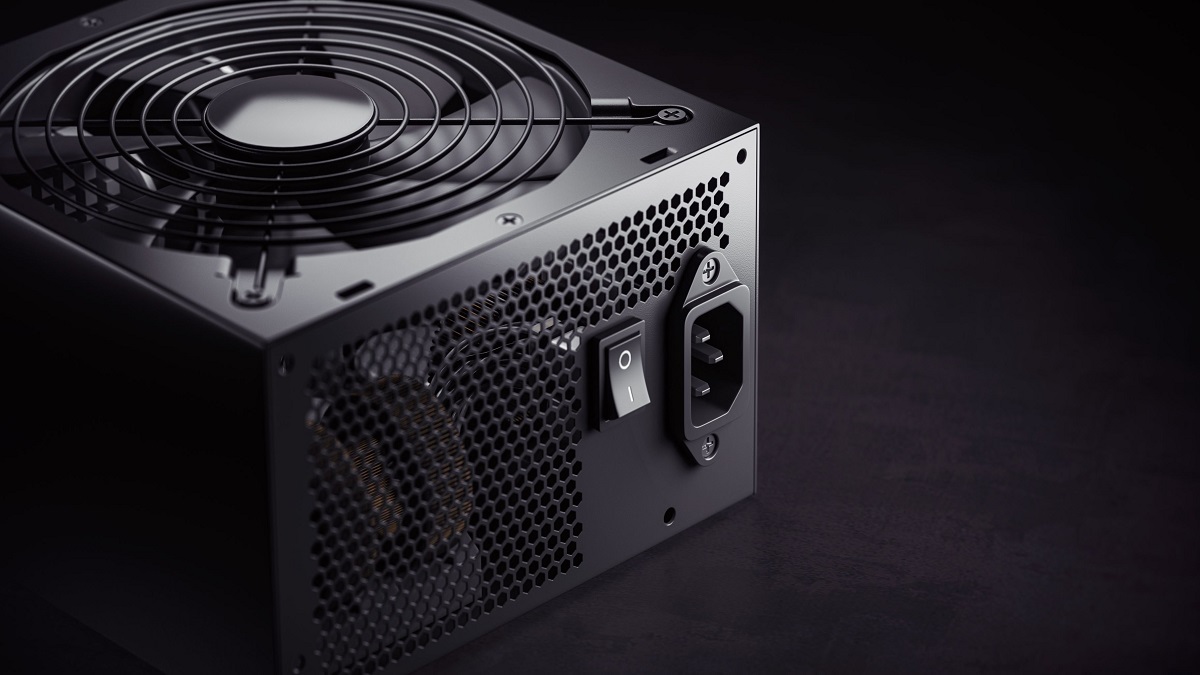
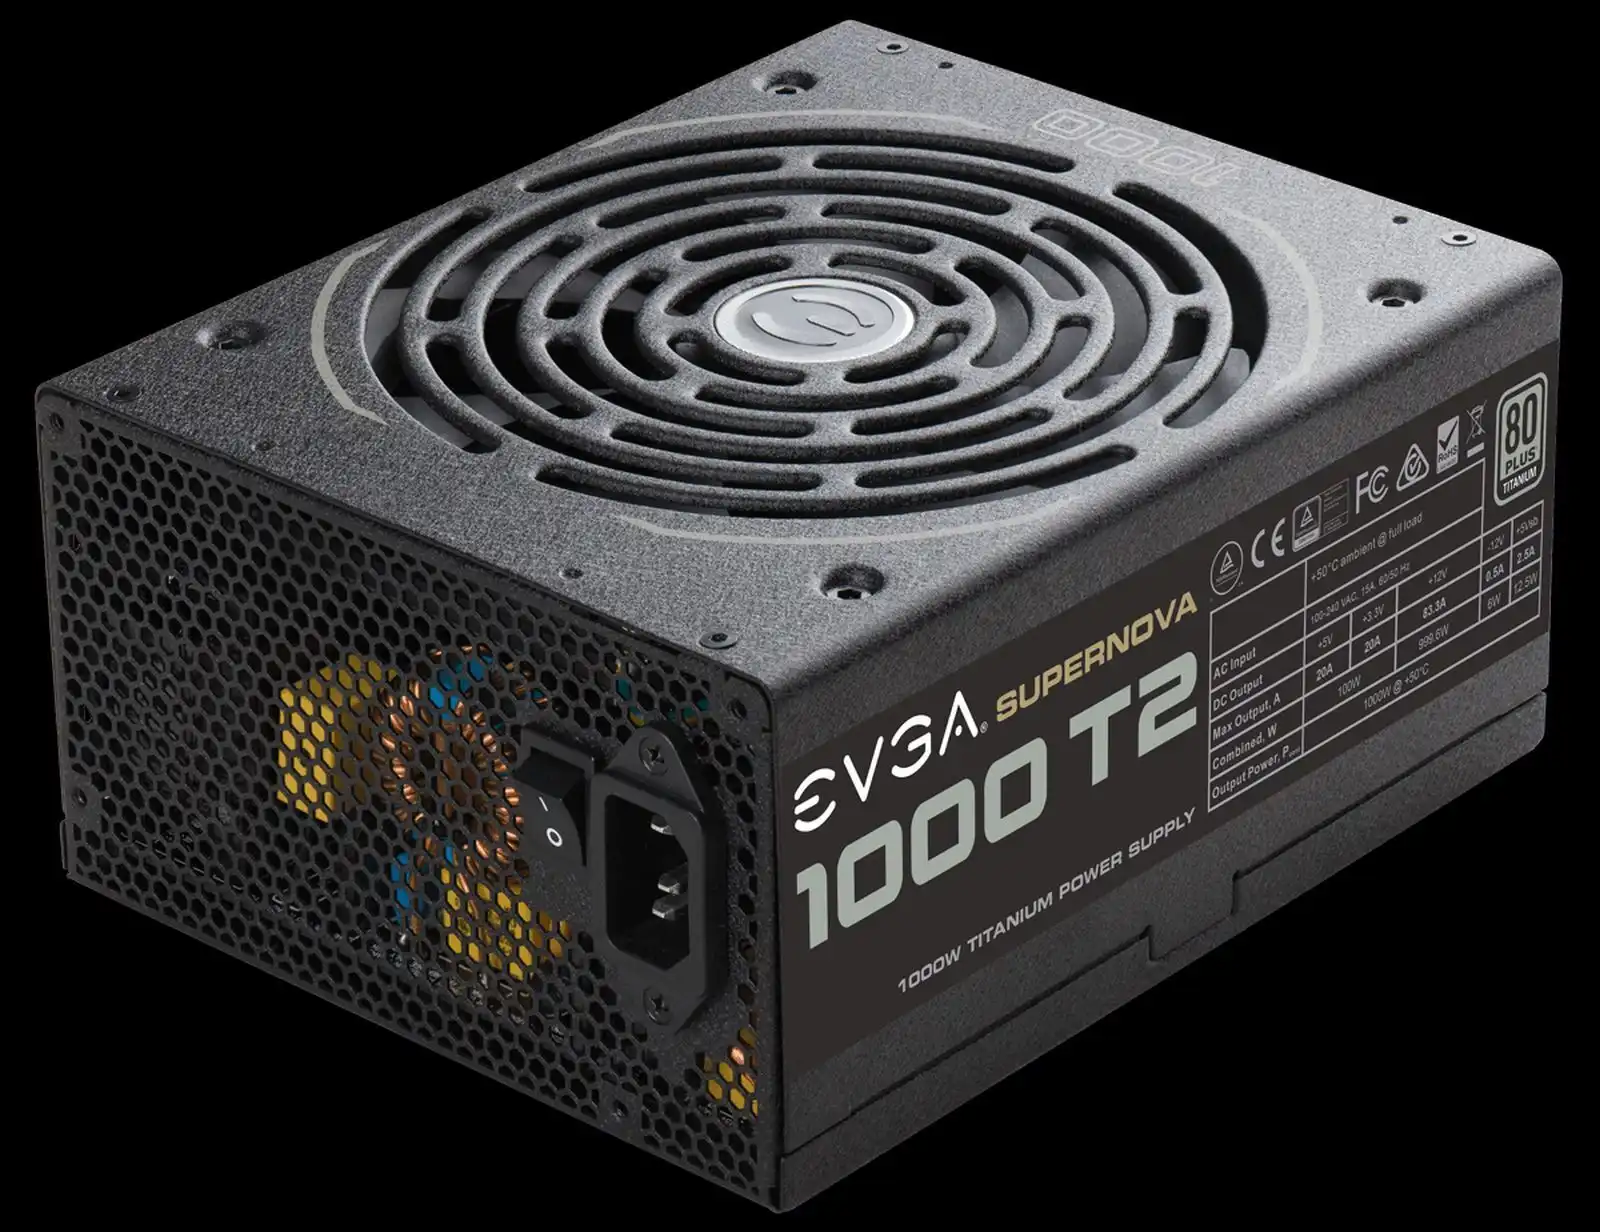
Welcome to the world of power supply units (PSUs)! These essential devices play a crucial role in providing electrical power to various electronic devices, ranging from computers and smartphones to household appliances and industrial machinery. Understanding how power supply units work and even building your own can be a rewarding and educational experience.
In this guide, we will explore the basics of power supply units and provide step-by-step instructions on how to build your own PSU. Whether you are a hobbyist looking to expand your electronics knowledge or a DIY enthusiast seeking to customize your power supply, this article is for you.
A power supply unit’s main function is to convert an input voltage, usually from the mains electricity supply, into a usable output voltage that meets the needs of the connected electronic device. It consists of various components that work together to ensure a stable and reliable power supply.
By building your own power supply unit, you have the opportunity to tailor it to your specific requirements. You can choose the voltage and current ratings, select high-quality components, and even add additional features such as voltage regulation or surge protection.
Throughout this guide, we will provide detailed explanations of the different components used in a power supply unit, including transformers, rectifiers, capacitors, and voltage regulators. We will also cover the step-by-step process of building your own PSU, from selecting the necessary components to testing and troubleshooting the final circuit.
Building a power supply unit may sound daunting, but with the right information and guidance, it can be an enjoyable and achievable project. So, let’s dive in and explore the fascinating world of power supply units!
Understanding Power Supply Units
Before diving into the process of building a power supply unit, it’s important to have a solid understanding of how these essential devices function. A power supply unit, also known as a PSU, is responsible for converting the AC (alternating current) voltage from the mains electricity supply into the DC (direct current) voltage required by electronic devices. Let’s explore the key components that make up a power supply unit:
1. Transformers: The transformer is the heart of the power supply unit. It steps down the high voltage from the mains to a lower voltage suitable for electronic devices. Transformers consist of primary and secondary windings, which help in voltage conversion.
2. Rectifiers: After the transformer lowers the voltage, rectifiers come into play. These components convert the AC voltage into a pulsating DC voltage. The most common rectifier types used in power supply units are diodes and bridge rectifiers.
3. Capacitors: Capacitors are used to smooth out the pulsating DC voltage produced by the rectifiers. They store electrical charges and release them when the voltage drops, ensuring a continuous and stable DC voltage output.
4. Voltage Regulators: Voltage regulators are responsible for maintaining a constant DC voltage output regardless of fluctuations in the input voltage. They provide a stable power supply for the connected electronic devices, protecting them from voltage spikes and irregularities.
5. Protection Circuitry: Power supply units often include protection circuitry to safeguard against overvoltage, overcurrent, and short circuits. These safety measures help prevent damage to the connected devices and ensure the longevity of the power supply unit.
Understanding these components and their roles within a power supply unit is vital for successful construction and troubleshooting. By grasping the principles behind each component, you can make informed decisions when selecting components and confidently tackle any issues that may arise during the building process.
In the next sections, we will delve into the process of selecting the right components and building your own power supply unit. This hands-on experience will not only deepen your understanding of power supply units but also empower you to customize your power supply to suit your specific needs.
Components Needed for Building a Power Supply Unit
Building a power supply unit requires several key components that work together to provide a stable and reliable source of electrical power. Each component serves a specific purpose in converting the input voltage into the desired output voltage. Let’s take a look at the essential components you will need:
1. Transformer: The transformer is an indispensable component that steps down the voltage from the mains electricity supply to a lower, more manageable level. It typically consists of primary and secondary windings that facilitate voltage conversion.
2. Rectifier: The rectifier converts the AC voltage from the transformer into a pulsating DC voltage. Diodes or bridge rectifiers are commonly used for this purpose. They allow current to flow in only one direction, ensuring that the output voltage is in the form of pulsating DC waves.
3. Capacitors: Capacitors play a critical role in smoothing out the pulsating DC voltage produced by the rectifier. They store electrical charges during periods of high voltage and release them when the voltage drops, resulting in a more stable and continuous DC output.
4. Voltage Regulator: The voltage regulator is responsible for maintaining a constant output voltage regardless of fluctuations in the input voltage. It ensures a stable power supply for the connected electronic devices, protecting them from damage caused by voltage irregularities.
5. Protection Circuitry: Incorporating protection circuitry is crucial to safeguard your power supply unit and the connected devices. Overvoltage protection prevents the voltage from exceeding safe limits, while overcurrent protection limits the current flow to prevent damage. Additionally, short circuit protection safeguards against potential hazards caused by short circuits.
6. Other Components: Depending on your specific requirements and the complexity of your power supply unit, you may need additional components such as resistors, inductors, and capacitors for filtering purposes, switches for on/off functionality, and indicators to display the status of the power supply.
When selecting these components, it is important to consider their specifications, such as voltage and current ratings, to ensure compatibility with your desired power output. Additionally, opt for high-quality components from reputable manufacturers to ensure durability and reliability.
By gathering these necessary components, you are now equipped to embark on the journey of building your own power supply unit. The next sections will guide you through the step-by-step process, from selecting the right transformer to assembling and testing the final circuit.
Step 1: Selecting a Transformer
The first step in building a power supply unit is selecting an appropriate transformer. The transformer plays a crucial role in stepping down the voltage from the mains electricity supply to a usable level for your electronic devices. Here are some key factors to consider:
1. Input and Output Voltage Ratings: Determine the input voltage (the voltage from the mains supply) and the desired output voltage for your power supply unit. Ensure that the transformer you choose can handle the input voltage and provide the required output voltage. It is essential to match the voltage ratings to prevent damage to both the transformer and the connected devices.
2. Power Rating: Consider the power rating of the transformer, which is typically measured in VA (volt-ampere) or watts. The power rating indicates the maximum power that the transformer can handle without overheating. Calculate the power requirements of your electronic devices to ensure that the transformer’s power rating is sufficient.
3. Isolation: Decide whether you need a transformer with isolation. Isolation transformers provide electrical isolation between the input and output, protecting the devices from potential electrical hazards. They are particularly useful for sensitive equipment or applications where ground-loop issues may occur.
4. Physical Size and Mounting: Consider the physical size and mounting options of the transformer. Ensure that it fits within the available space in your power supply unit enclosure and that it can be securely mounted. Some transformers may have specific mounting requirements, such as chassis mounting or PCB mounting.
5. Efficiency and Regulation: Take into account the efficiency and regulation of the transformer. Higher efficiency transformers convert electrical energy more efficiently, resulting in less heat dissipation. Good regulation ensures that the output voltage remains stable even with variations in the input voltage, providing a consistent power supply to the connected devices.
6. Safety Certifications: Check for safety certifications on the transformer, such as UL or CE markings. These certifications ensure that the transformer meets specific safety standards and regulations, giving you peace of mind regarding its quality and reliability.
Once you have considered these factors, you can proceed with sourcing a transformer that meets your requirements. Consult electronic component suppliers, visit local electronics stores, or explore reputable online platforms to find a suitable transformer for your power supply unit.
Remember, the transformer is a critical component that sets the foundation for your power supply unit. Taking the time to select the right transformer will ensure the efficiency, reliability, and overall performance of your DIY power supply unit.
Step 2: Choosing a Rectifier
After selecting the appropriate transformer for your power supply unit, the next step is to choose a rectifier. The rectifier is responsible for converting the AC (alternating current) voltage from the transformer into a pulsating DC (direct current) voltage. Here are a few important considerations when choosing a rectifier:
1. Rectifier Type: There are two main types of rectifiers commonly used in power supply units: diodes and bridge rectifiers. Diodes are single components that allow current to flow in one direction, whereas bridge rectifiers consist of four diodes arranged in a bridge configuration, enabling full-wave rectification. Both types have their advantages and are suitable for different applications.
2. Current and Voltage Ratings: Consider the current and voltage ratings of the rectifier. Ensure that the rectifier can handle the maximum current and voltage requirements of your power supply unit. It is crucial to choose a rectifier with ratings that exceed the expected current and voltage to provide a reliable and safe operation.
3. Forward Voltage Drop: The forward voltage drop is an important characteristic of the rectifier. It represents the voltage drop across the rectifier when it is conducting current. Lower forward voltage drops are desirable as they result in less power dissipation and higher efficiency. However, make sure the forward voltage drop is within an acceptable range for your specific application.
4. Reverse Voltage Rating: Consider the reverse voltage rating of the rectifier, which indicates the maximum voltage that can be applied across the rectifier in the reverse direction without damaging it. Ensure that the selected rectifier has a reverse voltage rating that exceeds the highest possible reverse voltage in your power supply unit.
5. Heat Dissipation: Rectifiers can generate heat, especially when handling high currents. Adequate heat dissipation is important to prevent overheating and ensure the longevity of the rectifier. Consider the mounting options and specifications related to heat dissipation, such as using a heat sink or selecting rectifiers with built-in thermal protection features.
6. Supplier and Quality: Choose rectifiers from reputable suppliers or manufacturers known for producing quality electronic components. This ensures that you receive reliable and durable rectifiers that meet industry standards and specifications.
Consider these factors while choosing a rectifier for your power supply unit. If you are unsure about the specifications or unable to find the right rectifier, consult with an electronics specialist or refer to online resources for additional guidance.
By selecting the appropriate rectifier, you can ensure proper conversion of AC to DC voltage and enable a smooth and stable power supply for your electronic devices.
Step 3: Deciding on Capacitors
After choosing a rectifier for your power supply unit, the next step is to decide on the capacitors. Capacitors play a crucial role in smoothing out the pulsating DC voltage generated by the rectifier, ensuring a stable and continuous power output. Here are some important factors to consider when deciding on capacitors:
1. Capacitance: Capacitance is the most crucial specification to consider when selecting capacitors. It determines the amount of charge a capacitor can store. The capacitance value you choose will depend on the specific application and the amount of smoothing required. Higher capacitance values result in better smoothing, but be mindful of space constraints and any limitations imposed by the power supply unit design.
2. Voltage Rating: Ensure that the voltage rating of the capacitors exceeds the maximum voltage that will be applied across them in the power supply circuit. It is essential to choose capacitors with voltage ratings that provide a comfortable margin above the expected voltage to avoid damaging the capacitors or compromising the performance of the power supply unit.
3. Capacitor Type: There are various capacitor types available, including electrolytic capacitors, ceramic capacitors, tantalum capacitors, and film capacitors. Each type has its advantages and is suitable for different applications. Electrolytic capacitors are widely used for power supply units due to their high capacitance values and affordability.
4. ESR and Ripple Current: Equivalent Series Resistance (ESR) and ripple current handling are important considerations for capacitors in power supply units. ESR affects the capacitor’s ability to handle high-frequency ripple currents, while ripple current handling determines the maximum current that the capacitor can handle continuously without compromising its performance. Choose capacitors with low ESR and adequate ripple current handling capabilities for optimal performance and reliability.
5. Temperature and Lifespan: Consider the operating temperature range of the capacitors and their expected lifespan. Capacitors with wider temperature tolerances and longer lifespans are desirable, especially for power supply units that may experience varying environmental conditions or are intended for long-term use.
6. Quality and Supplier: Select capacitors from reputable suppliers known for producing quality electronic components. Ensure that the capacitors meet industry standards and specifications to guarantee reliability and performance.
By carefully considering these factors, you can choose the capacitors that best suit your power supply unit requirements. It is always a good idea to consult with electronics experts or refer to reliable resources for detailed capacitor specifications and technical guidance.
Remember that capacitors play a crucial role in ensuring stable and smooth power output, and selecting the right capacitors will contribute to the overall performance and reliability of your DIY power supply unit.
Step 4: Selecting Voltage Regulators
Once you have chosen the appropriate capacitors for your power supply unit, the next step is to select voltage regulators. Voltage regulators are essential components that ensure a stable output voltage regardless of variations in the input voltage or load conditions. Here are some important considerations when selecting voltage regulators:
1. Voltage Regulation Type: Voltage regulators come in different types, including linear regulators and switching regulators. Linear regulators offer simplicity and low noise but may have limitations on efficiency, especially when there is a significant voltage drop. Switching regulators, on the other hand, provide high efficiency but can be more complex to design and configure.
2. Output Voltage and Current Ratings: Determine the required output voltage and current rating for your power supply unit. Ensure that the voltage regulators you choose can handle the desired output voltage and deliver sufficient current to power the connected devices. It is important to match the specifications of the voltage regulators to the specific requirements of your project.
3. Dropout Voltage: Dropout voltage is an important parameter to consider, especially for linear voltage regulators. It represents the minimum voltage difference required between the input and output for the regulator to provide a stable output voltage. Choose voltage regulators with low dropout voltages to maximize efficiency and minimize power dissipation.
4. Temperature Range and Thermal Protection: Consider the operating temperature range of the voltage regulators and ensure they can handle the intended environment. Additionally, look for voltage regulators that have built-in thermal protection features to prevent overheating and ensure long-term reliability.
5. Supplier and Quality: Select voltage regulators from reputable suppliers or manufacturers known for producing reliable electronic components. Choose regulators that meet industry standards and come with proper documentation and technical support to ensure their quality and compatibility.
6. Additional Features: Depending on your specific requirements, you may consider voltage regulators with additional features such as adjustable output voltage, overvoltage protection, undervoltage lockout, and short-circuit protection. These features can enhance the functionality and safety of your power supply unit.
By considering these factors, you can choose the most suitable voltage regulators for your power supply unit. It is recommended to consult with electronics experts or refer to reliable resources for detailed technical specifications and application notes related to specific voltage regulator models.
Remember, voltage regulators play a crucial role in providing a stable and reliable output voltage, and selecting the right regulators will contribute to the overall performance and functionality of your DIY power supply unit.
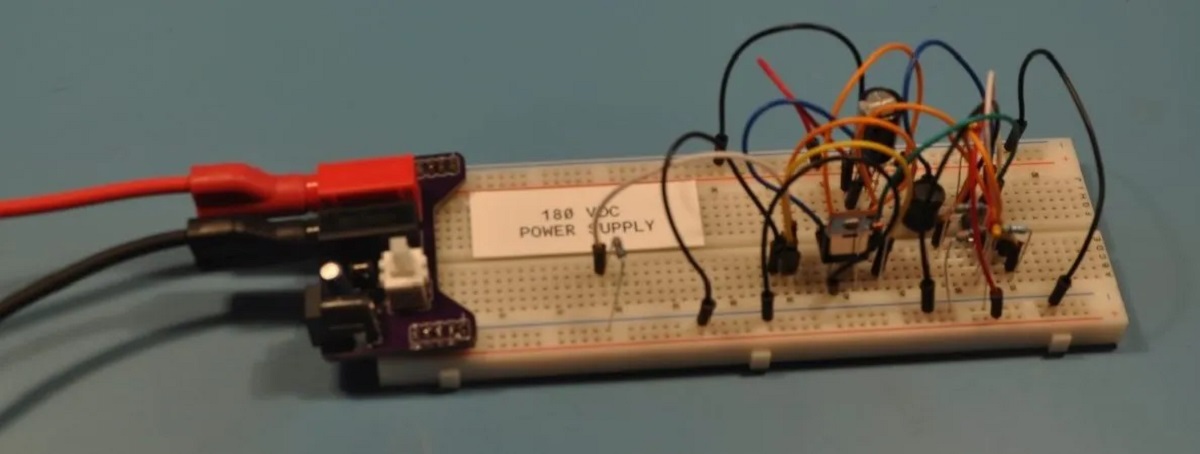
Step 5: Building the Circuit
After selecting all the necessary components for your power supply unit, it’s time to start building the circuit. This step involves assembling the components together to create a functional and reliable power supply unit. Here is a general guide to building the circuit:
1. Prepare the Workspace: Set up a clean and organized workspace with adequate lighting. Gather all the required tools and ensure a safe working environment by following proper electrical safety precautions.
2. Layout the Components: Plan the layout of your power supply unit. Consider the size of the components, the available space in your enclosure, and the proximity of the components to ensure proper airflow and ease of assembly.
3. Mount the Components: Start by mounting the transformer, rectifier, capacitors, voltage regulators, and any other components onto a circuit board or a suitable mounting platform. Follow the manufacturer’s guidelines and use appropriate fastening techniques to secure the components in place.
4. Connect the Components: Connect the components together using appropriate wiring techniques. Pay attention to the polarity and correct orientation of the components, adhering to the schematics or layout diagrams provided by the manufacturer or your own design.
5. Insulate and Protect: Insulate the connections by using heat-shrink tubing, electrical tape, or insulating sleeves. Take extra care to insulate high-voltage connections. Ensure that all exposed conductors are covered to prevent accidental short circuits or electrical shocks.
6. Soldering: Properly solder the connections to ensure secure and reliable electrical connections. Use a soldering iron and lead-free solder to create strong bonds between the components and the circuit board. Follow good soldering practices to prevent solder bridges and cold joints.
7. Double-Check and Clean: Double-check all the connections and verify that there are no loose wires or soldering defects. Use isopropyl alcohol or a suitable cleaning agent to remove any flux residue or contaminants that might affect the performance of the circuit.
8. Test the Circuit: Before closing the enclosure, perform a thorough functional test of your power supply unit. Connect it to a load or a testing device and ensure that the output voltage is within the desired range. Verify that all the components are functioning correctly and troubleshoot any issues if necessary.
Building the circuit requires attention to detail, patience, and adherence to good practices. If you are unsure about any aspect of the building process, seek guidance from experienced individuals or refer to reliable resources for additional information and troubleshooting tips.
By following these steps and building the circuit carefully, you can transform your collection of components into a fully functional power supply unit ready to provide reliable power to your electronic devices.
Step 6: Soldering and Wiring
Once the components are mounted and the circuit is built, the next step in building your power supply unit is soldering and wiring. This step involves making secure and reliable electrical connections between the components, ensuring proper conductivity and stability. Here is a guide to help you through the soldering and wiring process:
1. Prepare Your Soldering Station: Set up your soldering station in a well-ventilated area with proper lighting. Ensure that you have a soldering iron with a suitable tip size and temperature control to prevent overheating or damaging the components.
2. Tin Your Soldering Iron: Before starting, make sure to clean and tin your soldering iron tip. Applying a thin layer of solder onto the iron’s tip helps improve heat transfer and ensures better soldering results.
3. Trim and Strip Wires: Trim the wires to the appropriate lengths using wire cutters, leaving some excess for flexibility. Then, use wire strippers to strip off a small portion of insulation from the ends of the wires, exposing the bare conductor.
4. Solder the Connections: Apply heat to the joint by touching the soldering iron tip to the wire and component lead simultaneously. Once the joint is heated, touch the solder wire to the joint. Allow the solder to flow and create a strong bond between the wire and the component lead. Ensure the joint is neat and smooth, without any solder bridges or cold joints.
5. Secure Components with Heat Shrink Tubing: Slide heat shrink tubing over the soldered connections and use a heat source such as a heat gun to shrink it, providing insulation and mechanical support to the soldered joints. This helps prevent accidental shorts and adds durability to the connections.
6. Follow Wiring Diagrams: Refer to wiring diagrams or schematics provided by the component manufacturers or your own design. Follow the designated wiring paths, connecting the appropriate wires between the components, ensuring correct polarities, and maintaining proper separation to prevent any potential short circuits.
7. Use Cable Ties and Insulation: Secure and organize the wires using cable ties, keeping them neat and preventing excessive strain. Additionally, use insulating materials like plastic tubing or electrical tape to cover exposed wires, ensuring safety and preventing any unintended contact.
8. Double-Check and Inspect: Inspect each solder connection and wire to ensure there are no loose connections, solder splatter, or exposed conductors. Double-check the correct routing of wires and connections by comparing them with the wiring diagram or schematic.
9. Test for Continuity and Functionality: Before closing the enclosure, use a multimeter or continuity tester to check for continuity in the soldered connections and ensure proper conductivity. Once confirmed, perform functional tests on your power supply unit to verify that the circuit is working as expected and providing the desired output voltage.
Soldering and wiring are critical steps in building a power supply unit, and attention to detail is key. If you are new to soldering, it is advisable to practice on scrap wires or components to develop your soldering skills before working on the actual circuit.
With proper soldering techniques and meticulous wiring, you can ensure a well-assembled and reliable power supply unit ready for use in your electronics projects.
Step 7: Testing and Troubleshooting
Once you have completed assembling your power supply unit, the next crucial step is to test and troubleshoot the circuit to ensure its functionality and stability. Testing and troubleshooting are essential to identify any potential issues or malfunctions and resolve them effectively. Here is a guide to help you through the testing and troubleshooting process:
1. Double-check Connections: Before powering on your power supply unit, double-check all the connections to ensure they are secure, properly soldered, and correctly wired. Verify that there are no loose wires or components that could cause short circuits or other electrical issues.
2. Verify Input Voltage: Ensure that the input voltage provided to the power supply unit matches the specified voltage for the transformer and is within the acceptable range. Connecting the power supply unit to a higher or lower input voltage than intended can damage the circuit or provide incorrect output voltage.
3. Measure Output Voltage: Use a multimeter or a voltage meter to measure the output voltage of your power supply unit. Ensure that the measured voltage matches the intended output voltage, accounting for any voltage drop due to circuit losses. Confirm that the output voltage remains stable under varying load conditions.
4. Test under Different Loads: Connect different loads, such as resistors or electronic devices, to the output of the power supply unit and observe how it performs. Verify that the output voltage remains within the desired range and there are no excessive fluctuations or abnormal behavior when the load changes.
5. Check for Ripple or Noise: Use an oscilloscope or a multimeter with a frequency measurement function to check for any undesirable ripple or noise in the output voltage. Excessive ripple or noise can adversely affect the performance of connected devices. Ensure that the measured ripple is within acceptable limits.
6. Troubleshooting: If you encounter any issues during the testing process, such as unstable output voltage, excessive heat, or abnormal behavior, begin the troubleshooting process. Review your circuit design, inspect connections, and use systematic troubleshooting techniques like isolating components or sections of the circuit to identify and resolve the problem.
7. Seek Expert Assistance: If the troubleshooting process becomes challenging or if you are unable to resolve the issue on your own, it is advisable to seek the assistance of experienced individuals or electronics experts. They can provide guidance, offer insights, and help you troubleshoot and address any complex problems that may arise.
Testing and troubleshooting are integral parts of building a power supply unit. Thoroughly testing and troubleshooting your circuit ensures its reliability, functionality, and performance, giving you confidence in using it to power your electronic devices.
Remember to exercise patience, perseverance, and attention to detail during the testing and troubleshooting process, as it often leads to the successful resolution of any issues that may arise.
Conclusion
Building your own power supply unit can be an exciting and rewarding undertaking, allowing you to customize the voltage output and create a tailored solution for your electronic devices. Throughout this guide, we have explored the essential steps involved in building a power supply unit, from understanding its components to testing and troubleshooting the circuit.
By selecting a suitable transformer, rectifier, capacitors, voltage regulators, and other necessary components, you can create a stable and reliable power supply unit that meets your specific voltage requirements. Soldering and wiring the circuit ensure secure connections and proper conductivity, while testing and troubleshooting help identify and resolve any issues that may arise during the building process.
Remember to follow good soldering practices, adhere to safety guidelines, and consult with electronics experts or reliable resources whenever needed. Building a power supply unit requires attention to detail, patience, and perseverance, but the knowledge and skills gained from the experience are invaluable.
Now that you have a comprehensive understanding of the steps involved, you are ready to embark on your DIY power supply unit project. Whether it’s for a simple hobby project or a complex electronic system, building your own power supply unit provides you with a customized and reliable power source.
Enjoy the process of building, testing, and troubleshooting your power supply unit. By creating your own power supply, you gain a deeper understanding of electronics and the satisfaction of knowing that you have successfully built a crucial component of your electronic system.
So, gather your components, heat up the soldering iron, and get ready to embark on a journey of building your own power supply unit. Happy building!