Introduction
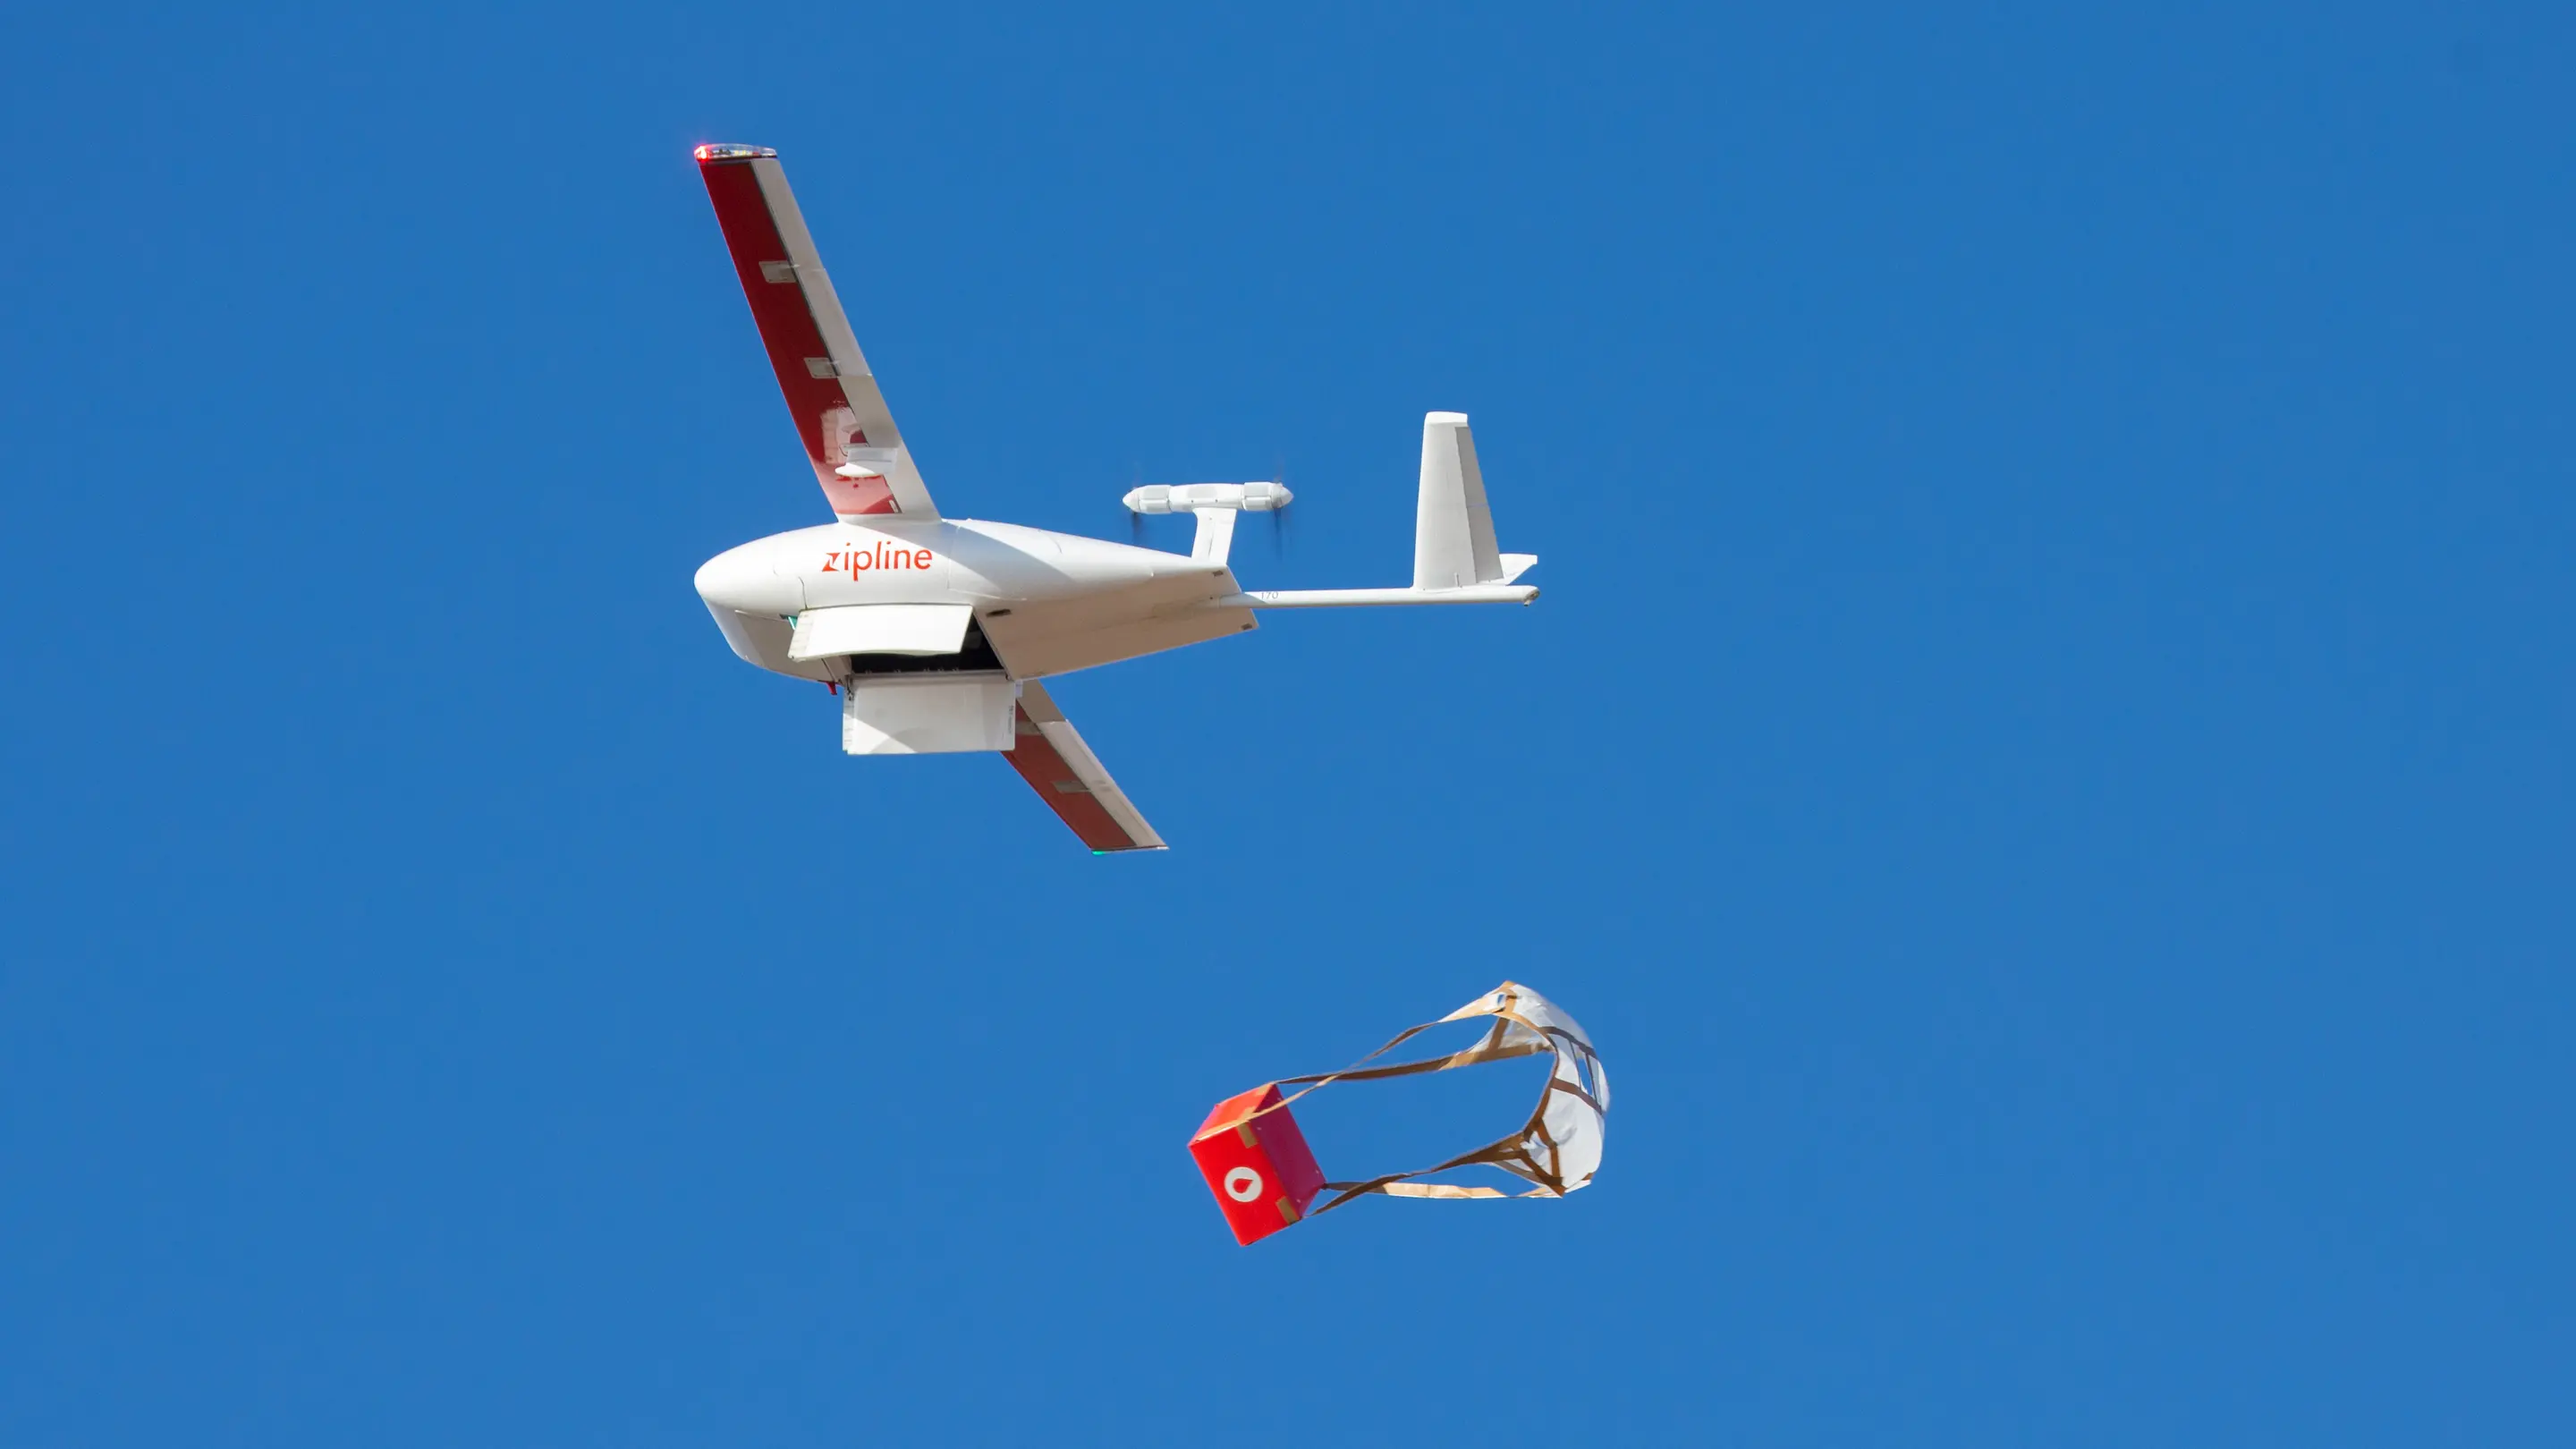
Welcome to the world of drone jammers – devices that are designed to interrupt the signals and control systems of unmanned aerial vehicles (UAVs), commonly known as drones. Drones have gained immense popularity in recent years for various applications like aerial photography, surveillance, and even delivery services. However, as with any technology, there are concerns about their potential misuse.
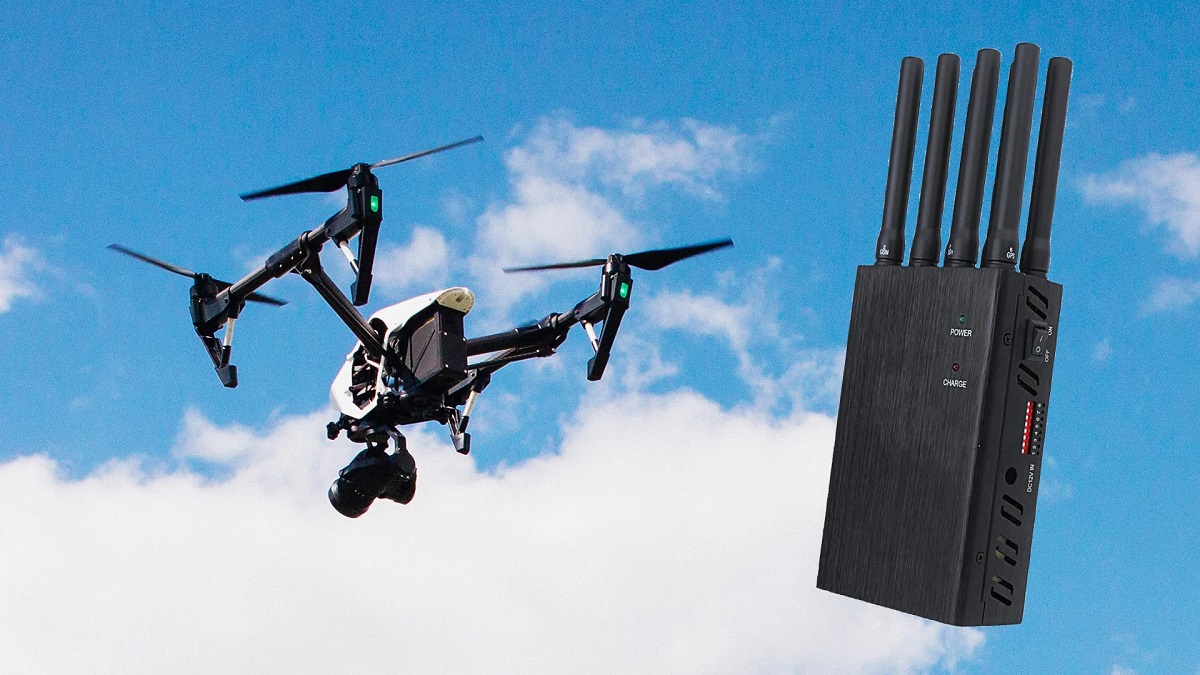
Drone jammers act as a countermeasure to unauthorized or potentially dangerous drone activities. They work by emitting radio frequency signals that interfere with the communication between the drone and its operator, effectively rendering the drone inoperable. While the use of drone jammers might raise ethical and legal questions, they can be a useful tool in certain situations, such as protecting sensitive areas or ensuring public safety during events.
In this article, we will delve into the world of drone jammers and provide insights into how they work. You’ll also find a step-by-step guide on how to build your own drone jammer, along with the necessary components and tools required. However, it’s crucial to note that the use of drone jammers may be subject to legal restrictions in different jurisdictions, so it’s essential to understand and adhere to the laws in your specific area.
By the end of this article, you’ll have a comprehensive understanding of drone jammers, be equipped with the knowledge to build one, and have an awareness of the legal and ethical considerations associated with their use.
Background on Drone Jammers
Drone jammers are devices specifically designed to disrupt the signals and control systems of drones, making them unable to function properly. They are utilized in various scenarios, including military operations, border security, event protection, and safeguarding sensitive areas from potential threats.
The use of drones has become increasingly prevalent, bringing both positive and negative impacts. While drones offer numerous benefits such as aerial photography and surveillance capabilities, they also pose risks if used inappropriately or maliciously. This has led to the development of drone jammers as a defensive measure against unauthorized or potentially harmful drone activities.
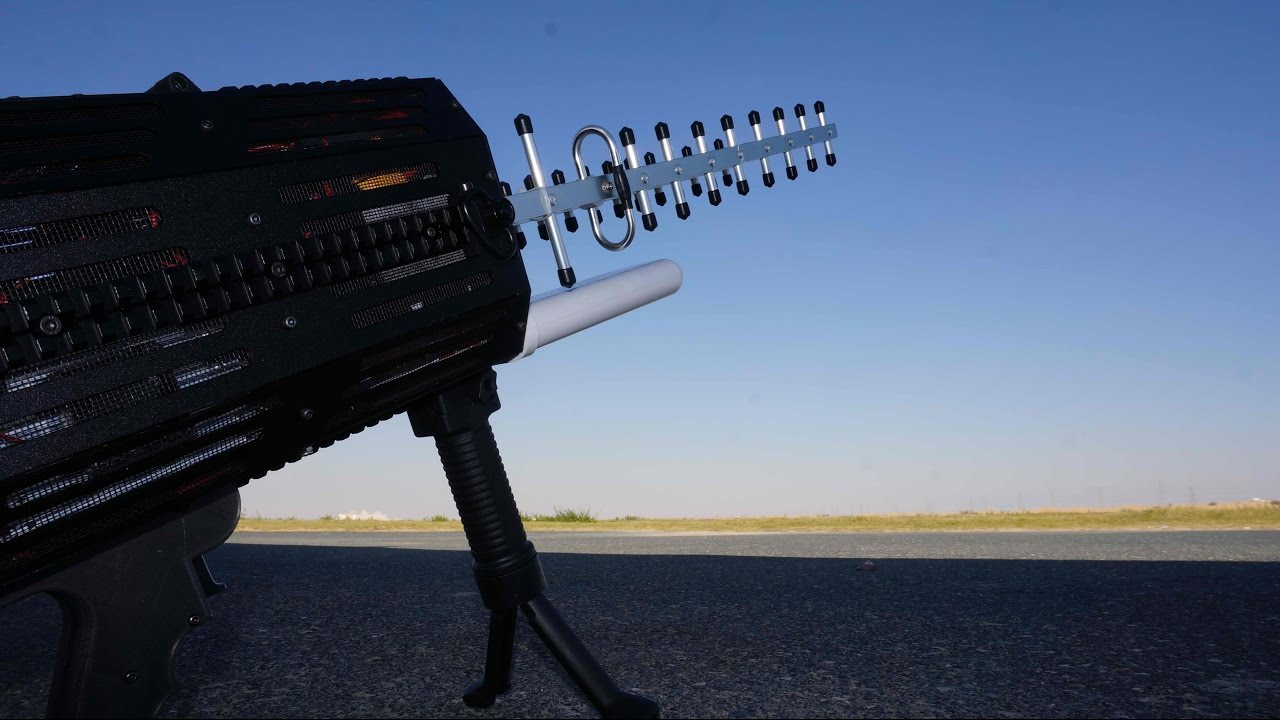
Drone jammers work by emitting radio frequency (RF) signals that interfere with the communication between the drone and its operator. These RF signals disrupt the commands and data transmission, preventing the drone from responding to control inputs and rendering it essentially useless. Some advanced drone jammers can even force the drone to perform a controlled landing or return to its point of origin.
It’s important to note that there are different types of drone jammers available, each with its own capabilities and limitations. Some drone jammers operate on specific frequency bands, while others are designed to jam multiple frequency bands simultaneously. The effectiveness of a drone jammer depends on factors such as the power output, range, and compatibility with different drone models.
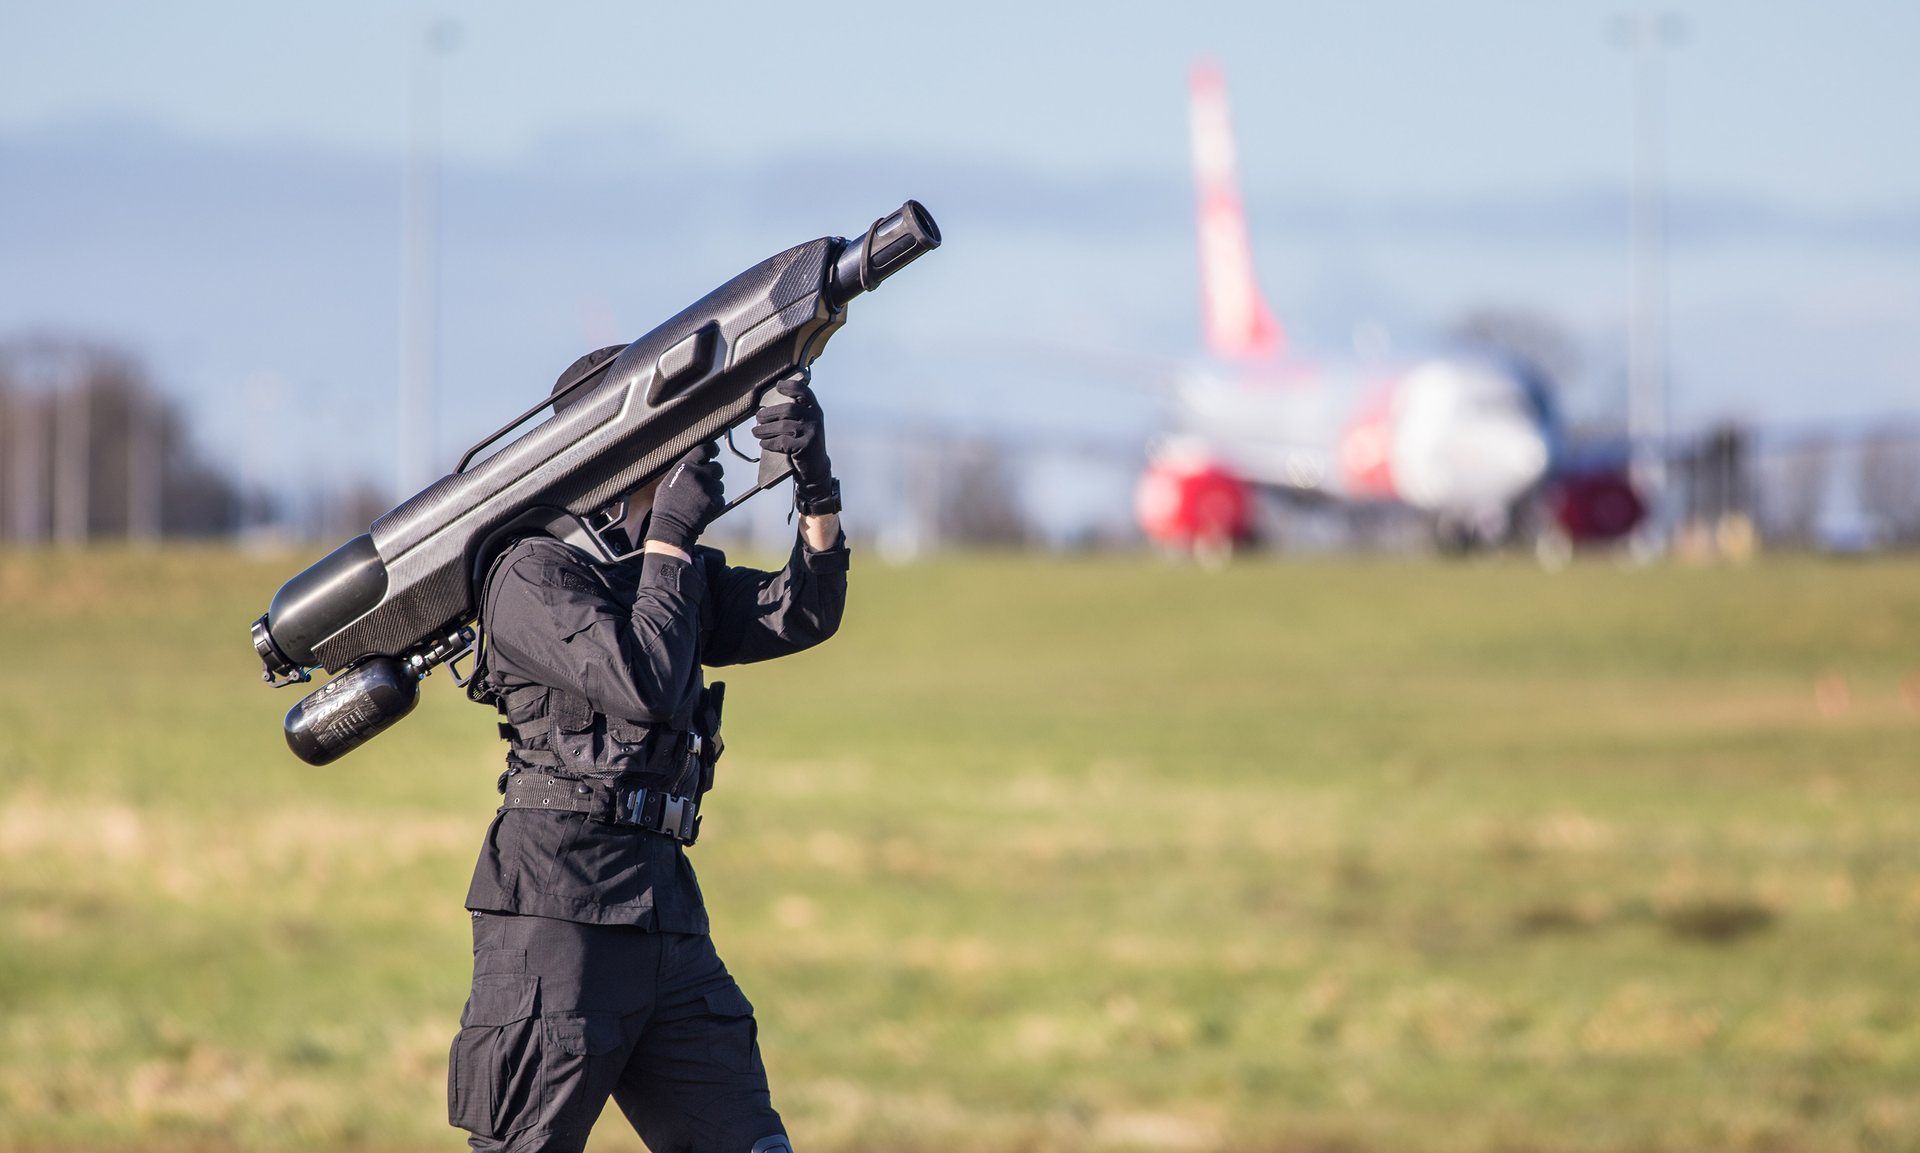
Drone jammers can be classified into two main categories: portable and stationary. Portable drone jammers are compact and easy to carry, making them suitable for mobile operations. They are often used by law enforcement agencies or security personnel who need to respond quickly to drone threats. On the other hand, stationary drone jammers are fixed installations that provide continuous protection for larger areas. These are commonly used in critical infrastructure sites or high-security zones.
While drone jammers can be a valuable tool in certain situations, it’s essential to be aware of the legal and ethical implications associated with their use. Regulations regarding drone activities and the use of countermeasures may vary from country to country, so it’s crucial to understand and comply with the applicable laws in your jurisdiction.
In the following sections of this article, we will explore the principles behind drone jamming, guide you through the process of building your own drone jammer, and discuss the legal and ethical considerations that should be taken into account.
Understanding the Principles of Drone Jamming
Before diving into the process of building a drone jammer, it’s essential to have a basic understanding of the principles behind drone jamming. Drone jammers work by disrupting the communication between the drone and its operator, essentially disrupting the signals that control the drone’s flight and functionality.
The primary method used in drone jamming is through the emission of radio frequency (RF) signals. Drones communicate with their operators via wireless protocols, such as Wi-Fi or radio signals. Drone jammers exploit this wireless communication by emitting powerful RF signals on the same frequencies used by drones, effectively overpowering and interfering with the legitimate signals.
Drone jammers can jam specific frequency bands employed by drones, or they can jam multiple frequency bands simultaneously. They can target common frequencies used by consumer drones or focus on specific frequency bands used by professional or military-grade drones.
One of the key aspects of effective drone jamming is the power output of the jammer. Higher power output allows for a greater range and stronger interference with the drone’s signals. However, it’s crucial to consider the legal restrictions and limitations on the power output of drone jammers, as exceeding legal limits can have serious consequences.
Another consideration is the range of the jammer. While some drone jammers have limited range and are designed for short-range applications, others have an extended range and can disrupt drone signals from a significant distance. The range depends on various factors, including the power output, antenna design, and environmental conditions.
In addition to RF jamming, some advanced drone jammers may employ other methods to disrupt drones, such as GPS spoofing. By simulating the GPS signals that drones rely on for navigation and location tracking, these jammers can effectively mislead a drone and cause it to lose its positioning or fly off course.
It’s important to note that drone jamming should be approached with caution and used responsibly. While there are legitimate reasons for deploying drone jammers, such as protecting sensitive areas or enhancing public safety, it’s essential to be aware of the legal and ethical implications. Some jurisdictions may have stringent regulations and restrictions on the use of drone jammers, and using them inappropriately or without proper authorization can have legal consequences.
In the next sections, we will guide you through the process of building your own drone jammer, ensuring that you have the knowledge and understanding to use it responsibly and in compliance with applicable laws and regulations.
Step-by-step guide to building a drone jammer
Building a drone jammer requires a combination of technical knowledge and the right components. While the process may seem complex, this step-by-step guide will walk you through the necessary steps to create your own drone jammer.
Step 1: Determine the Frequency Bands
Start by researching and determining the frequency bands used by the drones you wish to target. Consumer drones typically operate within the 2.4GHz and 5.8GHz frequency bands, while professional or military drones may use additional frequency ranges. Understanding the frequency bands will help you identify the appropriate components to build your jammer.
Step 2: Gather the Components
Next, gather the components you’ll need to build your drone jammer. These components may include a radio frequency amplifier, bandpass filters, antennas, power supply, and control circuitry. Ensure that the components are suitable for the frequency bands you identified in Step 1.
Step 3: Design the Circuit
Design the circuit for your drone jammer based on the components you’ve gathered. This circuit will control the amplification and filtering of the RF signals. You may need to consult circuit diagrams or seek assistance from an experienced electronics engineer to ensure the circuit is designed correctly.
Step 4: Assemble the Hardware
Once you have the circuit design ready, assemble the hardware components according to the circuit diagram. This includes connecting the amplifiers, filters, antennas, and control circuitry. Take care to follow proper soldering techniques and ensure all connections are secure.
Step 5: Configure the Power
To power your drone jammer, connect a suitable power supply, ensuring it meets the power requirements of the components. Take precautions to prevent any short circuits or power surges that could damage the circuit or components.
Step 6: Test the Drone Jammer
Before deploying your drone jammer, it’s important to thoroughly test its functionality. Find a safe and controlled environment where you can test the jammer without interfering with any legitimate drone operations. Verify that the jammer effectively disrupts the signals of the targeted drones within the desired range.
Step 7: Legal and Ethical Considerations
Once you have a fully functional drone jammer, it’s crucial to educate yourself about the legal and ethical considerations surrounding its use. Research the regulations and laws in your jurisdiction to ensure compliance. Additionally, use your drone jammer responsibly and ethically, considering the potential impact on legitimate drone operations and the privacy of individuals.
By following these steps, you can build your own drone jammer. Remember to exercise caution, abide by the laws, and prioritize safety and ethical considerations when deploying and using your drone jammer.
Required Components and Tools
Building a drone jammer requires specific components and tools to ensure its proper operation. Here is a list of essential items you will need to gather before starting the construction:
Components:
- Radio Frequency (RF) Amplifier: This amplifies the RF signals used to disrupt the drone’s communication.
- Bandpass Filters: These filters ensure that only the desired frequency bands are amplified, reducing interference from other signals.
- Antennas: Antennas transmit and receive the RF signals, allowing the jammer to disrupt drone communication effectively.
- Power Supply: A suitable power supply is required to provide electricity to the components and ensure stable operation.
- Control Circuitry: This circuitry regulates and controls various aspects of the jammer’s operation, such as power output and frequency selection.
- Enclosure: An enclosure or casing provides physical protection and helps organize the components neatly.
Tools:
- Soldering Iron and Solder: These tools are necessary for securely connecting components and wires together.
- Wire Cutters and Strippers: These tools facilitate the process of cutting and stripping wires to the required length.
- Multimeter: A multimeter is used to measure voltage, current, and resistance, ensuring proper circuit connections.
- Screwdrivers and Screws: These tools are essential for securing the components and enclosure together.
- Wire and Cables: High-quality wires and cables are necessary for reliable connections and signal transmission.
- Printed Circuit Board (PCB) (optional): If you prefer a more professional-looking jammer, you can design and manufacture a PCB to mount and connect the components.
Ensure that the components you choose are compatible with the frequency bands you intend to jam and meet the power requirements for effective disruption. Additionally, it’s important to use appropriate safety precautions while working with electrical components and soldering.
Gathering the necessary components and tools beforehand will simplify the construction process and increase the chances of a successful drone jammer assembly.
Assembling the Hardware
Once you have gathered all the required components and tools, it’s time to assemble the hardware for your drone jammer. Follow these steps to ensure a successful assembly:
Step 1: Prepare the Enclosure
If you are using an enclosure, make sure it is clean and free from any dust or debris. This will provide a secure and organized space for the jammer components.
Step 2: Mount the Components
Begin by mounting the RF amplifier, bandpass filters, and control circuitry on the enclosure or circuit board. Secure them in place using screws and ensure they are properly aligned and connected.
Step 3: Connect the Antennas
Attach the antennas to the designated antenna ports on the RF amplifier. The antennas should be positioned appropriately to provide optimal signal transmission and reception.
Step 4: Wire the Components
Using the wire cutters and strippers, carefully cut and strip the wires to the required length. Connect the components together according to the circuit diagram, ensuring proper connections are made. Use soldering techniques or suitable connectors for secure and reliable connections.
Step 5: Check for Loose Connections
After wiring the jammer, inspect all the connections to ensure that they are secure and free from any loose wires or components. Additionally, check for any potential short circuits or incorrect connections that may cause malfunctions.
Step 6: Test the Jammer
Before sealing the enclosure or finalizing the assembly, it’s crucial to test the jammer to ensure its functionality. Connect the power supply and power on the jammer. Verify that all the components are receiving power and that the jammer is emitting RF signals on the desired frequency bands. Use a multimeter to measure voltage and check for any irregularities.
Step 7: Safely Enclose the Jammer (if applicable)
If you are using an enclosure, carefully place the assembled hardware inside and secure it using screws or other appropriate fasteners. Ensure that the enclosure provides proper ventilation to prevent overheating of the components.
By following these steps, you will have successfully assembled the hardware components of your drone jammer. However, it’s important to note that the assembly process may vary depending on the specific design and components used. Consult the component datasheets, circuit diagram, or seek expert guidance if needed.
Configuring the Software
Once you have assembled the hardware components of your drone jammer, configuring the software is the next crucial step. Software configuration allows you to control and fine-tune the performance of the jammer. Follow these steps to configure the software:
Step 1: Understand the Firmware
Review the documentation and understand the firmware or software that controls the jammer. This may include settings for power output, frequency selection, modulation methods, and other operational parameters.
Step 2: Connect to the Jammer
To configure the software, connect your computer to the jammer using the appropriate interface. This may be a USB or Ethernet connection, depending on the design of your jammer.
Step 3: Install Configuration Software
If your jammer comes with dedicated configuration software, install it on your computer. Follow the instructions provided by the manufacturer to ensure a smooth installation process.
Step 4: Launch the Configuration Software
Launch the configuration software on your computer and establish a connection to the jammer. This typically involves selecting the appropriate communication port and establishing a connection through the software interface.
Step 5: Adjust Power Output
Using the configuration software, adjust the power output of the jammer according to your needs. Carefully consider legal restrictions and limitations on power output to ensure compliance with regulations.
Step 6: Select Frequency Bands
Configure the software to select the desired frequency bands that you want the jammer to target. Ensure that you are familiar with the frequency bands used by the drones you intend to disrupt and adjust the settings accordingly.
Step 7: Customize Additional Settings (if applicable)
Depending on the capabilities of your jammer and the configuration software, you may have the option to customize additional settings. This may include modulation methods, signal patterns, and other advanced parameters for fine-tuning the jammer’s performance.
Step 8: Save and Apply the Configuration
Once you have adjusted the desired settings in the configuration software, save the configuration and apply it to the jammer. This ensures that the jammer operates according to the configured parameters.
It’s important to note that software configuration may vary depending on the specific model and manufacturer of the jammer. It is recommended to carefully follow the instructions provided by the manufacturer and consult any available documentation or support resources for proper software configuration.
By successfully configuring the software, you will have fine-tuned and optimized your drone jammer for effective operation.
Testing and Troubleshooting
Once you have assembled and configured your drone jammer, the next crucial step is to thoroughly test it for functionality and performance. This section will guide you through the testing process and provide troubleshooting steps if issues arise.
Step 1: Find a Suitable Test Location
Choose an appropriate test location that allows you to safely test the jammer without interfering with legitimate drone operations or violating any local regulations. It’s essential to prioritize safety and ensure that your testing does not pose any risks to people, property, or other aircraft.
Step 2: Power On the Jammer
Connect the power supply and turn on the drone jammer. Ensure that all the components are receiving power and that the jammer is operational.
Step 3: Test Different Frequency Bands
Using a compatible drone or a drone simulator, test the jammer’s effectiveness by flying the drone within the range of the jammer. Experiment with different frequency bands and observe how the jammer disrupts the drone’s communication. Verify that the drone becomes unresponsive or exhibits erratic behavior when subjected to the jammer’s signals.
Step 4: Measure Range and Coverage
Gradually move away from the drone while keeping an eye on the drone’s reaction to the jamming signals. Measure the effective range of the jammer and determine its coverage area. Remember that environmental factors, such as physical obstacles or interference, can impact the range and coverage, so take those into account during the testing process.
Step 5: Monitor Power Output
Use a power meter or multimeter to measure the power output of the jammer. Ensure that the power output is within legal limits and, if necessary, adjust the configuration settings accordingly.
Troubleshooting
If you encounter any issues during testing, it’s crucial to troubleshoot the problem. Here are some common troubleshooting steps:
- Check for Loose Connections: Ensure that all connections within the jammer are secure and properly soldered or connected.
- Verify Power Supply: Double-check the power supply to ensure it is delivering the correct voltage and current required by the jammer.
- Inspect Antennas: Confirm that the antennas are correctly installed and positioned for optimal signal transmission and reception.
- Review Configuration Settings: Check the configuration software and verify that the settings are accurate and appropriate for the target frequency bands.
- Consult the Manufacturer: If issues persist, consult the manufacturer’s documentation or seek assistance from their support team for further troubleshooting steps.
Thoroughly testing and troubleshooting your drone jammer will ensure its reliable performance and help identify any potential issues that may arise during operation. Always prioritize safety and adhere to local regulations while conducting your tests.
Legal and Ethical Considerations
While drone jammers can serve as a valuable tool in certain situations, it’s imperative to be aware of the legal and ethical implications associated with their use. Here are some key considerations to keep in mind:
Legal Regulations:
Before deploying a drone jammer, familiarize yourself with the laws and regulations governing their use in your jurisdiction. Different countries may have specific rules and restrictions regarding drone activities and the use of countermeasures. It’s crucial to understand and comply with these regulations to avoid legal consequences.
Permitted Use:
Ensure that you are utilizing the drone jammer for authorized and legitimate purposes. Common justifications for using a drone jammer may include protecting critical infrastructure, safeguarding sensitive areas, or enhancing public safety during events. Deviating from these justifiable reasons may lead to legal issues.
Privacy Concerns:
Consider the potential impact on privacy when deploying a drone jammer. Drones equipped with cameras or other sensors may gather sensitive information, and interfering with their operation may infringe on individuals’ privacy rights. Respect privacy laws and avoid unauthorized surveillance or intrusion.
Flight Safety:
While drone jammers aim to disrupt unauthorized drone activities, it’s essential to prioritize flight safety. Avoid interfering with legitimate drone operations, such as those conducted by emergency services, government agencies, or commercial entities. Interfering with these operations could compromise public safety or disrupt essential services.
Use Responsibly:
Exercise responsible use of a drone jammer and avoid unnecessary or excessive disruption. Minimize collateral damage by ensuring that you have a clear understanding of the jammer’s effective range and coverage area. This will help prevent unintentional interference with nearby devices or communication systems.
Disclosure and Authorization:
If you plan to use a drone jammer in a professional or commercial capacity, it is advisable to disclose your intent to relevant authorities. Seek proper authorization and obtain any necessary permits or licenses. This can help ensure compliance with local regulations and maintain transparency in your operations.
Continuous Monitoring and Compliance:
Stay informed about updates or changes to drone-related regulations and adjust your practices accordingly. Regularly assess the legal landscape to ensure ongoing compliance with applicable laws. Maintain a diligent and responsible approach to the use of drone jammers.
Understanding and adhering to legal and ethical considerations is crucial when using a drone jammer. By doing so, you can balance the benefits of protecting sensitive areas or public safety while respecting the rights and privacy of individuals and organizations.
Conclusion
Building a drone jammer can be a challenging yet rewarding endeavor. By understanding the principles of drone jamming, gathering the necessary components and tools, assembling the hardware, configuring the software, and conducting thorough testing, you can create a functional and effective drone jammer.
However, it is crucial to remember that the use of drone jammers comes with legal and ethical responsibilities. Familiarize yourself with the laws and regulations in your jurisdiction and ensure compliance with applicable rules. Use drone jammers only for legitimate purposes, such as protecting critical infrastructure or enhancing public safety.
While drone jammers can provide security and privacy benefits, it’s important to exercise responsible use. Avoid unnecessary disruptions and respect the rights and privacy of individuals. Consider the potential impact on flight safety and be cautious of interfering with legitimate drone operations.
Continuous monitoring of legal requirements and compliance is essential. Stay informed about any changes in drone regulations and adjust your practices accordingly. Maintain a responsible and ethical approach to the use of drone jammers to avoid any legal consequences and ensure the safety of all involved.
By following the steps outlined in this guide, you have the knowledge and tools to embark on building your own drone jammer. Remember to proceed responsibly, prioritize safety, and use drone jammers in a way that respects the law, privacy, and flight safety.
Building and using a drone jammer requires not only technical know-how but also a strong understanding of the legal and ethical considerations. By striking the right balance, you can harness the benefits of this technology while promoting responsible and conscientious use.