Introduction
Welcome to the exciting world of drones! Drones have become increasingly popular in recent years, and building your own drone from scratch can be a rewarding and educational experience. Whether you are a hobbyist looking to have fun or a professional enthusiast wanting to learn more, this guide will provide you with step-by-step instructions on how to build your own drone from scratch.
Building a drone from scratch offers several advantages. Not only do you have complete control over the design and specifications, but it also allows you to customize your drone to suit your needs. Additionally, understanding how drones work and building one yourself can provide valuable knowledge in electronics, aerodynamics, and programming.
This guide is designed to be beginner-friendly, assuming no prior knowledge of drones or electronics. We will start with the basics, gradually progressing to more advanced topics. By the end, you will have a fully functional drone that you can be proud of.
Throughout this guide, we will cover everything you need to know about building a drone from scratch. This includes understanding the different components of a drone, gathering the necessary tools and materials, choosing the right frame, building the flight controller, wiring the ESCs and motors, installing the camera and FPV system, configuring the flight controller, and testing and troubleshooting the drone.
While building your own drone may seem daunting at first, remember that with patience, attention to detail, and following proper safety precautions, anyone can successfully build their own drone. So, let’s dive into the exciting world of drone building and get started on this thrilling journey.
Chapter 1: Understanding the Basics of Drones
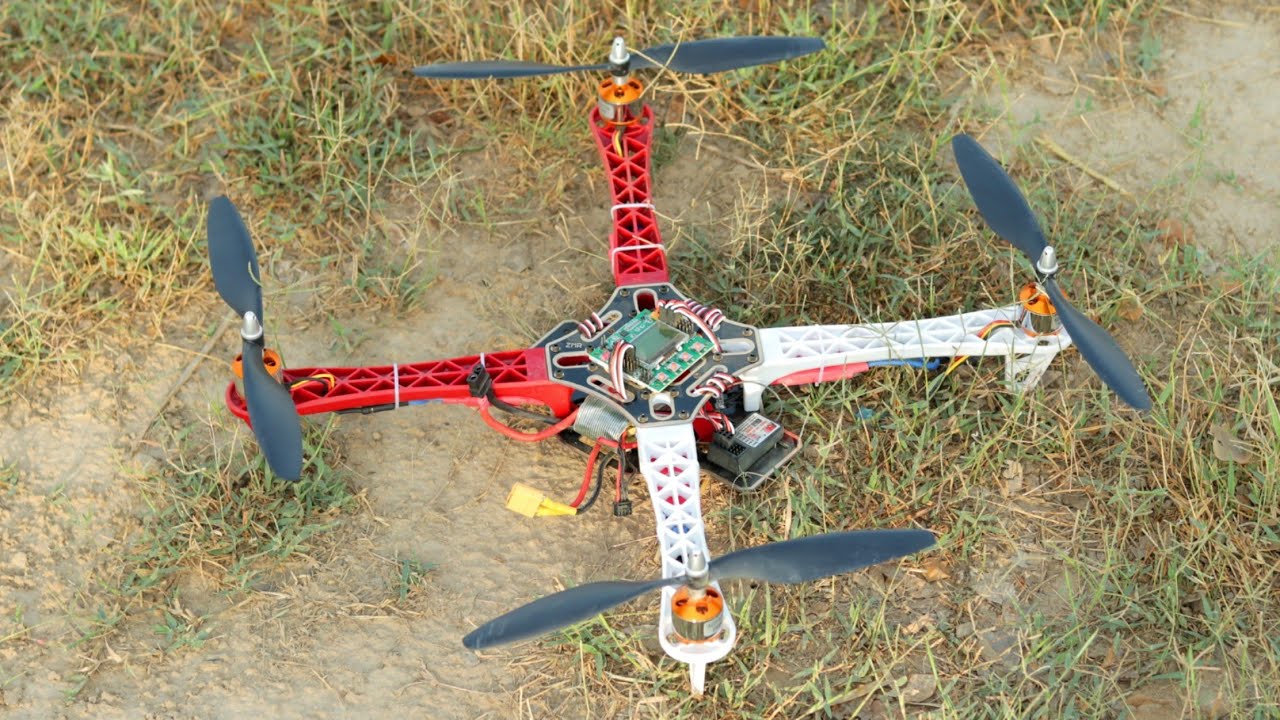
Drones, also known as unmanned aerial vehicles (UAVs), have revolutionized various industries and have become a popular recreational tool. Before diving into building your own drone, it’s crucial to understand the basic concepts and components of these remarkable flying machines.
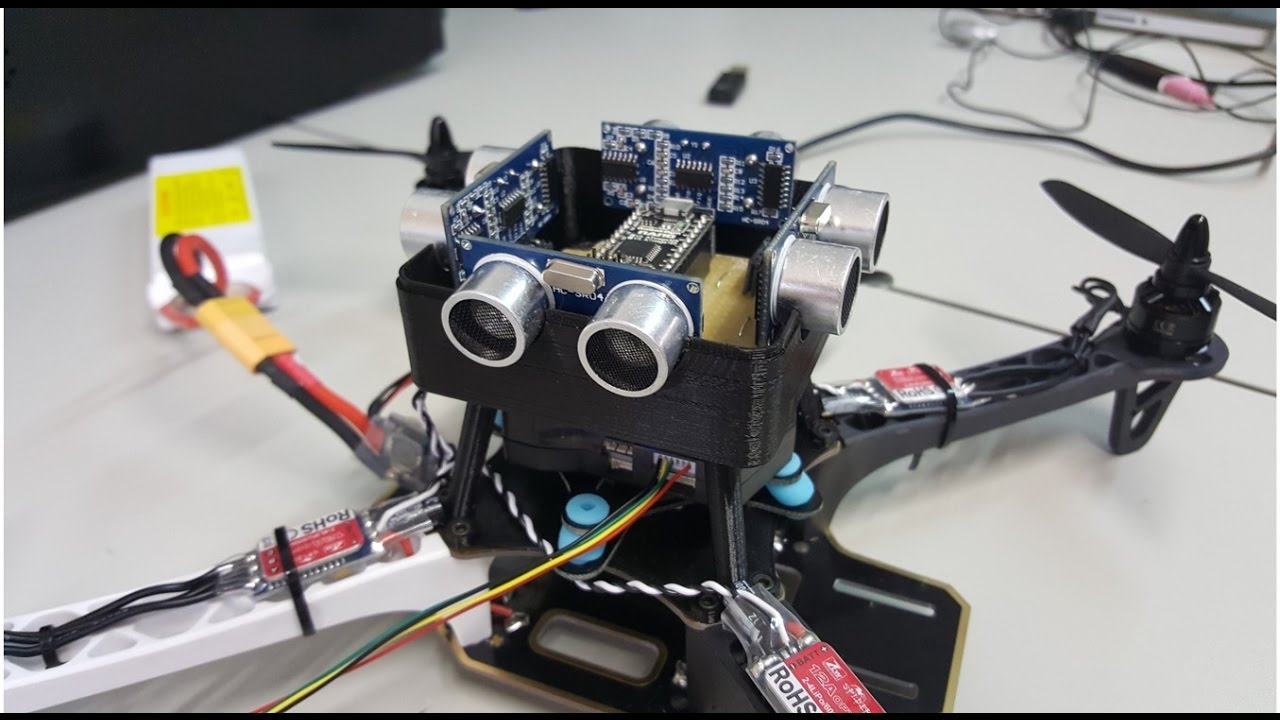
At the heart of a drone is its flight controller, which acts as the brain of the aircraft. The flight controller is responsible for stabilizing the drone and executing flight commands. It uses a combination of sensors, such as accelerometers, gyroscopes, and magnetometers, to determine the aircraft’s orientation and make adjustments in real-time.
The power source of a drone is typically a lithium polymer (LiPo) battery. LiPo batteries provide the necessary energy to the motors, flight controller, and other electronic components. It’s crucial to choose the appropriate battery capacity and voltage to ensure optimal flight performance and duration.
To control the movement of a drone, it is equipped with multiple motors and propellers. The number of motors and propellers can vary depending on the drone’s design, with quadcopters being the most common configuration. The motors are responsible for generating the thrust required for the drone to lift off and maneuver through the air.
Another essential component of a drone is the electronic speed controller (ESC). The ESC regulates the speed of the motors based on the signals received from the flight controller. It ensures that each motor operates at the correct speed to maintain stability and control during flight.
To navigate and communicate with the drone, many models are equipped with a global positioning system (GPS) module and a radio transceiver. The GPS module allows the drone to determine its location and provides features such as autonomous navigation and return-to-home functions. The radio transceiver allows the pilot to control the drone remotely and receive real-time telemetry data.
In addition to the basic components, drones can also be equipped with various accessories, such as cameras, gimbals, and first-person view (FPV) systems. These accessories allow you to capture stunning aerial footage and get a live video feed from the drone’s perspective.
Understanding the basics of drones is crucial for successfully building and operating your own drone. In the next chapter, we will discuss the tools and materials required to embark on this exciting DIY journey. So, let’s continue to Chapter 2 and gather the necessary resources to build your very own drone.
Chapter 2: Gathering the Necessary Tools and Materials
Before embarking on the journey of building your own drone, it’s essential to ensure you have all the necessary tools and materials at your disposal. Having the right equipment will not only make the building process smoother but also ensure the proper assembly and functionality of your drone.
Here are some of the essential tools and materials you will need:
- Soldering Iron: A soldering iron is necessary for various soldering tasks, such as connecting wires and components. Make sure to choose a soldering iron with adjustable temperature settings to suit different soldering requirements.
- Wire Cutters and Strippers: These tools are essential for cutting and stripping wires to the required length and size.
- Screwdrivers: You will need a set of screwdrivers with different sizes and types to assemble and secure various parts of the drone.
- Heat Shrink Tubing: Heat shrink tubing is used to protect and insulate soldered connections. It helps prevent short circuits and ensures reliable electrical connections.
- Velcro or Adhesive Mounting Pads: These are used to secure components like the flight controller, battery, and other electronics to the drone’s frame.
- Multi-Meter: A multi-meter is a versatile tool that is used to measure voltage, current, and resistance. It is handy for troubleshooting and ensuring proper electrical connections.
- Hex Keys: Hex keys, also known as Allen wrenches, are used for tightening and loosening hex screws commonly used in drone frames and other components.
- Propeller Balancer: A propeller balancer is used to ensure that the propellers are balanced, reducing vibrations and increasing overall flight stability.
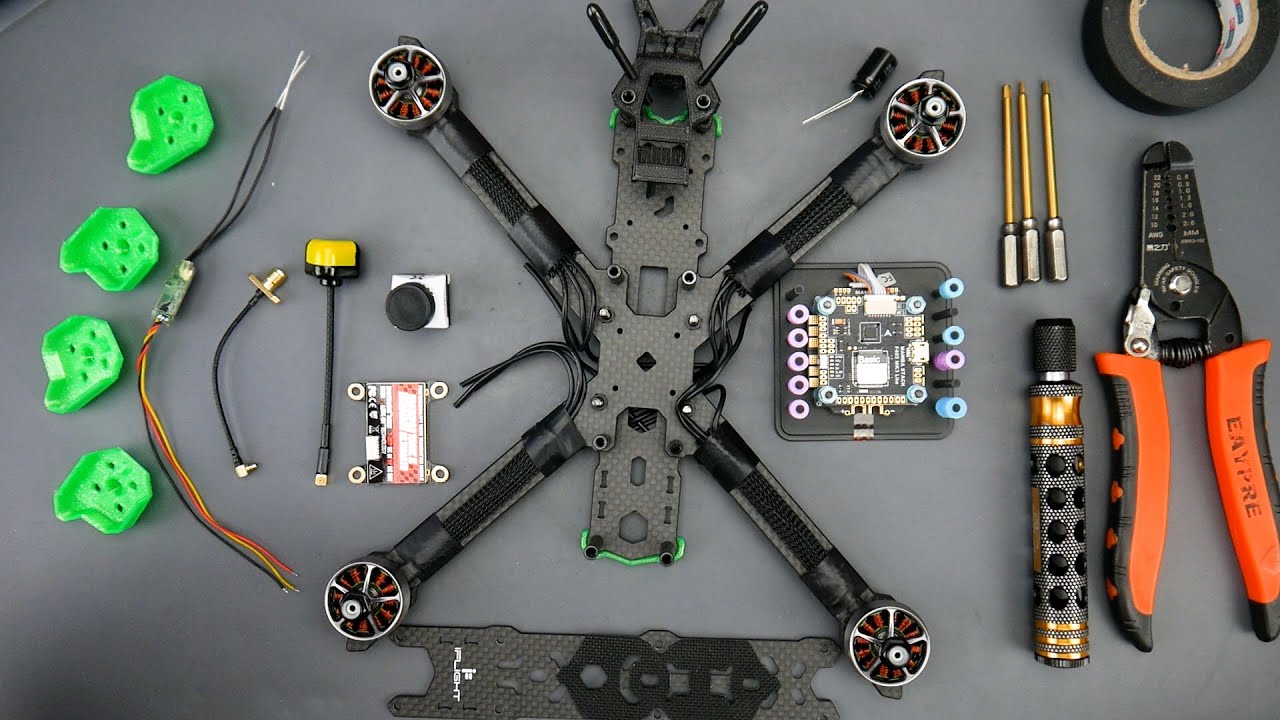
- Drone Kit or Components: Depending on your preference, you can either purchase a drone kit that includes all the necessary components or individually source the flight controller, motors, propellers, ESCs, and other required parts.
It’s crucial to choose high-quality components, as they directly impact the durability and performance of your drone. Research different brands and read customer reviews to ensure you are investing in reliable and compatible parts.
By gathering the appropriate tools and materials, you are now ready to move on to the next chapter, where we will discuss choosing the right frame for your drone. So, let’s dive into Chapter 3 and explore the various frame options available.
Chapter 3: Choosing the Right Frame for Your Drone
The frame of a drone serves as its structural backbone, providing support and housing for the various components. Choosing the right frame is crucial as it determines the drone’s size, stability, maneuverability, and payload capacity. In this chapter, we will explore the different types of frames available and factors to consider when selecting one for your drone.
There are several types of frames commonly used in drone construction, including:
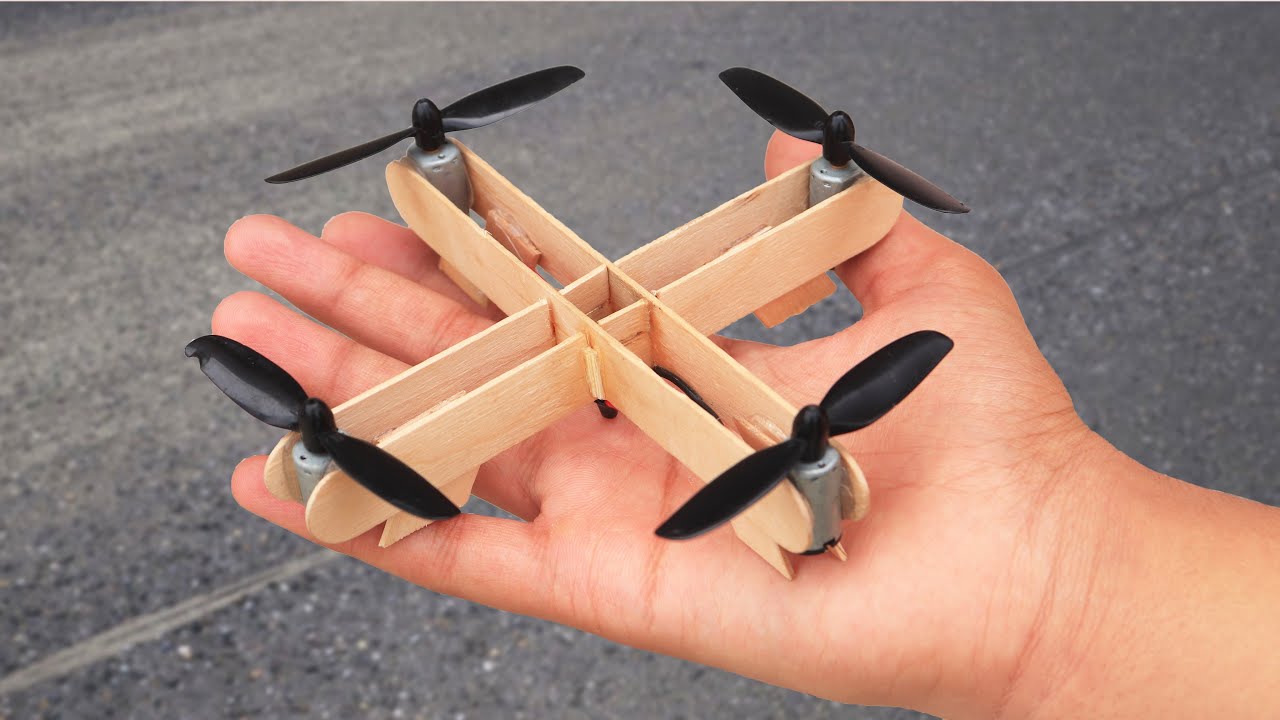
- Quadcopter: A quadcopter frame is the most popular choice among drone enthusiasts. It consists of a symmetrical X or H-shaped structure with four arms, each holding a motor and propeller. Quadcopters offer good stability, maneuverability, and carry capacity, making them suitable for various applications.
- Hexacopter and Octocopter: Hexacopter frames have six arms, each holding a motor and propeller, while octocopter frames have eight. These frames provide increased lift capacity and redundancy, making them suitable for carrying heavier payloads or performing tasks that require high stability, such as aerial photography or cinematography.
- Fixed Wing: Fixed wing frames resemble traditional airplanes, with wings that generate lift and a motor at the front for propulsion. Unlike multirotors, fixed-wing drones require a take-off and landing space and are more suitable for long-distance flights or mapping applications.
- Hybrid: Hybrid frames combine the features of multirotors and fixed-wing drones. They have a vertical take-off and landing (VTOL) capability, like multirotors, and can transition to a fixed-wing flight mode for longer range and duration. These frames are commonly used in industrial and military applications.
When selecting a frame for your drone, consider the following factors:
- Purpose: Determine the intended use of your drone. Are you building it for aerial photography, racing, or agricultural purposes? Different frames have varying characteristics that cater to specific applications.
- Size and Weight: Consider the size and weight limitations you have in mind for your drone. Smaller frames are more compact and lightweight but may have limitations in payload capacity and stability.
- Materials: Frames are typically made from carbon fiber, aluminum, or plastic. Carbon fiber offers durability and rigidity, while aluminum frames provide strength and stability. Plastic frames are lightweight but may be less sturdy.
- Budget: Set a budget for your drone build and choose a frame that fits within your allocated funds. Keep in mind that higher-quality frames may come with a higher price tag.
By considering these factors, you will be able to select a frame that suits your requirements and ensures optimal performance for your drone. In the next chapter, we will explore the process of building the flight controller, an essential component that controls the drone’s flight and stability. So, let’s move forward to Chapter 4 and dive into the exciting world of flight controllers.
Chapter 4: Building the Flight Controller
The flight controller is a crucial component of any drone as it is responsible for controlling the drone’s flight and stability. In this chapter, we will delve into the process of building the flight controller for your drone, including selecting the right controller board and integrating it with necessary sensors.
First and foremost, you need to choose a flight controller board that suits your needs. There are many options available in the market, such as the popular Arduino-based boards or specialized flight controllers like the Pixhawk series. Consider factors like the number of supported channels, the presence of built-in sensors, and the compatibility with the software you plan to use.
Once you have chosen the flight controller board, it’s time to assemble it. Follow the manufacturer’s instructions to properly mount the board onto the drone’s frame. Take care to secure it firmly, ensuring that it is well-protected against vibrations and impacts.
The flight controller relies on various sensors to gather data about the drone’s orientation and movement. This data is crucial for maintaining stability and for executing flight commands accurately. Common sensors used in flight controllers include:
- Accelerometer: Measures the drone’s acceleration and tilt, providing essential data for stabilizing the flight.
- Gyroscope: Detects changes in the drone’s rotational movements, allowing for precise control and adjustments.
- Magnetometer: Provides the drone with heading information by measuring the Earth’s magnetic field.
- Barometer: Measures atmospheric pressure, allowing for altitude control and estimation.
Depending on your flight controller board, these sensors may be integrated into the board or may need to be connected separately. Follow the manufacturer’s instructions to properly install and calibrate the sensors to achieve optimal performance.
It is also important to ensure that the flight controller is properly powered. Connect the flight controller to the LiPo battery using a power distribution board or voltage regulator, depending on the voltage requirements of your flight controller board. Double-check the wiring and confirm that the power connections are secure and reliable.
Lastly, before proceeding further, it is crucial to flash the latest firmware onto the flight controller. Firmware updates often bring bug fixes, performance improvements, and new features. Visit the manufacturer’s website or the open-source project’s page for instructions on how to update the firmware.
By following these steps, you will successfully build and integrate the flight controller into your drone. In the next chapter, we will explore the process of wiring and connecting the electronic speed controllers (ESCs) and motors, which are responsible for providing power and controlling the movement of your drone. So, let’s move on to Chapter 5 and discover the intricate wiring process.
Chapter 5: Wiring and Connecting the ESCs and Motors
Wiring and connecting the electronic speed controllers (ESCs) and motors is an important step in building your own drone. The ESCs are responsible for controlling the speed and direction of the motors, which ultimately determine the drone’s movement and flight dynamics. In this chapter, we will explore the process of wiring and connecting these essential components.
Start by identifying the motor wires coming out of each ESC. Typically, these wires are color-coded, with three wires for each motor: red, blue, and yellow. The red wire is usually the power wire, and the other two wires control the motor’s rotation.
Next, determine the motor layout of your drone’s frame. Depending on the configuration (quadcopter, hexacopter, etc.), each motor will correspond to a specific position on the frame. Follow the frame’s documentation or markings to ensure that the motors are connected to the correct ESCs.
Now, it’s time to connect the ESCs to the flight controller. Depending on the flight controller board you are using, there may be labeled ports for each ESC motor connection. Match the correct ESC to the corresponding port on the flight controller board.
Make sure to connect the motor wires to the correct motor signal pins on the flight controller. For example, the motor 1 wires should be connected to the motor 1 signal pins on the flight controller, and so on. Be cautious to connect them according to the correct order to avoid any confusion or motor spinning issues.
Once the motor wires are connected to the flight controller, secure the connections with heat shrink tubing or electrical tape to prevent any accidental disconnections or short circuits. Ensure that the wires are neatly organized and free from any obstructions that could interfere with the drone’s operation.
After the connections are made, it’s essential to calibrate the ESCs. This process ensures that the flight controller communicates effectively with the ESCs and establishes the correct motor spin direction and throttle range. Consult the ESC and flight controller manufacturer’s documentation for specific calibration procedures.
Lastly, double-check all the connections and ensure they are secure. Loose or improperly connected wires can cause erratic behavior or even lead to motor failure.
By following these steps, you will successfully wire and connect the ESCs and motors, allowing your drone to receive signals from the flight controller and initiate controlled flight movements. In the next chapter, we will discuss the process of adding propellers and balancing them, a crucial step for smooth and stable flight. So, let’s move on to Chapter 6 and explore propeller installation.
Chapter 6: Adding Propellers and Balancing Them
Propellers play a vital role in the flight performance and stability of your drone. It’s crucial to properly install and balance the propellers to ensure smooth and efficient flight. In this chapter, we will discuss the process of adding propellers to your drone and balancing them for optimal performance.
Start by identifying the correct propellers for your drone. Propellers come in different sizes and types, and it’s important to choose ones that are compatible with your motor’s specifications. Refer to the motor’s documentation or the manufacturer’s recommendations to select the appropriate propellers.
When attaching the propellers, it’s important to ensure that they are mounted correctly and securely. Most propellers have markings indicating the motor rotation direction. Ensure that you install the propellers in the correct order and that they rotate in the designated direction. Improperly installed propellers can result in unstable flight or even damage to your drone.
Once the propellers are attached, it’s essential to balance them. Balanced propellers minimize vibrations, reduce strain on the motors, and improve overall flight performance. An unbalanced propeller can cause jitters and instability in the drone during flight.
To balance the propellers, you can use a propeller balancer or a simple DIY balancing technique. One method involves suspending the propeller horizontally using a thin rod or shaft at the center. Observe if one side is tipping down more than the other. To correct the imbalance, carefully sand down the heavier side of the propeller until it balances evenly.
Continue sanding and checking until the propeller remains balanced when suspended horizontally. Take care not to remove too much material, as this can adversely affect the propeller’s performance.
Once all the propellers are balanced, ensure that they are securely tightened onto the motor shafts. Loose propellers can detach during flight, causing a potentially dangerous situation.
It’s a good practice to regularly check the propellers for any signs of wear, such as cracks or chips. Damaged propellers can compromise flight stability and should be replaced immediately.
By properly adding and balancing the propellers, you are ensuring smooth, stable, and efficient flight for your drone. In the next chapter, we will discuss the process of installing the camera and FPV (First Person View) system, allowing you to capture breathtaking aerial footage. So, let’s move on to Chapter 7 and explore the exciting world of aerial photography and FPV.
Chapter 7: Installing the Camera and FPV System
Installing a camera and First Person View (FPV) system on your drone allows you to capture stunning aerial footage and experience the thrill of flying in real-time. In this chapter, we will discuss the process of installing the camera and FPV system, enabling you to explore the world from a whole new perspective.
The first step is to choose a camera suitable for your needs. Consider factors like image quality, resolution, weight, and compatibility with your drone’s frame and flight controller. Popular options include action cameras, micro cameras, and specialized FPV cameras.
Once you have selected the camera, determine the best mounting position on your drone. Ideally, the camera should be placed on a gimbal or vibration dampening mount to minimize unwanted vibrations and jitters in the footage. Consult the camera and gimbal manufacturer’s documentation for specific installation instructions.
Next, it’s time to connect the camera to the power source and video transmitter. Depending on your drone’s setup, you may need additional cables or connectors to establish proper connections. Refer to the camera and FPV system manual for specific wiring instructions.
After connecting the camera, it’s essential to secure it with zip ties, adhesive mounts, or other appropriate means to prevent it from dislodging during flight. Ensure that the camera is securely attached but also consider factors like weight balance and flight performance.
Once the camera is securely installed, you can focus on setting up the FPV system. This typically involves connecting the video transmitter to the camera’s video output and attaching an antenna to the transmitter. Ensure the transmitter is properly fastened and the antenna is positioned properly for optimal signal strength.
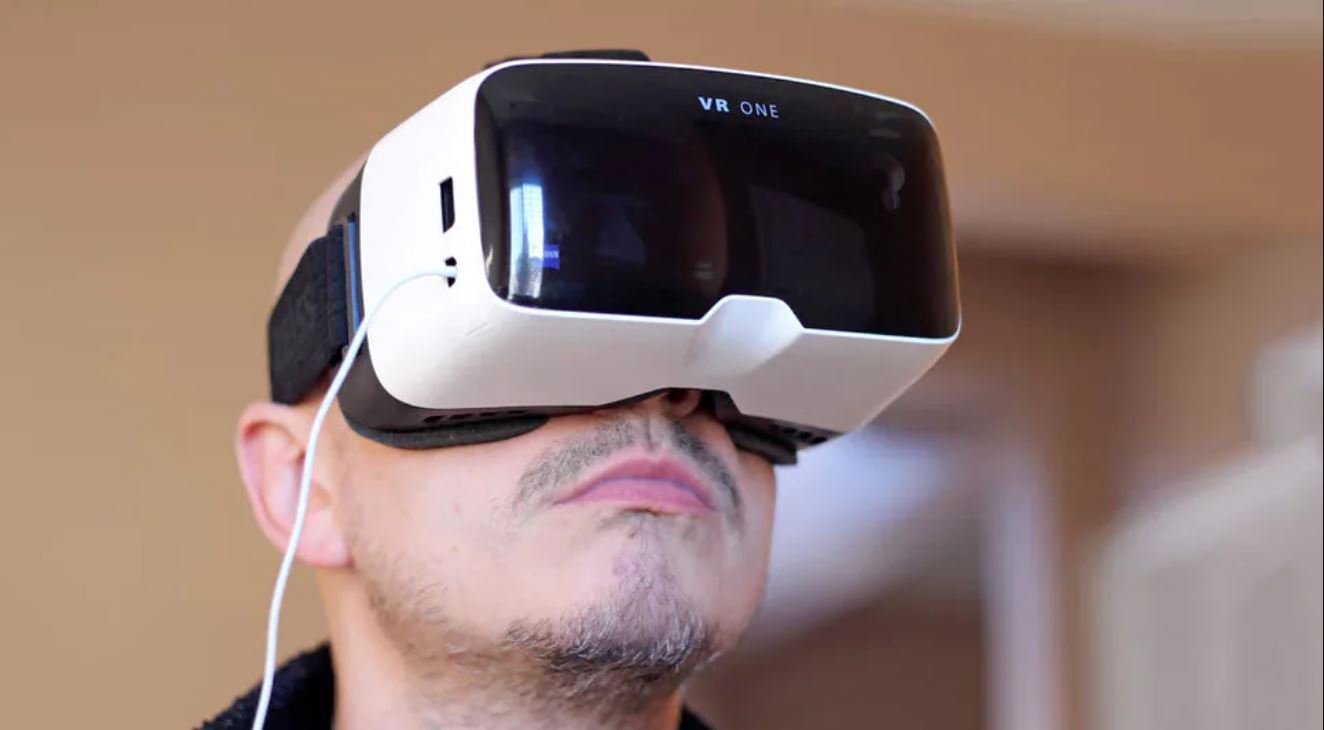
Before taking your drone for a flight, test the camera and FPV system to ensure they are functioning correctly. Verify that the camera is capturing clear footage and that the video is transmitted successfully to your FPV goggles or display. Make any necessary adjustments to the camera angle or settings to achieve the desired perspective.
Remember to comply with local regulations and guidelines for flying drones equipped with cameras. Respect the privacy of others and avoid flying in restricted or prohibited areas.
By installing the camera and FPV system, you can unlock a world of possibilities and capture breathtaking moments from above. In the next chapter, we will explore the process of configuring the flight controller and calibrating the drone, bringing us closer to the moment when we can take our drone for its first flight. So, let’s move on to Chapter 8 and dive into the configuration process.
Chapter 8: Configuring the Flight Controller and Calibrating the Drone
Configuring the flight controller and calibrating your drone is a critical step before taking it for its first flight. In this chapter, we will discuss the process of fine-tuning the flight controller settings, ensuring accurate flight control, and calibrating the drone for optimal performance.
Begin by connecting the flight controller to your computer using a USB cable and open the configuration software or programming interface associated with your flight controller. This software allows you to adjust various flight parameters and settings.
One of the essential configurations is setting up the flight modes. Depending on your flight controller board, you can define different flight modes, such as manual mode, stabilization mode, and autonomous mode, each with its specific characteristics and behavior. Customize these modes based on your needs and preferences.
Next, it’s crucial to configure the transmitter or remote control settings. This involves calibrating the control sticks and mapping them to the appropriate channels on the flight controller. Follow the instructions provided by the transmitter manufacturer or refer to the flight controller documentation for specific calibration procedures.
Once the basic configurations are complete, it’s time to calibrate the drone. Calibration ensures that the flight controller accurately reads the sensor data and provides precise control over the drone’s movement.
Begin by calibrating the accelerometer. Place the drone on a level surface and follow the instructions in the configuration software to calibrate the accelerometer. This step allows the flight controller to determine the drone’s level and adjust the flight control accordingly.
Next, calibrate the gyroscope. Follow the software’s instructions to perform a gyroscope calibration, which helps the flight controller accurately detect changes in the drone’s rotational movements.
Lastly, perform a compass calibration if your flight controller has a built-in magnetometer. This step involves rotating the drone around different axes to ensure that the compass readings are accurate. Follow the software’s instructions to complete the compass calibration process.
Ensure that the drone is on a flat and stable surface throughout the calibration process, and follow any additional instructions provided by the flight controller or software.
Once the flight controller is properly configured and the drone is calibrated, double-check all the settings and perform a final review of the configurations. Confirm that the flight modes are correctly assigned, the control sticks respond appropriately, and the sensor readings are accurate.
By properly configuring the flight controller and calibrating the drone, you are setting the foundation for a smooth and controlled flight experience. In the next chapter, we will explore testing and troubleshooting your drone, ensuring that everything is functioning as expected before taking it for its maiden flight. So, let’s move on to Chapter 9 and embark on the testing phase.
Chapter 9: Testing and Troubleshooting Your Drone
Testing your drone is a crucial step to ensure that all the components are functioning correctly and that it is ready for flight. In this chapter, we will cover the process of testing your drone and troubleshooting any potential issues that may arise.
Before attempting flight, it’s important to perform a thorough pre-flight inspection. Check all the wiring connections, ensure that propellers are securely attached, and confirm that the battery is properly installed and charged. Inspect the frame for any signs of damage or loose components. Additionally, verify that the flight controller and transmitter have a stable connection.
Once the pre-flight inspection is complete, power on your drone and verify that all the components power up and initialize properly. Observe the flight controller’s LED indicators to ensure that it is receiving the necessary sensor inputs and communicating with the receiver.
Next, prepare for a test hover. Find an open and unobstructed area, away from people and objects, to perform your maiden flight. Start by arming your drone according to the configured flight mode instructions. Gradually increase the throttle and observe how the drone responds. Check if all motors spin in the correct direction and at an even speed.
While the drone is hovering, pay attention to stability and any signs of drift. Use the transmitter to make small adjustments and observe how the drone reacts. Test all the flight control commands, such as pitch, roll, and yaw, to ensure that the drone responds accurately and smoothly.
During the test flight, also pay attention to any abnormal vibrations, strange sounds, or electronic interference. These could be indications of potential issues that need to be addressed before further flight activities.
If you encounter any issues during the test flight, it’s important to troubleshoot systematically. Start by identifying the problem area. Check the flight controller’s logs and error messages, if available, to pinpoint the issue. Inspect and recheck all the connections, ensure that the software and firmware are up to date, and verify that the transmitter settings are correct.
If troubleshooting doesn’t resolve the problem, consult online communities, forums, or seek assistance from experienced drone builders and pilots. They can provide valuable insights and guidance to help identify and resolve the issue.
Remember to document any troubleshooting steps and changes made for future reference. This will help in diagnosing similar issues that may occur in the future or when performing maintenance on your drone.
By thoroughly testing and troubleshooting your drone, you can identify and address any potential issues, ensuring that your drone is safe and ready for flight. With all the preparations and tests complete, you are now ready to enjoy the exciting world of drone piloting. So, get out there and soar to new heights!
Conclusion
Congratulations on successfully building your own drone from scratch! Throughout this guide, we covered the essentials of drone building, from understanding the basic components to configuring the flight controller and conducting thorough testing. By following each step carefully and taking the necessary precautions, you have created a fully functional drone that you can be proud of.
Building a drone from scratch not only offers a rewarding and educational experience but also provides you with the opportunity to customize your drone to suit your specific needs. It allows you to gain valuable knowledge in electronics, aerodynamics, and programming, opening doors to further exploration and innovation in the world of drones.
As you continue your journey with your newly built drone, remember to prioritize safety and adhere to local regulations and guidelines for drone usage. Respect others’ privacy, avoid restricted areas, and always fly responsibly.
Additionally, don’t forget to regularly maintain your drone by inspecting and cleaning its components, ensuring that all connections are secure, and updating firmware and software when necessary. This will help prolong the lifespan and optimal performance of your drone.
Lastly, keep exploring and pushing the boundaries of what your drone can do. Experiment with different flight modes, capture breathtaking aerial footage, or even consider expanding your knowledge by adding more advanced functionalities, such as autonomous flight or advanced GPS navigation.
Thank you for joining us on this exciting journey of building your own drone from scratch. We hope this guide has provided you with the necessary knowledge and tools to confidently customize and fly your drone. Wishing you exhilarating flights and boundless creativity!