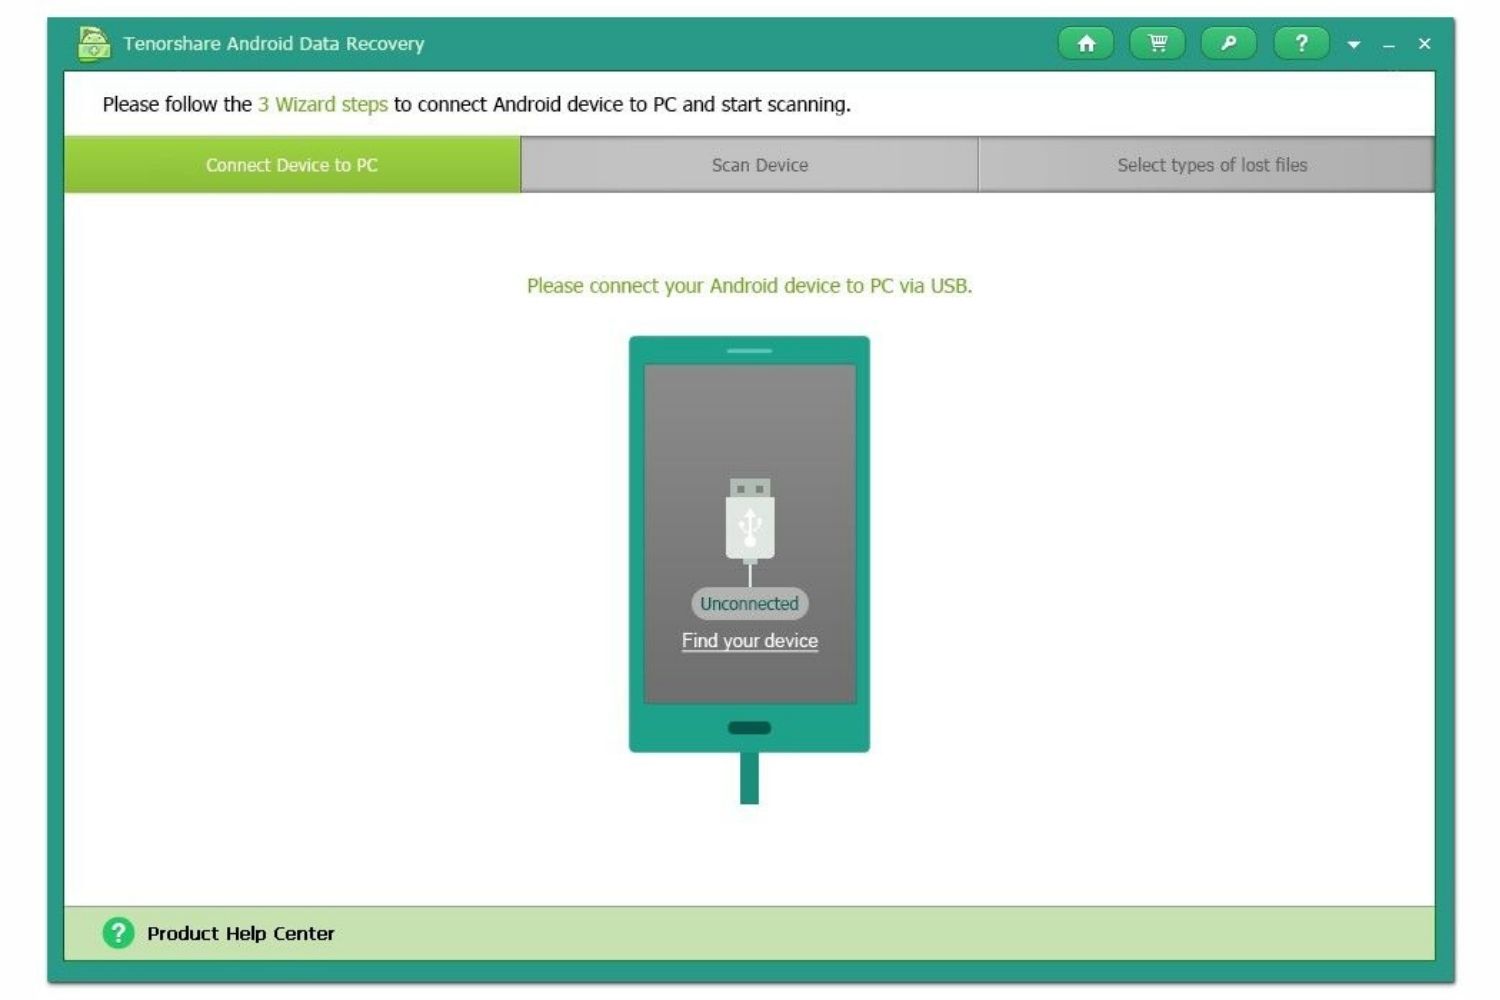
Introduction
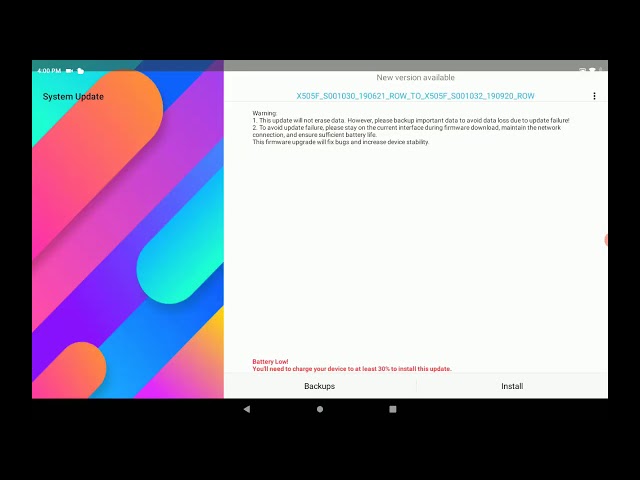
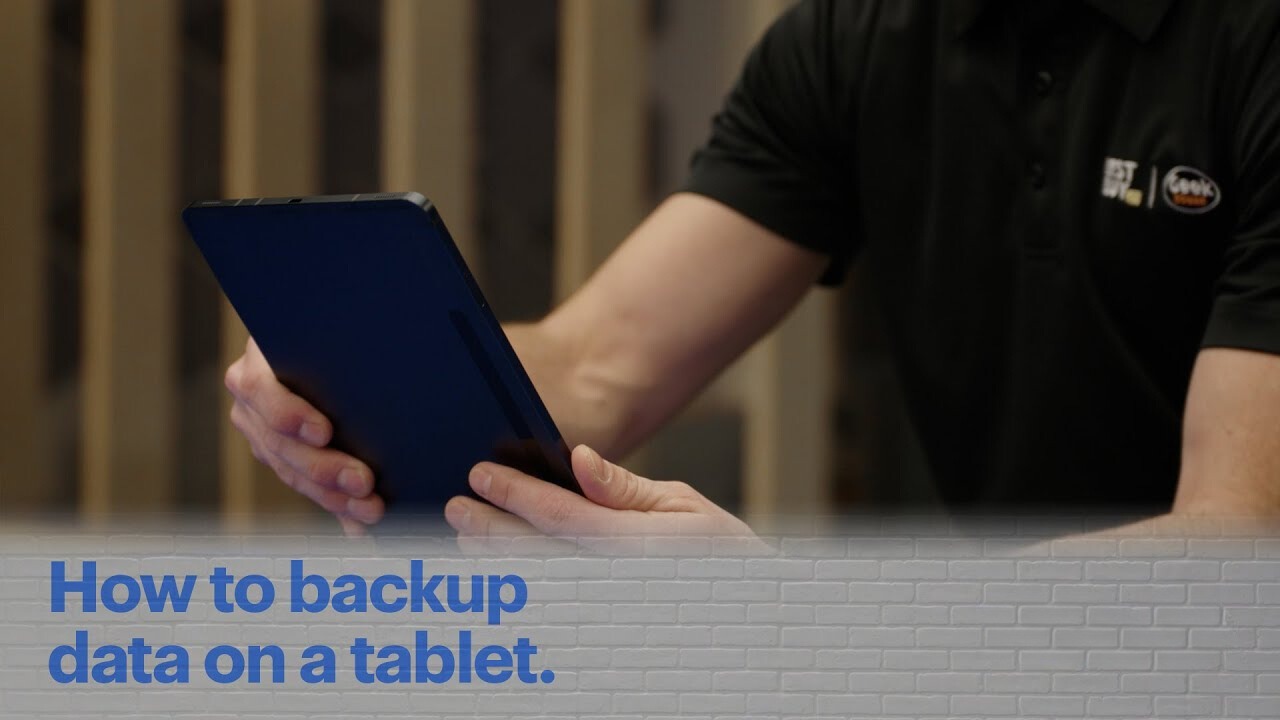
Backing up data on your Android tablet is crucial to ensure the safety and security of your valuable information. Tablets have become an integral part of our daily lives, serving as portable devices for work, entertainment, and storing personal data. However, they are not immune to potential risks such as accidental damage, theft, or system failure. Therefore, having a reliable backup system in place is essential.
When you backup your data, you create a duplicate copy of your files, applications, settings, and other important information. This copy can be stored in a secure location, either online or offline, so that it can be easily restored in the event of data loss. By regularly backing up your Android tablet, you can safeguard your photos, videos, documents, contacts, and any other important data from being permanently lost.
Whether you use your Android tablet for personal or professional purposes, the consequences of losing data can be detrimental. Imagine losing years worth of family photos, important work documents, or contacts that you rely on for your business. It’s a situation that nobody wants to find themselves in.
Fortunately, backing up your Android tablet is a relatively simple process and can be done in several different ways. In this article, we will explore various methods that allow you to safely and securely backup your data, ensuring that you have peace of mind knowing that your information is well-protected.
Why is it important to backup data on your Android tablet?
Backing up the data on your Android tablet is of utmost importance for several reasons. Here are some key reasons why you should make it a priority:
1. Data Loss Prevention: Your Android tablet contains valuable data, including photos, videos, documents, and personal information. Accidental deletion, device theft, hardware failure, or software glitches can lead to data loss. By regularly backing up your data, you can minimize the risk of permanently losing important files.
2. Device Replacement: If you ever need to replace your Android tablet due to damage or upgrade to a new model, having a backup ensures a smooth transition to the new device. You can restore your data onto the new tablet without any hassle, saving you time and effort in manually transferring everything.
3. Data Recovery: In case your Android tablet encounters a software issue or a system crash, having a backup allows you to easily recover your data. By restoring the backup, you can get your applications, settings, and files back onto your tablet quickly, minimizing downtime.
4. Peace of Mind: Knowing that your data is backed up provides peace of mind. It eliminates the worry of losing precious memories or important information. Whether it’s sentimental photos, important work documents, or contacts, having a backup ensures that you can always retrieve them if something goes wrong.
5. Easy Migration: If you decide to switch to a new Android device or even a different operating system, having a backup makes the transition seamless. You can easily transfer your data from your tablet to the new device, ensuring that you don’t lose anything in the process.
6. Protection Against Malware: Although Android devices are generally secure, there is still a possibility of malware or viruses infecting your tablet. In case your device gets infected and the data becomes compromised, having a backup allows you to restore your files to a clean state, removing any malicious software.
In essence, backing up your Android tablet is a proactive step that ensures the safety and security of your data. Whether it’s for sentimental or practical reasons, having a backup gives you the reassurance that your valuable information is well-protected and easily recoverable in case of any unfortunate events.
Different methods to backup data on your Android tablet
When it comes to backing up data on your Android tablet, there are multiple methods available to suit your preferences and needs. Here are three common methods:
- Using a cloud storage service: This method involves uploading your data to a cloud-based server, where it is stored securely and can be accessed from any device with an internet connection.
- Using an external storage device: This method involves connecting an external storage device, such as a USB flash drive or an SD card, to your tablet and transferring your data onto it.
- Using a computer and USB cable: This method involves connecting your tablet to a computer using a USB cable and copying your data onto the computer’s hard drive.
Each method has its own advantages and considerations that you should take into account. Let’s explore them in more detail.
Using a cloud storage service: The use of cloud storage services has gained popularity due to their convenience and accessibility. Providers such as Google Drive, Dropbox, and OneDrive offer secure storage space where you can upload your files and access them from any device. This method is ideal if you have a stable internet connection and want to have your data available on multiple devices.
Using an external storage device: If you prefer to have physical control over your data and don’t want to rely on an internet connection, using an external storage device is a viable option. You can transfer your files onto a USB flash drive, an SD card, or an external hard drive. This method is particularly useful for large files, such as videos and high-resolution photos.
Using a computer and USB cable: If you regularly connect your Android tablet to a computer, this method may be the most convenient for you. By connecting your tablet to the computer using a USB cable, you can copy your files directly onto the computer’s hard drive. This method is also useful if you want to organize and manage your files on a larger screen.
It’s important to note that these methods are not mutually exclusive, and you can choose to combine them based on your needs. For example, you can use a cloud storage service as your primary backup method and periodically create a secondary backup on an external storage device or a computer.
By considering the advantages and limitations of each method, you can select the one that aligns with your preferences and provides a reliable backup solution for your Android tablet. The next sections will provide step-by-step guides for each method to help you implement the backup process effectively.
Method 1: Using a cloud storage service
Using a cloud storage service is a popular and convenient method to backup data on your Android tablet. It allows you to securely store your files in the cloud and access them from any device with an internet connection. Here’s how you can use a cloud storage service to back up your data:
- Creating an account on the cloud storage service: Start by signing up for a cloud storage service of your choice. Popular options include Google Drive, Dropbox, and OneDrive. Download the app from the Google Play Store, open it, and follow the instructions to create an account. Make sure to choose a strong password to protect your data.
- Uploading your data to the cloud: Once you have created your account, you can start uploading your data to the cloud storage service. Open the app on your Android tablet and navigate to the folder or files that you want to backup. Tap and hold on a file or folder to select it, then tap on the “Upload” or “Save” button. Depending on the app, you may have the option to select multiple files or folders to upload at once. Confirm the upload and wait for the process to complete.
It’s important to note that the speed of the upload process depends on the size of the files, your internet connection speed, and any limitations set by the cloud storage service. If you have a large amount of data to backup, it may take some time to complete the initial upload.
Once your data is uploaded to the cloud storage service, it is securely stored and can be accessed from any device with the same cloud storage app installed. This allows you to easily retrieve your files, even if your Android tablet gets lost, damaged, or requires a factory reset.
Additionally, most cloud storage services offer file syncing capabilities. This means that any changes made to a file on one device will automatically be reflected on other devices linked to the same cloud storage account. This ensures that you always have the most up-to-date version of your files, regardless of which device you are using.
Remember to regularly check your storage usage on the cloud storage service to ensure you have sufficient space for your backups. Some providers offer additional storage space for a fee if you require more than the free allocation. It’s also a good practice to periodically review and organize your files in the cloud to ensure you don’t keep unnecessary or outdated data that takes up valuable storage space.
Using a cloud storage service as a backup method provides you with the convenience of accessing your data from anywhere and the assurance that your files are securely stored. It’s a reliable and user-friendly option for backing up your Android tablet data.
Method 2: Using an external storage device
Using an external storage device is a straightforward method to backup data on your Android tablet. It allows you to transfer your files to a physical storage device, such as a USB flash drive or an SD card. Here’s how you can use an external storage device to back up your data:
- Connecting the external storage device to your tablet: Start by connecting the external storage device to your Android tablet. Depending on the device and the tablet’s connectivity options, you may use a USB port, a micro USB port, or a USB-C port. Use the appropriate cable or adapter to establish the connection. Once connected, your tablet should detect the external storage device.
- Transferring data to the external storage device: Once the external storage device is connected and recognized by your Android tablet, you can start transferring your files. Open the file manager or a file explorer app on your tablet and navigate to the files or folders that you want to backup. Tap and hold on a file or folder to select it, then look for an option to copy or move the selection. Select the external storage device as the destination and initiate the transfer. Depending on the size of the files and the speed of the storage device, the transfer process may take some time.
It’s important to ensure that the external storage device has sufficient space to accommodate your files. If the device is formatted with a different file system than your tablet, you may be prompted to format it before transferring the files. Formatting will erase any existing data on the device, so make sure to back up any necessary data before proceeding.
Using an external storage device for backup provides you with a physical and portable copy of your data. This can be especially useful in situations where you want to have immediate access to your files without relying on an internet connection. It also gives you the freedom to use the external storage device with other devices, such as computers or other Android devices, making it a versatile method for data backup.
Remember to keep your external storage device in a safe and secure location to prevent loss or damage. Regularly review and update your backup files to ensure they remain current. If you require additional storage space, consider investing in higher-capacity external storage devices or multiple devices to accommodate your growing backup needs.
Using an external storage device as a backup method offers simplicity, convenience, and portability. It provides you with a physical copy of your data that you can easily transfer and store, ensuring the safety of your files even if something happens to your Android tablet.
Method 3: Using a computer and USB cable
Using a computer and a USB cable is an effective method to backup data on your Android tablet. It allows you to connect your tablet to a computer and copy your files onto the computer’s hard drive. Here’s how you can use this method to back up your data:
- Connecting your tablet to the computer using a USB cable: Start by connecting your Android tablet to the computer using a USB cable. Depending on your tablet and computer, you may need to use a micro USB or USB-C cable. Once connected, your tablet should prompt you to select a USB connection mode. Choose the “File Transfer” or “MTP” mode to enable file transfer between your tablet and the computer.
- Copying data from your tablet to the computer: After the tablet is successfully connected to the computer, open the file explorer or file manager on your computer. Locate the connected tablet or the tablet’s storage in the file explorer. You should be able to access the folders and files on your tablet. Navigate to the files or folders you want to backup and select them. Then, copy or drag and drop them to a desired location on your computer’s hard drive. The transfer process may take some time, depending on the size and number of files being copied.
Ensure that your tablet remains connected to the computer throughout the transfer process. If the connection is interrupted, the transfer may be interrupted, and your files could be at risk of being corrupted. It’s recommended to have your tablet fully charged or connected to a power source during the backup process to avoid any power-related interruptions.
Using a computer and a USB cable for backup provides you with a direct and secure method to transfer your files. It also allows for easy organization and management of your files on the computer’s larger screen and storage capacity.
Remember to regularly review and update your backup files on the computer to ensure their accuracy and relevance. Organize your files in a logical folder structure to make it easy to locate them when needed. It’s also a good practice to use descriptive file names to quickly identify the content of each file.
If you have a large amount of data to transfer, you may consider using backup software or file synchronization tools to automate the process. These tools can help streamline the backup process and ensure that your files are regularly and accurately backed up to your computer.
Using a computer and a USB cable as a backup method provides you with flexibility, control, and the reassurance that your data is stored on a separate device. It’s a reliable and efficient option for backing up your Android tablet data.
Step-by-step guide for backing up data using each method
Now that we’ve explored the different methods of backing up data on your Android tablet, let’s take a closer look at each method and provide a step-by-step guide for each one:
Method 1: Using a cloud storage service
- Create an account on the cloud storage service of your choice by downloading the app from the Google Play Store and following the signup process.
- Open the cloud storage app on your Android tablet and navigate to the files or folders you want to backup.
- Select the files or folders and tap on the “Upload” or “Save” button to initiate the upload process.
- Wait for the upload to complete, ensuring you have a stable internet connection.
Method 2: Using an external storage device
- Connect the external storage device, such as a USB flash drive or an SD card, to your Android tablet using the appropriate cable or adapter.
- Open the file manager or file explorer app on your tablet and navigate to the files or folders you want to backup.
- Select the files or folders you want to backup and choose the option to copy or move them.
- Select the external storage device as the destination and start the transfer process.
- Wait for the transfer to complete, ensuring you have sufficient space on the external storage device.
Method 3: Using a computer and USB cable
- Connect your Android tablet to the computer using a USB cable, ensuring you have the correct cable for your tablet’s port.
- Select the “File Transfer” or “MTP” mode on your tablet when prompted to establish the connection for file transfer.
- Open the file explorer or file manager on your computer and locate your connected Android tablet.
- Navigate to the files or folders you want to backup on your tablet and select them.
- Copy or drag and drop the selected files to the desired location on your computer’s hard drive.
- Monitor the transfer progress and wait for it to complete, ensuring both devices remain connected throughout.
Regardless of the method you choose, it’s important to regularly backup your data to ensure the safety and security of your files. Schedule periodic backups to keep your data up to date and minimize the risk of data loss.
Remember to securely store your external storage devices and keep your cloud storage login credentials confidential. Additionally, periodically check your backup files to ensure their integrity and verify that you can retrieve them when needed.
By following these step-by-step guides for each backup method, you can effectively safeguard your data and ensure that you have a reliable backup system in place for your Android tablet.
1 Using a cloud storage service
Using a cloud storage service is a convenient and reliable method for backing up data on your Android tablet. With a cloud storage service, you can securely store your files in the cloud and access them from any device with an internet connection. Here’s a step-by-step guide on how to backup your data using a cloud storage service:
3.1.1 Creating an account on the cloud storage service
- Download the app of the cloud storage service you prefer from the Google Play Store.
- Open the app and follow the instructions to create an account. Provide your personal information and choose a strong, unique password to protect your data.
- Confirm your email address if necessary to activate your account.
3.1.2 Uploading your data to the cloud
- Launch the cloud storage app on your Android tablet.
- Navigate to the files or folders you want to backup. You can either select individual files or choose entire folders.
- Tap and hold on the selected files or folders to bring up the options menu.
- Select the “Upload” or “Save” option. The app may ask you to confirm the upload.
- Wait for the upload process to complete. The time taken will depend on the size of the files and the speed of your internet connection.
It’s important to note that the first backup may take longer as it involves uploading all your selected files to the cloud. Subsequent backups will typically be faster since only new or modified files need to be uploaded.
Ensure you have a stable internet connection while uploading your data to the cloud. If you have a large amount of data to backup, it may be helpful to perform the upload when you have a reliable and fast internet connection to expedite the process.
Regularly review your cloud storage usage and consider increasing your storage capacity if needed. Some cloud storage services offer additional space for a fee, allowing you to accommodate more files and data in your backups.
A cloud storage service provides the advantage of accessibility, as you can access your files from any device with the cloud storage app installed. It also offers file syncing, ensuring that any changes or additions you make on one device are automatically updated on other devices connected to the same account.
By following these steps, you can effectively backup your data using a cloud storage service, ensuring that your files are securely stored and easily accessible whenever you need them.
1.1 Creating an account on the cloud storage service
Before you can start backing up your data on a cloud storage service, you need to create an account. This allows you to securely store and access your files in the cloud. Here’s a step-by-step guide on how to create an account on a cloud storage service:
- Download the app of the cloud storage service: Open the Google Play Store on your Android tablet and search for the app of the cloud storage service you want to use, such as Google Drive, Dropbox, or OneDrive. Once you find the app, tap on the “Install” button to download and install it on your tablet.
- Open the cloud storage app: After the installation is complete, find the cloud storage app on your tablet’s home screen or app drawer and tap on its icon to open it.
- Sign up for an account: When you open the app, you will see a sign-up or create account option. Tap on it to begin the account creation process.
- Provide your personal information: Follow the on-screen instructions to enter your personal information, such as your name, email address, and password. Make sure to choose a strong and unique password to ensure the security of your account.
- Confirm your email address: Depending on the cloud storage service, you may need to confirm your email address. This is usually done by clicking on a confirmation link sent to the email address you provided during the sign-up process. Open your email inbox, look for the confirmation email, and follow the instructions to confirm your account.
It’s important to note that the account creation process may differ slightly between different cloud storage services. However, the general steps outlined above should give you an idea of the typical process involved.
Remember to keep your account credentials secure and avoid using the same password across multiple services. Adding an extra layer of security, such as enabling two-factor authentication, is also recommended to protect your account from unauthorized access.
Once you have successfully created the account, you can proceed to the next step and start using the cloud storage service to backup your data. The account you create will serve as the gateway to access your files from any device with the cloud storage app installed, providing you with a convenient and secure way to store and retrieve your data.
1.2 Uploading your data to the cloud
After creating an account on your chosen cloud storage service, you can start uploading your data to the cloud. This process ensures that your files are securely stored and accessible from any device with an internet connection. Here’s a step-by-step guide on how to upload your data to the cloud:
- Launch the cloud storage app: Open the app of the cloud storage service on your Android tablet. You may find the app on your home screen or in the app drawer.
- Navigate to the files or folders you want to backup: Use the app’s interface to navigate to the specific files or folders on your tablet that you want to upload to the cloud. You can explore different directories and storage locations within the app.
- Select the files or folders: Tap and hold on the files or folders you want to backup. You may be able to select multiple files or folders at once by tapping on each one individually, or by using the “Select All” option if available.
- Initiate the upload process: After selecting the files or folders, look for an option within the app to upload or save them to the cloud. This option is commonly represented by an arrow pointing upwards or a cloud icon.
- Confirm the upload: Depending on the cloud storage service, you may be prompted to confirm the upload before it begins. Verify the selection of files or folders, and confirm to proceed with the upload.
- Monitor the upload process: Once you confirm the upload, the app will start transferring your selected files or folders to the cloud storage. You can monitor the progress of the upload within the app, usually displayed as a progress bar or percentage.
The duration of the upload process depends on factors such as the size of the files, the speed of your internet connection, and any limitations set by the cloud storage service. Larger files or slower internet connections may require more time to complete the upload.
During the upload process, ensure that you have a stable internet connection to avoid any interruptions. If your tablet’s screen turns off or the connection is lost, the upload may be paused or canceled, resulting in incomplete backups.
Once the upload is complete, your files are securely stored in the cloud storage service. You can access them from any device with the same cloud storage app installed, making it convenient to retrieve your files or restore them to a new device if needed.
Regularly review your cloud storage usage and consider upgrading to a paid plan if you require additional storage space. This allows you to continue backing up your files and ensures that you have enough storage for your growing data needs.
By following these steps, you can effectively upload your data to a cloud storage service, ensuring that your files are safely stored and easily accessible whenever you need them.
2 Using an external storage device
Using an external storage device is a practical method to backup data on your Android tablet. By transferring your files to a physical device such as a USB flash drive, an SD card, or an external hard drive, you can ensure the safety and accessibility of your data. Here’s a step-by-step guide on how to use an external storage device to backup your data:
3.2.1 Connecting the external storage device to your tablet
- Choose the appropriate external storage device: Select the type of external storage device that suits your needs and is compatible with your Android tablet. This could be a USB flash drive, an SD card, or an external hard drive.
- Connect the external storage device: Use a USB cable or an adapter to connect the external storage device to your Android tablet. Use the USB port, micro USB port, or USB-C port depending on your tablet’s connectivity options.
- Ensure proper connection: Make sure that the device is securely connected and recognized by your tablet. You may receive a notification or see the storage device listed in the file explorer or file manager app on your tablet.
3.2.2 Transferring data to the external storage device
- Open the file manager or file explorer app: Launch the file manager or file explorer app on your Android tablet. This app allows you to navigate through your tablet’s files and manage them.
- Select the files or folders to be backed up: Navigate to the files or folders that you want to backup and select them. You can choose individual files or entire folders.
- Copy or move the files to the external storage device: Tap on the “Copy” or “Move” option, usually represented by icons such as a document with a plus sign or an arrow. Select the external storage device as the destination for the copied or moved files.
- Monitor the transfer process: Once you initiate the transfer, monitor the progress of the transfer as it copies the selected files from your tablet to the external storage device. The duration of the transfer depends on the size and number of files being transferred.
- Verify the successful transfer: After the transfer process completes, verify that all the files are successfully transferred to the external storage device. Safely disconnect the external storage device from your tablet.
Ensure that the external storage device has sufficient space to accommodate the files you want to backup. If needed, consider using higher-capacity devices or multiple devices for larger amounts of data.
Label and store your external storage devices in a safe and secure place to prevent loss or damage. Consider keeping them separate from your tablet to minimize the risk of losing both at the same time.
Using an external storage device for backup provides you with a physical copy of your data that you can easily store and transport. It also allows you to have control over your backup files and access them without relying on an internet connection.
By following these steps, you can effectively use an external storage device to backup your data, ensuring the safety and availability of your files whenever you need them.
2.1 Connecting the external storage device to your tablet
Before you can begin backing up your data using an external storage device, you need to establish a connection between the device and your Android tablet. This allows for seamless file transfer and ensures that your data is safely stored on the external device. Here’s a step-by-step guide on how to connect an external storage device to your tablet:
- Choose the appropriate external storage device: Depending on your needs and the compatibility of your Android tablet, select the type of external storage device you want to use. This could be a USB flash drive, an SD card, or an external hard drive.
- Connect the external storage device: Use a USB cable or an adapter to connect the external storage device to your Android tablet. The specific port you use depends on the type of device and the available ports on your tablet. For USB flash drives or external hard drives, you may connect them directly using a USB port, micro USB port, or USB-C port. For an SD card, insert it into the SD card slot on your tablet.
- Ensure proper connection: Once you have connected the external storage device to your tablet, ensure that it is properly recognized. Depending on your tablet’s settings, you may receive a notification confirming the connection or see the device listed in the file explorer or file manager app on your tablet.
It’s important to note that the specific steps for connecting the external storage device may vary slightly depending on your tablet’s make and model, and the type of external device you are using. However, the general steps outlined above should help you establish a connection for file transfer.
Make sure you are using a high-quality USB cable or adapter to ensure a stable connection between your tablet and the external storage device. Flimsy or damaged cables can lead to unreliable connections and potential data loss during the transfer process.
Take care when inserting an SD card into the card slot to avoid bending or damaging the card and the slot. Follow the manufacturer’s instructions for proper insertion and removal of the card.
Once you have successfully connected the external storage device to your tablet, you can proceed with the next steps to transfer your files and create a backup. The connection between your tablet and the external storage device ensures smooth and efficient data transfer, providing you with a secure backup solution for your Android tablet.
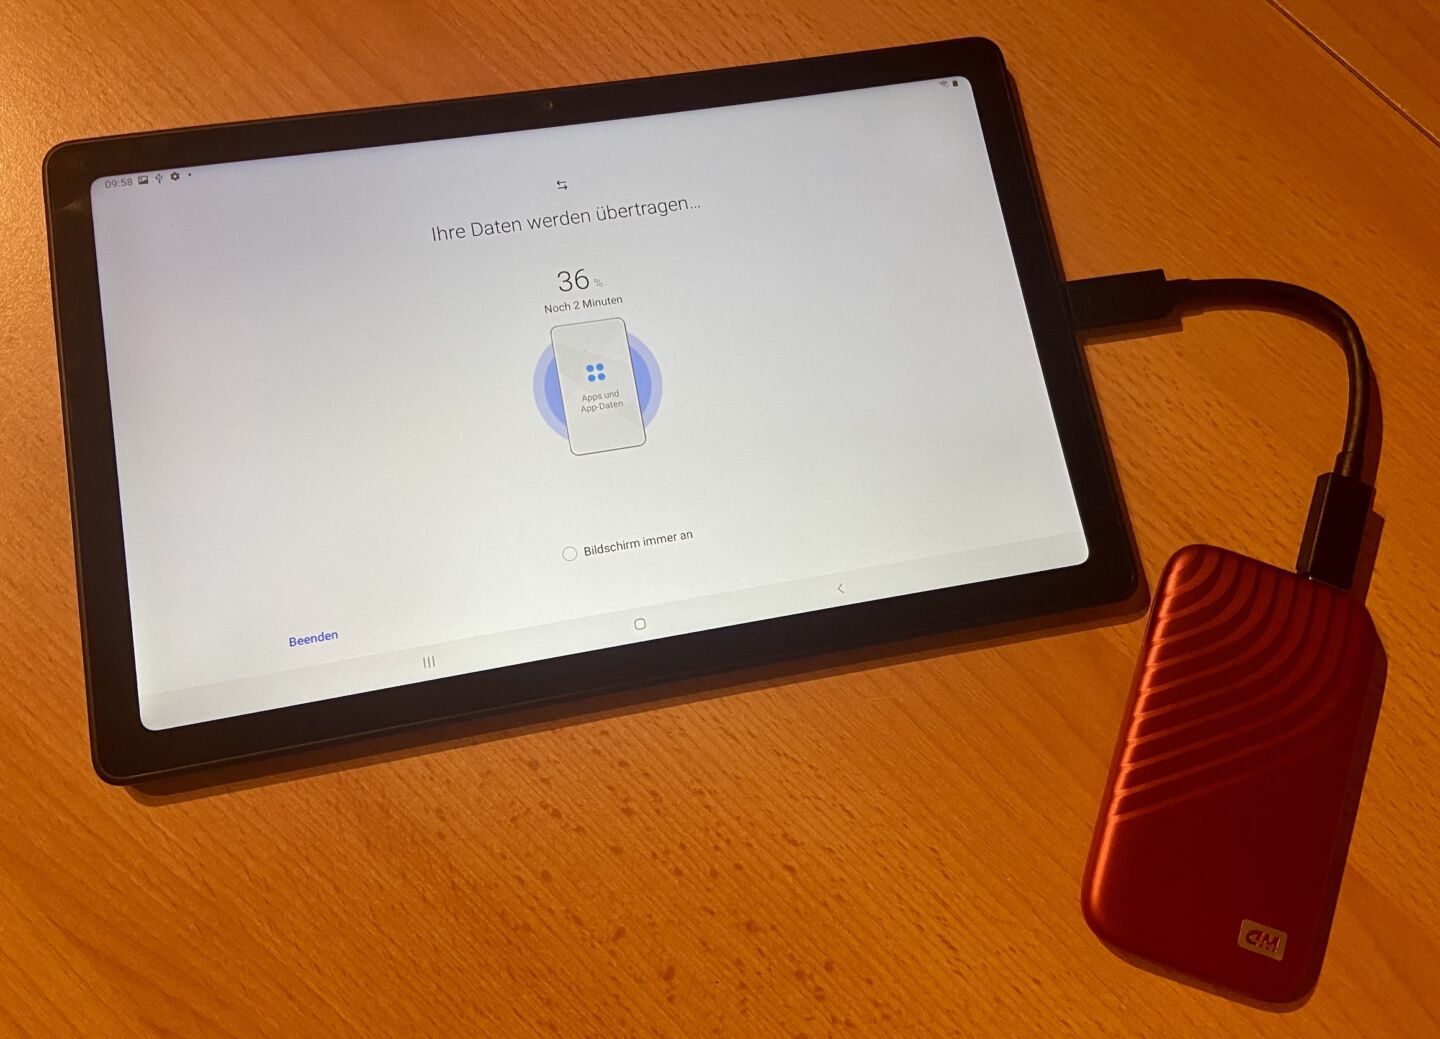
2.2 Transferring data to the external storage device
After successfully connecting the external storage device to your Android tablet, you can proceed with transferring your data to the device. This process ensures that your files are safely stored on the external storage and can be easily accessed whenever needed. Here’s a step-by-step guide on how to transfer your data to the external storage device:
- Open the file manager or file explorer app: Launch the file manager or file explorer app on your Android tablet. This app allows you to navigate through your tablet’s files and manage them.
- Navigate to the files or folders you want to backup: Use the file manager app to navigate to the specific files or folders on your tablet that you want to transfer to the external storage device.
- Select the files or folders: Tap and hold on the files or folders you want to backup. You can select multiple files or folders at once by tapping on each one individually or by using the “Select All” option if available.
- Copy or move the files to the external storage device: Look for an option within the file manager app to copy or move the selected files or folders. This option is usually represented by icons such as a document with a plus sign or an arrow. Select the external storage device as the destination for the copied or moved files.
- Monitor the transfer process: Once you initiate the transfer, the file manager app will start copying or moving the selected files from your tablet to the external storage device. You can monitor the progress of the transfer, typically displayed as a progress bar or percentage.
- Verify the successful transfer: After the transfer process completes, take a moment to verify that all the files you intended to transfer are successfully copied or moved to the external storage device. Safely disconnect the external storage device from your tablet once you have confirmed the successful transfer.
The duration of the transfer process depends on various factors, including the size of the files, the speed of your tablet’s storage, and the transfer speed of the external storage device. Larger files or a larger number of files may take longer to transfer.
During the transfer process, it’s important to ensure that your tablet remains connected to the external storage device. Avoid disconnecting the device or interrupting the transfer process, as it may result in incomplete backups or potential data loss.
Once the transfer is complete and you have verified the successful transfer, you can safely disconnect the external storage device from your Android tablet. Properly eject the device following the manufacturer’s instructions to prevent any data corruption or damage to the files on the external storage device.
Using an external storage device for backup provides you with a physical copy of your data that you can easily store and transport. It gives you full control over your backup files and allows you to access them without relying on an internet connection.
By following these steps, you can effectively transfer your data to an external storage device, ensuring the safety and accessibility of your files whenever you need them.
3 Using a computer and USB cable
Using a computer and USB cable is a convenient method to backup data from your Android tablet. It allows you to connect your tablet to a computer and copy your files onto the computer’s hard drive. This method provides you with a direct and reliable way to create a backup of your data. Here’s a step-by-step guide on how to use a computer and USB cable to backup your data:
3.3.1 Connecting your tablet to the computer using a USB cable
- Gather the necessary items: Prepare a USB cable that is compatible with your Android tablet and the USB port of your computer.
- Connect your tablet to the computer: Plug one end of the USB cable into the appropriate port on your tablet and the other end into an available USB port on your computer.
- Select the appropriate USB connection mode: On your tablet, you may receive a notification about the USB connection. Choose the “File Transfer” or “MTP” mode to establish a file transfer connection between your tablet and the computer.
- Enable USB debugging (optional): If prompted, you may need to enable USB debugging on your Android tablet. This step is typically required for specific devices or when accessing certain features of your tablet on the computer. Follow the on-screen instructions to enable USB debugging if necessary.
3.3.2 Copying data from your tablet to the computer
- Open the file explorer or file manager on your computer: Once the tablet is connected to the computer, open the file explorer or file manager application on your computer.
- Locate your tablet in the file explorer: Look for your tablet’s name or storage device in the file explorer or file manager on your computer. It should appear as an external device or drive.
- Navigate to the files or folders you want to backup: Use the file explorer or file manager on your computer to navigate to the specific files or folders on your tablet that you want to backup.
- Select the files or folders: Tap and hold or use the appropriate command to select the files or folders you want to backup.
- Copy the files to the computer: Right-click on the selected files or folders, and choose the “Copy” option. Then, navigate to the desired location on your computer’s hard drive and right-click again to choose the “Paste” option. Alternatively, you can use the drag-and-drop method to transfer the files to the desired location on your computer.
- Monitor the transfer process: As the files transfer from your tablet to the computer, a progress indicator may appear. The time it takes to complete the transfer depends on the size and number of files being copied.
Ensure that your tablet remains connected to the computer throughout the transfer process to avoid any interruptions or data loss. If your tablet’s screen turns off during the transfer, check the power settings on your tablet to keep it awake during the backup process.
Once the transfer is complete, you have successfully backed up your data from your Android tablet to your computer. It’s recommended to regularly review and update your backup files on your computer to ensure their accuracy and relevance.
Using a computer and USB cable as a backup method provides you with direct control over your backup files and allows for easy organization and management. It’s a reliable and efficient option for backing up data from your Android tablet.
3.1 Connecting your tablet to the computer using a USB cable
In order to backup data from your Android tablet using a computer and USB cable, you need to establish a connection between the two devices. This connection allows for seamless file transfer and enables you to copy your files from the tablet to the computer. Here’s a step-by-step guide on how to connect your tablet to the computer using a USB cable:
- Gather the necessary items: Ensure that you have a USB cable that is compatible with both your Android tablet and the USB port on your computer.
- Connect your tablet to the computer: On your Android tablet, locate the USB port or USB-C port and insert one end of the USB cable into it. Then, locate an available USB port on your computer and insert the other end of the USB cable into it.
- Select the appropriate USB connection mode: On your Android tablet, you may receive a notification indicating that it has been connected to a computer via USB. Swipe down from the top of the screen and tap on the notification to open the USB options. Depending on your tablet’s manufacturer, the option may be called “USB options,” “USB mode,” or “USB preferences.” Choose the option that enables file transfer or media transfer, such as “File Transfer,” “MTP,” or “Transfer files.”
- Enable USB debugging (optional): Some Android tablets may require you to enable USB debugging to establish a connection with a computer. If prompted, follow the on-screen instructions to enable USB debugging on your tablet. This step is typically optional and can be skipped if not prompted.
- Establish the connection: After selecting the appropriate USB connection mode and, if necessary, enabling USB debugging, the connection between your tablet and computer should be established. Your computer should detect the tablet as an external device.
Ensure that the USB cable is properly inserted into both the tablet and the computer to establish a stable connection. If the connection is not established or the tablet is not recognized by the computer, try using a different USB cable or a different USB port on the computer.
Keep in mind that the specific steps for connecting your tablet to the computer may vary slightly depending on your tablet’s make and model, as well as the operating system of your computer. However, the general steps outlined above should help you establish a connection for file transfer.
Once the connection is established, you can proceed with transferring your files from the tablet to the computer. This process allows you to create a backup of your data, ensuring that your files are safely stored on your computer and easily accessible whenever needed.
3.2 Copying data from your tablet to the computer
After successfully connecting your Android tablet to the computer using a USB cable, you can proceed with copying your data from the tablet to the computer. This process allows you to create a backup of your files and ensures that your data is safely stored on your computer. Here’s a step-by-step guide on how to copy data from your tablet to the computer:
- Open the file explorer or file manager on your computer: On your computer, open the file explorer or file manager application that allows you to navigate through files and folders.
- Locate your tablet in the file explorer: In the file explorer, you should see your Android tablet listed as an external device or drive. Click on the corresponding icon or name to access the tablet’s files and folders.
- Navigate to the files or folders you want to backup: Use the file explorer to navigate to the specific files or folders on your tablet that you want to copy to your computer.
- Select the files or folders: Tap and hold or use the appropriate command to select the files or folders you want to back up. You may be able to select multiple files or folders at once using Ctrl+click or Shift+click.
- Copy the files to the computer: With the files or folders selected, right-click on one of the selected items and choose the “Copy” option. Navigate to the desired location on your computer’s hard drive where you want to store the copied files, right-click again, and choose the “Paste” option.
- Monitor the copy process: As the files are being copied from your tablet to the computer, a progress indicator or dialog box may appear, indicating the status and estimated time remaining for the copy process.
- Verify the successful completion: After the copy process completes, verify that all the files you intended to copy are now saved on your computer’s hard drive. You can navigate to the destination folder and ensure that the files are present.
During the copy process, ensure that your tablet remains connected to the computer until all the files have been successfully copied. Avoid disconnecting the USB cable or interrupting the copy process to prevent any data loss or incomplete transfers.
Once the copy is complete and you have verified the successful transfer, you can safely disconnect your tablet from the computer. Properly eject the tablet from the computer by either right-clicking on the tablet’s icon in the file explorer and choosing the “Eject” or “Safely remove” option, or by following the manufacturer’s instructions for your specific tablet.
Using a computer and USB cable method to copy data provides you with a direct and reliable way to backup your files from your Android tablet. It allows for easy organization and management of your files on your computer’s larger screen and storage capacity.
By following these steps, you can effectively copy data from your Android tablet to your computer, creating a backup of your files and ensuring that your data is securely stored on your computer.
Tips for ensuring a successful backup
Backing up your data is crucial to protect your valuable information. To ensure a successful backup process and guarantee the security of your files, consider these helpful tips:
- Regularly schedule backups: Set a regular backup schedule to ensure that your data is consistently backed up. This helps to minimize the risk of data loss in case of device failures or accidents.
- Use multiple backup methods: Employ multiple backup methods for added security. Consider using a combination of cloud storage services, external storage devices, and computer backup to create redundant backups.
- Verify backups periodically: Regularly verify that your backups are successfully created and accessible. Check that your files are intact and that you can restore them if needed.
- Organize and categorize your files: Establish a well-organized folder structure for your backups. Categorize your files in a way that makes it easy to locate and retrieve specific files or folders when required.
- Encrypt sensitive files: If you have sensitive files in your backup, consider encrypting them for an extra layer of security. Encryption helps protect your files against unauthorized access and ensures your privacy.
- Keep backup storage devices in a safe place: Store your external storage devices, such as USB flash drives or external hard drives, in a secure and accessible location. Protect them from physical damage, theft, or accidental loss.
- Regularly update your cloud storage accounts: Keep an eye on your cloud storage usage and upgrade your storage plan as needed. Regularly review and remove any unnecessary files or folders to free up space for new backups.
- Take advantage of versioning: If your cloud storage service offers versioning, enable it for your important files. Versioning allows you to access previous versions of your files in case of accidental modifications or deletions.
- Test your backups: Perform occasional tests to restore some files from your backups to ensure that the process is working smoothly and that your files are recoverable.
- Update your backups after significant changes: Whenever you make significant changes or additions to your data, update your backups to reflect those changes. This ensures that your backup remains current and comprehensive.
Remember that backups are only effective if they are up-to-date and accessible when needed. By following these tips, you can ensure a successful backup process and have the peace of mind knowing that your important data is well-protected.
Conclusion
Backing up your data on your Android tablet is a vital step in protecting your valuable information from loss and ensuring its availability when needed. By following the methods outlined in this article, including using a cloud storage service, an external storage device, or a computer and USB cable, you can create reliable backups of your data.
Using a cloud storage service offers the convenience of accessing your files from anywhere and provides automatic synchronization across multiple devices. External storage devices provide a physical and portable option for backup, allowing you to have direct control over your files. Connecting your tablet to a computer via a USB cable provides a direct and efficient way to copy your files onto your computer’s hard drive.
Remember to regularly schedule your backups, use multiple backup methods for added security, and periodically verify the success and accessibility of your backups. Keeping your files organized, encrypting sensitive data, and securely storing your backup devices are key factors in ensuring the integrity and safety of your backed-up data.
By incorporating these tips into your backup routine, you can minimize the risk of data loss and have peace of mind knowing that your important files are well-protected. Whether it’s for personal memories or crucial work documents, taking the time to backup your data on your Android tablet is a small but crucial investment in safeguarding your digital life.