Introduction
Sony Vegas Pro 15 is a powerful video editing software that allows you to create professional-looking videos with ease. One of the key features of this software is the ability to add subtitles to your videos, which can greatly enhance the communication and engagement with your audience.
Subtitles are text overlays that appear on the screen, providing a written representation of the audio in the video. They can be used to convey dialogue, captions, translations, or any other textual information that is relevant to the video content. Adding subtitles not only makes your video accessible to a wider audience, including those with hearing impairments or language barriers, but it also improves engagement for viewers who prefer to read along while watching.
In this tutorial, we will walk you through the process of adding subtitles in Sony Vegas Pro 15. Whether you’re creating a tutorial, a promotional video, or a documentary, this feature will help you convey your message more effectively.
We will cover each step in the process, including importing your video, creating a new subtitle track, adding text to the track, adjusting the subtitle duration, formatting the subtitles, customizing the subtitle style, and finally, exporting the subtitles along with your video.
By the end of this tutorial, you’ll have a clear understanding of how to add subtitles to your videos in Sony Vegas Pro 15, giving you the tools to enhance the accessibility and impact of your content. So, let’s dive in and get started!
Step 1: Importing your video into Sony Vegas Pro 15
The first step in adding subtitles to your video in Sony Vegas Pro 15 is to import the video file into the software. Here’s how:
1. Launch Sony Vegas Pro 15 and create a new project or open an existing project where you want to add subtitles.
2. Click on the “File” menu at the top left corner of the screen and select “Import” from the dropdown menu.
3. Navigate to the location where your video file is stored and select the file you want to import. You can import a wide range of video formats, including MP4, AVI, MOV, and more.
4. Once you’ve selected the video file, click on the “Open” button to import it into Sony Vegas Pro 15. The video will now appear in the project media tab.
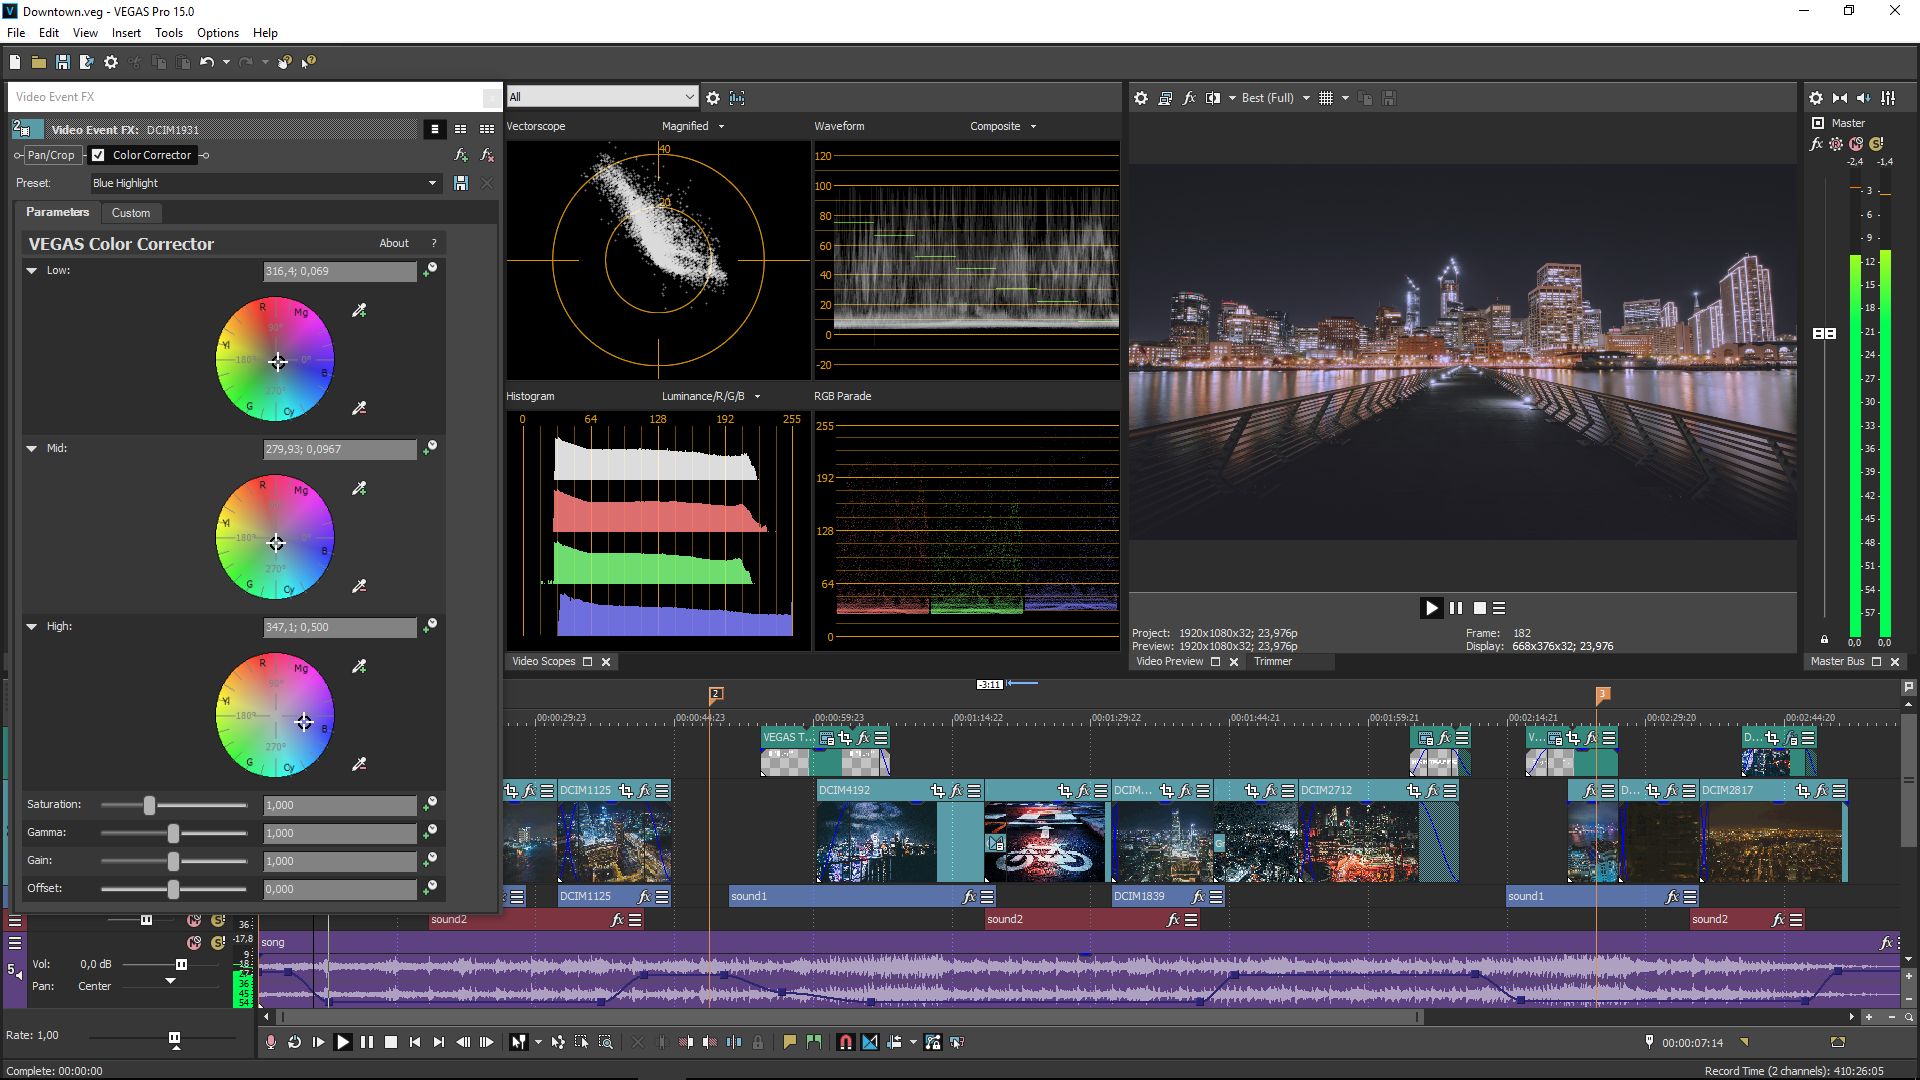
5. Drag and drop the video file from the media tab onto the timeline at the bottom of the screen. This will add the video to your project timeline, where you can edit and manipulate it.
Before proceeding to the next step, make sure that the video is properly imported and visible on the timeline. You can play the video by clicking on the “Play” button in the preview window to ensure everything is working correctly.
Importing your video into Sony Vegas Pro 15 is a straightforward process that lays the foundation for adding subtitles. Once your video is imported, you’re ready to move on to the next step where we’ll open the Subtitle & Text tab to start working on the subtitles.
Step 2: Opening the Subtitle & Text Tab
Once your video is imported into Sony Vegas Pro 15, you can proceed to open the Subtitle & Text tab, where you will find all the tools and options to add and edit subtitles. Follow these steps:
1. Locate the toolbar at the top of the software interface. Look for the “View” option and click on it.
2. In the dropdown menu that appears, select “Window Layouts” and then click on “Default Layout” to ensure you have the necessary panels visible.
3. Now, navigate to the “View” menu again and this time select “Timeline View” if it’s not already enabled. This will make the timeline panel visible, which is where you’ll be working with your subtitles.
4. Next, go to the “View” menu once more and hover over “Timeline” to reveal a submenu. From that submenu, select “Open Subtitles and Text” to open the Subtitle & Text tab.
5. The Subtitle & Text tab will now appear as a new panel in your workspace, typically to the right of the timeline. You can drag and adjust the size of this panel to your preference.
With the Subtitle & Text tab open, you have access to all the tools needed to create and edit subtitles. This tab provides options to add text, adjust timing, format the appearance of subtitles, and more. In the next step, we will learn how to create a new subtitle track to start adding text to your video.
Step 3: Creating a New Subtitle Track
In Sony Vegas Pro 15, subtitle tracks are used to organize and manage the subtitles within your video. To add subtitles, you’ll need to create a new subtitle track. Follow these steps:
1. Locate the Subtitle & Text tab on the right side of the interface. This is where you’ll be working to create and edit your subtitles.
2. Within the Subtitle & Text tab, find the “Track List” section. Right-click anywhere within the track list and select “Insert New Track” from the context menu.
3. A new subtitle track will be created in the track list. By default, it will be named “Subtitle Track 1.” You can rename it if desired by right-clicking on the track and selecting “Rename Track” from the menu.
With the new subtitle track created, you’ll be able to add and edit subtitles for your video. Each subtitle track can contain multiple subtitles, allowing you to add different sets of subtitles or captions as needed. You can easily switch between subtitle tracks to work on different sections of your video.
Now that you have a subtitle track in place, you’re ready to proceed to the next step, where we’ll learn how to add text to the subtitle track and start creating subtitles for your video.
Step 4: Adding Text to the Subtitle Track
Now that you have created a subtitle track, it’s time to start adding the actual text for your subtitles in Sony Vegas Pro 15. Follow these steps:
1. Ensure that the subtitle track you want to work on is selected in the track list within the Subtitle & Text tab. You can select a specific subtitle track by clicking on it with your mouse.
2. In the Subtitle & Text tab, click on the “Add Text” button located at the top left of the tab. This will open a text box where you can enter the text for your subtitle.
3. Enter the text for your subtitle in the text box. You can type or paste the text directly or import it from an external source if you have it prepared.
4. Once you’ve entered the text, you can adjust the positioning of the subtitle on the screen by dragging it to your desired location within the preview window.
5. If your video has multiple segments that require subtitles, you can add additional subtitles by repeating steps 2-4. Each subtitle will appear as a separate text box within the subtitle track.
As you add text to the subtitle track, you’ll notice that the timeline at the bottom of the screen updates to reflect the duration of each subtitle. This timeline will be crucial for adjusting the timing of your subtitles, which we’ll cover in the next step.
Adding text to the subtitle track is a fundamental step in the subtitle creation process. Take your time to input the accurate and appropriate text for each subtitle. Once you’re done with adding the text, you can move on to the next step, where we’ll learn how to adjust the duration of each subtitle for proper timing.
Step 5: Adjusting the Subtitle Duration
After adding the text to your subtitle track, it’s important to adjust the duration of each subtitle to ensure that they display on the screen at the appropriate times. Here’s how you can adjust the subtitle duration in Sony Vegas Pro 15:
1. Select the subtitle text box that you want to adjust in the Subtitle & Text tab. You can click on the specific text box in the track or use the track list to select the desired subtitle.
2. Once the subtitle is selected, you will notice that its duration is represented by the handles at the beginning and end of the text box on the timeline.
3. To change the duration of the subtitle, click and drag the handles of the subtitle text box on the timeline. Dragging the left handle will change the start time, while dragging the right handle will adjust the end time.
4. As you adjust the duration, you can use the preview window to check the synchronization between the subtitle and the video playback. Play the video to see how the subtitles align with the audio and make any necessary adjustments.
5. Continue adjusting the duration of each subtitle in the track until all subtitles are properly timed and synchronized with the video content.
By accurately adjusting the subtitle duration, you ensure that the text appears on the screen when it’s supposed to, allowing viewers to read along with the audio. It’s important to maintain a balance between giving viewers enough time to read the subtitles and ensuring that the text doesn’t linger on the screen for too long.
Now that you have fine-tuned the timing of your subtitles, let’s move on to the next step, where we’ll explore formatting options to make your subtitles visually appealing and easy to read.
Step 6: Formatting the Subtitles
Formatting your subtitles is an essential step to ensure that they are visually appealing and easy to read for your viewers. Sony Vegas Pro 15 offers various formatting options that you can apply to your subtitles. Follow these steps to format your subtitles:
1. Select the subtitle text box that you want to format in the Subtitle & Text tab. You can click on the specific text box in the track or use the track list to select the desired subtitle.
2. In the Subtitle & Text tab, you will find a range of formatting options in the toolbar at the top of the tab. These options include font size, font style, color, alignment, shadow, and more.
3. Customize the appearance of your subtitles by adjusting the formatting options. For example, you can increase or decrease the font size to make the text more prominent, choose a font style that suits the tone of your video, and select a color that stands out against the video background.
4. As you make changes to the formatting, you can preview the resulting look in the preview window. This allows you to see how the changes will affect the readability and overall aesthetic of your subtitles.
5. It’s a good practice to maintain consistency in formatting throughout your subtitles. Consider choosing a consistent font style, size, and color scheme for all your subtitles to create a cohesive and professional look.
Remember, the goal of formatting your subtitles is to make them visually appealing and legible for your viewers. Pay close attention to the readability of the text, ensuring that it contrasts well with the video background and doesn’t blend into the visuals.
With your subtitles formatted to enhance their appearance, we can now move on to the next step, where we’ll explore the option to customize the style of your subtitles further.
Step 7: Customizing the Subtitle Style
To make your subtitles stand out and reflect your unique style, Sony Vegas Pro 15 allows you to customize the look and feel of your subtitles further. Here’s how you can customize the subtitle style:
1. Select the subtitle text box that you want to customize in the Subtitle & Text tab. You can click on the specific text box in the track or use the track list to select the desired subtitle.
2. In the toolbar of the Subtitle & Text tab, you’ll find additional style options to modify the appearance of your subtitles. These options may include choices for background color, transparency, borders, effects, and more.
3. Experiment with different customization options to find a style that complements your video or meets your branding requirements. For example, you can add a background color behind your subtitles to enhance their visibility or apply an effect such as a drop shadow to make them pop.
4. As you make changes to the style options, observe the results in the preview window to ensure the customized style aligns with your vision for the subtitles.
5. Consistency is key when customizing the subtitle style. Make sure to maintain a consistent style throughout your video to provide a cohesive and professional viewing experience.
Customizing the subtitle style allows you to add a personal touch to your subtitles while maintaining readability and visual appeal. However, it’s important to strike a balance and avoid excessive styles that may distract viewers from the content itself.
With your subtitles now customized to reflect your preferred style, let’s move on to the final step, where we’ll explore how to export the subtitles along with your video.
Step 8: Exporting the Subtitles with your Video
Once you have added and customized the subtitles in Sony Vegas Pro 15, it’s time to export your video along with the subtitles. Follow these steps to export your video with subtitles:
1. Ensure that your video project is saved and ready for export. Go to the “File” menu at the top left corner of the screen and select “Render As” from the dropdown menu.
2. In the “Render As” dialog box, choose the desired output format for your video. You can select common video formats such as MP4 or AVI, depending on your needs.
3. Configure the export settings according to your preferences, such as the resolution, bitrate, and frame rate. Make sure to maintain the quality of your video while considering the file size and compatibility with your intended platform or device.
4. In the “Output Filename” field, specify the name and location where you want to save your exported video file.
5. Scroll down to the “Additional Files” section of the dialog box. Check the box next to “Embed Closed Captioning” or “Include Subtitles” to ensure that the subtitles are included in the exported video file.
6. Click on the “Render” button to start the export process. Sony Vegas Pro 15 will now render the video along with the subtitles, creating the final output file.
7. Once the rendering process is complete, navigate to the specified location where you saved the exported video. Play the video to verify that the subtitles are displayed as intended.
By exporting your video with the subtitles, you ensure that the subtitles are permanently integrated into the video file. This allows viewers to see the subtitles regardless of the platform or device they use to watch the video.
Congratulations! You have successfully added, customized, and exported subtitles with your video using Sony Vegas Pro 15. Subtitles can greatly enhance the accessibility and engagement of your video content, making it more inclusive and impactful for a wider audience.
Conclusion
Adding subtitles to your videos in Sony Vegas Pro 15 is a straightforward process that can greatly enhance the accessibility and engagement of your content. Subtitles allow you to communicate your message effectively to a wider audience, including those with hearing impairments or language barriers.
In this tutorial, we covered the step-by-step process of adding subtitles in Sony Vegas Pro 15. We learned how to import videos, open the Subtitle & Text tab, create subtitle tracks, add and adjust text, format and customize the appearance of subtitles, and finally, export the video with the subtitles embedded.
Remember to focus on readability and clarity when adding subtitles. Choose a font style, size, color, and background that make the subtitles easy to read, while ensuring they don’t distract from the video itself. Consistency in timing, style, and formatting is important to maintain a professional and cohesive look.
By incorporating subtitles into your videos, you open your content to a broader audience and improve viewer engagement. Whether you’re creating tutorials, promotional videos, or documentaries, the addition of subtitles can make your videos more informative and accessible.
Now that you have learned how to add subtitles in Sony Vegas Pro 15, start utilizing this feature to enhance your videos and connect with a wider audience. Experiment with different styles, formats, and placement of subtitles to find what works best for your content.
So, what are you waiting for? Dive into Sony Vegas Pro 15 and add impactful subtitles to your videos today!


