Introduction
Welcome to our tutorial on how to add Grammarly to PowerPoint! As an SEO writer, you understand the importance of clear and error-free content. Whether you’re creating a presentation for work, school, or personal use, having proper grammar and spelling is essential to convey your message effectively. With Grammarly’s powerful proofreading capabilities, you can ensure that your PowerPoint presentation is polished and professional.
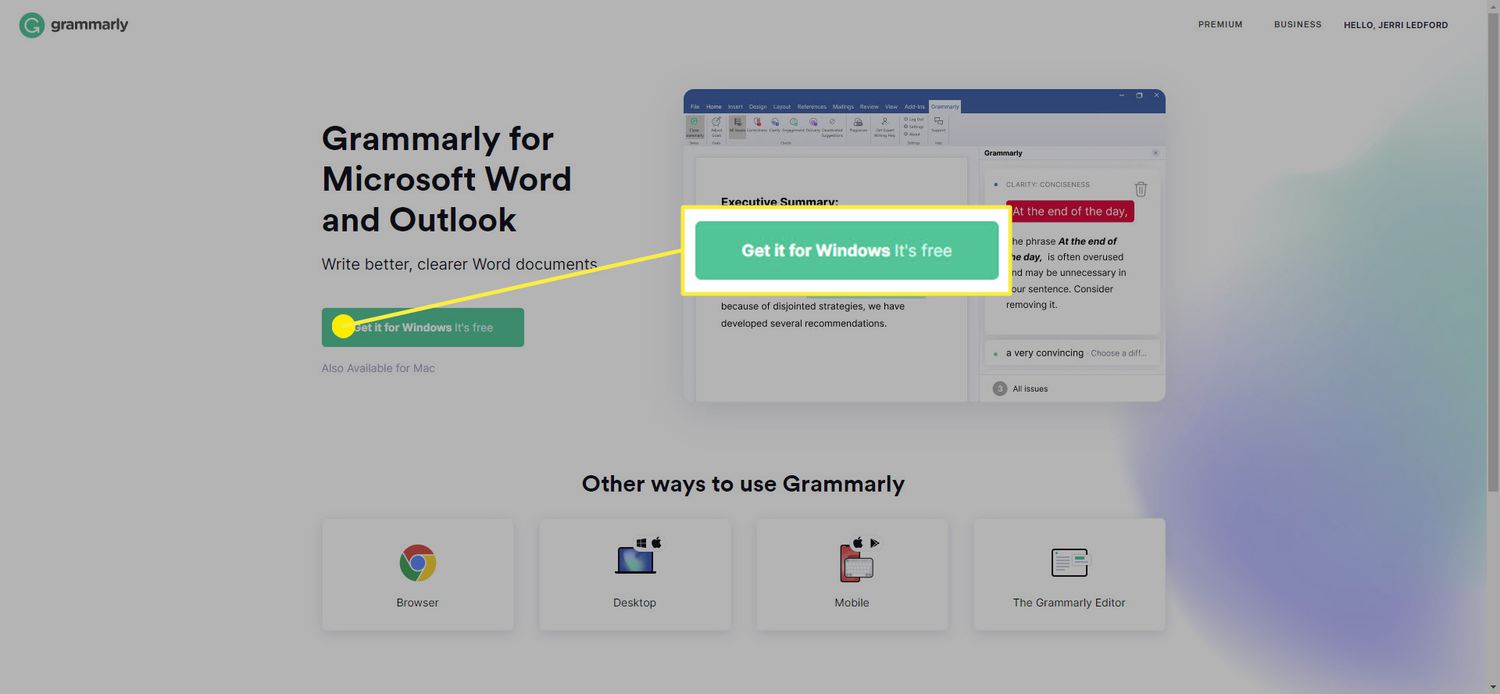
Grammarly is a popular online writing tool that offers real-time grammar and spelling corrections. While it’s commonly used with text editors and web browsers, you can also integrate Grammarly into Microsoft Office applications like PowerPoint. By adding Grammarly to PowerPoint, you’ll have an extra layer of editing assistance while you create your slides.
In this tutorial, we will guide you through the process of installing the Grammarly for Microsoft Office add-in and show you how to access and utilize its features within PowerPoint. We will also explore the different ways you can customize Grammarly to suit your writing preferences. By the end of this tutorial, you’ll be equipped with all the knowledge you need to enhance your PowerPoint presentations with the help of Grammarly.
Before we begin, make sure you have a stable internet connection, as Grammarly requires an internet connection to function properly. Also, ensure that you have a Grammarly account. If you don’t have one, you can sign up for a free account on the Grammarly website. With that out of the way, let’s get started!
Step 1: Installing the Grammarly for Microsoft Office Add-in
The first step in adding Grammarly to PowerPoint is to install the Grammarly for Microsoft Office add-in. This add-in allows Grammarly to integrate seamlessly with your PowerPoint application, providing you with real-time writing assistance. Here’s how you can install the add-in:
1. Launch PowerPoint and open a new or existing presentation.
2. Click on the “Insert” tab in the top menu bar.
3. In the “Add-ins” group, click on the “Get Add-ins” button. This will open the Microsoft Office Add-ins store.
4. In the search bar, type “Grammarly” and press Enter.
5. Locate the Grammarly for Microsoft Office add-in and click on it to view the add-in details.
6. Click on the “Add” button to install the add-in. A confirmation dialog box will appear.
7. Read the terms and permissions, and if you agree, click on the “Continue” button.
8. The Grammarly for Microsoft Office add-in will begin downloading and installing. This process may take a few moments depending on your internet connection speed.
9. Once the installation is complete, you will see a notification confirming that the add-in has been successfully installed.
That’s it! You have now successfully installed the Grammarly for Microsoft Office add-in for PowerPoint. You can proceed to the next step to learn how to access Grammarly within PowerPoint and start checking your grammar and spelling.
Step 2: Accessing Grammarly within PowerPoint
Now that you have installed the Grammarly for Microsoft Office add-in, let’s learn how to access Grammarly within PowerPoint and make use of its powerful writing assistance features. Follow these steps:
1. Launch PowerPoint and open the presentation you want to work on.
2. Click on the “Review” tab in the top menu bar.
3. In the “Proofing” group, locate the Grammarly button. It will be represented by the Grammarly logo.
4. Click on the Grammarly button to open the Grammarly panel on the right side of the PowerPoint window.
5. The Grammarly panel will display an overview of your presentation’s grammar and spelling errors, as well as suggestions to improve your writing. It will also display your document’s overall score.
6. To start checking your presentation for errors, click on the “Start Review” button.
7. Grammarly will now begin scanning your presentation for grammar and spelling mistakes. It will highlight the errors and provide suggestions for improvements.
8. Click on each highlighted error to view Grammarly’s suggestion for correction. You can choose to accept or ignore each suggestion depending on your preference.
9. As you make changes and corrections, the Grammarly panel will update the overall score of your presentation. Aim to achieve a high score to ensure your presentation is error-free and well-written.
10. If you want to dismiss the Grammarly panel temporarily, you can click on the “Hide” button at the top of the panel. To show the panel again, click on the Grammarly button in the Proofing group.
By accessing Grammarly within PowerPoint, you can easily identify and correct grammar and spelling errors in your presentation. This ensures that your content is clear and professional, capturing your audience’s attention and leaving a positive impression. Now that you know how to access Grammarly, let’s move on to the next step to discover how to utilize Grammarly’s writing insights feature.
Step 3: Checking and Correcting Grammar and Spelling Errors
Now that you have Grammarly integrated into PowerPoint, you can easily check and correct grammar and spelling errors in your presentation. Follow these steps:
1. Open your PowerPoint presentation and make sure the Grammarly panel is visible by following the instructions from the previous step.
2. Review the highlighted errors within your presentation. Grammarly will underline errors in red for spelling and blue for grammar.
3. Hover over a highlighted error to display Grammarly’s suggestion for correction. A small pop-up window will appear with the suggested correction.
4. If you agree with Grammarly’s suggestion, click on the suggestion to apply the correction to your presentation.
5. If you want to disregard Grammarly’s suggestion, simply ignore it and move on to the next error.
6. As you make corrections, the Grammarly panel will update the overall score of your presentation and provide feedback on the improvements you’ve made.
7. Continue reviewing and correcting errors throughout your presentation until you’re satisfied with the quality of your content.
8. Remember to save your presentation periodically to ensure that your progress is not lost.
By using Grammarly to check and correct grammar and spelling errors, you can be confident that your presentation is error-free, ensuring that your message is clear and professional. Grammarly’s real-time suggestions and feedback help you enhance the quality of your content, making it more engaging and impactful for your audience. Now that you’re familiar with how to check and correct errors, let’s move on to the next step to explore Grammarly’s writing insights feature.
Step 4: Utilizing Grammarly’s Writing Insights
Grammarly not only helps you check and correct grammar and spelling errors but also provides valuable insights to improve your writing. Here’s how you can make the most of Grammarly’s writing insights feature in PowerPoint:
1. With your PowerPoint presentation open, access the Grammarly panel by following the instructions from the earlier steps.
2. Browse through the Grammarly panel to view the various writing insights and suggestions provided.
3. Grammarly’s writing insights may include suggestions to improve sentence clarity, use more concise language, avoid wordy or complex phrases, or enhance the overall readability of your content.
4. Click on each writing insight to expand it and view detailed explanations and possible improvements.
5. Consider the suggested changes and incorporate them into your presentation to enhance the quality of your writing.
6. As you make improvements based on Grammarly’s writing insights, you’ll notice an improvement in your overall score and the overall professionalism of your presentation.
7. Experiment with different suggestions and revisions to find the writing style and tone that best suits your presentation’s purpose and audience.
The writing insights provided by Grammarly help you refine your writing skills and create compelling presentations. By implementing Grammarly’s suggestions, you can strengthen your communication, eliminate unnecessary jargon, and ensure that your ideas come across clearly and effectively.
Remember that Grammarly’s suggestions are meant to be a guide, and you can choose to accept or ignore them based on your writing style and preferences. It’s important to strike a balance between Grammarly’s suggestions and your own voice and style to maintain authenticity in your presentation.
Now that you know how to utilize Grammarly’s writing insights, let’s move on to the next step to explore how you can customize Grammarly’s settings to suit your preferences.
Step 5: Customizing Grammarly’s Settings for PowerPoint
Grammarly offers customizable settings that allow you to tailor its suggestions and preferences to your specific needs and writing style. By customizing Grammarly’s settings, you can ensure that it aligns with your preferences and provides you with the most relevant feedback. Here’s how you can customize Grammarly’s settings in PowerPoint:
1. Open PowerPoint and ensure the Grammarly panel is visible by following the previous steps.
2. Click on the “Settings” icon, which looks like a gear, located at the top right corner of the Grammarly panel.
3. The settings menu will appear, allowing you to customize various aspects of Grammarly’s behavior in PowerPoint.
4. In the settings menu, you can choose to enable or disable specific types of suggestions, such as spelling, grammar, punctuation, conciseness, clarity, and more.
5. You can also adjust the intensity of the suggestions to match your preference, ranging from moderate to strong.
6. Grammarly allows you to set your desired writing tone, such as formal, informal, neutral, or academic, depending on the nature of your presentation.
7. Additionally, you can choose whether or not you want Grammarly to provide suggestions for vocabulary enhancement.
8. Once you’ve customized the settings according to your preferences, click on the “Save” button to apply the changes.
By customizing Grammarly’s settings, you can tailor the tool to provide feedback that aligns with your writing style and specific requirements for your PowerPoint presentation. These personalized settings enhance the accuracy and relevance of Grammarly’s suggestions, resulting in an improved writing experience and a polished presentation.
Experiment with different settings to find the perfect configuration that suits your needs. Remember, you can always revisit the settings menu in the Grammarly panel to make adjustments as necessary.
Now that you know how to customize Grammarly’s settings, you’re equipped to fine-tune the writing assistance provided by Grammarly in PowerPoint. Let’s wrap up this tutorial by summarizing what we’ve learned and the benefits of using Grammarly in PowerPoint.
Conclusion
Adding Grammarly to PowerPoint can greatly enhance the quality and professionalism of your presentations. With Grammarly’s real-time grammar and spelling checks, writing insights, and customizable settings, you can ensure that your content is error-free, clear, and engaging.
In this tutorial, we have walked through the process of installing the Grammarly for Microsoft Office add-in in PowerPoint. We have also learned how to access Grammarly within PowerPoint, check and correct grammar and spelling errors, utilize Grammarly’s writing insights, and customize its settings to suit our preferences.
By incorporating Grammarly into your PowerPoint presentations, you can benefit in several ways. Firstly, Grammarly ensures that your writing is free of errors, helping you maintain a professional and credible image. Secondly, Grammarly provides writing insights and suggestions, empowering you to enhance the clarity, conciseness, and overall quality of your content. Lastly, Grammarly’s customizable settings allow you to personalize its feedback to align with your writing style and specific requirements.
Remember to save your presentation at regular intervals to avoid losing any progress. Additionally, while Grammarly is a powerful tool, it’s essential to maintain a balance between its suggestions and your own voice to ensure the authenticity and originality of your presentations.
Now that you are equipped with the knowledge of how to add Grammarly to PowerPoint and make the most of its features, go ahead and create error-free and captivating presentations. Your audience will appreciate your attention to detail and the polished delivery of your content.
So, harness the power of Grammarly, fine-tune your writing, and captivate your audience with compelling and flawless PowerPoint presentations!