Why Activate Your SIM Card?
Activating your SIM card in a tablet is an essential step that allows you to enjoy the full functionality and benefits of cellular connectivity. By activating the SIM card, you can access mobile data, make calls, and send text messages while on the go, making your tablet a truly versatile device.
Here are a few reasons why activating your SIM card in a tablet is important:
- Internet Connectivity: With an activated SIM card, you can connect to the internet wherever there is a cellular network coverage. This means you can browse the web, stream videos, check emails, and stay connected with friends and family, even without access to Wi-Fi.
- Enhanced Portability: Activating your SIM card turns your tablet into a portable communication device. You can use it to make phone calls, send and receive text messages, and stay connected while on the move. This is particularly useful when traveling or in situations where you don’t have access to a landline or smartphone.
- Emergency Situations: Having an activated SIM card in your tablet ensures that you can dial emergency services, such as 911 or your country’s equivalent, during critical situations. It provides an extra layer of safety and peace of mind, especially when you don’t have immediate access to a phone.
- Productivity and Convenience: Activating your SIM card enables you to access essential business applications and stay connected with colleagues and clients when you’re away from your office or a stable internet connection. This allows you to work efficiently and stay productive while on the go.
- Flexibility: Activating a SIM card in your tablet offers flexibility in terms of choosing a suitable data plan and mobile network provider. You can compare plans and select one that aligns with your data usage requirements and budget. This flexibility empowers you to have control over your internet connectivity options.
By activating your SIM card in your tablet, you unlock a range of benefits and possibilities, including enhanced internet connectivity, portability, emergency access, productivity, and flexibility. So, it is definitely worth taking the time to activate your SIM card and enjoy the full potential of your tablet.
Compatible Tablets
Before activating a SIM card in your tablet, it’s important to ensure that your tablet is compatible with cellular connectivity. Not all tablets have the built-in hardware necessary to support SIM card functionality. Here are some factors to consider when determining if your tablet is compatible:
- Tablet Model: Check the specifications of your tablet to see if it has a SIM card slot. Tablets with SIM card slots typically have cellular capabilities, allowing you to insert a SIM card for data and voice services.
- Network Compatibility: Determine which network frequencies your tablet supports. Different tablets are compatible with different network technologies, such as GSM or CDMA. Ensuring the tablet supports the network technology used by your desired mobile network provider is crucial for successful activation.
- Unlocked vs. Locked Tablets: If you have purchased your tablet directly from a mobile network provider, it may be locked to that specific carrier. A locked tablet restricts you from using SIM cards from other network providers. Consider unlocking your tablet if you wish to use it with different carriers or when traveling internationally.
- Software Compatibility: Check if your tablet’s operating system supports cellular connectivity. Most modern tablets running Android, iOS, or Windows have the necessary software to activate and use a SIM card. Ensure your tablet’s software is up to date for a seamless activation process.
- Consult Manufacturer’s Manual: If you are unsure about your tablet’s compatibility, consult the manufacturer’s manual or visit the manufacturer’s website for detailed specifications. They can provide specific information about your tablet’s compatibility and instructions on how to activate a SIM card.
It’s important to note that not all tablets are compatible with cellular connectivity and SIM card activation. If your tablet lacks the necessary hardware or software capabilities, you won’t be able to use a SIM card for cellular services. In such cases, you can still use your tablet with Wi-Fi for internet access, but you will not have mobile data or voice capabilities.
By ensuring that your tablet is compatible with SIM card activation, you can fully utilize the benefits of cellular connectivity and enjoy seamless internet access and communication while on the go.
Things You Will Need
Before you begin the process of activating a SIM card in your tablet, it’s essential to gather a few things to ensure a smooth and successful activation. Here are the key items you will need:
- SIM Card: The most important item you will need is a compatible SIM card. Make sure to obtain a SIM card from your desired mobile network provider. You can either visit their store or order one online. Ensure that the SIM card matches the correct size for your tablet’s SIM card slot (standard, micro, or nano).
- Activation Instructions: Depending on your mobile network provider, you may receive activation instructions along with the SIM card or via email. These instructions will guide you through the process of activating your SIM card and setting up cellular services on your tablet. Keep these instructions handy during the activation process.
- Tablet Manual: Locate the manual or user guide that came with your tablet. It provides valuable information about the SIM card slot’s location, as well as any specific instructions or limitations related to SIM card activation. Familiarize yourself with the manual to ensure a seamless activation process.
- Internet Connection: To activate your SIM card, ensure that you have access to a stable internet connection. You can use Wi-Fi or connect your tablet to a computer with an Ethernet cable. A reliable internet connection is required to complete the activation process and establish a connection with your mobile network provider.
- PIN/PUK Codes: Some SIM cards may require a Personal Identification Number (PIN) or PIN Unlock Key (PUK) code to activate. These codes are provided by your mobile network provider and are used for security purposes. Make sure to note down or keep these codes in a safe place for reference during the activation process.
By having these essential items ready, you can proceed with confidence through the SIM card activation process without any delays or interruptions. With your tablet and SIM card prepared, you’re one step closer to enjoying the convenience and flexibility of cellular connectivity on your tablet.
Step 1: Find SIM Card Slot
Before you can insert your SIM card into your tablet, you need to locate the SIM card slot. The location of the slot may vary depending on the tablet model, but here are some common places to look:
- Traditional Tablets: Many tablets have their SIM card slot on the side or back. Look for a small tray or panel, often marked with a SIM card icon or the words “SIM”. Sometimes, you may need a SIM card removal tool (or even a paperclip) to open the tray or remove the panel.
- Convertible Tablets: For 2-in-1 or convertible tablets with detachable keyboards, the SIM card slot can often be found on the tablet portion. Check the edges or sides of the tablet for a small slot or compartment that houses the SIM card.
- Ejectable Tray: Some tablets have an ejectable tray that holds the SIM card. Look for a small pinhole or groove on the side or top of the tablet. Use the provided SIM card removal tool or a paperclip to gently push into the hole and release the tray.
- Underneath the Battery: In rare cases, especially with older tablets, you may need to remove the back cover or battery to access the SIM card slot. Consult your tablet’s user manual or manufacturer’s website for precise instructions on how to access the SIM card slot if it is located underneath the battery.
Once you’ve located the SIM card slot, take a moment to carefully inspect it. Note the orientation of the SIM card slot, as well as any guides or markings that indicate how the SIM card should be inserted (e.g., gold contacts facing downwards). This will help ensure that you insert the SIM card correctly in the next step.
If you’re unsure about the location of the SIM card slot or how to access it on your specific tablet model, refer to the tablet’s user manual or visit the manufacturer’s website for detailed instructions and illustrations. Remember to handle your tablet and SIM card with care to avoid any damage during the process.
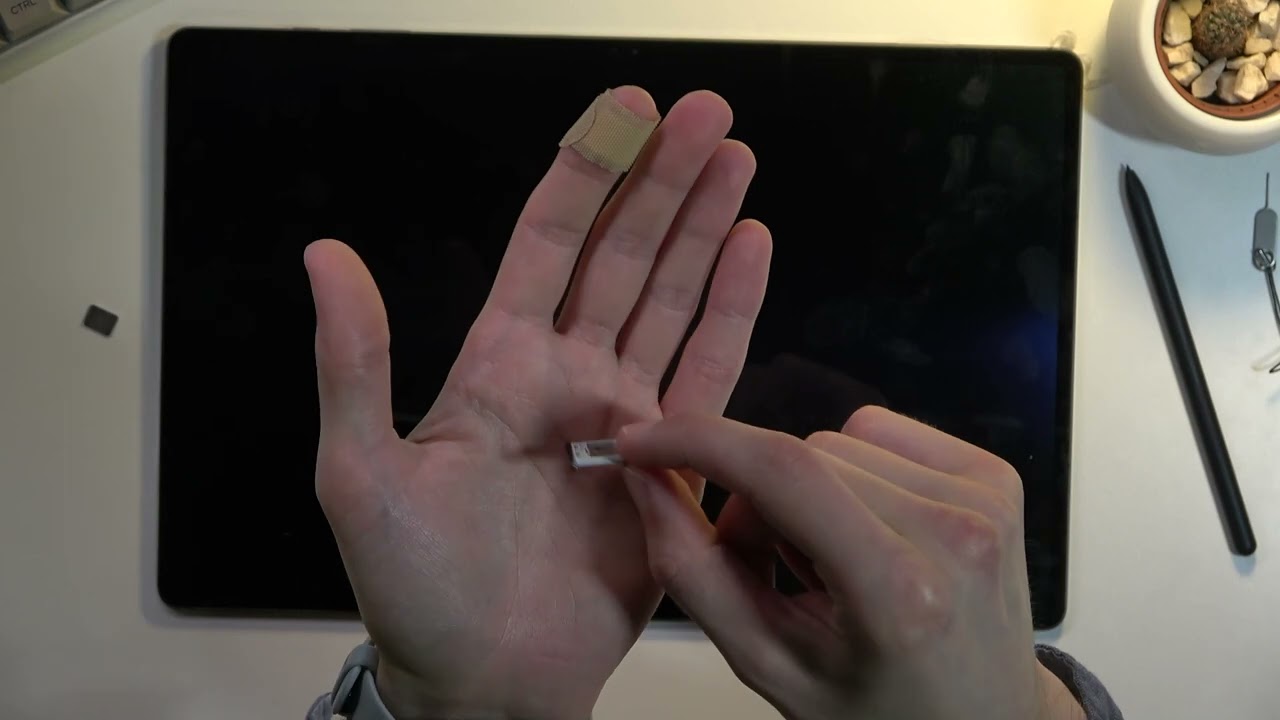
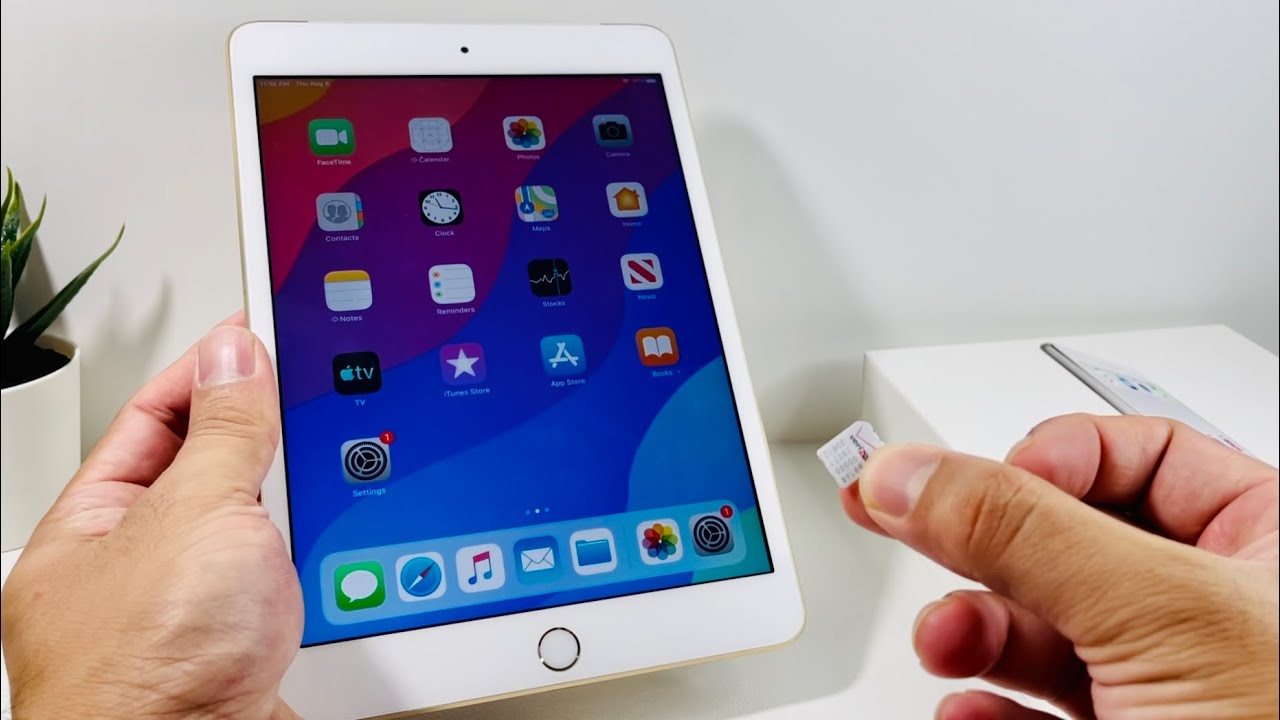
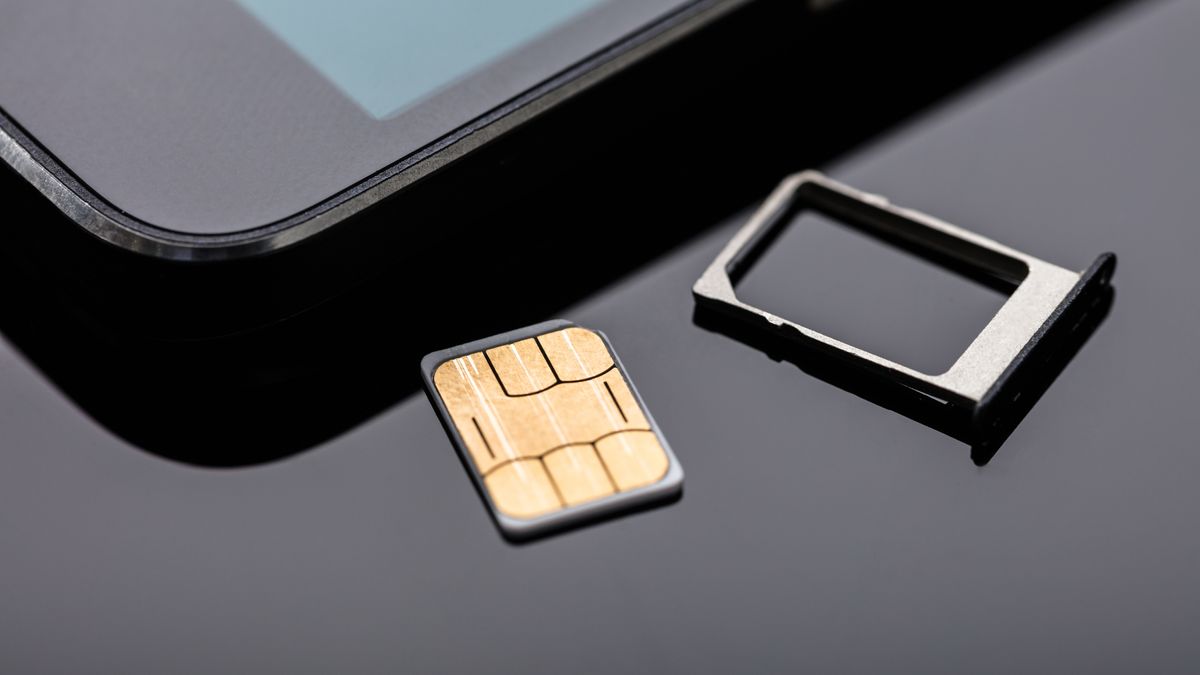
Step 2: Insert SIM Card
Now that you’ve located the SIM card slot in your tablet, it’s time to insert the SIM card. Follow these steps to ensure a successful insertion:
- Power Off: Before inserting the SIM card, make sure your tablet is powered off. This will help prevent any potential damage to the SIM card or tablet during the process.
- Remove SIM Card Tray: Depending on your tablet model, you may need to remove a SIM card tray or open a panel to access the SIM card slot. Use the appropriate method for your tablet, such as using a SIM card removal tool or gripping the panel and pulling gently to reveal the slot.
- Position the SIM Card: Take your SIM card and carefully position it in the designated slot. Pay attention to the orientation of the SIM card and any guides or markings that indicate the correct alignment. The gold contacts on the SIM card should face down, making contact with the corresponding connectors in the slot.
- Insert the SIM Card: Once the SIM card is correctly positioned, gently push it into the slot until it is fully inserted. Be cautious not to apply excessive force or damage the SIM card or slot. The SIM card should fit snugly into the slot without any protrusion.
- Replace the Tray or Panel: If you removed a SIM card tray or panel, carefully insert it back into its original position. Ensure it is securely closed or fitted to avoid any potential damage or dislodging of the SIM card during tablet operation.
- Power On: With the SIM card inserted, you can now power on your tablet. Follow the manufacturer’s instructions to turn on your tablet and proceed to the next step in activating your SIM card.
It’s essential to insert the SIM card with care and ensure it is properly aligned and seated in the slot. If you encounter resistance or difficulties when inserting the SIM card, double-check the orientation and alignment, and try again gently. Refer to the user manual or manufacturer’s website for specific instructions related to your tablet model if needed.
By successfully completing this step, you’ve laid the foundation for activating your SIM card and enjoying cellular connectivity on your tablet.
Step 3: Power On Tablet
Now that you have inserted your SIM card into the tablet, it’s time to power it on. Follow these steps to ensure a smooth start-up:
- Confirm SIM Card: Before turning on your tablet, double-check that the SIM card is securely inserted into the SIM card slot. Ensure that it is properly aligned and fitted to avoid any connectivity issues or damage to the card or slot.
- Press and Hold the Power Button: Locate the power button on your tablet. It is usually found on the side or top edge of the device. Press and hold the power button until the tablet screen lights up. This action may take a few seconds, so be patient.
- Observe the Booting Process: Once the tablet is powered on, you will see the manufacturer’s logo or a loading screen. This indicates that the tablet is starting up and initializing its system. Wait for the booting process to complete.
- Enter PIN or Security Code: Depending on your tablet and SIM card settings, you may be prompted to enter a PIN or security code. If a PIN is required, enter the code you received from your mobile network provider. If you haven’t set up a PIN yet, you will be guided through the process of creating one.
- Unlock and Access Home Screen: Once you have successfully entered the PIN or security code, the tablet will unlock, and you’ll be directed to the home screen. At this point, your tablet is powered on and ready to establish a cellular network connection.
It’s important to follow the correct sequence and enter any required codes accurately during the power-on process. Failure to do so may result in an unsuccessful start-up or limited functionality.
If you encounter any issues during the power-on process, such as the tablet not powering on or persistent error messages, consult the tablet’s user manual or the manufacturer’s support resources for troubleshooting steps specific to your tablet model.
By successfully completing this step, you have powered on your tablet and prepared it for the next stage of activating your SIM card.
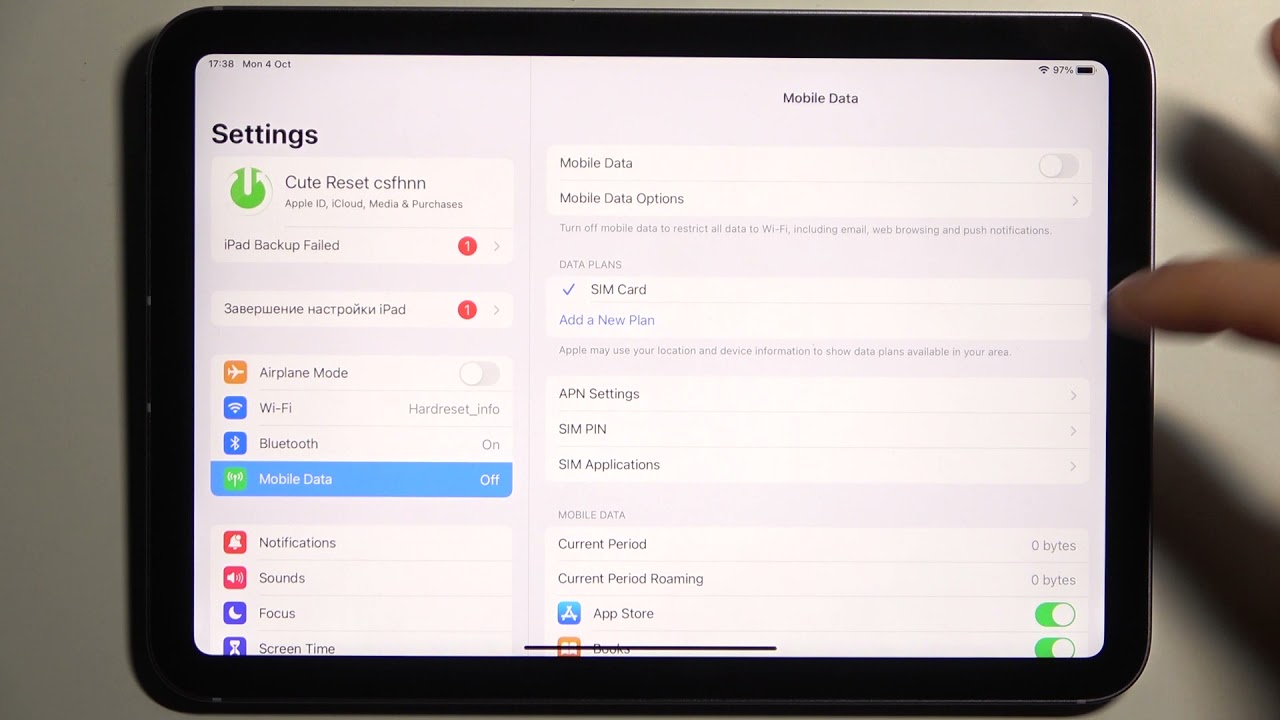
Step 4: Set Up Cellular Network
After powering on your tablet, the next step is to set up the cellular network connection. Follow these steps to configure the cellular network settings:
- Access Settings: Locate the Settings app on your tablet, which is usually represented by a gear icon. Tap on the app to open the settings menu.
- Select Cellular or Network Settings: Within the Settings menu, look for options related to cellular networks, mobile networks, or network settings. The exact wording may vary depending on your tablet’s operating system.
- Enable Cellular Data: If cellular data is not enabled by default, toggle the switch to enable it. This allows your tablet to connect to the mobile network and access data services.
- Choose Mobile Network Operator: Tap on the option to select the mobile network operator or carrier that corresponds to your SIM card. This may appear as “Network Operator,” “Carrier Selection,” or similar.
- Automatic or Manual Selection: Depending on your tablet, you may be given the option to select the network operator automatically or manually. If available, choose the automatic selection option to let the tablet search and connect to the appropriate network automatically.
- Wait for Network Registration: After selecting the network operator, your tablet will attempt to register and connect to the cellular network. This process may take a few moments, so be patient and wait for the successful network registration confirmation.
- Confirm Network Connection: Once the tablet is successfully connected to the cellular network, you will see the network name or carrier’s name displayed on the status bar or in the settings menu. This indicates that your tablet is now ready to use cellular data and voice services.
If you encounter any issues during the setup process, such as network registration failures or error messages, ensure that you have a valid SIM card from the supported network operator and a stable cellular network signal. If the problem persists, contact your mobile network provider for assistance or consult the tablet’s user manual for troubleshooting steps related to network setup.
By successfully completing this step, you have configured the cellular network settings on your tablet, allowing it to establish a connection with the mobile network and access cellular services.
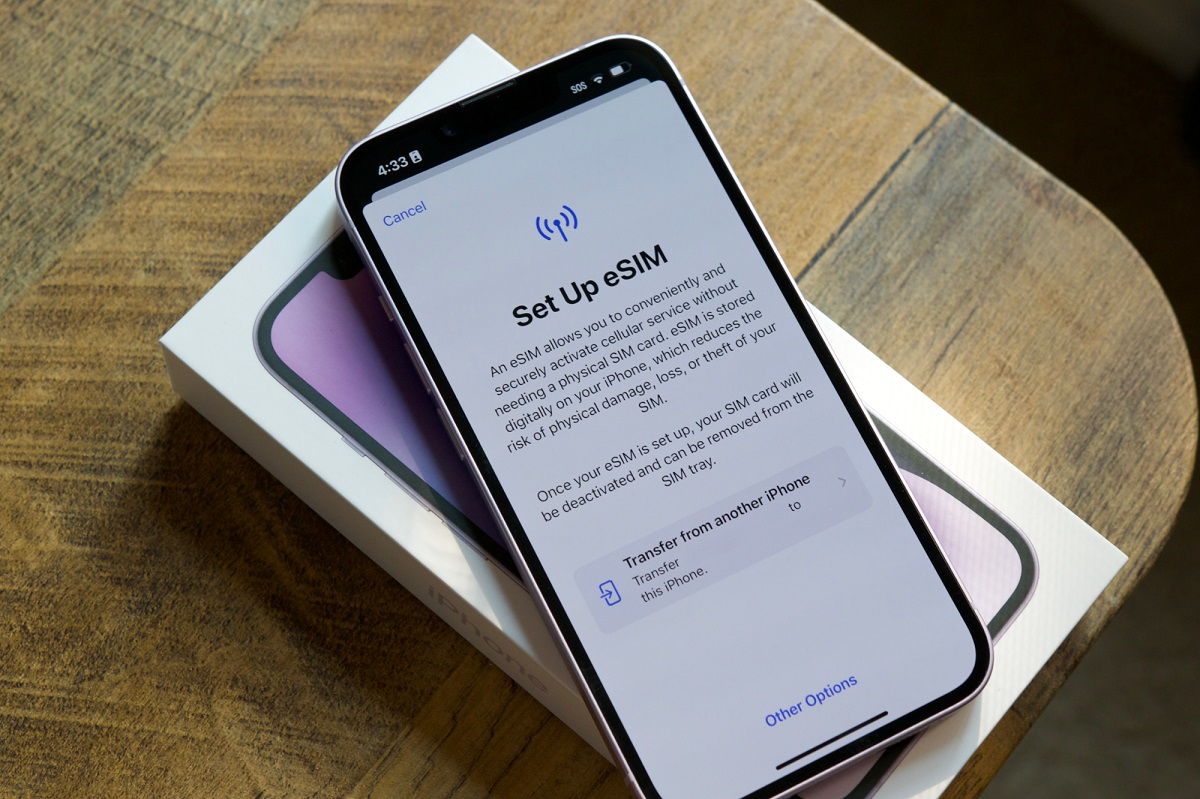
Step 5: Activate SIM Card
Now that your tablet is connected to the cellular network, it’s time to activate your SIM card. Depending on your mobile network provider, the activation process may vary. Follow these general steps to activate your SIM card:
- Open Activation App or Dial Activation Number: Some mobile network providers have a dedicated app for SIM card activation, while others require you to dial a specific activation number. Check the instructions provided by your mobile network provider to determine the appropriate method for activating your SIM card.
- Follow on-screen Instructions: Once you have accessed the activation app or dialed the activation number, you will be guided through the activation process. Follow the on-screen instructions carefully, providing any necessary information requested, such as your SIM card number or personal details.
- Submit Activation Request: After inputting the required information, submit your activation request. The activation process may take a few moments as your mobile network provider verifies and activates your SIM card on their network.
- Wait for Confirmation: Once the activation request is submitted, wait for a confirmation message or notification. This confirmation will indicate that your SIM card has been successfully activated and is ready to use.
- Restart Tablet: After receiving the activation confirmation, it is recommended to restart your tablet. This allows the device to update its network settings and ensures a smooth connection between the tablet and the activated SIM card.
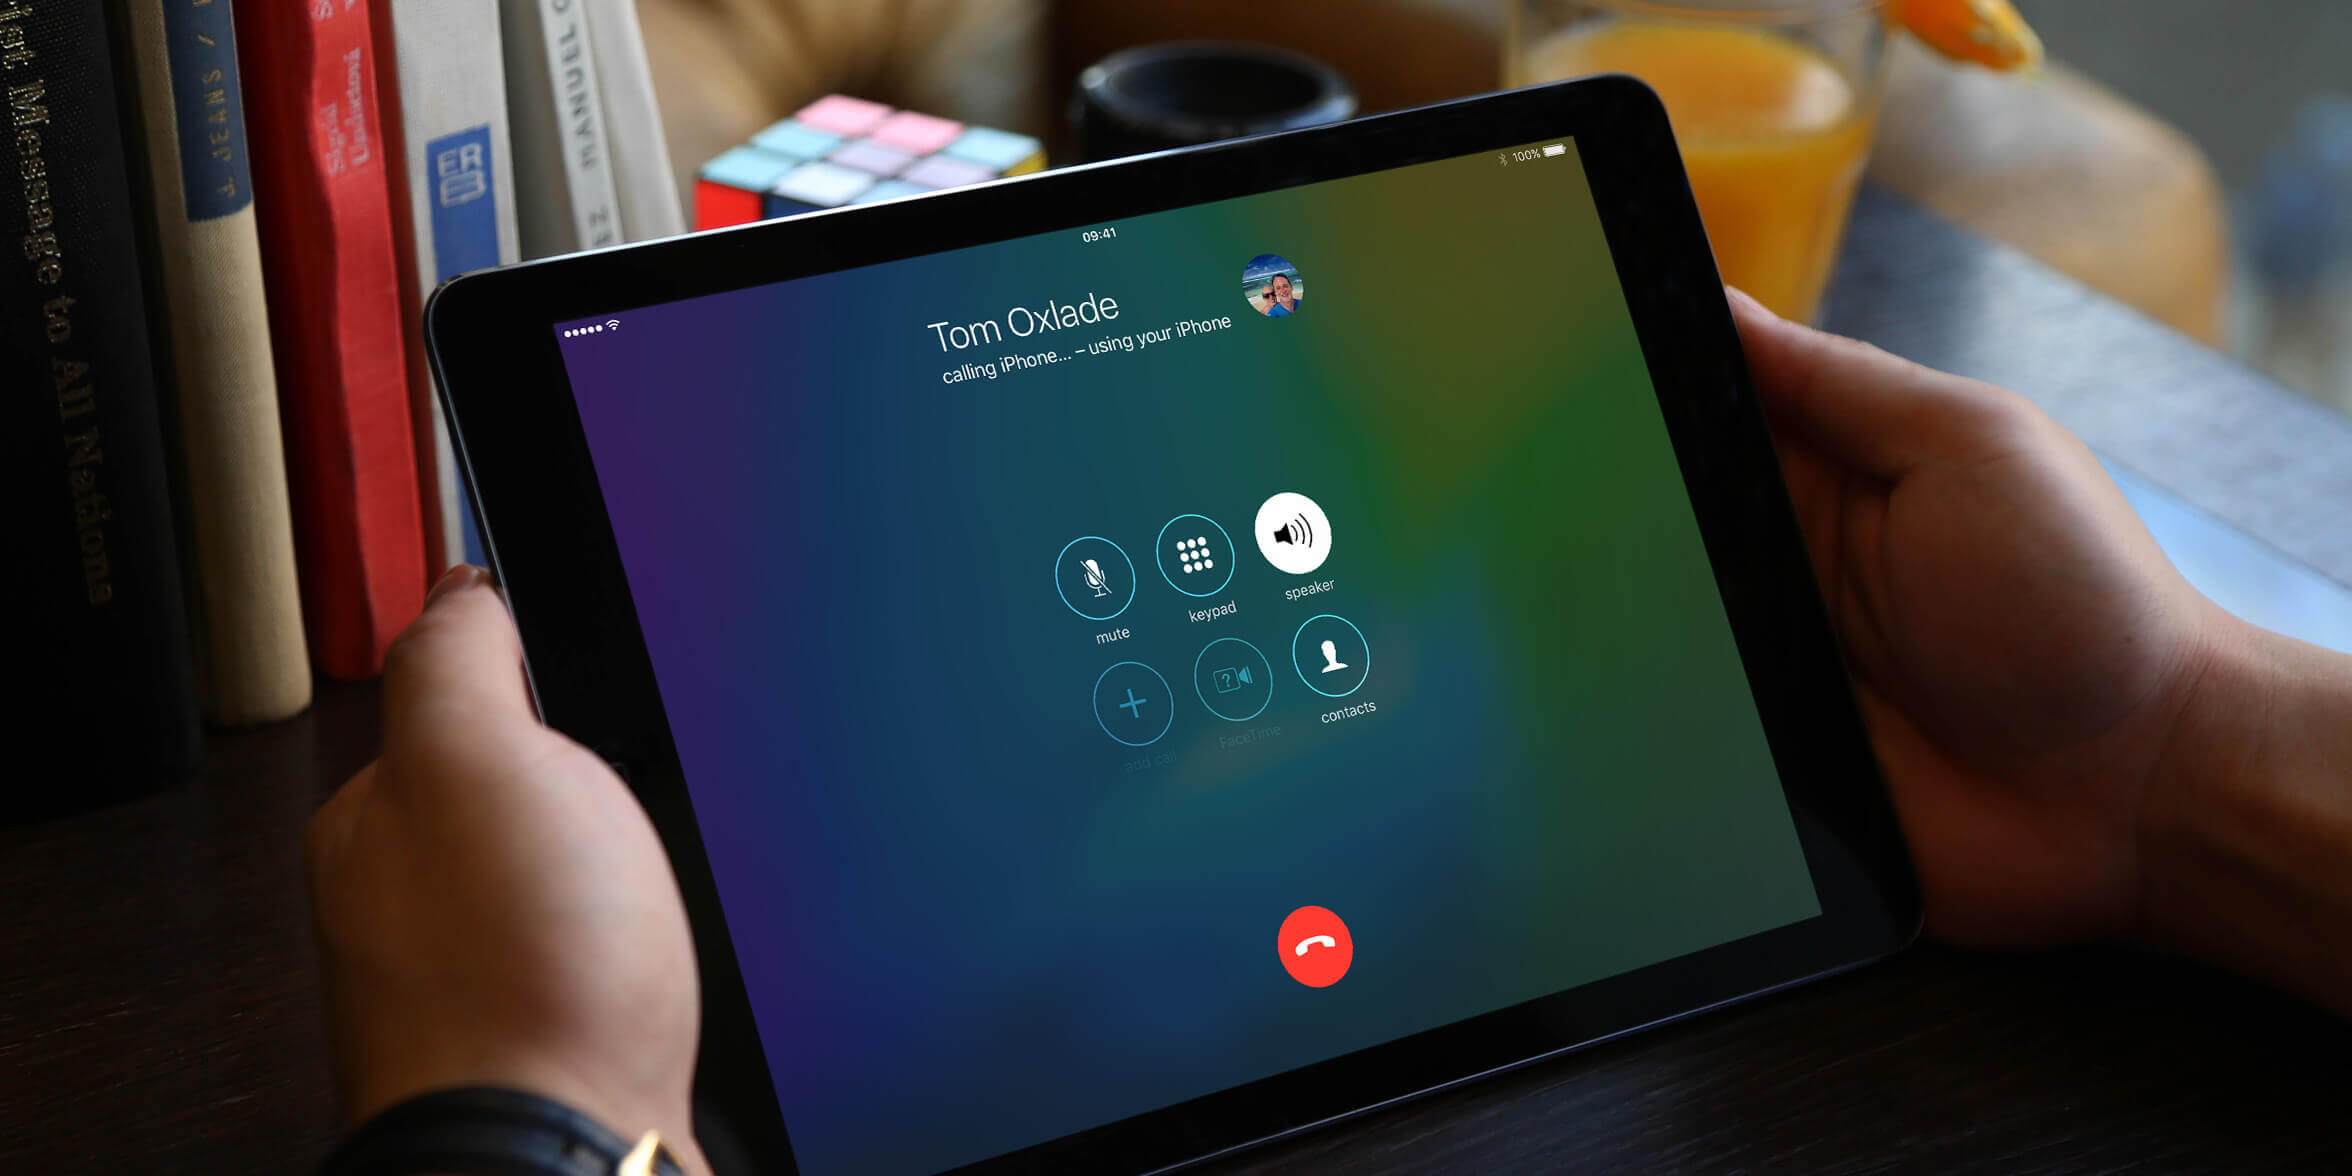
- Test Connectivity: Once your tablet has restarted, test the connectivity by accessing the internet, making a phone call, or sending a text message. If you can perform these actions successfully, it indicates that your SIM card is fully activated and functioning as expected.
If you encounter any issues during the activation process or do not receive a confirmation message, contact your mobile network provider’s customer support for assistance. They can provide guidance and troubleshoot any problems you may encounter.
By successfully completing this step, you have activated your SIM card, enabling your tablet to access mobile data, make calls, and send text messages using the cellular network.
Step 6: Confirm Activation
After activating your SIM card, it’s important to confirm that the activation was successful and that your tablet is fully connected to the cellular network. Follow these steps to ensure the confirmation of activation:
- Check Network Signal: Look at the signal strength bars or icons on your tablet’s screen. If you see a strong signal indicating full bars or a high signal level, it indicates that your tablet is connected to the cellular network.
- Verify Network Name: Confirm that the name of your mobile network provider or carrier is displayed on the status bar or settings menu of your tablet. This confirms that your tablet is connected to the correct network and the SIM card activation was successful.
- Test Data Connection: Open a web browser or any internet-dependent app on your tablet to verify if the data connection is working. Try visiting a website or accessing an online service to ensure that you can browse the internet without any issues.
- Make a Phone Call: Use your tablet’s dialer or phone app to make a test phone call. Dial a known number, such as a friend or family member’s phone number, and check if the call goes through successfully. Ensure that you can hear the other person and they can hear you clearly.
- Send a Text Message: Compose and send a text message to another phone number to test the text messaging function of your tablet. Confirm that the message is sent and received without any difficulties.
- Check Account Balance (Optional): If your mobile network provider offers prepaid services, you may want to check your account balance to ensure the SIM card has been properly activated and ready to use. Refer to your provider’s app, website, or customer service for information on how to check your account balance.
If you encounter any issues during the confirmation process, such as no network signal, inability to browse the internet, or failed phone calls or text messages, there may be a problem with the SIM card activation. Contact your mobile network provider’s customer support for assistance in troubleshooting and resolving any activation-related issues.
By successfully completing this step and confirming the activation of your SIM card, you can enjoy all the benefits of cellular connectivity on your tablet, including internet access, phone calls, and text messaging.
Troubleshooting Tips
While activating a SIM card on your tablet is generally a straightforward process, you may encounter some issues along the way. Here are some common troubleshooting tips to help you resolve any potential problems:
- Check SIM Card Compatibility: Ensure that your SIM card is compatible with your tablet and the network frequency used by your mobile network provider. If the SIM card is not recognized or you’re unable to establish a network connection, it could be due to incompatibility.
- Verify SIM Card Insertion: Double-check that the SIM card is properly inserted into the SIM card slot, with the gold contacts facing down and making contact with the connectors in the slot. A loose or improperly inserted SIM card can cause connection issues.
- Restart Tablet: If you’re experiencing difficulties after inserting and activating the SIM card, try restarting your tablet. This can help refresh the network settings and resolve any temporary glitches or conflicts.
- Ensure Adequate Signal Strength: Check if your tablet is receiving a good cellular signal. If the signal is weak or intermittent, it could affect the performance of your SIM card. Move to an area with better signal reception or try restarting your tablet to reconnect to the network.
- Confirm APN Settings: Access the APN (Access Point Name) settings on your tablet and ensure they are correctly configured for your mobile network provider. Incorrect APN settings can hinder data connectivity and prevent you from accessing the internet.
- Reset Network Settings: If you’re facing persistent connectivity issues, try resetting the network settings on your tablet. This can often resolve network-related problems by restoring the default network configurations.
- Contact Customer Support: If you have tried these troubleshooting tips and are still unable to activate your SIM card or establish a stable network connection, reach out to your mobile network provider’s customer support. They can provide specific guidance and assistance based on your tablet model and network provider.
Remember to follow any specific troubleshooting steps provided by your tablet’s manufacturer or your mobile network provider. They may have additional recommendations or steps to address unique issues.
By employing these troubleshooting tips, you can overcome common obstacles and enjoy a hassle-free activation process for your SIM card, ensuring a smooth experience with cellular connectivity on your tablet.
Conclusion
Activating a SIM card on your tablet is an essential step that empowers you to enjoy the benefits of cellular connectivity. By following the steps outlined in this guide, you can easily and successfully activate your SIM card, enabling your tablet to access mobile data, make phone calls, and send text messages while on the go.
We discussed the importance of activating your SIM card and the advantages it brings, such as internet connectivity, enhanced portability, emergency access, productivity, and flexibility. By activating your SIM card, you can transform your tablet into a versatile device that keeps you connected wherever you are.
We also covered the necessary preparations and equipment needed for a successful activation, including a compatible SIM card, activation instructions, your tablet’s manual, a stable internet connection, and any PIN/PUK codes required.
Throughout the guide, we provided step-by-step instructions for finding the SIM card slot, inserting the SIM card correctly, powering on your tablet, setting up the cellular network, activating the SIM card, and confirming the activation. We also offered troubleshooting tips to help address any potential issues you may encounter along the way.
Remember to consult your tablet’s user manual or contact your mobile network provider’s customer support if you require specific instructions or encounter difficulties during the activation process.
By successfully completing the activation process, you can enjoy the convenience, connectivity, and freedom that cellular connectivity brings to your tablet. Stay connected, browse the internet, make calls, and be productive wherever you go with your activated SIM card and tablet.