Introduction
Welcome to the world of electric pressure cooking! If you’re looking to explore new culinary horizons and try something different, cooking tongue in an electric pressure cooker is a unique and delicious option. While it may seem like an intimidating prospect, rest assured that with the right preparation and cooking techniques, you can enjoy tender, flavorful tongue with minimal effort.
The electric pressure cooker has revolutionized cooking by providing a convenient and efficient way to prepare a variety of dishes. The high pressure and sealed environment allow for faster cooking times and enhanced flavor infusion. When cooking tongue in an electric pressure cooker, these advantages are put to great use, as they help break down the collagen in the meat and create a tender and melt-in-your-mouth texture.
Whether you’re a seasoned pressure cooker enthusiast or a beginner, this guide will provide you with the necessary steps to successfully cook tongue in your electric pressure cooker. From choosing the tongue to the ideal cooking time and testing for doneness, we’ll cover it all.
But before we dive into the details, let’s take a moment to understand the various types of tongue that you can cook. The most common choices include beef tongue, pork tongue, and lamb tongue. Each type has its own unique flavor and texture, so feel free to choose the one that appeals to your taste buds the most.
So, are you ready to embark on a tongue-tantalizing adventure? Let’s begin by selecting and preparing the perfect tongue for your pressure cooker!
Choosing and Preparing the Tongue
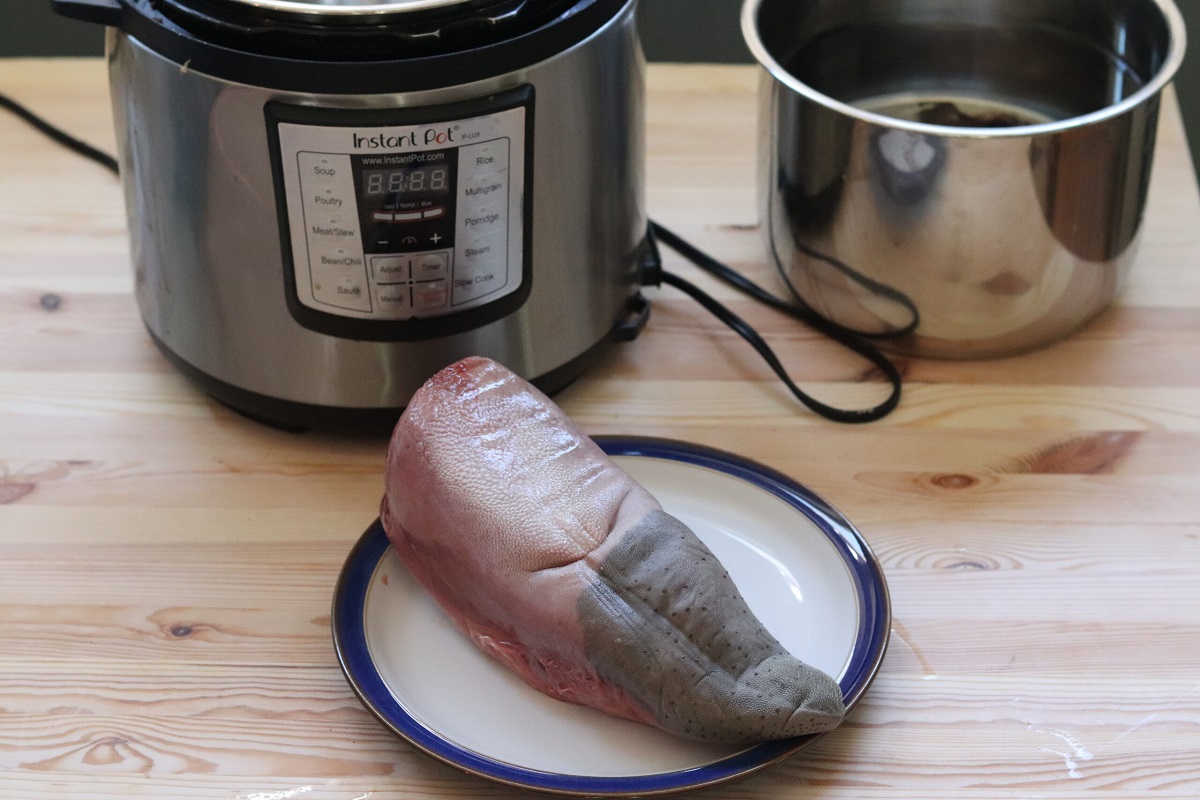
When it comes to cooking tongue, selecting the right piece of meat is crucial for a successful outcome. Look for a tongue that is fresh, firm, and of high quality. Whether you’re buying from a butcher or a grocery store, choose a tongue that has a smooth texture and is free from bruises or blemishes. The size of the tongue will vary depending on the type of meat and the number of servings you wish to prepare.
Once you have chosen your tongue, it’s time to prepare it for cooking. Start by rinsing the tongue under cool running water to remove any excess blood or debris. Pat it dry with a paper towel and place it on a clean cutting board. Using a sharp knife, carefully trim off any excess fat or membrane from the surface of the tongue. Some may prefer to leave a thin layer of fat for added flavor and moisture.
Next, it’s time to remove the tough outer skin of the tongue. You can do this by blanching the tongue in boiling water for a few minutes. This process will make it easier to peel off the skin later. After blanching, remove the tongue from the boiling water and immediately immerse it in a bowl of ice-cold water to stop the cooking process and cool it down. Once the tongue is cool to the touch, use your fingers or a small knife to peel off the skin. Take your time and be gentle to avoid tearing the meat.
After peeling off the skin, the tongue is now ready to be seasoned and flavored according to your preferences. This is the exciting part where you can get creative with your favorite herbs, spices, and marinades. Whether you prefer a classic blend of salt, pepper, and garlic, or a more adventurous combination of paprika, cumin, and lime juice, the choice is yours. Remember to season both sides of the tongue generously, ensuring that the flavors penetrate the meat.
Once seasoned, let the tongue marinate for at least 30 minutes to allow the flavors to develop and infuse into the meat. You can also refrigerate it overnight for a more intense flavor profile. When you’re ready to cook the tongue, it’s time to set up your electric pressure cooker and get cooking!
Seasoning and Flavoring Options
Seasoning and flavoring the tongue is a crucial step in creating a mouthwatering dish. The right combination of spices and marinades can enhance the natural flavors of the meat and elevate the overall taste experience. Here are some popular seasoning and flavoring options to consider:
- Classic Seasoning: A simple yet delicious option is to season the tongue with salt, black pepper, and minced garlic. This classic combination allows the natural flavor of the meat to shine while adding a subtle savory kick.
- Citrus Marinade: For a zesty and refreshing twist, marinate the tongue in a blend of citrus juices such as lemon, lime, and orange. The acidity of the citrus fruits helps tenderize the meat and adds a bright, tangy flavor.
- Spice Rub: If you’re a fan of bold and spicy flavors, try creating a spice rub using a combination of chili powder, cumin, smoked paprika, and cayenne pepper. This robust blend will infuse the tongue with a smoky, fiery taste.
- Asian-Inspired Flavors: To incorporate Asian flavors, consider marinating the tongue in soy sauce, ginger, garlic, and a touch of sesame oil. This combination brings a savory umami taste and a hint of sweetness to the dish.
- Herb Infused: For a more herbaceous profile, combine fresh herbs such as rosemary, thyme, and parsley with olive oil and lemon zest. The aromatic herbs will impart a fragrant and earthy taste to the tongue.
When applying the seasonings and marinades, be sure to coat the entire surface of the tongue evenly. You can massage the seasonings into the meat or use a brush to ensure even distribution. After seasoning, allow the tongue to marinate for at least 30 minutes to allow the flavors to penetrate the meat. This step is crucial for achieving maximum flavor infusion.
Remember, these are just a few examples of seasoning and flavoring options. Feel free to experiment with different combinations and adjust the quantities to suit your personal taste preferences. The goal is to create a delightful symphony of flavors that complement the natural richness of the tongue.
Setting Up the Electric Pressure Cooker
Now that your tongue is seasoned and ready to go, it’s time to set up your electric pressure cooker for cooking. Follow these steps to ensure a smooth and safe cooking process:
- Check the Sealing Ring: Before using your electric pressure cooker, inspect the sealing ring to ensure it’s clean and properly seated in the lid. A properly fitted sealing ring is essential for maintaining pressure during cooking.
- Add Liquid: Most electric pressure cookers require a minimum amount of liquid for proper operation. Check your manufacturer’s instructions to determine the required amount. Typically, one to two cups of liquid, such as broth, water, or a combination, is sufficient.
- Preheat the Pressure Cooker: Some models may require preheating before adding the tongue. Refer to your cooker’s manual for specific instructions. Preheating helps maintain consistent pressure and speeds up the cooking process.
- Place the Tongue: Carefully place the seasoned tongue in the electric pressure cooker, ensuring that it is fully submerged in the liquid. Avoid overcrowding the cooker and leave enough space for the pressure to build.
- Secure the Lid: Seal the pressure cooker with its lid, making sure it is properly aligned and locked in place. Double-check that the pressure release valve is set to the “Sealing” position to prevent steam from escaping during cooking.
- Select the Cooking Function and Time: Depending on your model, choose the appropriate cooking function for pressure cooking. Set the cooking time according to the type and size of the tongue and the desired level of tenderness. Consult your cooker’s manual for recommended cooking times.
- Start the Cooking Process: Once you have selected the cooking function and time, start the pressure cooker. It will take some time to build up pressure, and then the cooking process will begin. The actual cooking time will vary depending on factors such as the size and type of the tongue and the pressure cooker’s performance.
During the cooking process, it’s normal for the pressure release valve to release steam periodically. This indicates that pressure is building inside the cooker. However, if you notice excessive steam escaping or any safety concerns, stop the cooking process immediately and follow the instructions provided by your cooker’s manufacturer.
Now that the electric pressure cooker is all set up, it’s time to sit back, relax, and let the magic happen as your tongue transforms into a tantalizing culinary masterpiece.
Cooking the Tongue
With the electric pressure cooker set up and ready to go, it’s time to start cooking the tongue. Follow these steps to ensure a perfectly cooked and tender result:
- Begin the Cooking Process: Once the pressure cooker has reached the desired pressure, the cooking process will automatically start. The high pressure and sealed environment will work their magic to break down the collagen in the meat and create a tender texture.
- Monitor the Cooking Time: Keep an eye on the cooking time indicated in your recipe or the cooking instructions for tongue. Cooking times can vary depending on the size and type of the tongue. Set a timer and avoid opening the pressure cooker during cooking, as this will cause a loss of pressure and extend the cooking time.
- Adjust the Cooking Time for Desired Doneness: If you prefer a more firm texture, cook the tongue for the minimum recommended cooking time. For a melt-in-your-mouth tenderness, extend the cooking time by a few minutes. Factors such as personal preference and the type of meat will influence the ideal cooking time.
- Natural Pressure Release or Quick Release: After the cooking time is complete, you have the option to let the pressure release naturally or use the quick release method. Natural pressure release involves allowing the pressure to come down gradually, which can take anywhere from 10 to 20 minutes or longer. Quick release involves carefully venting the pressure by turning the pressure release valve to the “Venting” position. Follow your electric pressure cooker’s instructions for the appropriate release method.
Once the pressure inside the cooker has been completely released, it’s time to move on to the next step: testing for doneness.
Remember, cooking times can vary, so it’s essential to refer to your recipe or the cooking instructions specific to the type of tongue you’re cooking. Don’t be afraid to experiment and adjust the cooking time to achieve your desired level of tenderness.
Testing for Doneness
Testing for doneness is a critical step to ensure that your tongue is perfectly cooked and ready to be enjoyed. Here are a few methods you can use to determine if the tongue is done:
- Visual Inspection: Examine the tongue visually to check for signs of doneness. It should appear tender and moist, with the meat pulling away slightly from the bone. The color of the meat should be uniform and not overly pink in the case of beef tongue.
- Tenderizing Texture: Use a fork or a knife to gently pierce the thickest part of the tongue. If it feels tender and yields easily to the fork or knife, it is likely cooked to perfection. Avoid applying excessive force as this may break the meat apart.
- Internal Temperature: For a more accurate determination of doneness, use a meat thermometer to check the internal temperature of the tongue. The recommended temperature for cooked beef tongue is around 160°F (71°C) and pork tongue is around 170°F (77°C). Lamb tongue may vary, so refer to specific guidelines for lamb tongue recipes.
By using a combination of these methods, you can ensure that the tongue is cooked to your desired level of tenderness. Keep in mind that tongue is considered a relatively tough cut of meat, so it may require longer cooking times compared to other cuts. If the tongue is not yet cooked to your liking, return it to the pressure cooker and cook for additional minutes until desired tenderness is achieved.
Once you are satisfied with the doneness of the tongue, it’s time to proceed to the next step: cooling and peeling.
Remember, the key to perfectly cooked tongue lies in finding the ideal balance between tenderness and texture, so take your time to test and ensure that it meets your preferences.
Cooling and Peeling the Tongue
After the tongue is cooked to perfection, it’s essential to properly cool and peel the meat before serving. This process helps to enhance the flavor, texture, and presentation of the tongue. Follow these steps to cool and peel the tongue:
- Cooling the Tongue: Carefully remove the tongue from the pressure cooker and place it on a cutting board or a large plate. Allow it to cool for a few minutes until it is safe to handle. Cooling the tongue not only makes it easier to handle but also helps retain the juices within the meat.
- Trimming Excess Fat: While the tongue is still warm, use a sharp knife to trim any excess fat or gristle that may be present. Removing excess fat helps improve the texture and presentation of the tongue.
- Peeling the Skin: Once the tongue has cooled enough to handle comfortably, gently peel off the outer skin. Start at one end of the tongue and use your fingers or a small knife to separate the skin from the meat. Take care not to remove too much meat while peeling the skin.
- Slicing or Shredding: Now that the skin has been peeled off, you can slice the tongue into thin slices or shred it, depending on your preferred serving style. Slicing the tongue allows for attractive presentation, while shredding creates a more versatile and tender texture.
As you peel and prepare the tongue, take a moment to appreciate the beautifully cooked and tender meat. The cooling and peeling process may take a bit of time and patience, but the results will be well worth it.
Once the tongue has been cooled, trimmed, and peeled, it is now ready to be served and enjoyed. Whether you decide to serve the tongue as a main dish, incorporate it into sandwiches or salads, or use it in other creative recipes, the possibilities are endless.
Now that the tongue has been cooked, cooled, and peeled, it’s time to savor the delightful flavors and textures that you have achieved through the art of electric pressure cooking.
Serving and Enjoying the Tongue
After all the hard work of selecting, seasoning, cooking, and preparing the tongue, it’s time to indulge in its delicious flavors and savor the fruits of your labor. Here are some ideas for serving and enjoying the tongue:
- Slice and Serve as a Main Course: Arrange the cooked tongue slices on a serving platter and garnish with fresh herbs. Serve it alongside your favorite side dishes, such as roasted vegetables, mashed potatoes, or a crisp salad.
- Make Tacos or Wraps: Fill warm tortillas or wraps with shredded tongue, diced onions, cilantro, and a squeeze of lime juice. Top it off with your preferred salsa or sauce for a flavorful and satisfying meal.
- Create Sandwiches: Layer thin slices of tongue on crusty bread or rolls, along with your favorite condiments such as mustard, mayonnaise, or pickles. Add lettuce, tomato, and cheese for a delicious tongue sandwich.
- Incorporate into Salads: Chop the cooked tongue into bite-sized pieces and add it to a fresh and vibrant salad. Combine with mixed greens, cherry tomatoes, cucumber, and a tangy dressing for a unique and hearty salad option.
- Use in Stir-Fries or Noodle Dishes: Thinly slice the tongue and stir-fry it with vegetables and your preferred sauce. Add it to noodle dishes, such as lo mein or stir-fried noodles, for an exciting twist on traditional recipes.
- Experiment with Fusion Recipes: Let your creativity run wild and incorporate the cooked tongue into fusion dishes. From tongue tacos with an Asian-inspired twist to tongue-topped pizza or even tongue-stuffed empanadas, the possibilities are endless.
Remember, the tender and flavorful tongue you have cooked is versatile and can be enjoyed in various culinary creations. Don’t be afraid to explore different flavors and experiment with different serving styles to find your personal favorite.
Whether you’re serving it to family and friends or indulging in the culinary adventure yourself, take pride in your accomplishment and enjoy every delicious bite of the tongue you have carefully prepared.
Additional Tips and Variations
To further enhance your experience with cooking tongue in an electric pressure cooker, consider these additional tips and variations:
- Brining the Tongue: Before seasoning, consider brining the tongue for a few hours. This involves soaking the tongue in a brine solution made with water, salt, and various flavorings. Brining helps tenderize the meat and infuses it with additional flavors.
- Smoking the Tongue: For a smoky and robust flavor, you can smoke the tongue after it has been pressure cooked. This adds a unique dimension to the taste and can be done using a smoker or a stovetop smoking method.
- Marinating Overnight: For even more intense flavors, marinate the tongue overnight in the refrigerator. This extended marinating time allows the seasonings and spices to deeply penetrate the meat, resulting in a more pronounced taste.
- Adding Aromatics: Along with the seasoning, experiment with adding aromatics to the pressure cooker. Consider using ingredients such as onions, garlic, herbs, or even a splash of wine or vinegar. These aromatic additions can elevate the overall flavor profile of the tongue.
- Using Different Cooking Liquids: Feel free to experiment with different liquids for cooking, such as beer, broth, or even wine, to infuse additional flavors into the tongue.
- Playing with Spices: Don’t hesitate to get adventurous with your choice of seasonings and spices. Incorporate unique blends, such as Moroccan spices, Indian curry powder, or Latin American adobo, to transform the flavor profile of the tongue.
- Trying Different Cuts: While this guide primarily focuses on cooking whole tongue, you can also try using pre-sliced tongue or sliced tongue segments for different textures and cooking times.
Remember to always follow the manufacturer’s instructions for your specific model of electric pressure cooker and ensure that proper safety precautions are taken when using the appliance.
Now that you have these additional tips and variations, get creative in your kitchen and allow your taste buds to explore the endless possibilities of cooking tongue in an electric pressure cooker. Enjoy the delightful flavors and the culinary journey that awaits!
Conclusion
Cooking tongue in an electric pressure cooker is a wonderful way to transform this unique cut of meat into a tender and flavorful delicacy. With the convenience and efficiency of an electric pressure cooker, you can enjoy the rich and succulent taste of tongue with minimal effort. By carefully selecting and preparing the tongue, seasoning it with your preferred flavors, and utilizing the features of your electric pressure cooker, you can achieve mouthwatering results.
Throughout this guide, we’ve explored the steps to choose and prepare the tongue, discussed various seasoning and flavoring options, and provided guidelines for setting up and using an electric pressure cooker. We’ve also covered testing for doneness, cooling and peeling the tongue, and different serving and enjoyment suggestions. Along the way, we’ve shared additional tips and variations to inspire your culinary creativity.
Remember, cooking tongue in an electric pressure cooker allows for tenderizing and flavor infusion, resulting in a delicious and satisfying dish. Whether you prefer traditional preparations or enjoy exploring fusion flavors, there’s no shortage of possibilities for enjoying tongue in various culinary creations.
So, roll up your sleeves, fire up your electric pressure cooker, and embark on the delightful adventure of cooking tongue. From cozy family dinners to impressive gatherings with friends, your perfectly cooked and seasoned tongue will undoubtedly captivate the taste buds and leave everyone wanting more.
Have fun exploring different recipes, experimenting with flavors, and enjoying the unique and irresistible taste of tongue prepared in an electric pressure cooker. Happy cooking!