Introduction
When it comes to cooking a delicious and tender rump roast, an electric pressure cooker can be a game-changer. The electric pressure cooker, also known as an Instant Pot, has gained popularity for its efficiency and convenience in the kitchen. It allows you to cook a variety of dishes in a fraction of the time compared to traditional cooking methods.
If you’re in a hurry or simply want a hassle-free cooking experience, using an electric pressure cooker to prepare your rump roast is the way to go. With the right techniques and cooking times, you can achieve a succulent and flavorful roast that will impress your family and guests.
In this guide, we will walk you through the steps of selecting, preparing, and cooking a rump roast in an electric pressure cooker. We will also discuss the different options for releasing the pressure, checking the internal temperature, and serving the roast. Whether you’re a seasoned cook or a beginner, this article will provide you with all the information you need to create a mouthwatering rump roast with ease.
Before we dive into the cooking process, it’s important to note that different electric pressure cooker models may have variations in cooking times and settings. It’s always recommended to consult your specific appliance’s user manual for specific instructions. With that said, let’s get started on our journey to making a perfectly cooked rump roast!
Selecting and Preparing the Rump Roast
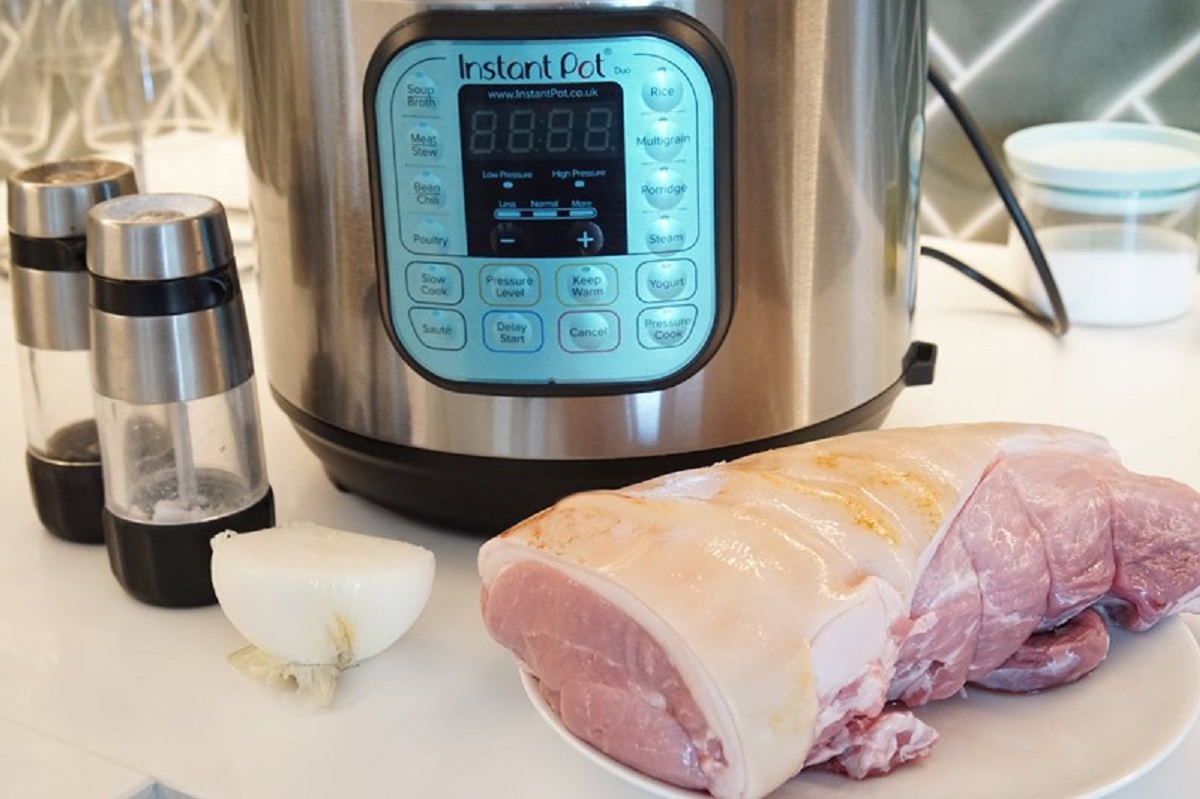
Choosing the right rump roast is crucial for achieving a mouthwatering result. Look for a well-marbled cut of beef with minimal fat and a deep red color. It’s important to select a roast that is suitable for pressure cooking, as not all cuts are suitable for this method.
Before cooking, it’s recommended to let the rump roast come to room temperature for about 30 minutes. This allows for more even cooking throughout the meat. Meanwhile, take this opportunity to season the roast with your desired blend of herbs, spices, and marinades. A classic combination might include salt, pepper, garlic powder, and rosemary.
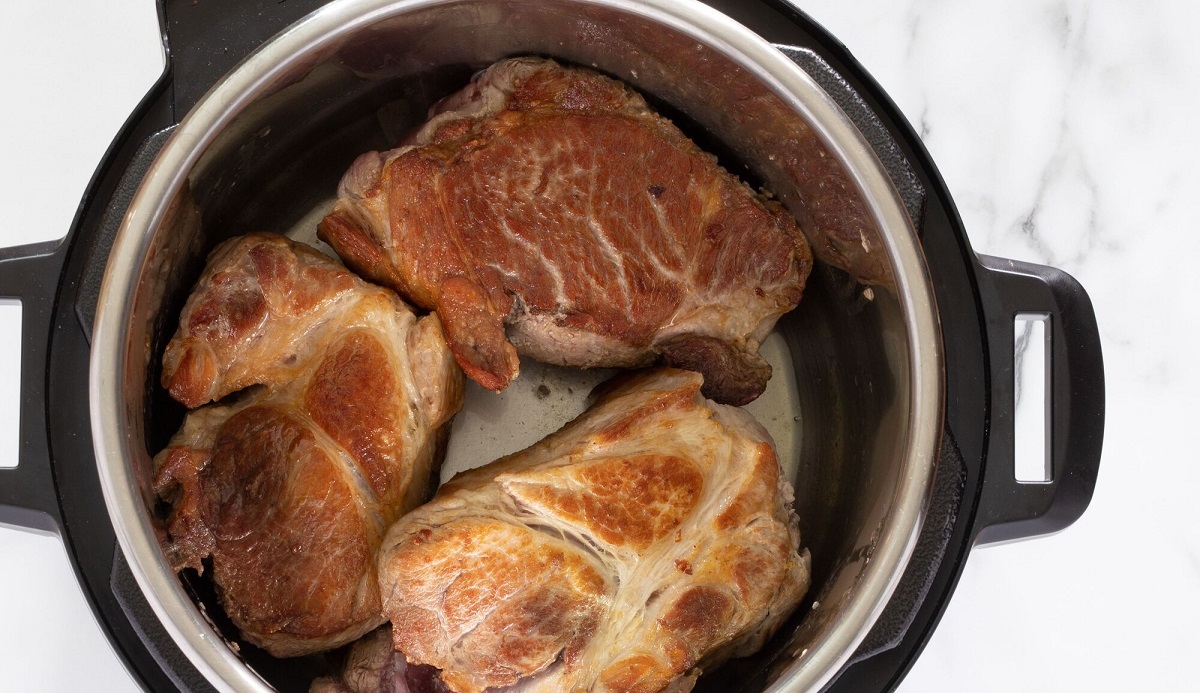
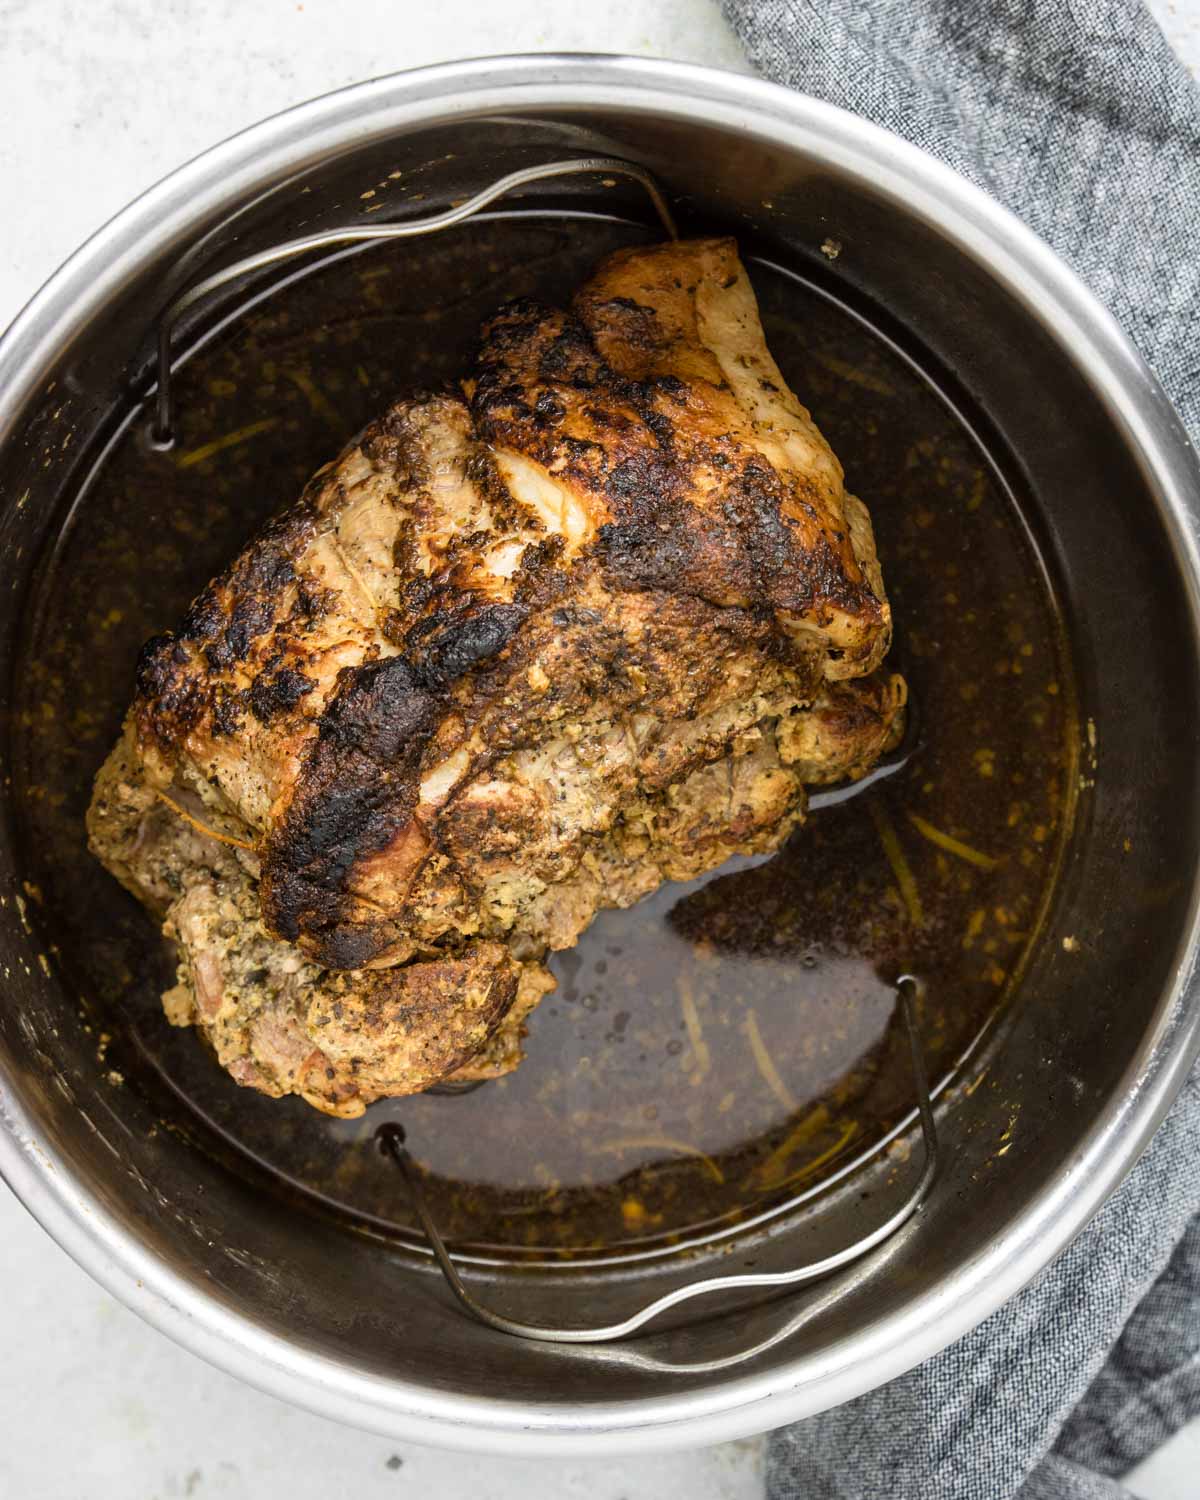
Next, you’ll want to sear the rump roast to enhance the flavors and texture. Preheat your electric pressure cooker on the sauté function or use a stovetop skillet until it’s hot. Add a bit of cooking oil to prevent sticking, and then carefully place the seasoned roast in the cooker. Sear each side for about 2 to 3 minutes until a brown crust forms.
Once the searing is complete, remove the roast from the cooker and set it aside. This step is essential for sealing in the juices and preserving the tenderness of the meat.
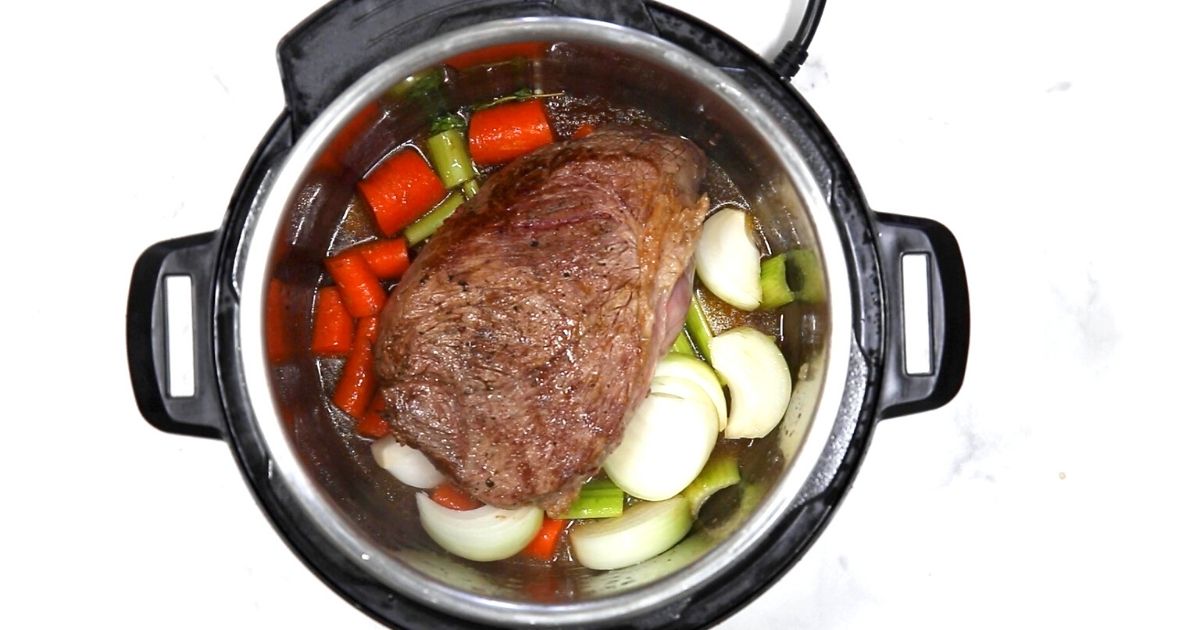
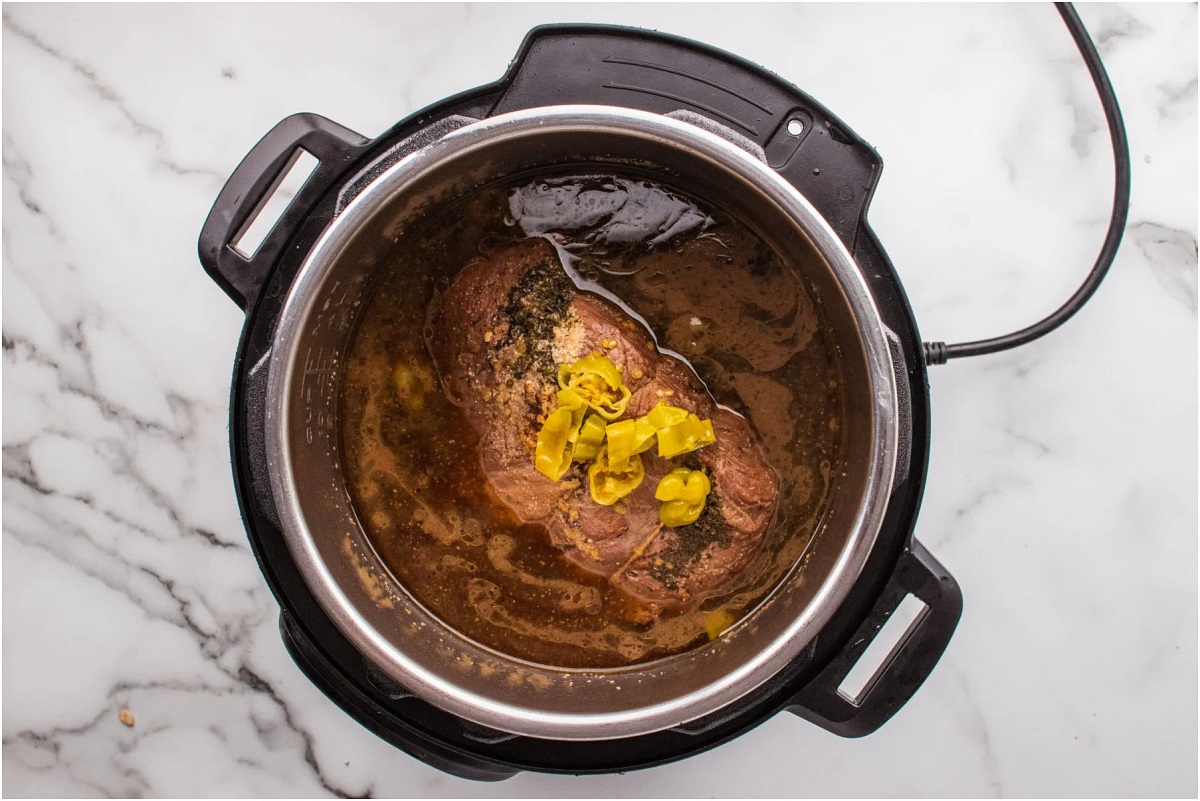
While the rump roast is resting, it’s a good time to prepare the cooking liquid. You can use beef broth, red wine, or a combination of both to infuse the roast with rich flavors. Add the liquid to the electric pressure cooker and deglaze by scraping off any stuck bits from the bottom. This will prevent the burn notice from appearing during pressure cooking.
Now that the roast is seasoned, seared, and the cooking liquid is ready, you’re all set to cook the rump roast in the electric pressure cooker. In the next section, we’ll guide you through the process of setting up the cooker and determining the cooking times.
Setting up the Electric Pressure Cooker
Before diving into the cooking process, it’s essential to familiarize yourself with the settings and functions of your electric pressure cooker. Each model may have different buttons or dials, so refer to the user manual for specific instructions.
Start by ensuring the sealing ring is properly placed in the lid of the pressure cooker. This ring helps create an airtight seal, allowing the pressure to build inside the cooker. Make sure the ring is clean and free from any debris or residue.
Next, pour the prepared cooking liquid into the electric pressure cooker. The amount of liquid required will vary depending on the size of your roast and the manufacturer’s recommendations. Generally, a cup of liquid should be sufficient, but consult your specific appliance’s guidelines for accuracy.
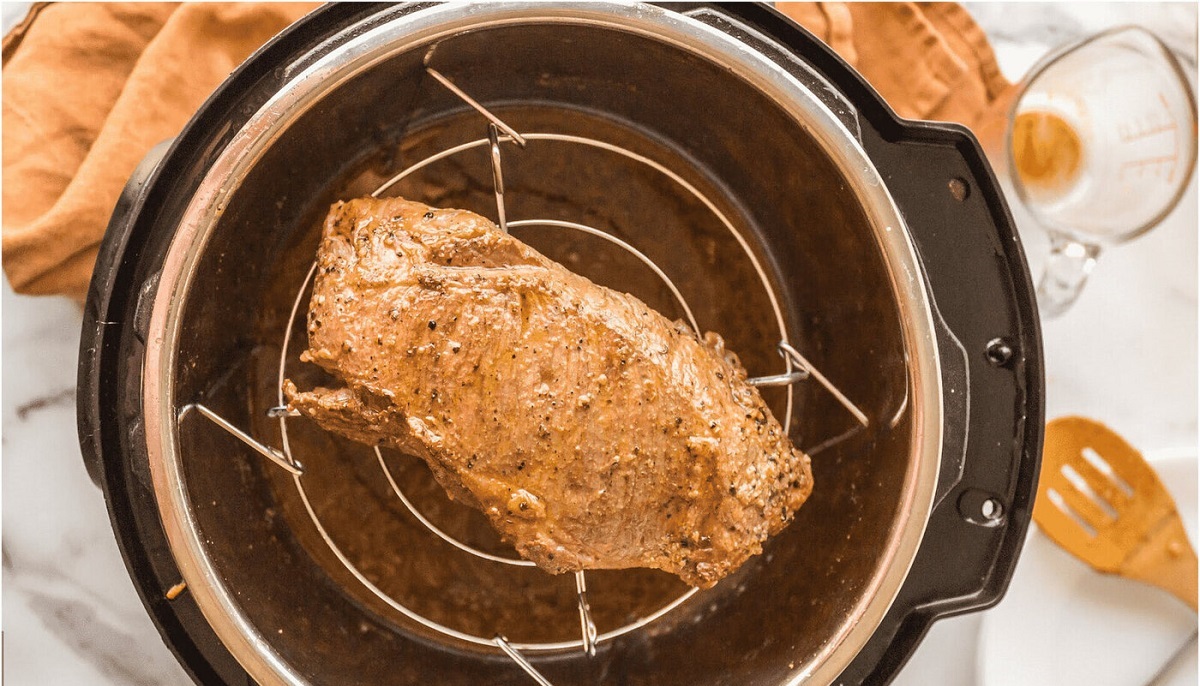
Now it’s time to place the seared rump roast back into the pressure cooker. Gently lower it into the liquid, making sure not to submerge the entire roast. The liquid should only come about halfway up the sides of the roast to avoid excessive moisture in the final result.
Before securing the lid, double-check that the pressure release valve is in the sealing position. This ensures that the pressure will build up inside the cooker during the cooking process. Once everything is in place, align the lid correctly and lock it into position.
Depending on your electric pressure cooker model, you may need to select a specific cooking function or program. Choose the appropriate setting for your rump roast. Some cookers have pre-programmed options for roasts, while others allow manual adjustment of time and pressure levels.
Once the settings are selected, press the start button to begin the cooking process. The electric pressure cooker will take some time to come up to pressure before the countdown begins. This time can vary depending on your appliance, but expect it to take around 10 to 15 minutes.
Now that your electric pressure cooker is set up and ready, it’s time to move on to the cooking times and instructions. We’ll guide you through the process to ensure you achieve a perfectly tender and flavorful rump roast.
Cooking Times and Instructions
Cooking times for a rump roast in an electric pressure cooker can vary depending on the size of the roast and personal preference for doneness. As a general rule of thumb, you can follow these guidelines:
- For a rare roast, cook for about 20 minutes per pound.
- For a medium-rare roast, cook for about 25 minutes per pound.
- For a medium roast, cook for about 30 minutes per pound.
Keep in mind that these times are approximate and may need to be adjusted based on your specific electric pressure cooker and the desired level of tenderness.
Once the cooking time is up, you have two options for releasing the pressure: natural pressure release (NPR) or quick pressure release (QPR).
For a natural pressure release, simply turn off the pressure cooker and allow the pressure to come down naturally. This can take anywhere from 10 to 20 minutes. Natural pressure release is ideal for large cuts of meat as it helps retain the juices and prevents the meat from becoming tough.
Alternatively, you can opt for a quick pressure release. Using caution, carefully move the pressure release valve from the sealing position to the venting position. This will release the steam quickly, causing the pressure to decrease rapidly. Quick pressure release is suitable for smaller roasts or when you’re short on time.
Regardless of the method you choose, it’s important to avoid opening the pressure cooker until all the pressure has been released. This ensures the safety of handling the appliance and prevents any potential burns from escaping steam.
Once the pressure has been fully released, carefully remove the lid of the electric pressure cooker. You’ll be greeted with the aroma of perfectly cooked rump roast. At this point, it’s a good idea to check the internal temperature of the roast to ensure it has reached the desired level of doneness.
Continue on to the next section for instructions on how to check the internal temperature of the rump roast and let it rest before slicing and serving.
Natural Pressure Release vs. Quick Pressure Release
When cooking a rump roast in an electric pressure cooker, one of the key decisions you’ll need to make is whether to use a natural pressure release (NPR) or a quick pressure release (QPR) method. Both methods have their advantages and it’s important to understand the differences to make an informed choice.
Natural pressure release involves allowing the pressure cooker to naturally release the built-up pressure over a period of time after the cooking cycle is completed. This is achieved by simply turning off the pressure cooker and letting it sit undisturbed until the pressure indicator drops, indicating that the pressure has fully dissipated.
The benefit of using a natural pressure release is that it allows the meat to continue cooking gently in the residual heat, resulting in a more tender and juicy roast. This method is particularly recommended for larger cuts of meat, such as a rump roast, as it helps prevent the meat from becoming tough.
On the other hand, quick pressure release enables you to release the steam and pressure from the cooker immediately after the cooking time is complete. This is done by carefully moving the pressure release valve from the sealing position to the venting position using protective gloves or a long utensil to avoid any burns from the hot steam.
The advantage of a quick pressure release is that it significantly speeds up the cooking process and allows you to serve the roast sooner. This method is ideal for those who are short on time or prefer a firmer texture to their meat. However, be cautious while executing a quick pressure release as the sudden release of steam can cause spewing or splattering.
It’s important to note that the choice between natural pressure release and quick pressure release may also depend on the recipe you’re following. Some recipes may specify a specific release method to ensure optimal results.
Ultimately, the decision between natural pressure release and quick pressure release comes down to personal preference and the desired outcome of your rump roast. Whichever method you choose, always follow the manufacturer’s instructions for your specific electric pressure cooker to ensure safe and effective pressure release.
Next, we’ll explore how to check the internal temperature of the rump roast, an essential step to determining its doneness and ensuring a perfectly cooked roast.
Checking the Internal Temperature
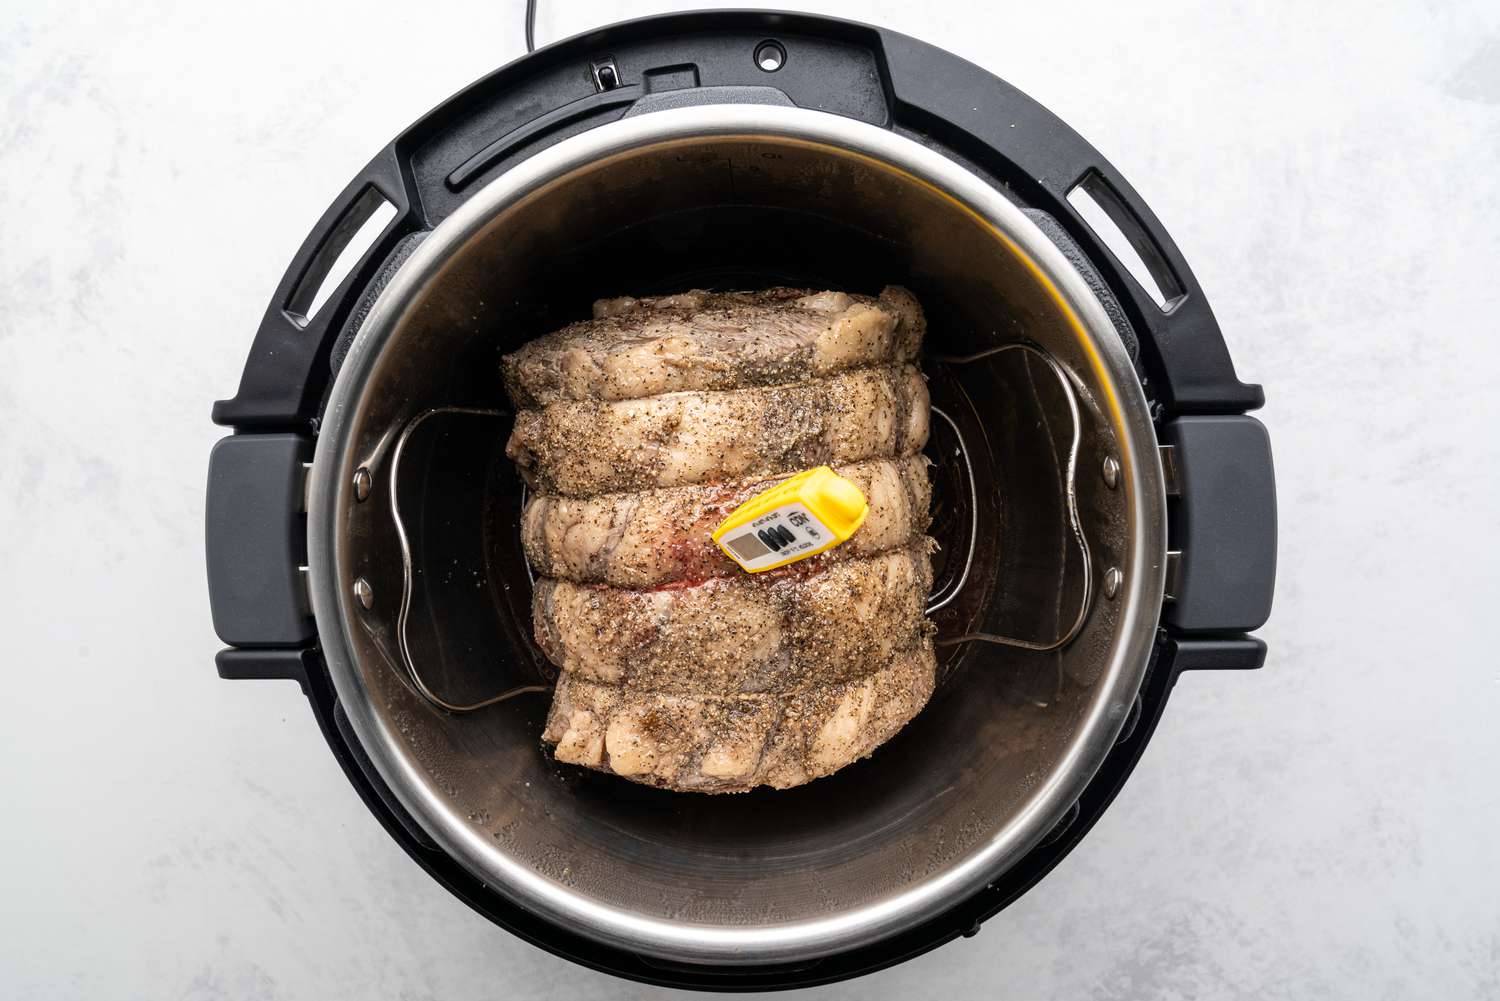
Checking the internal temperature of your rump roast is crucial to ensure that it has reached the desired level of doneness. Using a meat thermometer will give you an accurate reading and help you avoid undercooking or overcooking the roast.
Before using the meat thermometer, carefully remove the roast from the electric pressure cooker and place it on a cutting board. Use tongs or silicone mitts to protect your hands from the hot meat.
Insert the meat thermometer into the thickest part of the roast, making sure that the tip is not touching any bone. Slowly and carefully push it all the way into the center of the meat to get an accurate temperature reading.
For a medium-rare rump roast, the internal temperature should reach around 145°F (63°C). If you prefer a medium roast, aim for an internal temperature of 160°F (71°C). Keep in mind that these temperatures are recommendations, and you can adjust them based on your personal preference.
If the meat thermometer indicates that the roast hasn’t reached the desired temperature, you can place it back into the electric pressure cooker for additional cooking. Avoid overcooking the roast by monitoring the temperature closely and removing it once it’s done to your liking.
Remember that the rump roast will continue to cook as it rests, so it’s advisable to remove it from the cooker when the internal temperature is a few degrees below the desired temperature. The residual heat will allow the roast to reach the perfect level of doneness during the resting period.
Once the roast has reached the desired internal temperature, carefully remove it from the cutting board and place it on a serving platter. Cover it with aluminum foil and let it rest for about 10 to 15 minutes. This will allow the juices to redistribute, resulting in a more tender and flavorful roast.
The resting period is also an excellent opportunity to prepare any sides or sauces to accompany your rump roast. Once the roast has rested, it’s time to move on to slicing and serving!
In the next section, we’ll explore the proper techniques for slicing and serving the rump roast, ensuring an impressive presentation and a satisfying dining experience.
Letting the Roast Rest
After carefully cooking and checking the internal temperature of your rump roast, it’s time to let it rest. Allowing the roast to rest is a crucial step in the cooking process that should not be skipped. During this period, the meat will continue to cook slightly and the juices will redistribute, resulting in a more tender and flavorful final product.
To let the roast rest, transfer it from the cutting board to a serving platter and cover it loosely with aluminum foil. The foil will help retain the heat while allowing excess steam to escape. The recommended resting time for a rump roast is around 10 to 15 minutes.
While the roast is resting, take this opportunity to prepare any accompanying sides or sauces. Roasted vegetables, mashed potatoes, or a flavorful gravy can complement the rich flavors of the rump roast beautifully.
During the resting period, it’s important to avoid cutting into the roast. Doing so too soon will cause the precious juices to escape, resulting in a drier and less flavorful roast. Patience is key, as the wait will be well worth it.
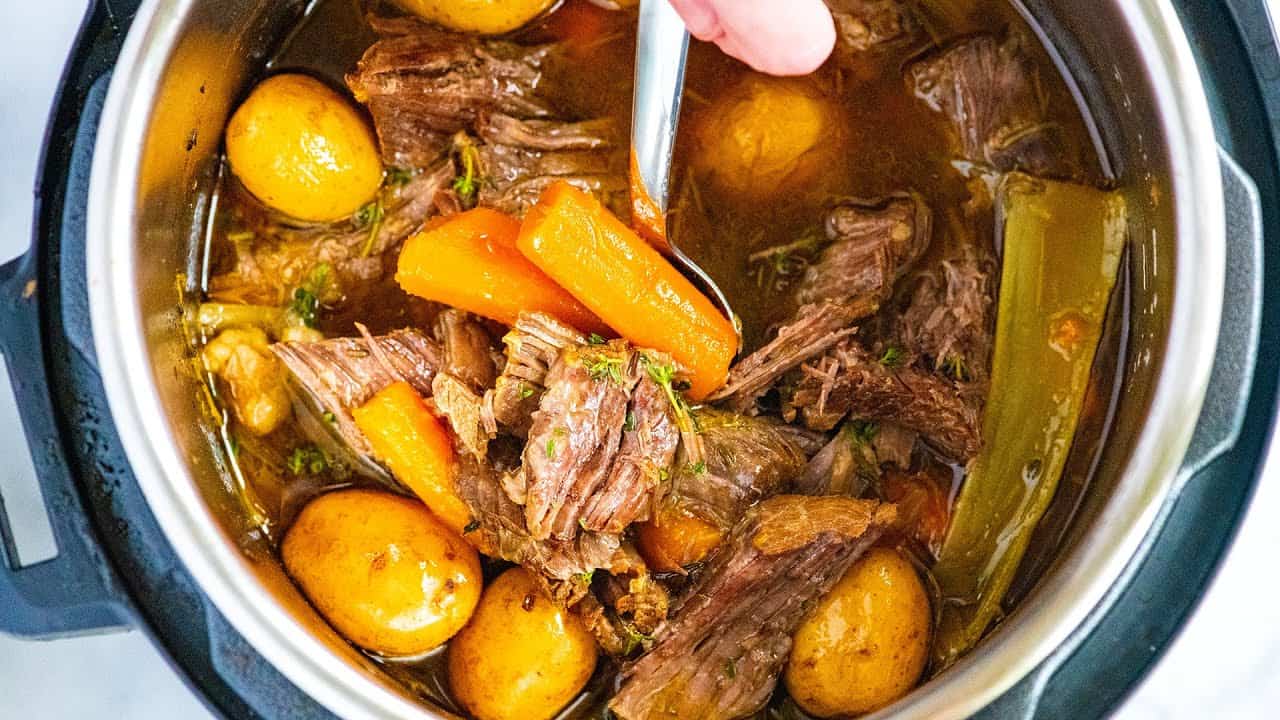
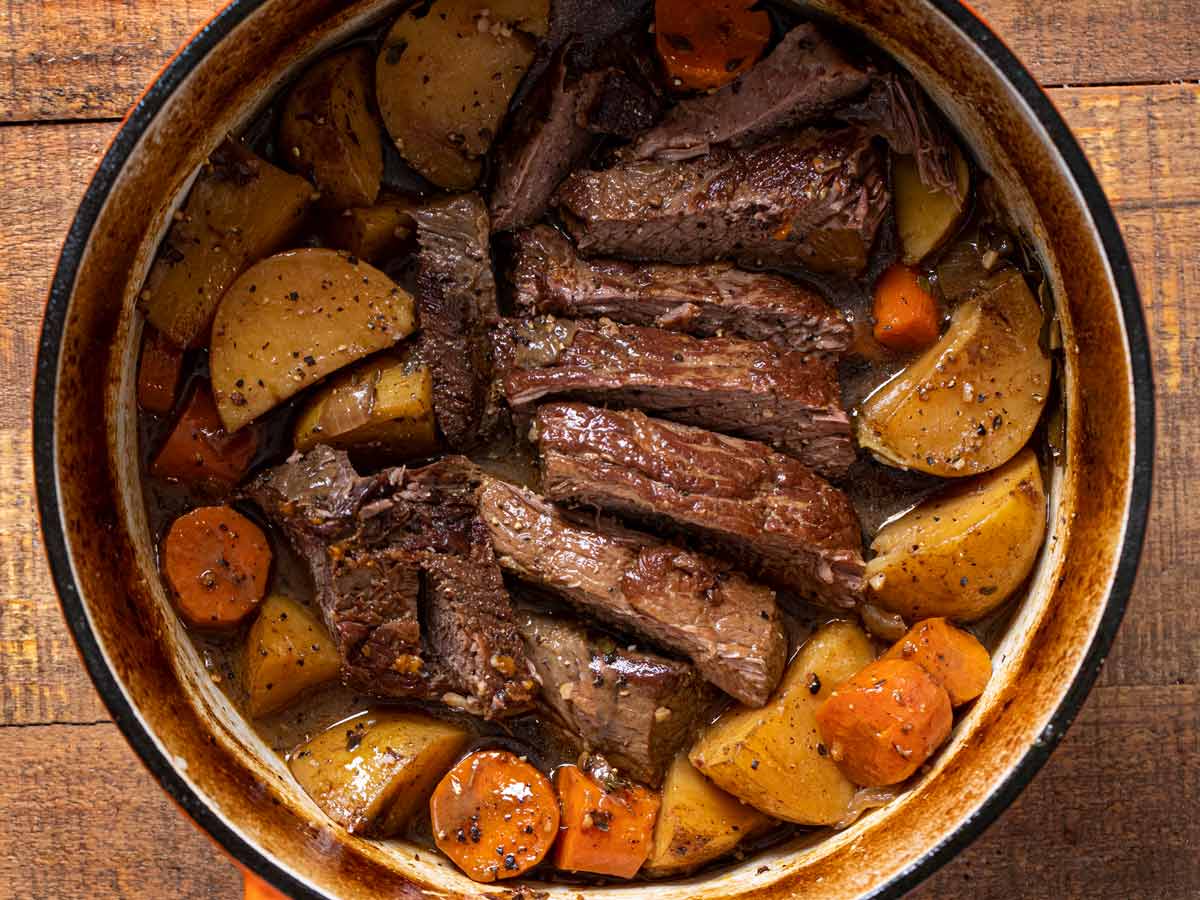
After the allotted resting time, the rump roast is ready to be sliced and served. Use a sharp carving knife or a serrated knife to carve thin slices against the grain of the meat. Slicing against the grain ensures tenderness and makes each bite more enjoyable.
Arrange the slices on a serving platter or individual plates, and pour any accumulated juices over the meat for added flavor and moisture. This will enhance the overall presentation of your dish.
Remember to save any remaining juices for drizzling over the individual servings or for making a delicious gravy to accompany the roast.
Now that you’ve mastered the art of letting the roast rest, your rump roast is ready to be savored and enjoyed. Whether it’s a special occasion or a comforting family dinner, the tender and succulent results will surely impress your guests.
In the next section, we’ll provide some additional tips and variations to help you take your rump roast to the next level.
Slicing and Serving the Rump Roast
Now that your rump roast has rested and the anticipation is building, it’s time to slice and serve the mouthwatering meat. Follow these steps to ensure a flawless presentation and maximum enjoyment:
1. Begin by sharpening your carving knife or using a serrated knife for easier slicing. Make sure the knife is long enough to cut through the thickness of the roast.
2. Place the rested rump roast on a clean cutting board or carving platter. Hold the roast firmly with a carving fork or tongs to prevent it from slipping.
3. Identify the direction of the grain, which is the natural lines or fibers running through the meat. It’s crucial to slice against the grain to maximize tenderness.
4. Starting from the end furthest from you, make even, thin slices against the grain. Use a smooth, fluid motion, applying gentle pressure as needed. Avoid sawing or using excessive force, as this can lead to uneven slices.
5. Continue slicing until you’ve carved the desired amount of meat for serving. If you’re providing a buffet-style spread, you can slice the entire roast. Otherwise, slice only what you need and leave the remainder intact to retain its juiciness.
6. Arrange the slices on a serving platter, keeping the presentation neat and attractive. You can stack them in an overlapping fashion or fan them out for an elegant display.
7. Serve the rump roast slices while still warm, allowing your guests to savor the delicious flavors. If desired, drizzle any reserved juices over the slices for added moisture and flavor.
8. Accompany the rump roast with your favorite side dishes, such as roasted vegetables, creamy mashed potatoes, or a fresh salad, to create a well-rounded meal.
9. Consider offering a variety of sauces or condiments to complement the rump roast, such as horseradish cream, mushroom gravy, or a tangy chimichurri sauce. This adds an extra layer of flavor and allows guests to personalize their plates.
Now that you have mastered the art of slicing and serving the rump roast, it’s time to enjoy the fruits of your labor. Sit back, relax, and relish each tender and juicy bite of this delectable dish.
Next, we’ll provide you with some additional tips and variations to help you elevate your rump roast to new culinary heights.
Tips and Variations for Perfect Rump Roast
To take your rump roast to the next level of deliciousness, consider these tips and variations to enhance the flavors and create a memorable dining experience:
- Marinating: If you have the time, marinating the rump roast overnight can infuse it with additional flavors. Use a mixture of herbs, spices, and your choice of marinade, such as soy sauce, Worcestershire sauce, or balsamic vinegar. The marinade will help tenderize the meat and add extra depth of flavor.
- Browning the Roast: To achieve a richer flavor, sear the seasoned rump roast before pressure cooking it. This step not only adds a beautiful caramelized crust but also enhances the overall taste and appearance of the final dish.
- Adding Aromatics: Enhance the aroma and taste of the roast by including aromatic vegetables, such as onions, garlic, or carrots, in the cooking liquid. These ingredients will infuse the meat with their flavors, elevating the overall taste of the dish.
- Using Beef Broth or Stock: Instead of using plain water as the cooking liquid, substitute it with beef broth or stock. This will give the rump roast an even richer and more savory taste profile.
- Herb Rub: Create a flavorful herb rub by combining your favorite herbs, such as rosemary, thyme, and garlic powder, and rubbing it on the surface of the roast before searing. The herb rub will impart a delicious aroma and taste to the meat.
- Slow Cooking Option: If you prefer a more hands-off approach, some electric pressure cookers have a slow cooking function. This allows you to cook the rump roast at a lower temperature over a longer period, resulting in an incredibly tender and flavorful roast.
- Leftover Roast Ideas: If you have any leftovers, consider repurposing them into sandwiches, salads, or wraps. Thinly slice the cold roast and use it as a delicious filling, adding your choice of condiments and vegetables for a quick and satisfying meal.
Remember to experiment and adjust the seasonings and cooking times to suit your personal taste preferences. With these tips and variations, you’ll be able to create a perfect rump roast that will impress your family and guests alike.
Now that you’re armed with these tips, it’s time to put them into practice and enjoy the incredible flavors of a perfectly cooked rump roast. Happy cooking!
Conclusion
Cooking a rump roast to perfection in an electric pressure cooker is an excellent way to create a tender and flavorful dish with minimal effort. By following the right techniques and utilizing the features of your pressure cooker, you can achieve incredible results that will impress your family and friends.
We explored the process of selecting and preparing the rump roast, setting up the electric pressure cooker, determining cooking times and instructions, and the importance of natural pressure release versus quick pressure release. We also discussed the significance of checking the internal temperature, letting the roast rest, and carving and serving the meat for the ultimate dining experience.
Throughout the article, we provided useful tips and variations to help you customize and elevate your rump roast, making it a standout dish on any occasion. Whether you prefer a classic herb rub, experimenting with marinades, or exploring different cooking liquids, these variations allow you to tailor the flavors to your liking.
By following these guidelines and adapting them to your preferences, you can consistently produce a perfectly cooked and delicious rump roast in your electric pressure cooker. Remember to consult the specific instructions of your pressure cooker model and always prioritize safety in the kitchen.
Now it’s time to gather your ingredients, fire up your electric pressure cooker, and embark on the journey of creating a succulent and mouthwatering rump roast. With practice and a touch of creativity, you’ll become a master at impressing your loved ones with a beautifully cooked rump roast that will leave lasting memories.
So, go ahead and enjoy the process of preparing and savoring the flavors of a perfectly cooked rump roast. Happy cooking!