Introduction
Welcome to the delicious world of homemade ice cream! If you’re a fan of this frozen treat and have recently purchased a Cuisinart ice cream maker, you’re in for a treat. Making ice cream at home allows you to customize the flavors, ingredients, and textures to your liking. But one question that often comes to mind is: “How long does it take to make ice cream in a Cuisinart ice cream maker?
The answer to this question may vary depending on several factors, such as the type of recipe you’re using, the ingredients you choose, and the specifications of your Cuisinart ice cream maker. In this article, I’ll guide you through the different elements that can influence the time it takes to make ice cream using your Cuisinart ice cream maker.
Before we dive into the details, let’s take a moment to appreciate the joy of homemade ice cream. Whether you prefer classic flavors like vanilla and chocolate or want to experiment with unique combinations, nothing beats the satisfaction of creating your own frozen delights in the comfort of your kitchen. With the Cuisinart ice cream maker, the process is made easier, allowing you to enjoy the creamy goodness of your favorite flavors whenever you desire.
Now, let’s delve into the factors that can affect the time it takes to make ice cream with your Cuisinart ice cream maker.
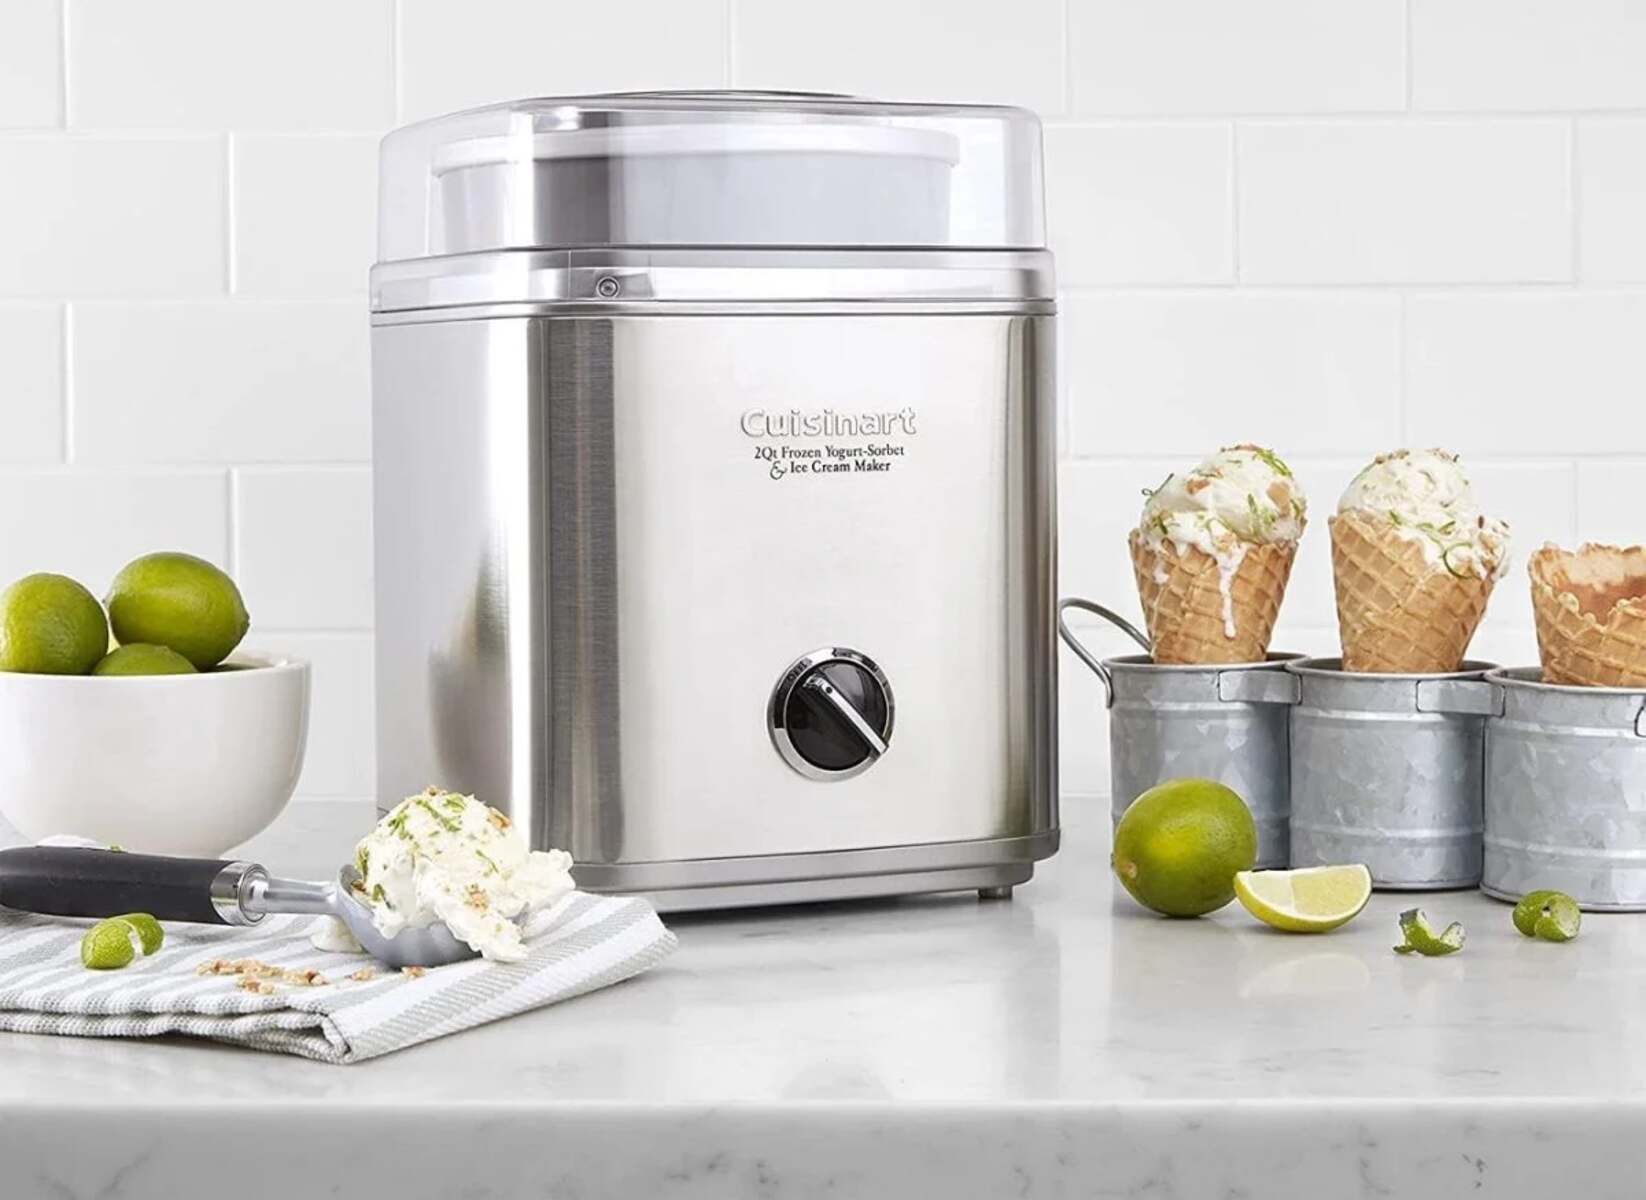
Understanding the Cuisinart Ice Cream Maker
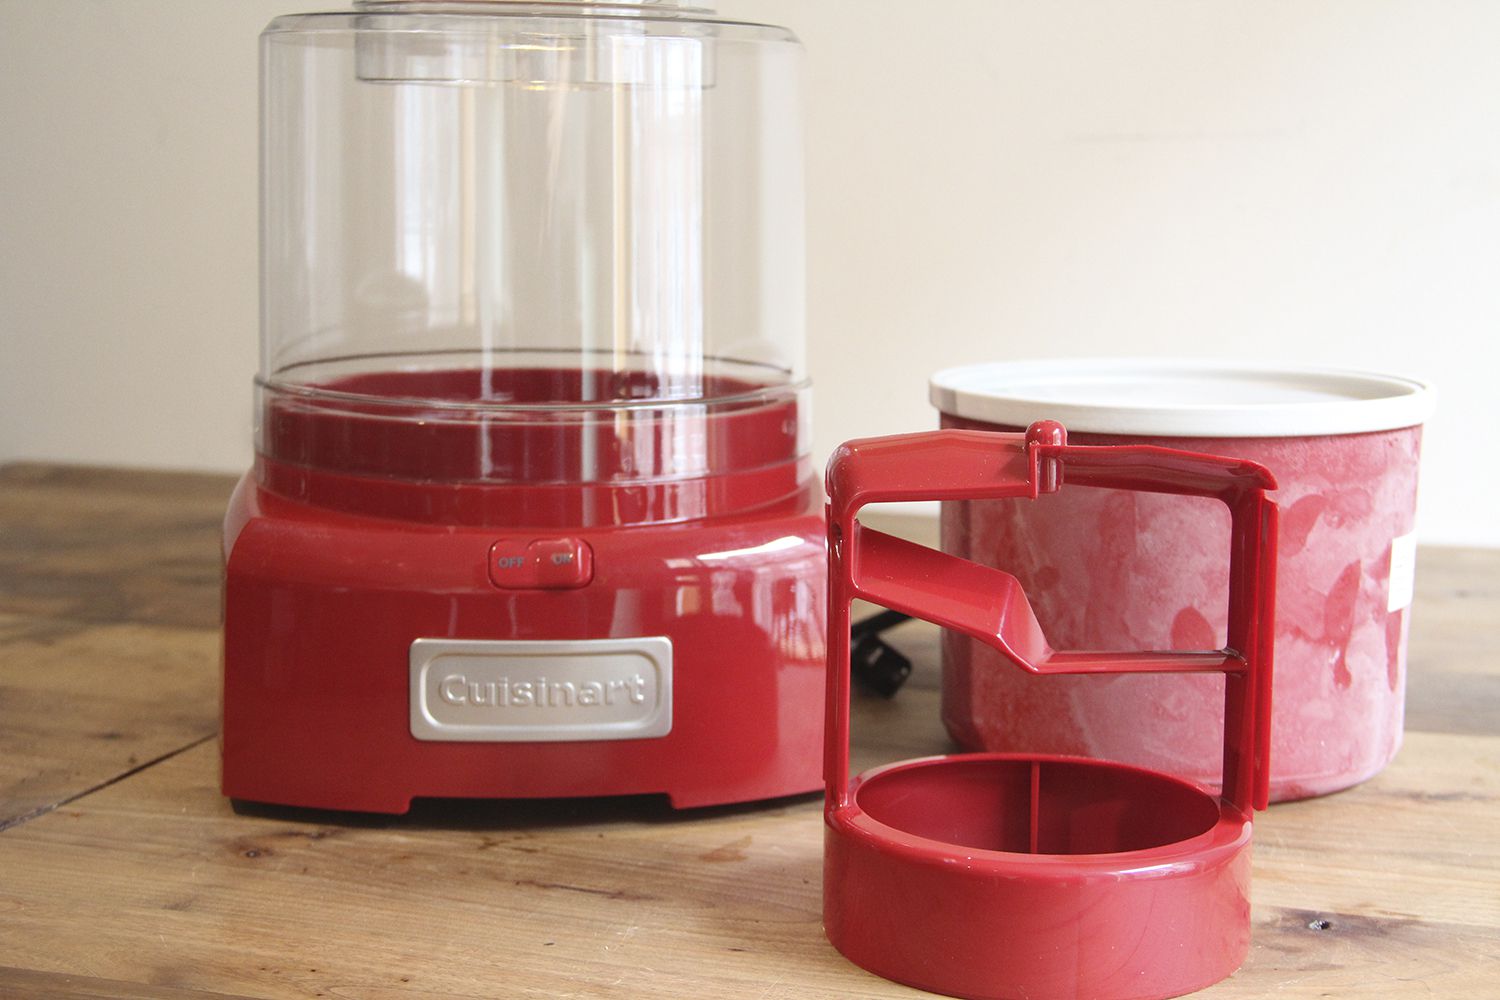
Before we explore the factors influencing ice cream making time, it’s essential to understand the basic workings of the Cuisinart ice cream maker. This machine consists of a motorized base, a removable freezer bowl, and a mixing paddle or dasher.
The freezer bowl is a crucial component of the Cuisinart ice cream maker. Before making ice cream, it needs to be pre-frozen to ensure that the mixture freezes properly. This typically involves placing the bowl in the freezer for a minimum of 12 hours or as instructed in the manufacturer’s guidelines.
The mixing paddle or dasher is responsible for churning and incorporating air into the ice cream mixture. It rotates slowly, creating a smooth and creamy texture as the mixture freezes. The paddle is attached to the motorized base, which powers the churning process.
Now that we have a basic understanding of the components, let’s explore the factors that influence the time it takes to make ice cream in a Cuisinart ice cream maker.
Factors Affecting Ice Cream Making Time
When it comes to making ice cream in a Cuisinart ice cream maker, several factors can affect the overall time it takes to achieve that perfect scoop. Let’s take a closer look at these factors:
1. Freezing Bowl Temperature: The temperature of the freezer bowl plays a significant role in the ice cream making process. It needs to be adequately frozen before use, typically around 0°F (-18°C). If the bowl is not sufficiently frozen, it can lead to prolonged freezing time and a less creamy end result.
2. Recipe and Ingredients: The specific recipe and ingredients you choose can impact the freezing time. Recipes with a higher fat content, such as those using heavy cream or egg yolks, tend to freeze slower than lighter alternatives. Additionally, adding solid mix-ins like fruit chunks or chocolate chips can also affect freezing time.
3. Mixture Temperature: The initial temperature of your ice cream mixture can affect freezing time. Chilling the mixture in the refrigerator prior to adding it to the ice cream maker can help accelerate the freezing process and result in a smoother consistency.
4. Machine Capacity: The amount of ice cream mixture you put into the machine can impact the freezing time. Overfilling the machine can impede the churning process and result in a longer freezing time. It’s important to follow the manufacturer’s guidelines regarding the maximum capacity of your specific Cuisinart ice cream maker.
5. Ambient Temperature: The room temperature in which you are using the ice cream maker can also affect the freezing time. Warmer room temperatures can slow down the freezing process, while colder environments can speed it up.
Keep in mind that these factors are not definitive, and the time it takes to make ice cream can vary depending on the specific circumstances. Understanding these factors will allow you to make adjustments accordingly and achieve the desired results with your Cuisinart ice cream maker.
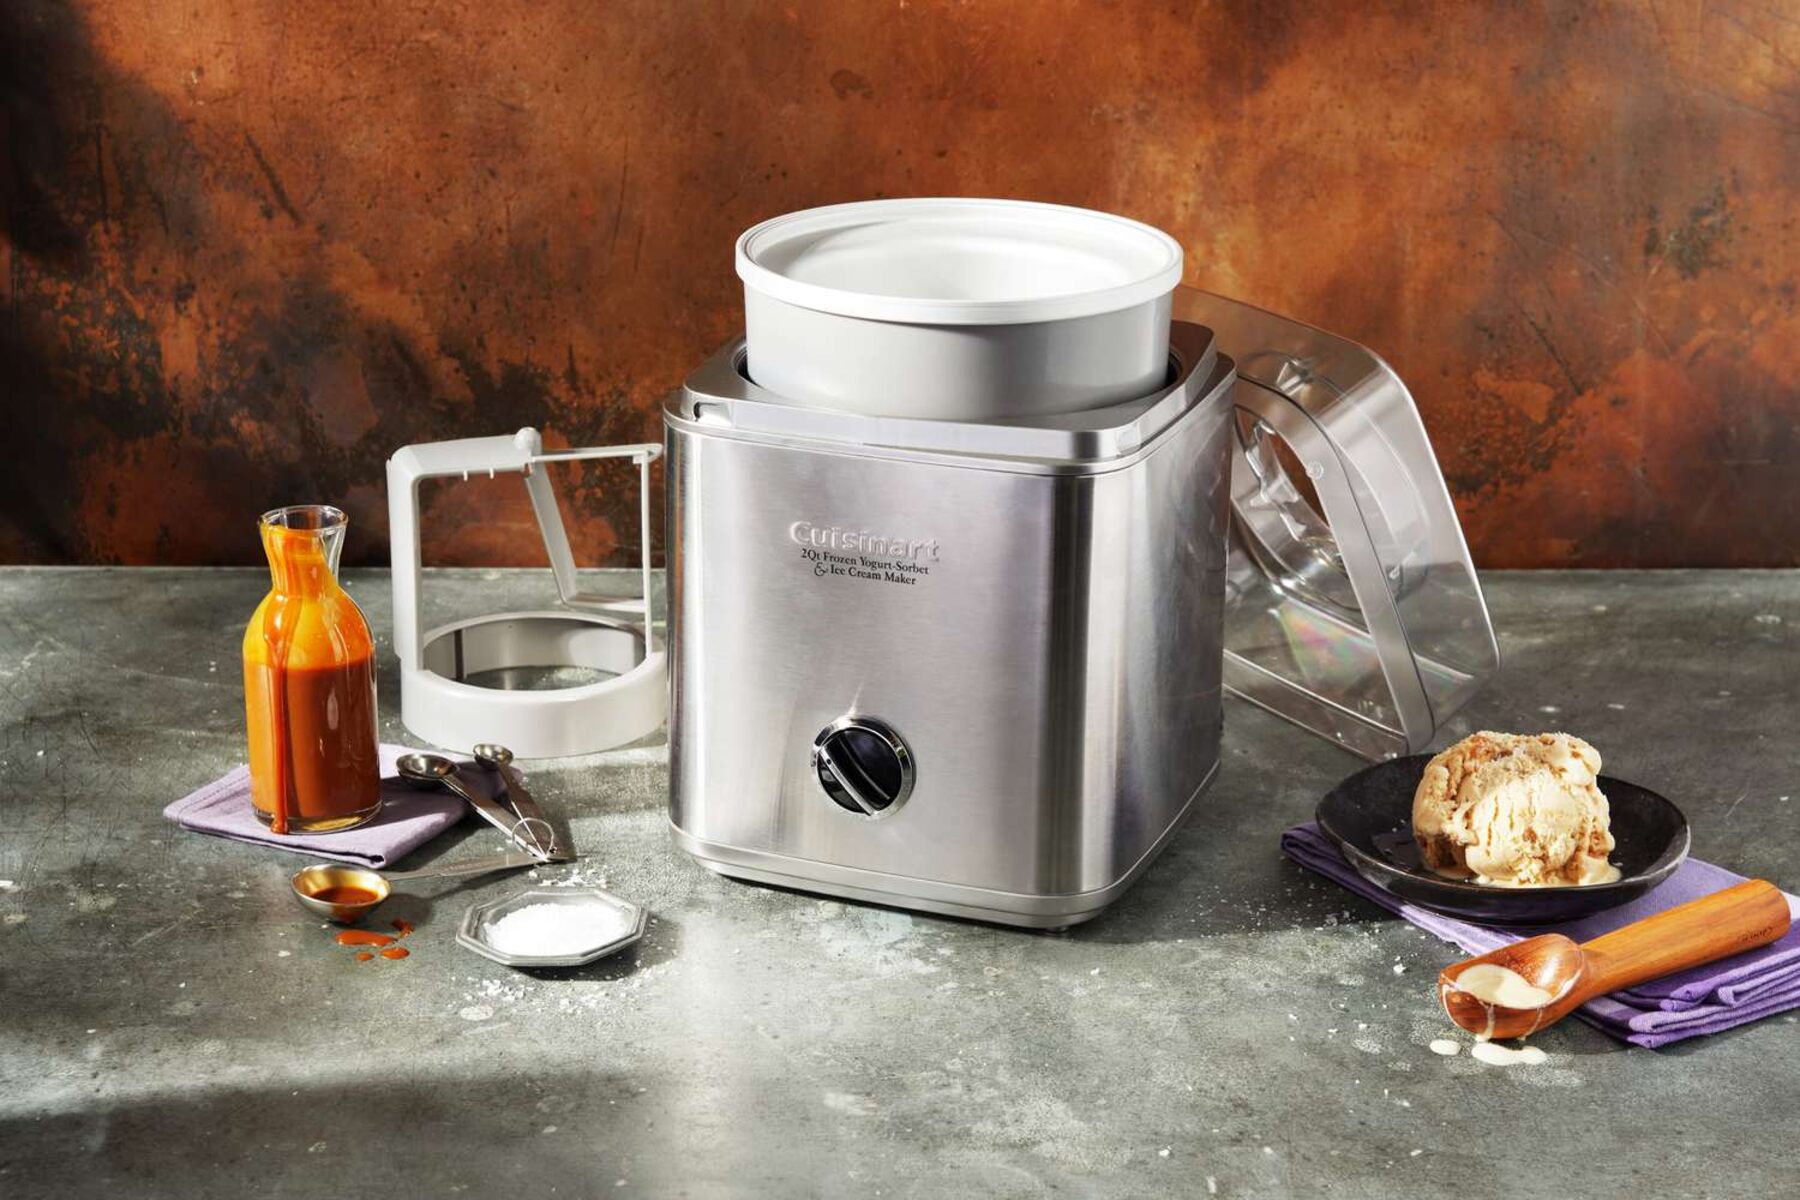
The Freezing Bowl
One of the key components of the Cuisinart ice cream maker is the freezing bowl. This bowl is responsible for freezing the ice cream mixture as the machine churns it. Understanding the freezing bowl and how to properly use it can significantly impact the time it takes to make ice cream.
The freezing bowl should be thoroughly frozen before use. Most Cuisinart ice cream makers require the bowl to be frozen for at least 12 hours. It’s crucial to check the manufacturer’s instructions for your specific model, as freezing times may vary.
When freezing the bowl, ensure that it is placed in the coldest part of your freezer. This will help maintain a consistent and low temperature throughout the bowl. Avoid placing it near the freezer door or on top of other items, as this can result in uneven freezing.
Before adding your ice cream mixture to the freezing bowl, it’s essential to give it a quick inspection. Ensure that the bowl is completely frozen and free of any visible ice crystals. If you notice any ice crystals, it may indicate that the bowl hasn’t frozen thoroughly, which can affect the freezing time and the texture of your ice cream.
It’s important to note that the freezing bowl has a limited capacity. Overfilling the bowl with too much mixture can hinder the freezing process and result in longer freezing times. Follow the guidelines provided by the manufacturer to determine the maximum capacity for your specific Cuisinart ice cream maker model.
After using the freezing bowl, make sure to clean and dry it thoroughly before placing it back in the freezer. This will ensure that it’s ready for your next ice cream making adventure and will help maintain optimal freezing conditions.
By properly preparing and utilizing the freezing bowl, you can minimize the time it takes to make ice cream in your Cuisinart ice cream maker. Remember to follow the manufacturer’s guidelines and check for any specific instructions related to your model to ensure the best possible results.
The Ingredients
When it comes to making delicious ice cream with your Cuisinart ice cream maker, the quality and composition of the ingredients play a significant role in the taste, texture, and freezing time. Understanding the impact of each ingredient can help you make informed choices and achieve the perfect scoop.
1. Dairy Products: The main dairy component in most ice cream recipes is cream. The fat content of the cream can affect how quickly the mixture freezes. Higher fat content, such as heavy cream, can result in a richer and creamier texture but may also slow down the freezing process. Lighter alternatives like milk or half-and-half may freeze faster but may produce a slightly less creamy texture.
2. Sweeteners: The type and amount of sweeteners used in your ice cream mixture can impact the freezing time. Granulated sugar, for example, can help lower the freezing point of the mixture, making it freeze more quickly. Other sweeteners like honey or maple syrup may have different effects since they contain additional water or sugars.
3. Flavors and Extracts: Adding flavors and extracts is where you can get creative with your ice cream recipes. Whether it’s vanilla, chocolate, fruit extracts, or even spices, these additives can enhance the taste and aroma of your ice cream. However, be mindful of the amount and type of flavorings you use, as excessive liquids or alcohol-based extracts can affect the freezing time and consistency.
4. Mix-ins: Mix-ins like nuts, fruits, chocolate chips, and cookies can add texture and flavor to your ice cream. However, keep in mind that larger mix-ins may slow down the freezing process. Chopping them into smaller pieces or pre-freezing them before incorporating them into the mixture can help mitigate these effects.
5. Stabilizers: Some recipes may include stabilizers like cornstarch or eggs to improve the texture and stability of the ice cream. These ingredients can affect the freezing time as they create a thicker base. Follow the recipe instructions carefully to achieve the desired results.
Experimenting with different ingredients and ratios can lead to unique and delicious ice cream creations. However, it’s essential to adjust the recipe accordingly and keep in mind the potential impact on freezing time. By understanding the role of each ingredient, you can tailor your ice cream recipe to suit your preferences and achieve optimal results with your Cuisinart ice cream maker.
The Recipe
When it comes to making ice cream in your Cuisinart ice cream maker, having a well-crafted recipe is essential. A carefully selected recipe can help ensure that your ice cream freezes properly and yields a creamy, delicious result. Here are some key aspects to consider when choosing a recipe:
1. Specific to Cuisinart Ice Cream Maker: Look for recipes specifically designed for the Cuisinart ice cream maker or similar models. These recipes often account for the machine’s specifications and can provide more accurate timings and ingredient ratios.
2. Freezing Time Estimates: Pay attention to any estimated freezing times mentioned in the recipe. While these times may vary depending on factors like temperature and ingredients, they can give you a general idea of what to expect in terms of freezing duration.
3. Balance of Ingredients: Consider the balance of ingredients in the recipe, particularly the fat content, sweeteners, and any additional additives. The proportions of these ingredients can impact the texture and freezing time of the ice cream.
4. Review User Feedback: Before settling on a specific recipe, check for reviews and feedback from other users. Look for comments on the freezing time, flavor, and texture of the final product. This can help you identify any potential issues or adjustments you may need to make.
5. Experimentation: Don’t be afraid to experiment and customize the recipe to suit your taste preferences. You can easily adjust the sweetness, flavors, and mix-ins to create unique ice cream flavors. However, keep in mind that significant modifications to the recipe may affect the freezing time and overall outcome.
Regardless of the recipe you choose, follow the instructions carefully. This includes pre-chilling the mixture (if required), properly combining the ingredients, and adjusting the freezing time as necessary. Taking these steps will help you achieve the best results and create ice cream that is truly melt-in-your-mouth delicious.
Remember, making ice cream is a fun and creative process, and with the right recipe, you can enjoy the satisfaction of creating your favorite frozen treats at home with your Cuisinart ice cream maker.
Prepping the Machine
Before diving into the ice cream making process with your Cuisinart ice cream maker, it’s crucial to properly prep the machine to ensure optimal results. Follow these steps to ensure your machine is ready to churn out delicious ice cream:
1. Clean and Assemble: Start by cleaning all the removable parts of the ice cream maker, such as the freezing bowl and mixing paddle, according to the manufacturer’s instructions. Once cleaned, assemble the machine by attaching the freezing bowl to the base and ensuring that it is snugly fitted.
2. Pre-Freeze the Bowl: Place the assembled freezing bowl in the coldest part of your freezer. Allow it to freeze for the recommended time, typically around 12 hours or as stated in the manufacturer’s guidelines. This step is crucial as it ensures that the bowl is fully frozen, allowing for efficient ice cream making.
3. Prioritize a Chilled Ice Cream Mixture: While not all recipes require pre-chilling, it can be beneficial to refrigerate your ice cream mixture before adding it to the machine. Cold mixtures freeze faster and result in a smoother consistency. If your recipe recommends chilling, follow those instructions for the best outcome.
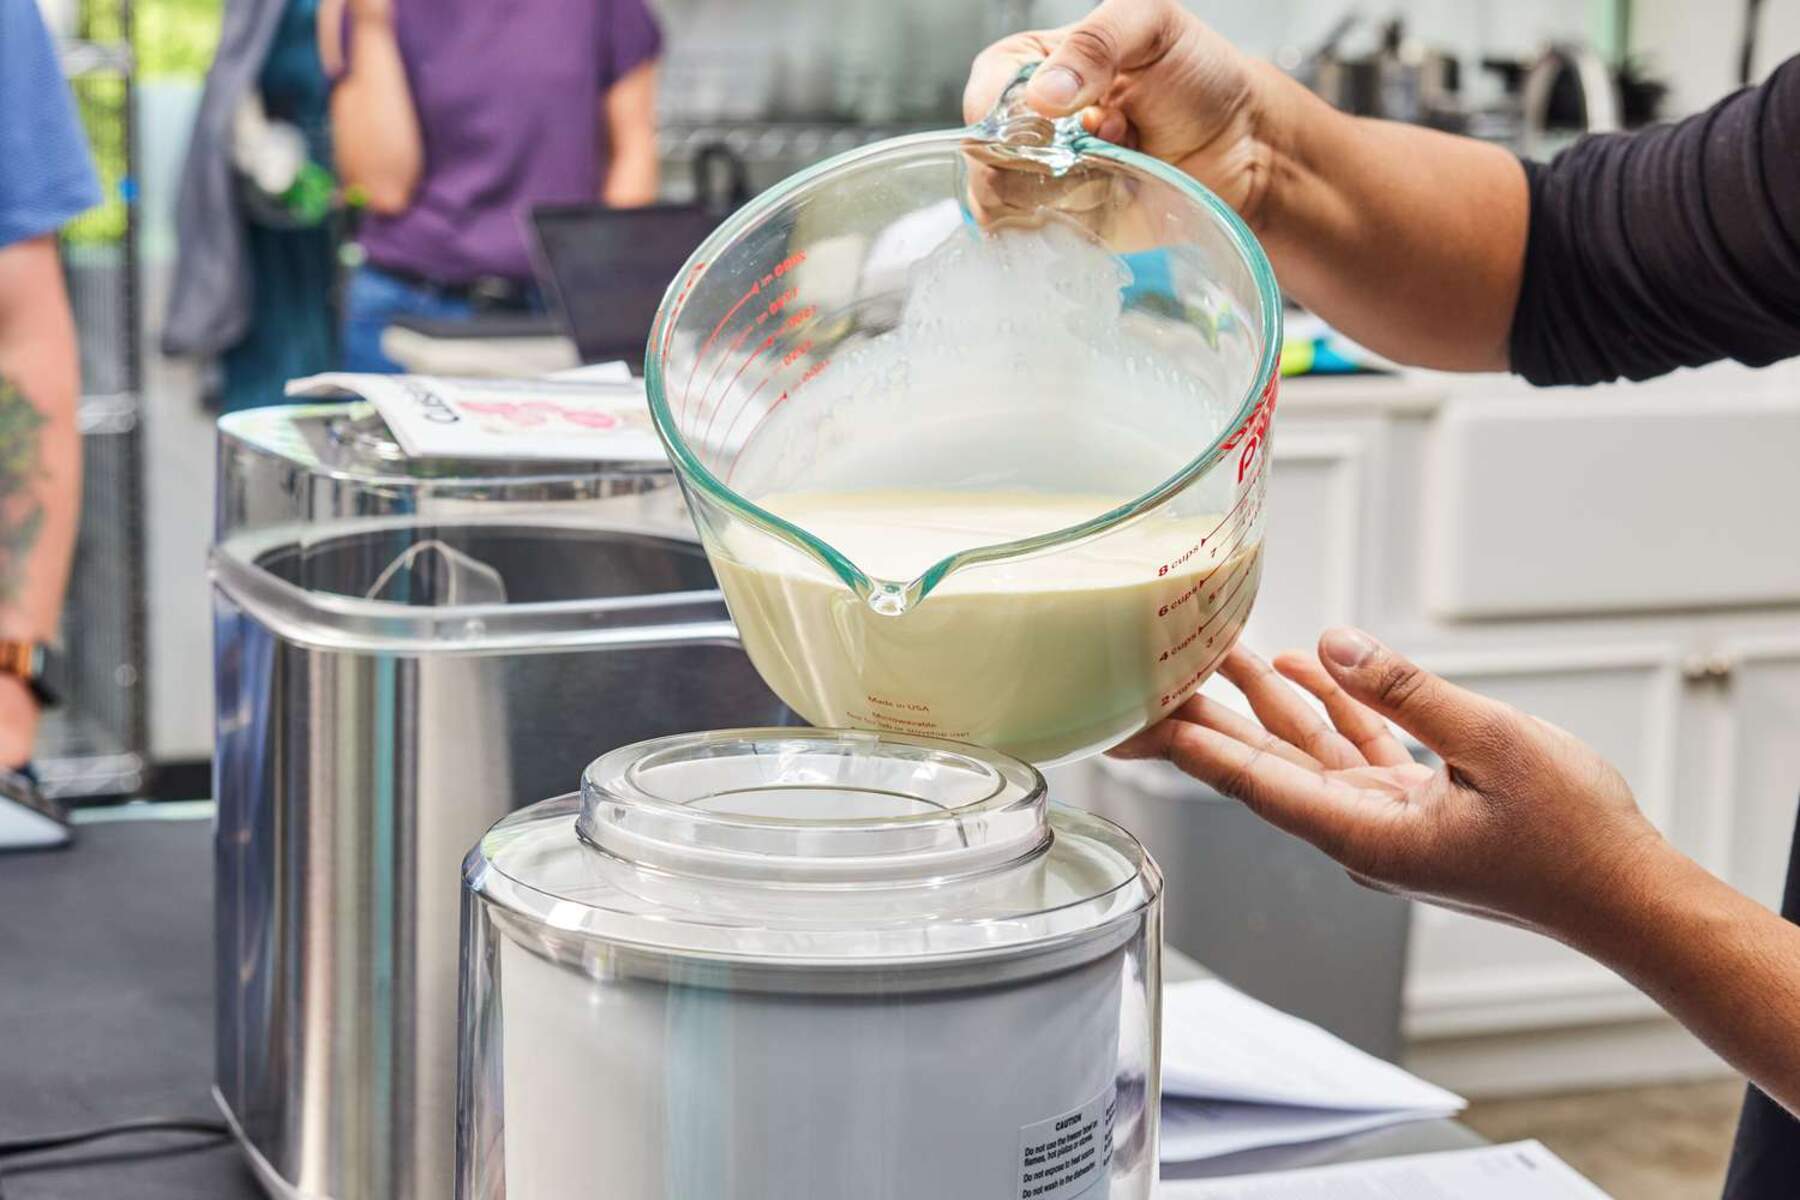
4. Prepare the Machine: Before adding the ice cream mixture, place the freezing bowl onto the base of the machine. Ensure that the mixing paddle is securely attached to the motorized base. Some models may require you to turn on the machine before pouring in the mixture, so it’s important to refer to the specific instructions for your Cuisinart ice cream maker.
5. Add the Ice Cream Mixture: Slowly pour the pre-chilled ice cream mixture into the freezing bowl while the machine is in motion. Be mindful not to exceed the maximum capacity recommended by the manufacturer, as an overfilled machine may hinder the churning process and extend the freezing time.
6. Let the Machine Work its Magic: Once the mixture is added, turn on the machine and let it churn for the recommended time, typically ranging from 15 to 30 minutes. The exact churning time may vary depending on the recipe and machine model. Be sure to monitor the progress and make any necessary adjustments as you go.
By following these steps, you can ensure that your Cuisinart ice cream maker is prepped and ready to create smooth and creamy homemade ice cream. Taking the time to properly assemble, pre-freeze the bowl, and prepare the ice cream mixture will contribute to a successful ice cream making experience.
Churning Time
The churning time is a crucial step in the ice cream making process with your Cuisinart ice cream maker. This is the period when the machine works its magic, incorporating air into the ice cream mixture and transforming it into a creamy and smooth dessert. The churning time can vary depending on various factors. Here’s a closer look at this important stage:
1. Recipe Guidelines: Start by following the recipe guidelines for the suggested churning time. The recipe’s instructions will give you a baseline to work with, considering the specific ingredients and ratios used. However, it’s important to note that these times are approximate and may vary depending on factors such as the machine’s model and the temperature of the ingredients.
2. Observation and Monitoring: As the machine churns, it’s essential to observe the progress of the ice cream mixture. Keep an eye on its consistency and texture. It should gradually thicken and become more solid as it freezes. The churning time may need to be adjusted based on the visual cues you observe.
3. Checking the Manual: Consult the manual or instructions that came with your Cuisinart ice cream maker for any specific guidelines pertaining to churning time. Different models may have different recommendations. The manual may provide insights into the average churning time for various recipes and serve as a helpful reference.
4. Adjusting the Time: If the ice cream mixture has not reached the desired consistency within the suggested churning time, it may need to be left in the machine for a bit longer. On the other hand, if the mixture becomes excessively firm before the recommended time, it’s advisable to stop the churning process to prevent over-freezing. Adjust the churning time accordingly to achieve the desired consistency.
5. Experiment and Personal Preferences: Feel free to experiment and adjust the churning time based on your personal preferences. If you like your ice cream denser and firmer, you may choose to extend the churning time. If you prefer a softer and lighter texture, you can reduce the churning time slightly. Remember that finding the perfect churning time may require a bit of trial and error.
Keep in mind that the churning time is not set in stone and can vary depending on different factors. It’s important to be flexible and adjust the time based on the recipe, machine model, and personal preferences. With practice and experience, you’ll be able to determine the ideal churning time for your desired ice cream consistency and texture.
Testing for Readiness
Knowing when your homemade ice cream is ready for consumption is an exciting moment in the ice cream making process. The testing phase allows you to determine the ideal consistency and texture of your frozen treat. Here are some ways to test for readiness when using your Cuisinart ice cream maker:
1. Visual Inspection: Take a close look at the ice cream as it churns. As it approaches readiness, it will thicken and firm up. You’ll notice that the mixture becomes creamier and less liquid-like. Keep an eye on the surface and edges for any signs of firmness.
2. Consistency Check: Use a spoon or spatula to scoop out a small amount of the ice cream mixture. Observe its consistency as you lift it. If it holds its shape and has a smooth and creamy texture, it is likely ready for consumption. If it appears too soft or runny, it may require more time in the machine.
3. Finger Swipe Test: Another way to test the readiness of your ice cream is to swipe your finger across the surface. If the swipe leaves a distinct trail and the texture is thick enough to hold its shape, the ice cream is likely ready. If the trail doesn’t hold or the mixture appears too liquidy, it may need more churning time.
4. Taste Test: Of course, the most delicious way to check for readiness is to taste your ice cream. Take a spoonful and savor the flavor and texture. If it has reached your desired level of creaminess and freeze, you can consider it ready to enjoy. Adjust the sweetness or flavors as desired based on your taste preferences.
5. Time and Experience: With time and experience, you will develop a better sense of when your ice cream is ready simply by observing the churning time and the consistency of previous batches. As you become more familiar with your Cuisinart ice cream maker and various recipes, you’ll have a better understanding of what to expect in terms of readiness.
Remember that ice cream can continue to firm up during the freezing process, so slightly softer ice cream from the machine is preferable. Once you have determined that your ice cream is ready, transfer it to a storage container and place it in the freezer for additional hardening if desired. This will further enhance its texture and make it even more enjoyable.
By employing these testing methods and using your judgment, you can ensure that your homemade ice cream from the Cuisinart ice cream maker is perfectly frozen and ready to be savored.
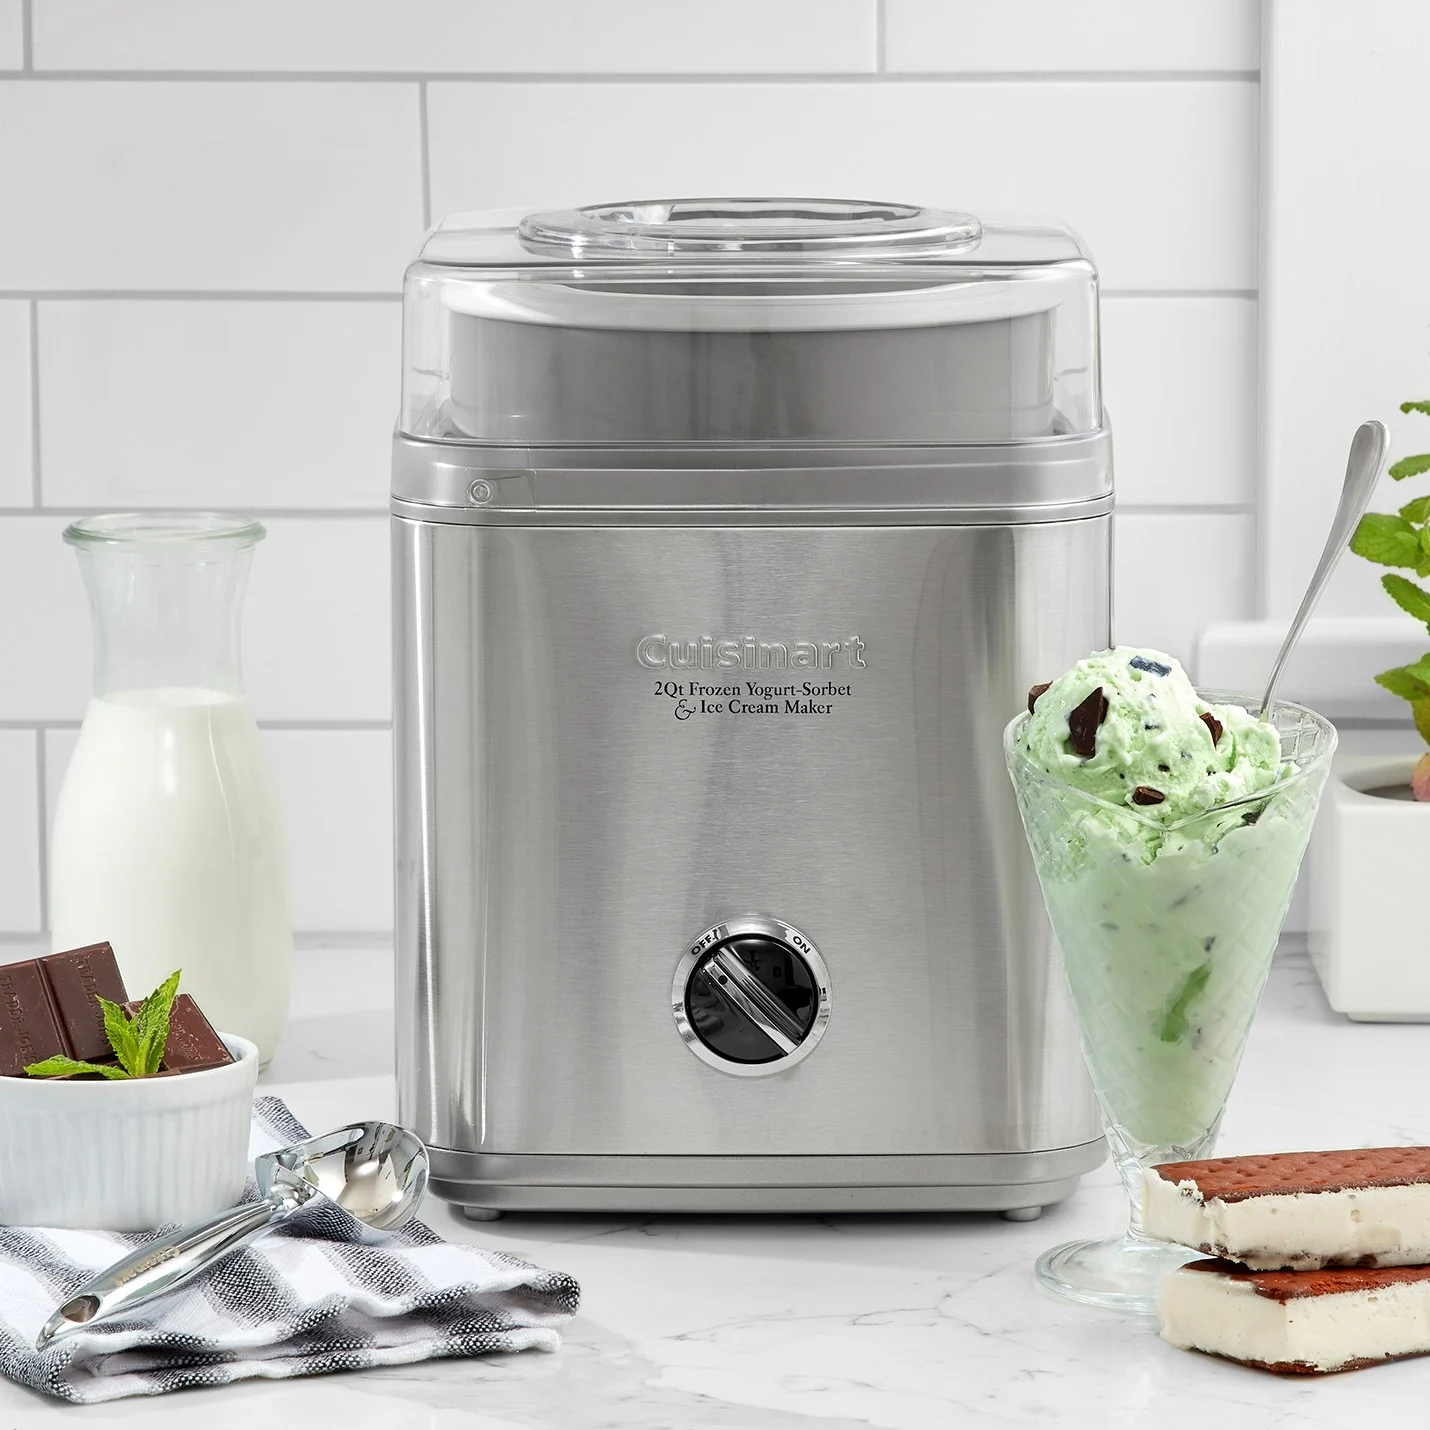
Enjoying Your Homemade Ice Cream
After patiently making and perfecting your homemade ice cream with your Cuisinart ice cream maker, it’s time for the most rewarding part – savoring your creation. Here are some tips to enhance your ice cream experience:
1. Serving and Presentation: Scoop your ice cream into a serving dish or cone for a classic presentation. Get creative with toppings, such as sprinkles, chocolate syrup, fresh fruit, or whipped cream, to add extra flavor and visual appeal to your treat.
2. Texture and Temperature: Allow your ice cream to soften at room temperature for a few minutes before serving. This helps achieve a smoother, creamier texture. However, be cautious not to let it melt entirely. Finding the ideal balance is key.
3. Pairings and Combinations: Experiment with different flavor combinations and pairings to complement your homemade ice cream. Consider serving it alongside warm desserts like brownies or complement it with a slice of pie for an indulgent treat.
4. Sharing the Joy: Ice cream is best enjoyed with loved ones. Gather family and friends for a fun ice cream social or surprise your loved ones with homemade ice cream as a sweet treat. Sharing the joy of your creation with others will make the experience even more memorable.
5. Storing Leftovers: If you have any leftover ice cream, store it in an airtight container in the freezer. To prevent ice crystals from forming, place a piece of plastic wrap directly on the surface of the ice cream before sealing the container.
6. Experiment and Customize: Don’t be afraid to get creative with your ice cream flavors and mix-ins. Explore new combinations, try different recipes, and adjust ingredients according to your preference. The beauty of making homemade ice cream is the ability to customize it to suit your taste.
7. Cherish the Experience: Making homemade ice cream with your Cuisinart ice cream maker is a delightful and fulfilling experience. Take a moment to appreciate the effort and love you put into creating this treat. Enjoy each spoonful and savor the rich flavors.
Remember that the joy of homemade ice cream extends beyond the first bite. Embrace the process, get creative, and have fun experimenting with different flavors and techniques. Your Cuisinart ice cream maker will be your trusty companion on this delicious journey of homemade icy delights.
Conclusion
Making ice cream at home with your Cuisinart ice cream maker opens the door to endless creative possibilities and delectable flavors. Throughout this article, we have explored the factors that impact ice cream making time, from the freezing bowl and ingredients to the churning process and testing for readiness.
Understanding the freezing bowl’s role and ensuring it is properly frozen sets the stage for successful ice cream creation. The choice of ingredients, including dairy products, sweeteners, and mix-ins, contributes to the taste, texture, and freezing time of your homemade ice cream.
Prepping the machine, such as cleaning and assembling, and following recipe guidelines are essential steps for achieving the best results. The churning time, a vital stage in the ice cream making process, can be adjusted based on visual cues, consistency, and personal preferences.
Testing for readiness ensures that your ice cream has reached the desired level of creaminess and texture. Finally, enjoying your homemade ice cream is a delightful experience. From serving and presentation to experimenting with flavors and pairings, make the most of your delicious creation to indulge in a truly delightful treat.
As you continue to explore and experiment with your Cuisinart ice cream maker, remember to embrace the joy, creativity, and satisfaction that come with making homemade ice cream. Each batch presents an opportunity to craft a unique and delicious treat that can be shared with loved ones or enjoyed solo. So, put on your apron, gather your ingredients, and dive into the delightful world of homemade ice cream with your Cuisinart ice cream maker.