Introduction
Welcome to the world of Wi-Fi! In today’s digitally connected age, having a secure Wi-Fi network is of paramount importance. One of the main ways to ensure the safety of your network is by regularly changing your Wi-Fi password.
Changing your Wi-Fi password not only helps protect your personal information and data but also prevents unauthorized access to your network. Whether you want to update your password due to security concerns or simply because it’s time for a refresh, this guide will walk you through the process step by step.
Before we dive into how to change your Wi-Fi password, it’s important to note that the specific steps may vary slightly depending on the make and model of your router. However, the general principles discussed here should apply to most routers. If you encounter any difficulties, consult your router’s user manual or contact your internet service provider for further assistance.
In this guide, we’ll cover the basic steps involved in changing your Wi-Fi password. We’ll start by accessing your router’s settings, then move on to locating the Wi-Fi security settings and making the necessary changes. Finally, we’ll test the new password to ensure that it’s working correctly.
So, if you’re ready to take control of your Wi-Fi network’s security, let’s get started with step one: accessing your router’s settings.
Step 1: Accessing your router’s settings
The first step in changing your Wi-Fi password is accessing your router’s settings. To do this, you’ll need to open a web browser on a device connected to your Wi-Fi network.
Launch your preferred web browser, such as Chrome, Firefox, or Safari, and type the IP address of your router into the address bar. Common IP addresses for routers include 192.168.1.1 or 192.168.0.1. If you’re unsure of your router’s IP address, you can usually find it on a sticker on the back or bottom of the router, or in the user manual.
Once you enter the router’s IP address in the address bar, hit Enter on your keyboard. This will take you to the router’s login page. You may be prompted to input a username and password to access the settings. If you’ve never changed the login credentials, try using the default username and password provided by the manufacturer. Common default values include “admin” for both the username and password, or “admin” for the username and “password” for the password.
If the default login doesn’t work, it’s likely that you or someone else changed the credentials at some point. In that case, you’ll need to reset your router to its factory settings. Look for a small reset button on the back of your router and press it using a paperclip or a similar object. Hold the button for about 10 seconds until the lights on the router flash, indicating that the reset process is complete. Keep in mind that resetting your router will erase any custom settings you’ve made, so it’s recommended to have a backup of your router’s configuration if possible.
Once you’ve successfully logged into your router’s settings, congratulations! You’re now one step closer to changing your Wi-Fi password. In the next step, we’ll discuss how to locate the Wi-Fi security settings on your router.
Step 2: Locating the Wi-Fi security settings
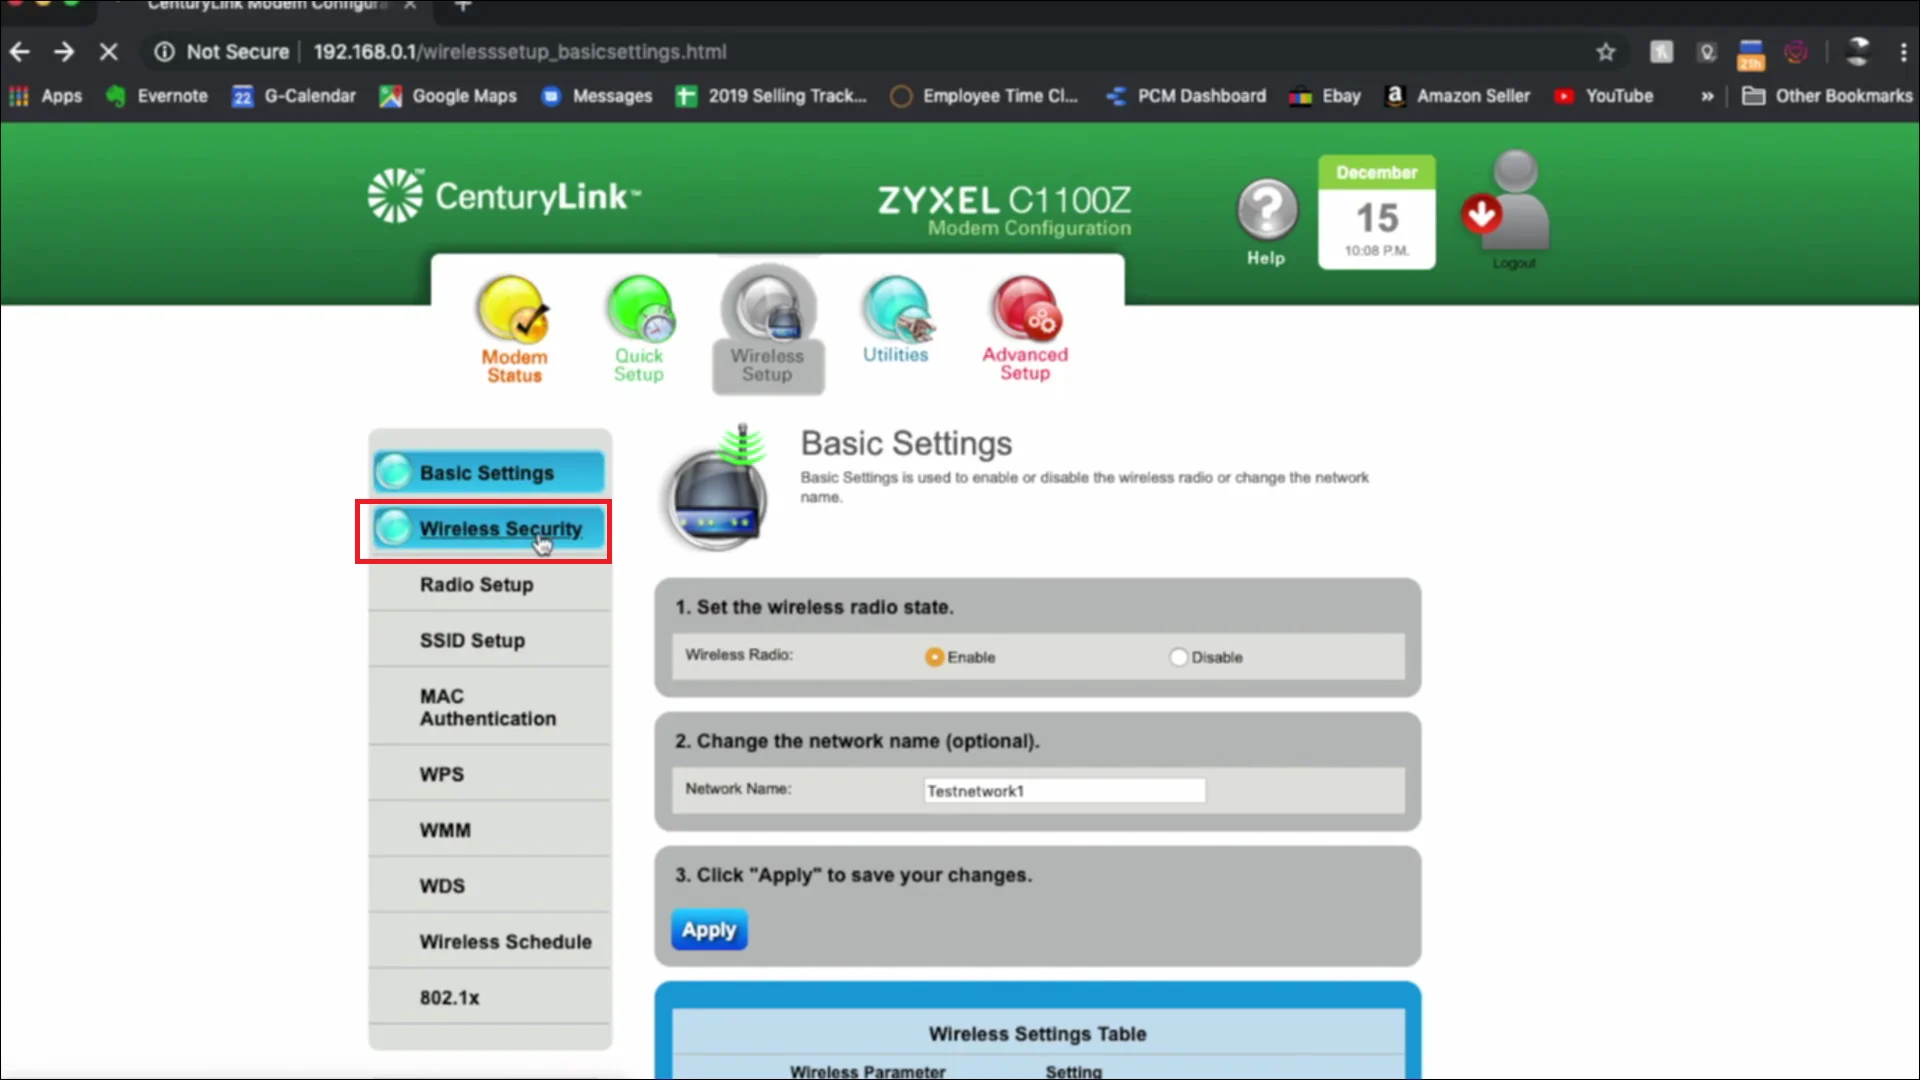
Now that you’re logged into your router’s settings, the next step is to locate the Wi-Fi security settings. These settings will allow you to change your Wi-Fi password and ensure the security of your network.
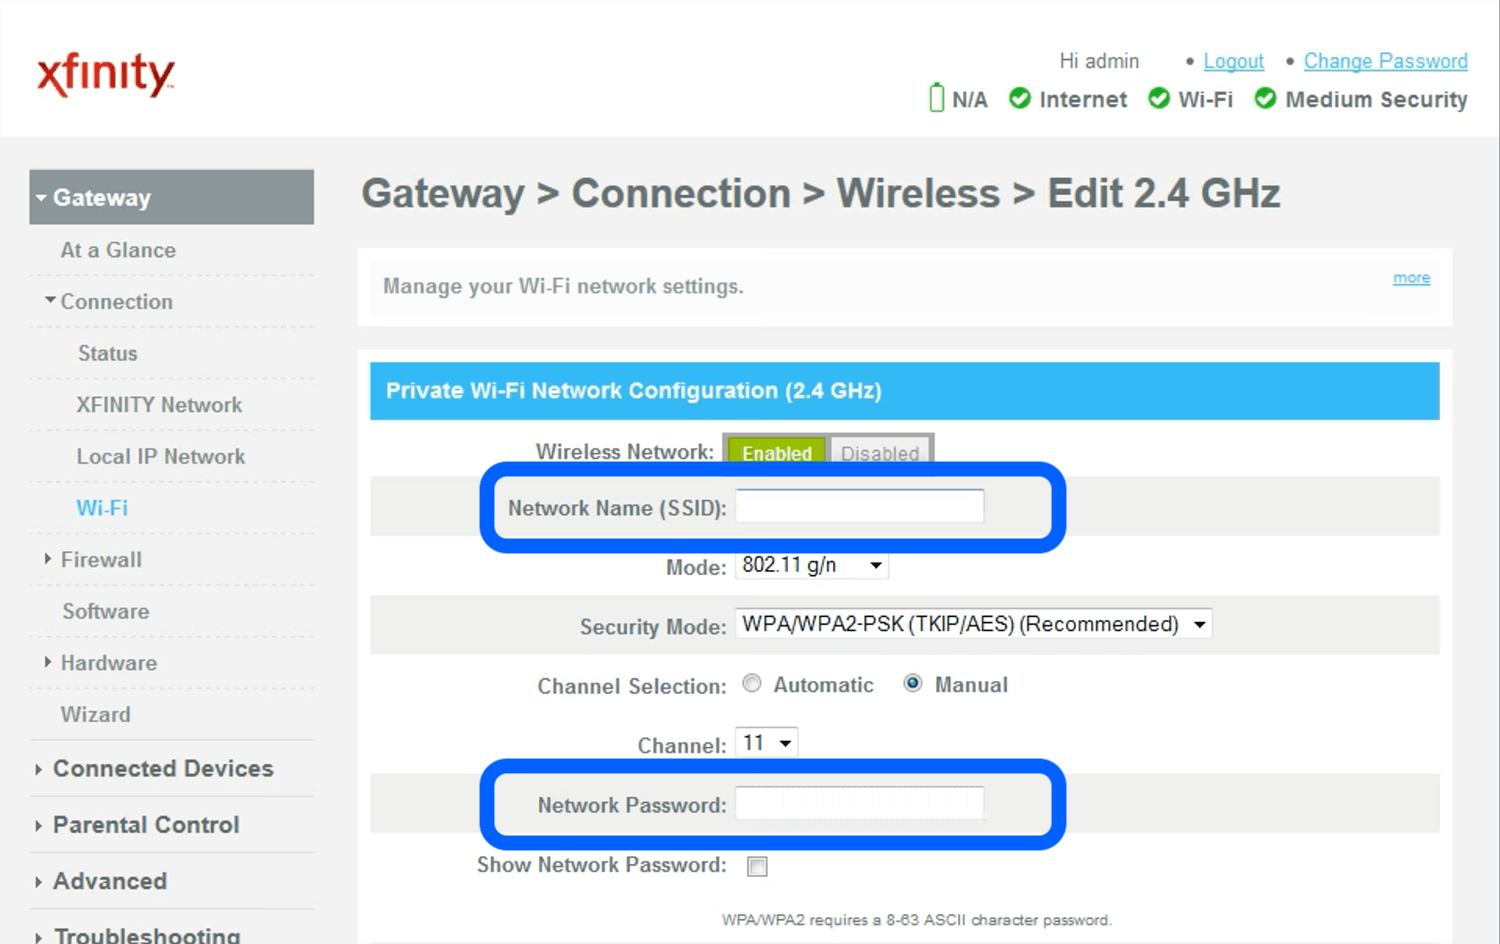
The exact location of the Wi-Fi security settings may vary depending on your router’s interface, but they are typically grouped together under a section related to wireless settings or security. Look for options like “Wireless,” “Wi-Fi,” or “Network Settings” in the menu or sidebar of your router’s settings interface.
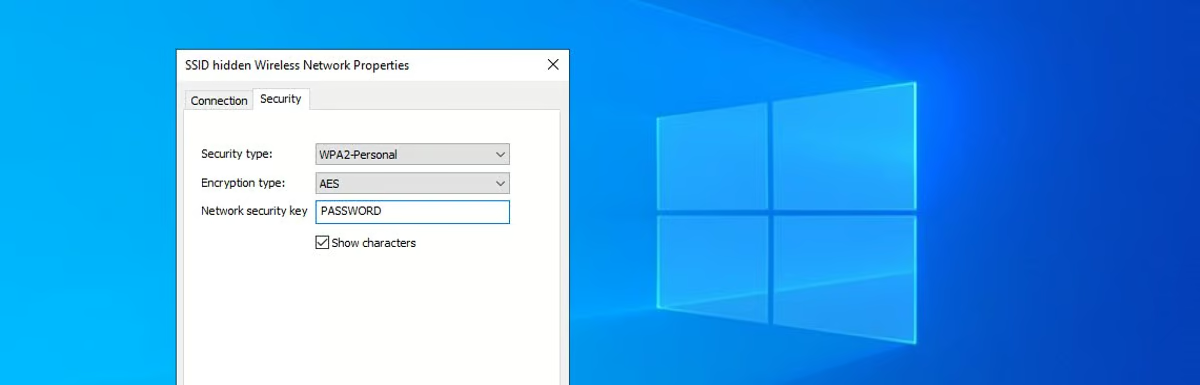
Once you’ve found the appropriate section, you’ll likely see various options related to your Wi-Fi network. Look for the option labeled “Wireless Security,” “Security,” or a similar term. This is where you can make changes to your Wi-Fi password.
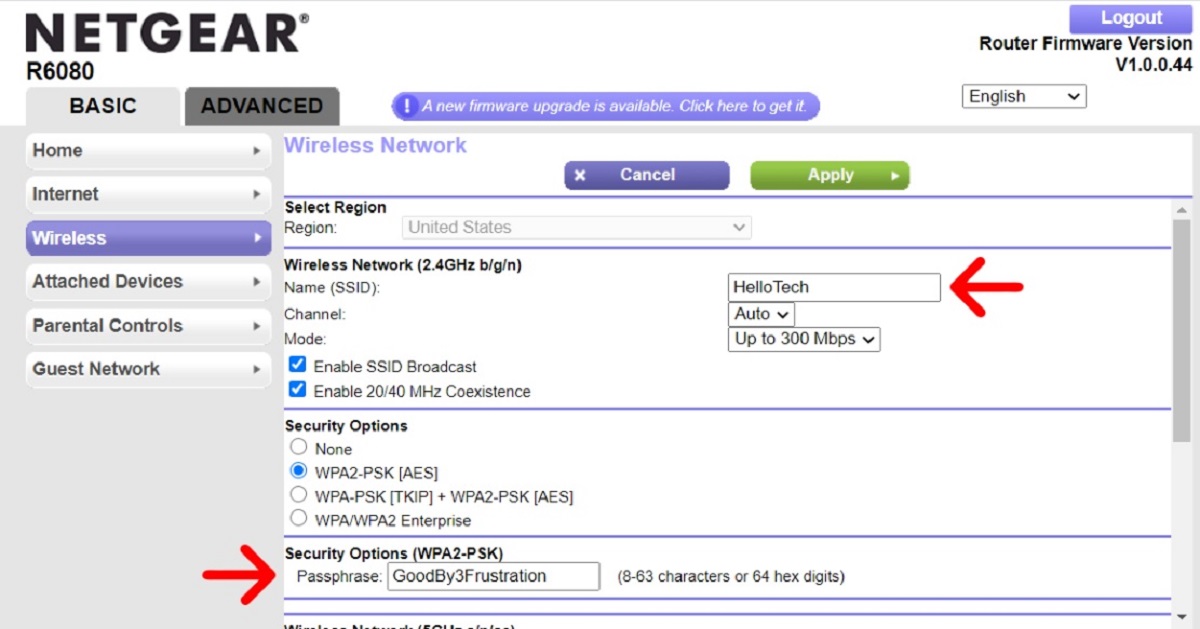
In this section, you may find a dropdown menu or a set of radio buttons that let you choose the type of security protocol for your Wi-Fi network. The most common types are WEP (Wired Equivalent Privacy), WPA (Wi-Fi Protected Access), and WPA2 (Wi-Fi Protected Access 2). It’s recommended to choose WPA2, as it offers the highest level of security.
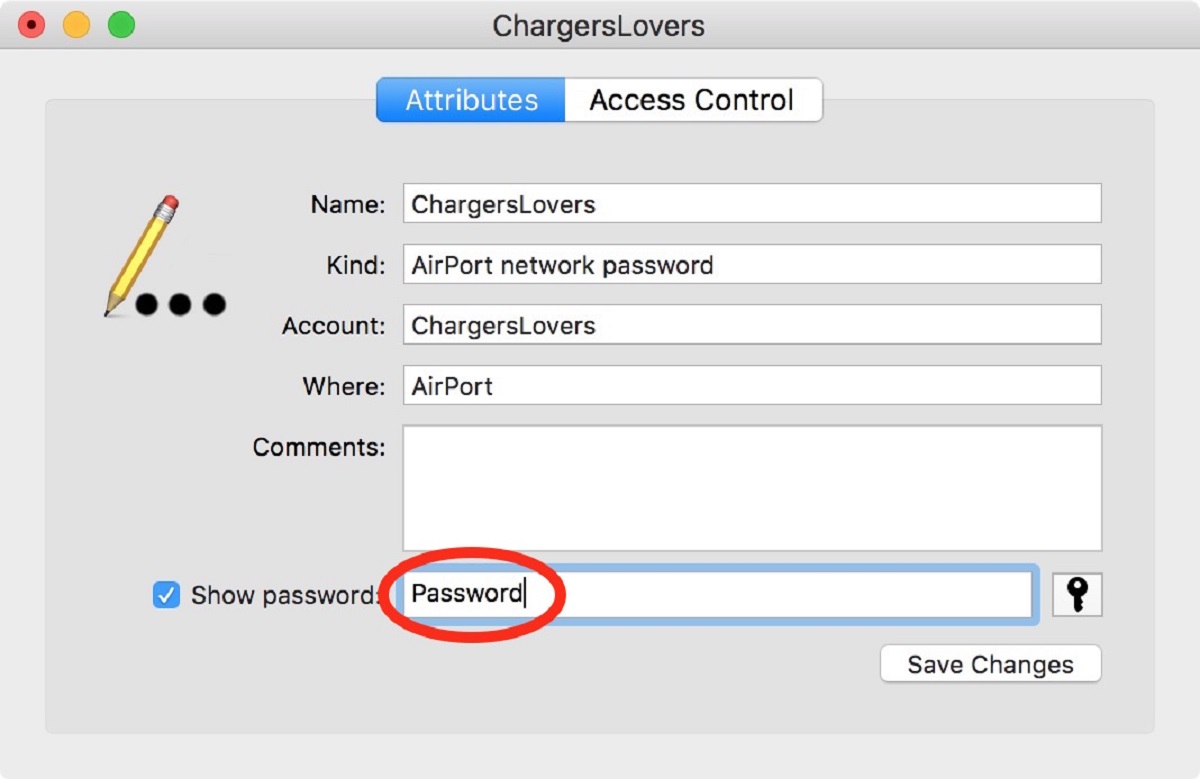
After selecting the appropriate security protocol, you should see an option to change the Wi-Fi password. This may be labeled as “Passphrase,” “Pre-shared Key,” or “Password.” Click on the field or button next to this option to enter your new password.
When creating a new password, it’s important to choose a strong and unique combination of characters. Aim for a password that is at least 8-12 characters long and includes a mix of uppercase and lowercase letters, numbers, and special characters. Avoid using easily guessable information like your name, address, or birthdate. Remember, the more complex your password, the harder it will be for unauthorized users to crack it.
Once you’ve entered your new Wi-Fi password, take a moment to double-check that it’s entered correctly. You don’t want to accidentally lock yourself out of your own network by mistyping the password. When you’re confident that the password is correct, proceed to the next step: changing the Wi-Fi password.
Step 3: Changing the Wi-Fi password
Now that you’ve located the Wi-Fi security settings and have chosen a strong password, it’s time to change the Wi-Fi password on your router. This step will ensure that only authorized users can access your network.
In the Wi-Fi security settings section of your router’s interface, you should see a field or button labeled “Change Password,” “Apply Changes,” or something similar. Click on this field or button to proceed with changing the password.
A pop-up window or a new page will appear, prompting you to enter the new password. Type in the password you’ve chosen, making sure it matches the one you entered in the previous step. Take a moment to confirm that the password is correct, as any mistakes may prevent you from connecting to your Wi-Fi network.
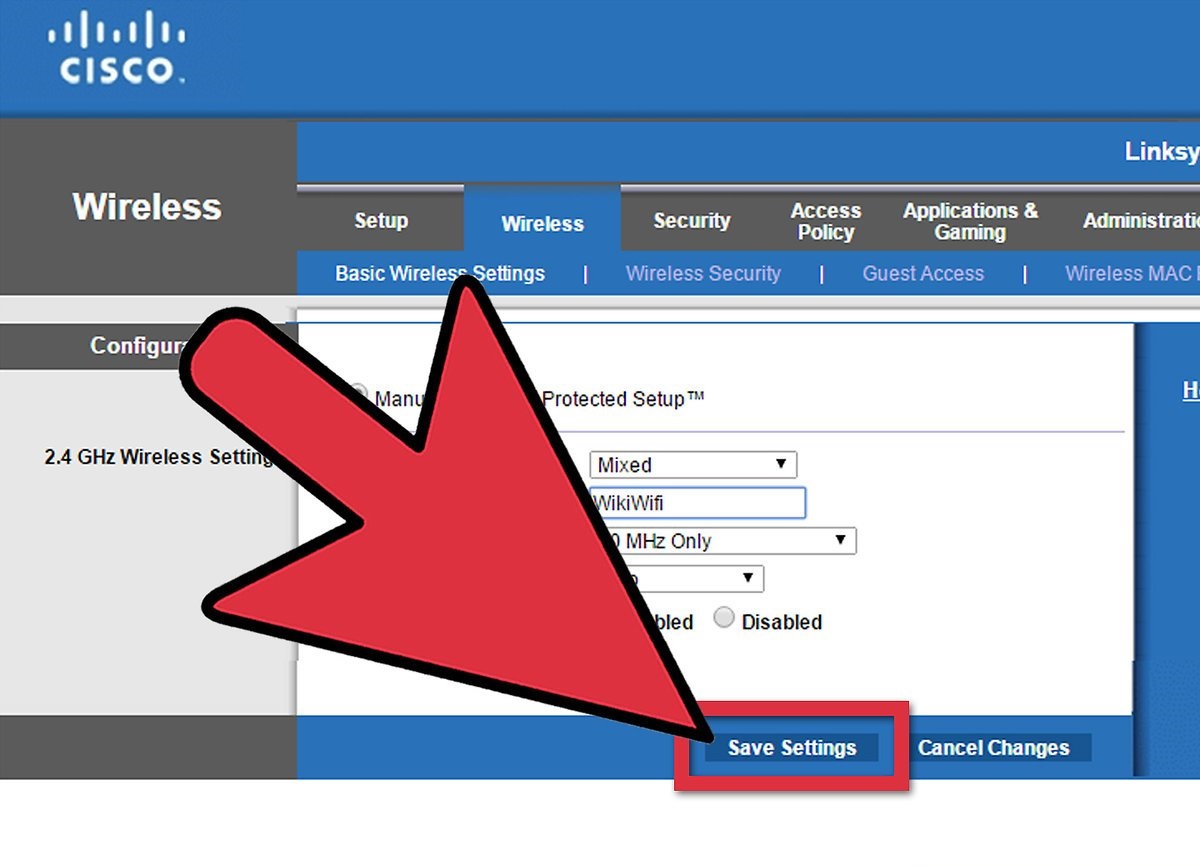
Once you’ve entered your new password, click on the “Save,” “Apply,” or “Submit” button to save the changes. Your router will then update the Wi-Fi password with the new one you’ve provided.
During this process, your Wi-Fi connection may briefly disconnect and reconnect as the changes take effect. Don’t worry, this is normal and should only last for a few seconds.
Congratulations! You’ve successfully changed your Wi-Fi password. This means only those who have the new password can access your network. It’s a simple yet effective step to boost the security of your Wi-Fi.
Keep in mind that when you change the Wi-Fi password, it will affect all devices connected to your network. This means you’ll need to update the Wi-Fi password on all your devices, including smartphones, tablets, laptops, and smart home devices, to ensure they remain connected to your network.
Now that you have updated your Wi-Fi password, it’s time to verify that the new password is working correctly. In the next step, we’ll discuss how you can test the new password.
Step 4: Testing the new password
After changing your Wi-Fi password, it’s essential to test the new password to ensure that it works correctly. Testing the password will ensure that all your devices can connect to your Wi-Fi network without any issues.
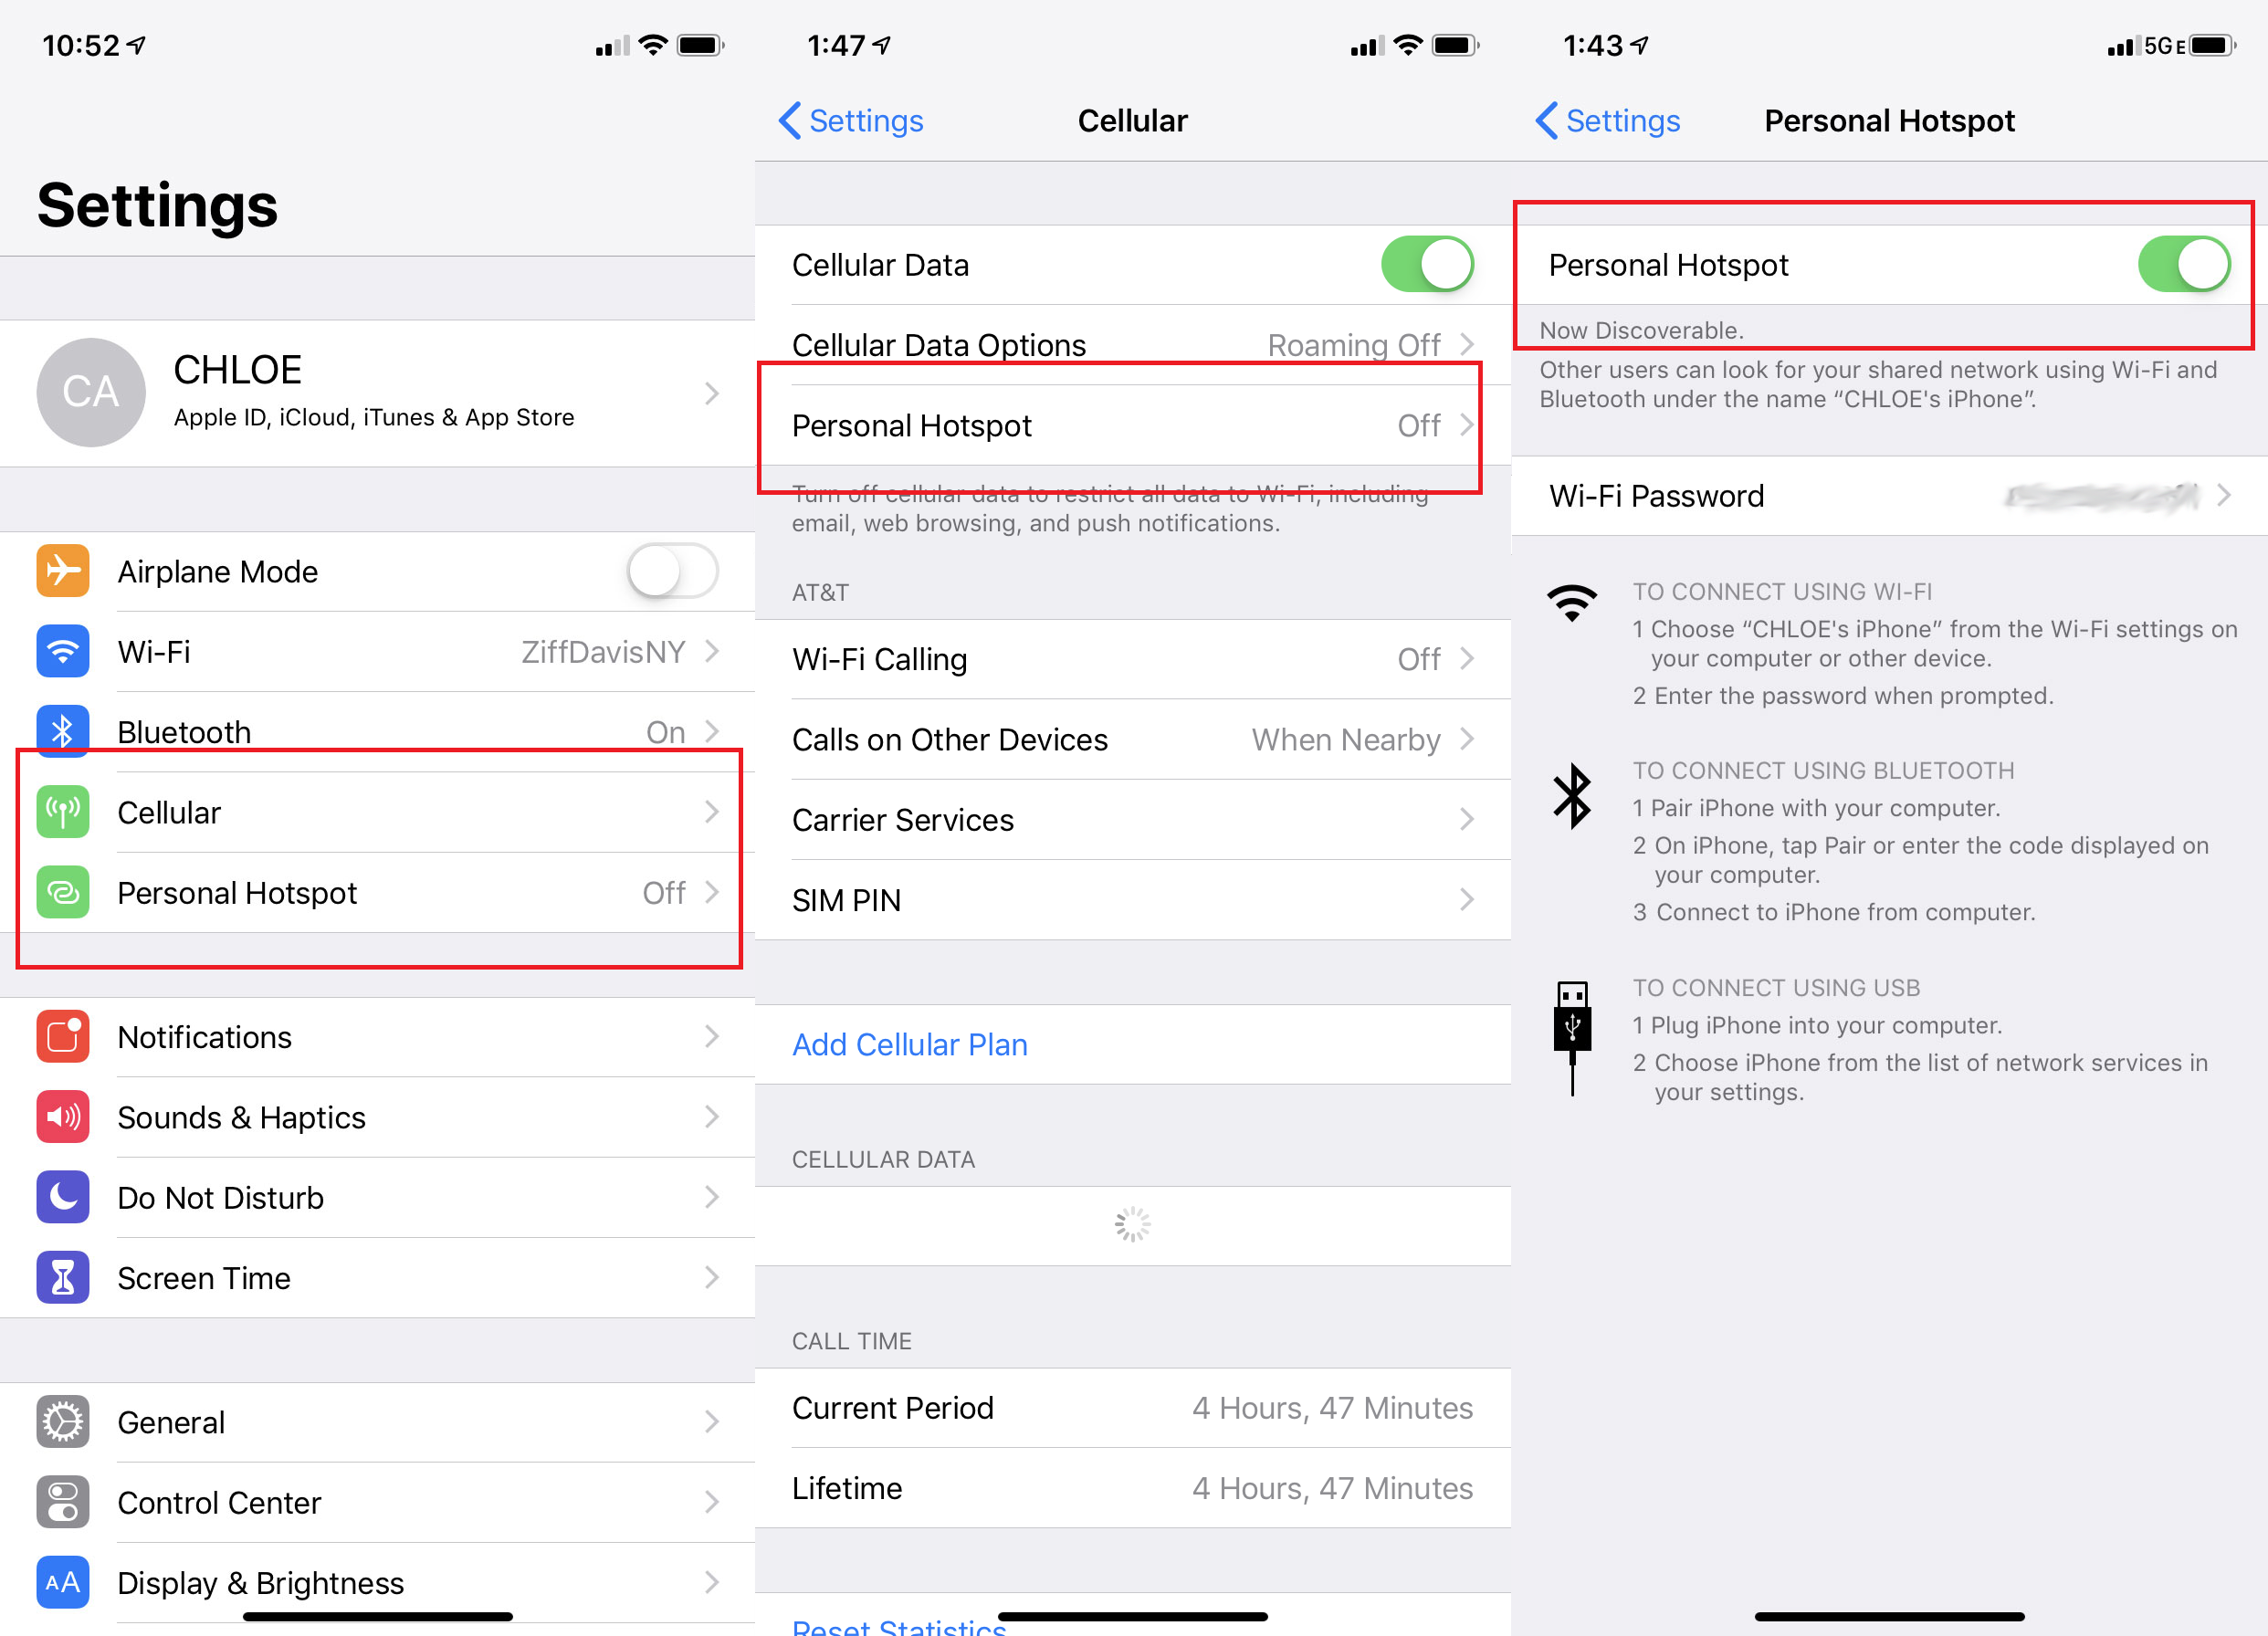
Begin by disconnecting your device from the Wi-Fi network. You can do this by going to the Wi-Fi settings on your device and selecting the option to disconnect or forget the network. Once disconnected, reconnect to the Wi-Fi network by selecting it from the list of available networks.
When prompted, enter the new Wi-Fi password that you recently set. Double-check to ensure that you’ve typed it correctly, paying attention to uppercase and lowercase letters, as well as any special characters.
After entering the password, wait a few moments for your device to connect to the network. If the connection is successful, you should see a notification or indicator that you are connected to the Wi-Fi network.
To confirm that the connection is working correctly, open up a web browser or any internet-dependent application on your device. Try accessing a few different websites to ensure that your internet connection is stable and functioning properly.
If you are able to browse the internet without any issues, that’s a good sign that the new Wi-Fi password is working correctly. However, if you encounter any difficulties or are unable to connect to the network, double-check the password to ensure that it has been entered correctly. If you’re certain the password is correct and you still can’t connect, you may need to restart your router and try the process again.
Testing the new Wi-Fi password is an important step as it allows you to verify that all your devices can connect to your network using the updated password. It also provides peace of mind, knowing that your network is secure and protected from unauthorized access.
With the new password successfully tested and your devices connected to the Wi-Fi network, you can now enjoy a safe and secure internet experience. Remember to periodically change your Wi-Fi password to maintain optimal network security.
Conclusion
Congratulations on successfully changing your Wi-Fi password! By following the steps outlined in this guide, you have taken an important step towards securing your Wi-Fi network and protecting your personal information.
Regularly changing your Wi-Fi password is crucial in today’s digital landscape, where cyber threats are becoming increasingly prevalent. With a strong, unique password in place, you can safeguard your network and ensure that only authorized users can access it.
Remember to choose a password that is a combination of uppercase and lowercase letters, numbers, and special characters. Avoid using easily guessable information and make sure that your password is 8-12 characters long. By adhering to these guidelines, you can create a password that is difficult for others to crack.
Additionally, it’s important to update the password on all your devices that connect to the Wi-Fi network. This will ensure a seamless and secure browsing experience across all your devices, including smartphones, tablets, laptops, and smart home devices.
If you ever need to change your Wi-Fi password again in the future, remember the steps outlined in this guide: accessing your router’s settings, locating the Wi-Fi security settings, changing the password, and testing the new password.
By periodically changing your Wi-Fi password and staying vigilant about network security, you can enjoy a safer online experience, protecting both your personal information and the integrity of your network.
Thank you for taking the time to read this guide. We hope it has been helpful in empowering you to take control of your Wi-Fi network’s security. Happy browsing!