Introduction
Welcome to the world of graphics cards! Whether you want to upgrade your existing card, troubleshoot performance issues, or simply want to know what kind of hardware is driving your graphics, it’s essential to know the type of graphics card you have. Fortunately, there are a few easy methods to find out this information.
In this article, we will guide you through the process of checking what kind of graphics card you have on different operating systems. We’ll cover Windows, macOS, and Linux, so no matter what platform you’re using, you’ll find the information you need. We’ll also explore various tools and utilities that you can use to identify the graphics card installed on your system.
Understanding your graphics card can be beneficial in several ways. First and foremost, it allows you to determine its capabilities, such as the amount of video memory, clock speed, and supported APIs, which is invaluable for gamers and professionals working with graphic-intensive applications. Additionally, knowing your graphics card details can help you troubleshoot compatibility issues, find the correct drivers for updates, and ensure optimal performance for your specific hardware configuration.
So, whether you’re a tech enthusiast, a gaming aficionado, or just someone curious about the inner workings of your computer, this guide will equip you with the knowledge and tools to uncover the mysteries of your graphics card. Let’s dive in and discover how to find out what kind of graphics card you have!
Checking the Graphics Card on Windows
Windows provides several methods to determine the type of graphics card installed on your system. Let’s explore a few of them:
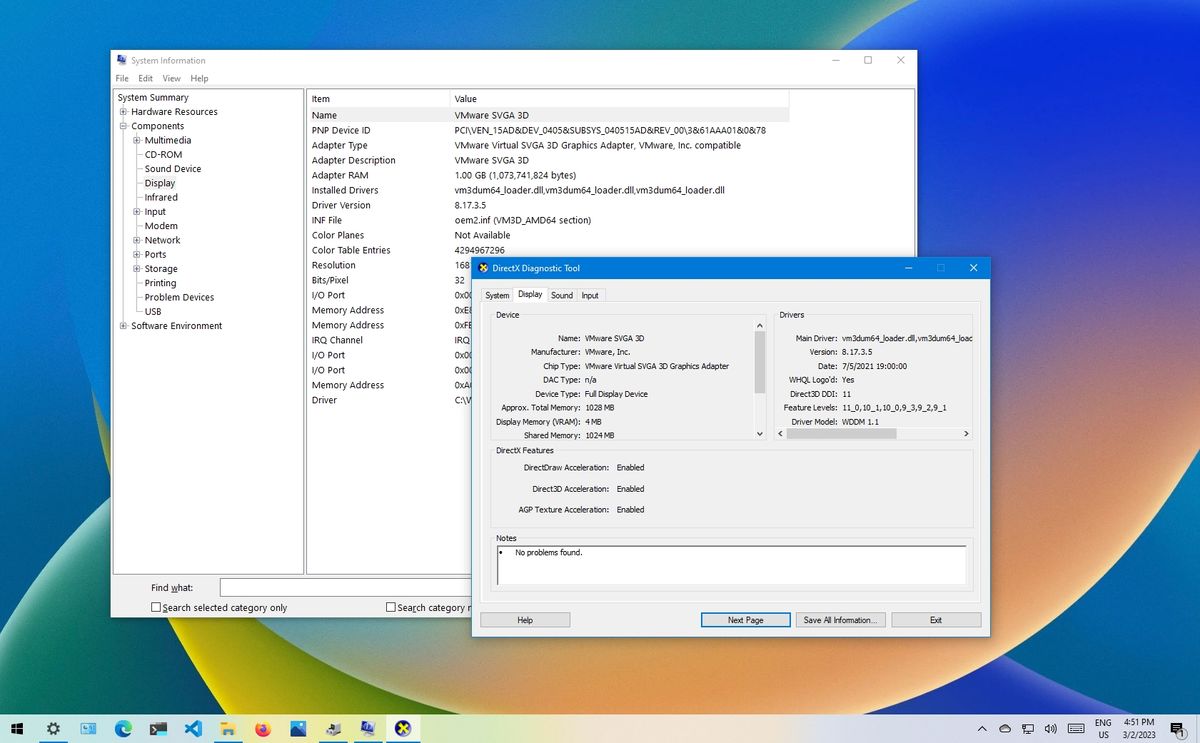
- Using System Information Tools: Windows offers built-in system information tools that provide comprehensive hardware details, including the graphics card. To access this information, press the Windows key + R, type “msinfo32” in the Run dialog box, and press Enter. In the System Information window, expand the “Components” section and select “Display.” Here, you’ll find detailed information about your graphics card, including the manufacturer, model, driver version, and more.
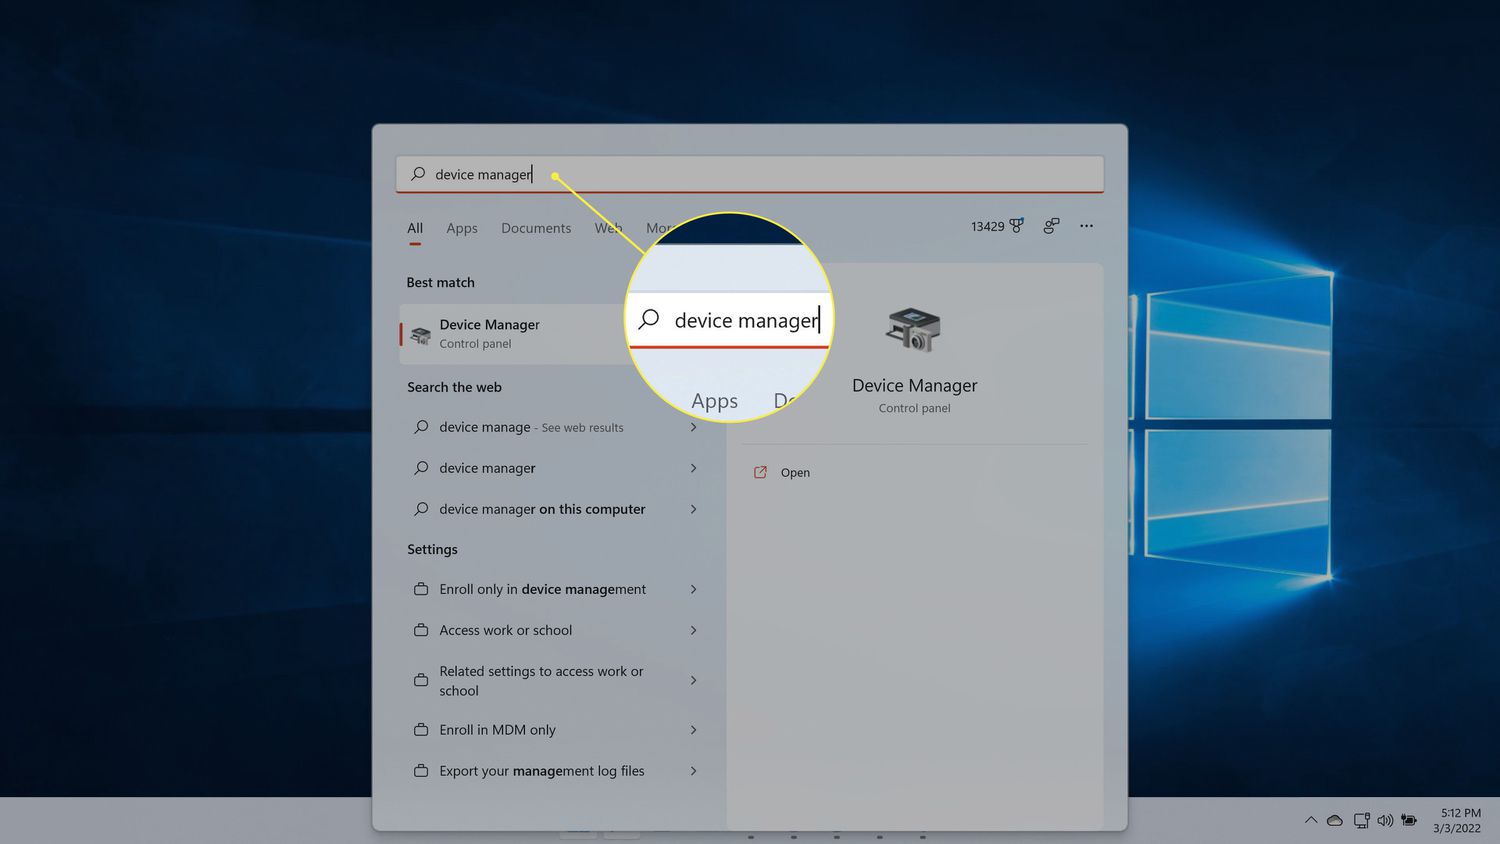
- Checking the Graphics Card Through Device Manager: Another way to identify your graphics card is through the Device Manager. Right-click on the Start menu and select “Device Manager.” In the Device Manager window, expand the “Display adapters” category, and you’ll see the name of your graphics card. Right-click on it and select “Properties” to view additional details.
- Checking the Graphics Card Through DirectX Diagnostic Tool: Windows includes the DirectX Diagnostic Tool, which provides detailed information about DirectX components, including the graphics card. To access it, press the Windows key + R, type “dxdiag” in the Run dialog box, and press Enter. In the DirectX Diagnostic Tool window, navigate to the “Display” tab, and you’ll find the name, manufacturer, and driver version of your graphics card.
- Checking the Graphics Card Through Command Prompt: If you prefer using the command line, you can obtain graphics card information through the Command Prompt. Open the Command Prompt by pressing the Windows key + R, typing “cmd,” and hitting Enter. In the Command Prompt window, type “wmic path win32_VideoController get name” and press Enter. This command will display the name of your graphics card.
By utilizing these methods, you can easily find out what kind of graphics card you have on your Windows system. Remember to note down the pertinent information, such as the manufacturer and model, as it will be helpful when searching for driver updates or troubleshooting any issues that may arise.
Checking the Graphics Card on macOS
macOS provides straightforward ways to identify the graphics card installed on your Mac. Here are a few methods you can use:
- Checking the Graphics Card Through System Profiler: Start by accessing the Apple menu and selecting “About This Mac.” In the window that appears, click on the “System Report” button. This will open the System Information utility. In the left sidebar, under the “Hardware” category, select “Graphics/Displays.” On the right side, you’ll find detailed information about your graphics card, including the name, chipset, VRAM, and more.
- Checking the Graphics Card Through Terminal: If you prefer using the command line, you can use the Terminal to retrieve graphics card information. Open the Terminal from the “Utilities” folder within the “Applications” folder or by using Spotlight Search. Once in the Terminal, type “system_profiler SPDisplaysDataType” and hit Enter. This will display detailed information on your graphics card, including the name, vendor, device ID, and more.
These methods will provide you with the necessary information to identify the graphics card on your macOS system. Make a note of the specific details for future reference, such as the manufacturer, model, and VRAM, as they will be helpful when updating drivers or troubleshooting any graphics-related issues that may arise.
Checking the Graphics Card on Linux
If you’re using a Linux distribution, there are various methods you can use to check the graphics card installed on your system. Here are a couple of common approaches:
- Using Terminal Commands: Linux distributions often come with command-line tools that provide hardware information, including the graphics card. Open the terminal and use the following commands to retrieve graphics card details:
- To get a summary of your graphics card, use the command:
lspci -v | grep -A 12 VGA. This displays information such as the manufacturer, model, driver version, and memory. - To obtain more detailed information, use the command:
lshw -C display. This will provide an extensive list of information about your graphics card, including firmware, capabilities, and more.
- To get a summary of your graphics card, use the command:
- Using GUI Utilities: Linux distributions also offer graphical utilities that simplify the process of checking your graphics card information. One commonly used utility is “HardInfo” (known as “System Profiler and Benchmark” on some distributions). You can install it from your distribution’s package manager and launch it to find detailed information about your graphics card under the “Devices” or “Graphics” section of the utility.
These methods should help you identify the graphics card installed on your Linux system. Note down the relevant details, such as the manufacturer, model, and driver version, for future reference. Knowing this information will assist you in troubleshooting graphics-related issues, installing appropriate drivers, or optimizing your system’s performance for specific applications or games.
Using System Information Tools to Find the Graphics Card
System information tools are a convenient way to gather detailed information about your system hardware, including your graphics card. Let’s explore how to use these tools on different operating systems:
- Windows: Windows provides a built-in system information tool that can easily reveal the details of your graphics card. To access it, press the Windows key + R, type “msinfo32” in the Run dialog box, and press Enter. In the System Information window, expand the “Components” section and select “Display.” Here, you’ll find detailed information about your graphics card, including the manufacturer, model, driver version, and more.
- macOS: macOS has a system information tool called System Profiler. To access it, go to the Apple menu and select “About This Mac,” then click the “System Report” button. In the System Information utility, select “Graphics/Displays” from the sidebar. On the right side, you’ll find detailed information about your graphics card, such as the name, chipset, VRAM, and more.
- Linux: Linux distributions have their own system information tools that can provide detailed information about your graphics card. One commonly used tool is “HardInfo” (known as “System Profiler and Benchmark” on some distributions). You can install it from your distribution’s package manager and launch it to find detailed information about your graphics card under the “Devices” or “Graphics” section. Alternatively, you can use command-line tools like “lshw” or “lspci” to retrieve graphics card details.
These system information tools provide a user-friendly and comprehensive interface to gather detailed information about your graphics card. By utilizing these tools, you can easily identify the manufacturer, model, driver version, and other relevant information about your graphics card, which is crucial when it comes to driver updates, troubleshooting, and optimizing your system’s performance.
Checking the Graphics Card Through Device Manager
On Windows, another method to identify your graphics card is through the Device Manager. Here’s how to do it:
- Right-click on the Start menu and select “Device Manager.” Alternatively, you can press the Windows key + X and choose “Device Manager” from the menu.
- In the Device Manager window, expand the “Display adapters” category by clicking on the arrow next to it.
- You will see the name of your graphics card listed under the “Display adapters” category. Right-click on it and select “Properties” to view additional details.
- In the properties window, you can find information such as the manufacturer, model, driver version, and other relevant details about your graphics card.
By using the Device Manager, you can easily identify the graphics card installed on your Windows system. It provides a quick and convenient way to access detailed information about your graphics hardware. Note down the relevant details for future reference, such as the manufacturer, model, and driver version, as they will be valuable when searching for driver updates or troubleshooting graphics-related issues.
Checking the Graphics Card Through DirectX Diagnostic Tool
Windows provides a powerful built-in tool called the DirectX Diagnostic Tool, which can help you retrieve detailed information about your graphics card. Follow these steps to access the DirectX Diagnostic Tool:
- Press the Windows key + R to open the Run dialog box.
- Type “dxdiag” in the Run dialog box and press Enter. This will launch the DirectX Diagnostic Tool.
- In the DirectX Diagnostic Tool window that opens, navigate to the “Display” tab.
- Here, you will find information about your graphics card, including the name, manufacturer, and driver version.
- You can also see details such as the current display mode, the amount of dedicated video memory (VRAM) available, and other pertinent information.
The DirectX Diagnostic Tool is a useful utility for gamers and those working with graphic-intensive applications. It not only provides information about your graphics card but also allows you to troubleshoot any DirectX-related issues that may be impacting your system’s performance in games or other graphical applications.
Make sure to note down the details about your graphics card, including the manufacturer, model, and driver version. This information will come in handy when searching for driver updates or support for specific applications.
Checking the Graphics Card Through Command Prompt
If you prefer using the command line, you can also check your graphics card information through the Command Prompt on Windows. Here’s how to do it:
- Press the Windows key + R to open the Run dialog box.
- Type “cmd” in the Run dialog box and press Enter. This will open the Command Prompt.
- In the Command Prompt window, type the following command and press Enter:
wmic path win32_VideoController get name - This command will display the name of your graphics card.
- Note that there may be multiple entries if you have more than one graphics card or integrated graphics. Each entry will display the name of a separate graphics card.
Using the Command Prompt is an efficient way to quickly retrieve your graphics card information without relying on graphical user interfaces. The command-line approach can be especially useful for advanced users or system administrators who prefer to work with the command line for system management tasks.
Make sure to take note of the graphics card name provided in the Command Prompt. This information will be valuable when searching for driver updates or troubleshooting any graphics-related issues that you may encounter.
Checking the Graphics Card Through System Profiler
On macOS, you can use the System Profiler to easily check the details of your graphics card. Here’s how:
- Click on the Apple menu in the top-left corner of your screen.
- Select “About This Mac” from the menu.
- In the window that appears, click on the “System Report” button. This will open the System Information utility.
- In the left sidebar of the System Information window, under the “Hardware” category, select “Graphics/Displays.”
- On the right side, you’ll find detailed information about your graphics card, including the name, chipset, VRAM, and more.
The System Profiler provides a comprehensive overview of your Mac’s hardware, including the graphics card. This tool allows you to quickly access information about your graphics card without needing to install any additional software or utilities.
Make sure to take note of the relevant details about your graphics card, such as the manufacturer, model, and VRAM. Having this information on hand will be useful when searching for driver updates or troubleshooting any graphics-related issues that may arise.
Conclusion
Identifying the type of graphics card installed on your system is essential for various reasons, including upgrading, troubleshooting, and optimizing performance. Whether you’re using Windows, macOS, or Linux, there are multiple methods available to check your graphics card details.
On Windows, you can utilize system information tools like the System Information utility, Device Manager, or the DirectX Diagnostic Tool. These tools provide comprehensive information about your graphics card, including the manufacturer, model, driver version, and more.
macOS users can access the System Profiler utility to find detailed information about their graphics cards. The utility provides information such as the name, chipset, VRAM, and other relevant details.
Linux users have the option to use terminal commands like “lshw” and “lspci” or graphical utilities like “HardInfo” to retrieve graphics card information. These tools provide vital details about the graphics card, allowing for driver updates and troubleshooting.
Regardless of the operating system, knowing your graphics card details can help in troubleshooting compatibility issues, finding suitable drivers, and ensuring optimal performance for graphic-intensive applications and games.
So, the next time you need to find what kind of graphics card you have, refer to this guide and use the appropriate method for your operating system. With this knowledge at your disposal, you can make informed decisions about upgrading, troubleshooting, and maximizing the capabilities of your graphics card.