Introduction
As the world becomes increasingly interconnected, ensuring the security and privacy of our online activities is of paramount importance. One effective way to achieve this is by using a Virtual Private Network (VPN). A VPN creates a secure connection between your device and the internet, encrypting your data and shielding your online identity from prying eyes.
In this article, we will explore the process of setting up your own VPN server. By doing so, you can have complete control over your data, while also benefiting from the added security and flexibility that a self-hosted VPN server offers.
A VPN server allows you to establish a secure tunnel through which your internet traffic is routed. This ensures that your data remains encrypted and private, even when using public Wi-Fi networks or accessing the internet from remote locations. Additionally, a self-hosted VPN server allows you to bypass geographical restrictions, giving you unrestricted access to websites and online services.
Setting up your own VPN server can seem intimidating, but with the right knowledge and guidance, it can be a straightforward process. In this article, we will provide step-by-step instructions on choosing the right server hardware, installing the necessary operating system, configuring network interfaces, and setting up the VPN software. We will also discuss important aspects such as authentication and securing your VPN server.
Whether you are a privacy-conscious individual or a business looking to secure your network, creating your own VPN server is an excellent solution. By taking control of your online privacy and security, you can browse the internet with peace of mind, knowing that your data is protected from prying eyes.
So, let’s dive in and explore the world of VPN servers, and learn how to set up your own secure and private connection to the internet.
What is a VPN?
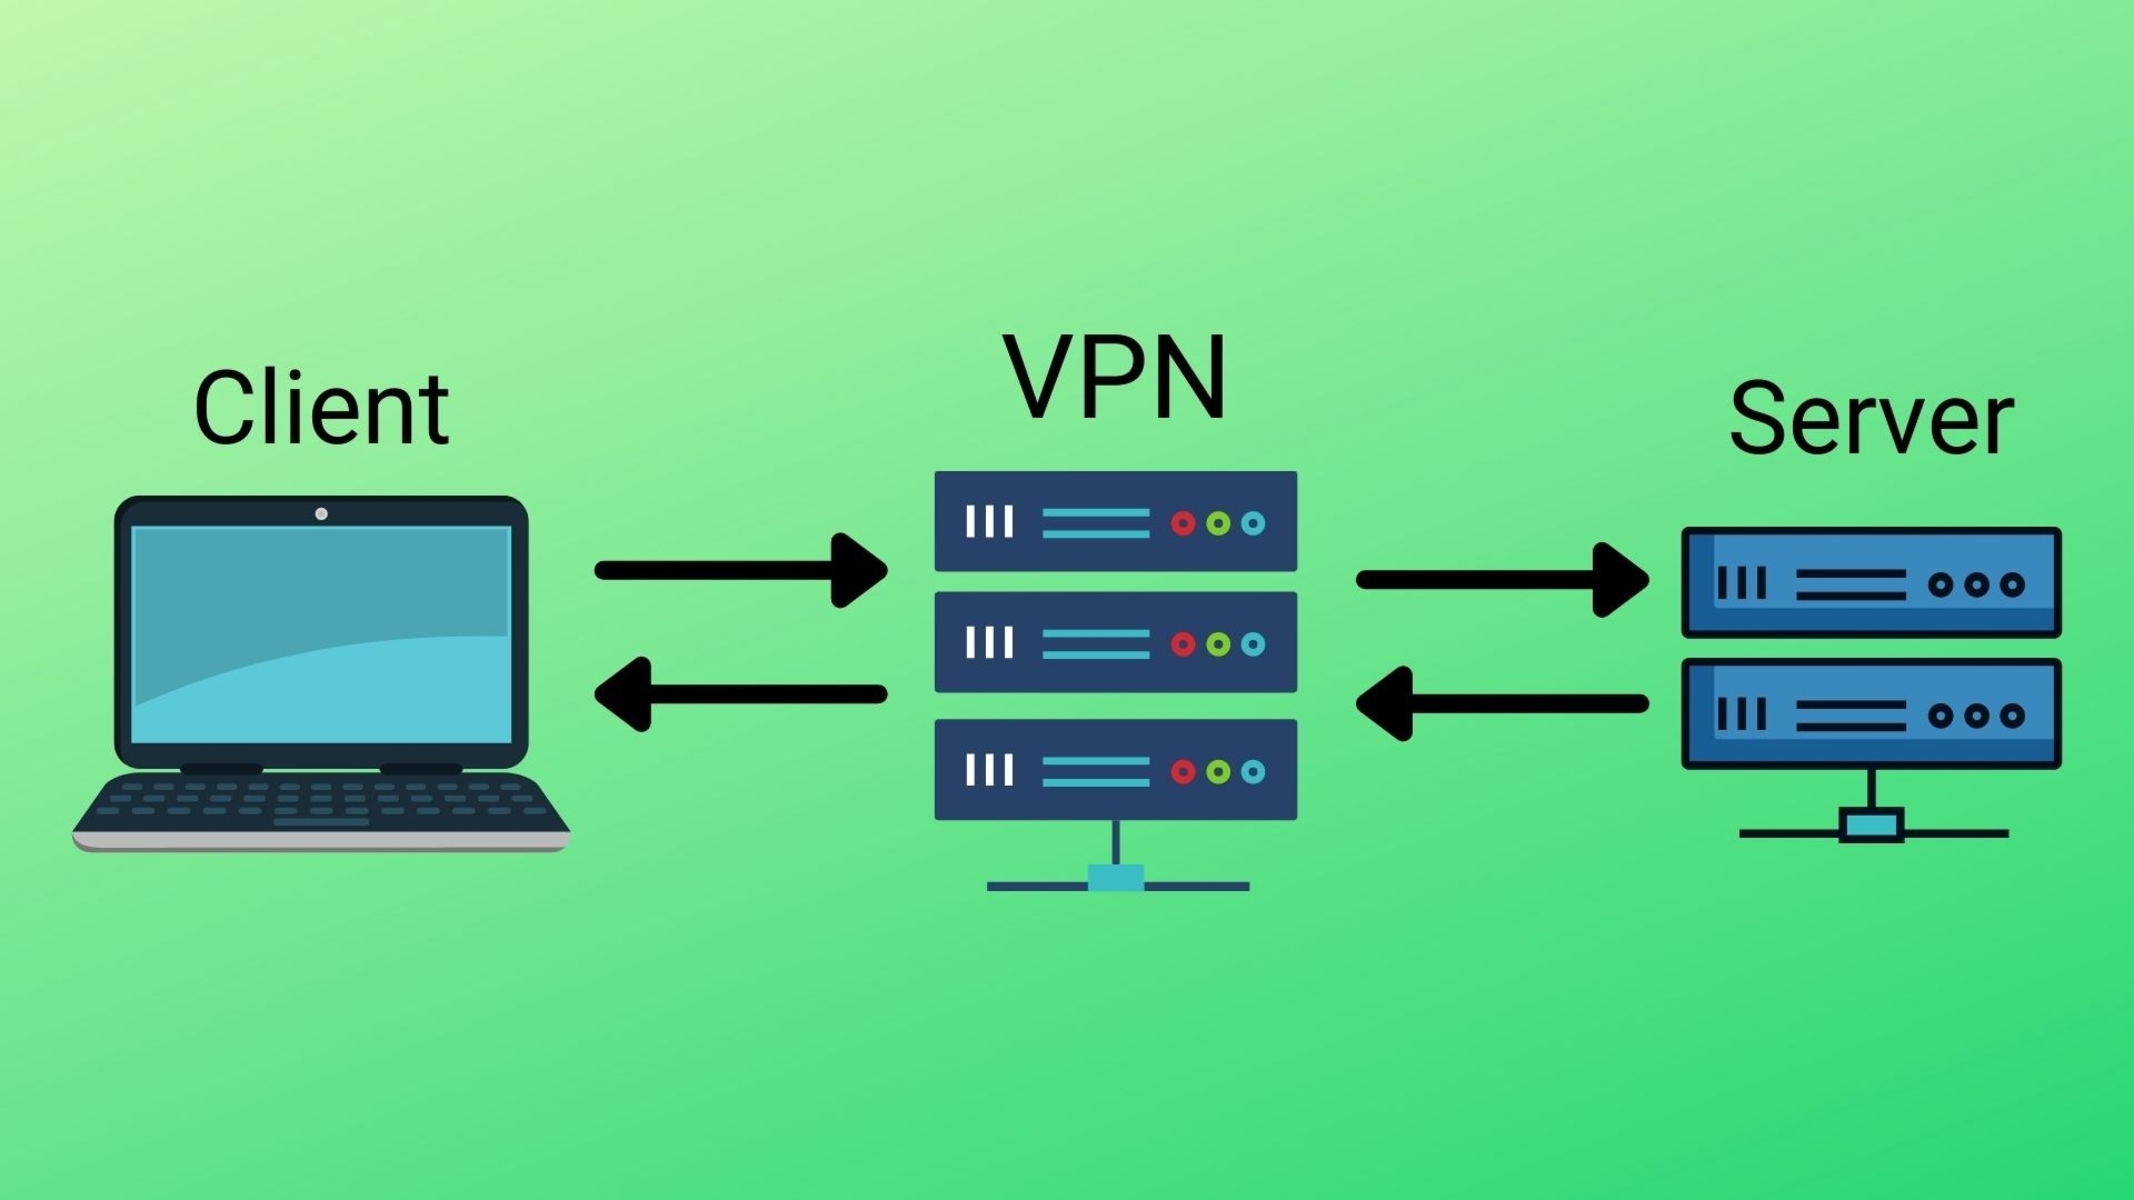
A Virtual Private Network (VPN) is a technology that allows you to create a secure and encrypted connection over a public network, such as the internet. It acts as a tunnel between your device and the internet, ensuring that your data remains private and protected.
When you connect to the internet through a VPN, all your internet traffic passes through an encrypted tunnel created by the VPN server. This means that your online activities, including browsing websites, accessing online services, and sending/receiving data, are all shielded from potential eavesdroppers.
One of the primary features of a VPN is its ability to hide your IP address. An IP address is a unique numerical identifier assigned to your device when it connects to the internet. By using a VPN, you can mask your IP address, making it appear as if you are browsing from a different location. This allows you to bypass restrictions and access geo-blocked content that may otherwise be unavailable in your region.
Furthermore, a VPN provides an additional layer of security by encrypting your data. Encryption transforms your data into a coded form that can only be deciphered using an encryption key. This ensures that even if your data is intercepted, it remains unreadable and protected.
VPN technology is widely used by individuals and organizations for various reasons. For individuals, a VPN provides a means to browse the internet privately and securely, protecting sensitive information such as passwords, financial transactions, and personal communications from cybercriminals and surveillance.
In the business world, VPNs are essential tools as they allow employees to securely access company networks and resources remotely. This is especially important for organizations with remote workers or those with offices in different locations.
Overall, a VPN is an invaluable tool for anyone looking to enhance their online security, privacy, and freedom. With a VPN, you can browse the internet with confidence, knowing that your data is protected and your online activities remain private.
Why do you need a VPN server?
In today’s digital landscape, the need for a VPN server has become increasingly important. Here are several key reasons why you may need a VPN server:
- Enhanced Security: One of the primary reasons to use a VPN server is to enhance your online security. When connected to a VPN, your data is encrypted, making it extremely difficult for hackers and cybercriminals to intercept and decipher your sensitive information. This is particularly crucial when using public Wi-Fi networks which are notorious for their vulnerabilities.
- Privacy Protection: By using a VPN server, you can maintain your online privacy and anonymity. Your internet service provider (ISP), as well as other third parties, will not be able to monitor or track your online activities, ensuring that your personal information remains confidential.
- Bypassing Geographical Restrictions: Many websites and online services impose geo-blocks, limiting access to certain content based on your location. With a VPN server, you can bypass these restrictions by masking your IP address and appearing to browse from a different location. This allows you to access region-locked content, streaming services, and websites that may otherwise be unavailable in your country.
- Secure Remote Access: If you work remotely or require access to your company’s network while traveling, a VPN server is essential. It allows you to securely connect to your work network from anywhere in the world, ensuring that your data and communications are protected from unauthorized access.
- Torrenting and P2P Sharing: If you engage in torrenting or peer-to-peer (P2P) sharing, a VPN server can protect your privacy and prevent your internet service provider from throttling your connection or monitoring your activities. It provides a secure and private environment for downloading and sharing files.
Whether you want to safeguard your personal information, access restricted content, or securely connect to your work network, a VPN server offers a multitude of benefits. It provides an extra layer of security and privacy, ensuring that your online activities remain protected and anonymous.
It’s important to choose a reliable VPN service provider or set up your own self-hosted VPN server to ensure that you have full control over your data and the highest level of security. By investing in a VPN server, you can enjoy a safer and more unrestricted online experience.
Choosing the right server hardware
When setting up your own VPN server, one of the first considerations is selecting the right server hardware. The hardware you choose will play a crucial role in the performance, stability, and scalability of your VPN server. Here are some factors to consider:
- Processing Power: The processing power of your server hardware is essential in handling the encryption and decryption processes required by a VPN server. Look for a server with a powerful CPU, preferably a multi-core processor, to ensure smooth operation even during periods of high user traffic.
- Memory (RAM): Adequate memory is necessary to handle the simultaneous connections and data encryption/decryption operations. Aim for a server with a sufficient amount of RAM to accommodate the expected number of users that will be accessing your VPN server.
- Storage: The storage capacity of your server will depend on your specific requirements. If you plan to store large amounts of data or log files, consider a server with ample storage space, either with traditional hard disk drives (HDD) or faster solid-state drives (SSD).
- Network Interface: Ensure that your server hardware has multiple network interfaces or ports, such as Ethernet ports, to handle incoming and outgoing VPN connections. Having multiple interfaces allows for better network segregation and improved performance.
- Redundancy and Scalability: Consider the future growth and scalability of your VPN server. Look for server hardware that supports expansion through additional hardware components or the ability to cluster multiple servers together to handle increased demand.
- Operating System Compatibility: Check the compatibility of your chosen server hardware with the operating system you plan to use for your VPN server. Popular choices include Linux distributions such as Ubuntu, Debian, or CentOS.
Additionally, keep in mind factors such as power consumption, physical size, and noise levels if you plan to host the server on-premises. Alternatively, you may opt for a cloud-based hosting solution, where the hardware requirements are handled by the cloud service provider.
Ultimately, the right server hardware for your VPN server will depend on factors such as the expected number of users, the volume of traffic, and future growth projections. It’s essential to strike a balance between performance, reliability, and cost-effectiveness when choosing your server hardware to ensure a smooth and secure VPN experience for your users.
Installing the operating system
Once you have selected the appropriate server hardware for your VPN server, the next step is to install the operating system (OS). The OS serves as the foundation for your VPN server, providing the necessary framework and tools for its operation. Here’s a step-by-step guide to installing the OS:
- Choose the right OS: Select a Linux-based OS that is well-suited for hosting a VPN server, such as Ubuntu, Debian, or CentOS. These options offer stability, security, and a wide range of community support.
- Download the OS image: Visit the official website of the chosen Linux distribution and download the ISO image file that corresponds to your server hardware architecture.
- Create bootable media: Burn the ISO image file to a USB drive or DVD-ROM using a disk image burner software application. This will allow you to boot your server from the installation media.
- Boot from the installation media: Insert the bootable media into your server, then restart the server and enter the BIOS/UEFI settings. Set the boot order to prioritize the installation media, ensuring that your server boots from the USB or DVD-ROM.
- Start the installation process: Follow the on-screen prompts to begin the installation. You will be prompted to choose language settings, keyboard layout, and other basic configurations.
- Partition the disk: Decide on the disk partitioning scheme for your VPN server. You can choose to use the entire disk or create separate partitions for the OS and data storage.
- Configure network settings: Provide the necessary network configuration details, such as IP address, gateway, and DNS settings. These settings will ensure that your VPN server can communicate with the network.
- Create user account: During the installation process, you will be asked to create a user account with administrative privileges. This account will be used to manage and configure the VPN server.
- Complete the installation: Once all the necessary settings have been configured, proceed with the installation process and wait for the OS to be installed on your server. The server will then reboot, and you will be ready to proceed with setting up the VPN software.
It’s important to refer to the documentation specific to your chosen operating system for detailed installation instructions. Additionally, make sure to keep your OS up to date with the latest security patches to ensure the integrity and security of your VPN server.
By successfully installing the operating system on your server, you have laid the groundwork for building your VPN server. The next steps involve setting up network interfaces, installing the necessary VPN software, and configuring the server to establish a secure connection.
Setting up network interfaces
After installing the operating system for your VPN server, the next step is to configure the network interfaces. This involves setting up the network connections that will allow your server to communicate with the internet and connected devices. Here’s a step-by-step guide to setting up network interfaces:
- Identify the network interfaces: Determine the network interfaces available on your server hardware. This could include Ethernet ports, wireless adapters, or virtual network interfaces.
- Assign IP addresses: Assign IP addresses to each network interface. You can do this manually or via DHCP (Dynamic Host Configuration Protocol) if your network supports automatic IP address assignment.
- Configure networking settings: Update the networking settings in the operating system to match your network configuration. This includes setting the default gateway, DNS servers, and other network-specific parameters.
- Enable packet forwarding: If you plan to route internet traffic through your VPN server, ensure that packet forwarding is enabled. This allows your server to receive incoming packets and forward them to their destination.
- Set up firewall rules: Configure the firewall settings on your VPN server to allow necessary network traffic while blocking unauthorized access. This helps to protect your server from potential security threats.
- Test network connectivity: Verify that your network interfaces are functioning correctly by pinging external IP addresses or accessing websites. This will ensure that your server has proper internet connectivity.
- Consider network bonding: For advanced setups, you may want to explore network bonding techniques such as Link Aggregation (LACP) or NIC teaming to combine multiple network interfaces, increasing bandwidth and improving network redundancy.
It’s important to refer to the documentation and resources specific to your operating system to understand the steps required for configuring network interfaces. Detailed instructions can vary depending on the Linux distribution you have chosen for your VPN server.
By setting up and configuring the network interfaces, you are establishing the foundation for your VPN server to connect to the internet and facilitate secure communication with your devices and client connections. The next steps involve installing the VPN software and configuring the server to enable VPN connectivity.
Installing VPN software
Once you have set up the network interfaces on your VPN server, the next step is to install the necessary VPN software. The VPN software is responsible for establishing the secure tunnel between your server and client devices, enabling encrypted communication. Here’s a step-by-step guide on installing VPN software:
- Research and choose VPN software: There are various VPN software options available, both open-source and commercial. Research and select a VPN software that aligns with your requirements in terms of security features, ease of use, and compatibility with your chosen operating system.
- Download the VPN software: Visit the official website of your chosen VPN software and download the appropriate package for your operating system.
- Validate the software package: Ensure that the downloaded software package is from a trusted source and check for any available checksums or digital signatures to verify the integrity of the package.
- Install the VPN software: Depending on the VPN software you have chosen, installation methods may vary. Typically, it involves running an installer or executing specific commands in the terminal. Follow the instructions provided by the VPN software documentation to complete the installation process.
- Configure the VPN software: Once the installation is complete, you need to configure the VPN software to meet your specific requirements. This may include setting up encryption protocols, configuring network options, and defining authentication methods.
- Customize logging and auditing: Consider configuring logging and auditing settings to capture relevant information for troubleshooting and security purposes. Be mindful of any data protection regulations applicable to your environment.
- Start and test the VPN service: Start the VPN service on your server and test its functionality. Connect client devices to the server and verify that a secure VPN connection is established. Test network connectivity and ensure that all traffic is effectively routed through the VPN.
- Monitor the VPN service: Implement a monitoring system to keep track of your VPN server’s performance. Use tools such as logging, real-time monitoring, and alerting to identify and address any potential issues.
It’s crucial to refer to the official documentation and resources provided by the VPN software vendor to ensure accurate installation and configuration. The specific steps may differ depending on the software you choose and the operating system you are using.
By successfully installing the VPN software on your server, you are now ready to configure the server to establish VPN connections, set up authentication methods, and ensure the security and privacy of your VPN users.
Configuring the VPN server
After installing the VPN software on your server, the next crucial step is to configure it to establish VPN connections and customize the server settings according to your requirements. Here’s a step-by-step guide on configuring your VPN server:
- Choose the VPN protocol: Determine which VPN protocol you want to use. Options include OpenVPN, IPSec, L2TP/IPSec, or PPTP. Research and select the protocol that best suits your needs in terms of security, compatibility, and performance.
- Create VPN profiles: Configure VPN profiles for different types of client connections. Define parameters such as encryption settings, authentication methods, and DNS settings for each profile.
- Allocate IP addresses: Define the IP address pool that will be used to assign IP addresses to connected VPN clients. Ensure that the IP addresses do not conflict with any existing IP ranges on your network.
- Enable and configure port forwarding: If your VPN server resides behind a router or firewall, you may need to configure port forwarding to allow incoming VPN connections on the required ports. Consult your router or firewall documentation for guidance.
- Set up routing and firewall rules: Configure routing rules on your VPN server to ensure that traffic is correctly routed through the VPN tunnel. Additionally, implement firewall rules to control access to the VPN server and protect against unauthorized connections.
- Implement load balancing and failover: For high availability and scalability, consider implementing load balancing across multiple VPN servers or setting up failover mechanisms. This ensures uninterrupted VPN service even during server failures or high traffic periods.
- Configure DNS settings: Ensure that DNS requests from VPN clients are correctly resolved. You can specify the DNS servers to be used by the VPN clients or configure DNS forwarding to an internal DNS server.
- Set up logging and monitoring: Enable logging on your VPN server to capture relevant events and troubleshoot any potential issues. Implement monitoring tools to keep track of server performance, bandwidth usage, and security events.
- Test VPN connections: Connect client devices to the VPN server and perform thorough testing. Verify that VPN connections are established successfully, data is securely transferred, and network resources are accessible.
It’s important to refer to the documentation provided by the VPN software vendor or community resources to ensure accurate configuration. The specific steps may vary based on the VPN software and operating system you are using.
By properly configuring your VPN server, you can optimize its performance, security, and functionality. The steps outlined above will help you customize the server settings to suit your specific needs and provide a reliable and secure VPN experience for your users.
Setting up authentication
Authentication is a critical aspect of setting up your VPN server as it ensures that only authorized users can access the network resources. By implementing proper authentication methods, you can strengthen the security of your VPN server. Here’s a step-by-step guide on how to set up authentication for your VPN server:
- Select an authentication method: Choose the authentication method that best suits your needs. Common options include username/password authentication, certificate-based authentication, or multi-factor authentication.
- Username/password authentication: This is the most common authentication method. Set up user accounts with unique usernames and strong passwords. Ensure that passwords adhere to strong password guidelines and encourage users to use complex and unique passwords.
- Certificate-based authentication: Certificate-based authentication provides an additional layer of security. Generate a server certificate and distribute client certificates to authorized users. Configure your VPN server to authenticate clients based on the certificates they present.
- Multi-factor authentication (MFA): Consider implementing MFA for added security. This involves requiring users to provide an additional form of verification, such as a one-time password (OTP) generated by a mobile app or a hardware token, in addition to their username and password.
- Configure user access permissions: Define user access permissions to control what resources they can access once connected to the VPN server. Assign appropriate access levels based on user roles and responsibilities.
- Enable account lockout policies: Implement account lockout policies to protect against brute-force attacks. Set thresholds for unsuccessful login attempts and configure temporary lockouts for user accounts that exceed these thresholds.
- Regularly review and update user accounts: Periodically review user accounts and disable or remove any accounts that are no longer needed. Update passwords and certificates as required to maintain the security of your VPN server.
- Train users on secure authentication practices: Educate your VPN users on secure authentication practices. Teach them how to choose strong passwords, avoid password reuse, and protect their authentication credentials.
It’s important to refer to the documentation provided by your VPN software and authentication method of choice for detailed instructions on configuring authentication. Secure authentication practices play a crucial role in ensuring the integrity and security of your VPN server.
By setting up authentication correctly, you can control access to your VPN server, authenticate authorized users, and protect your network resources from unauthorized access.
Securing your VPN server
Securing your VPN server is of utmost importance to protect your network and the data transmitted through the VPN. By implementing security measures, you can safeguard your VPN server from potential security threats. Here are essential steps for securing your VPN server:
- Keep your software updated: Regularly update your VPN software, operating system, and other server applications with the latest security patches. These updates often include security fixes that address vulnerabilities.
- Configure a firewall: Set up a firewall on your VPN server to control incoming and outgoing network traffic. Only allow necessary VPN-related ports and protocols while blocking all other unnecessary traffic.
- Enable intrusion detection and prevention: Consider implementing intrusion detection and prevention systems (IDS/IPS) to monitor network traffic and detect any suspicious activity or potential attacks on your VPN server.
- Implement strong encryption: Use robust encryption algorithms for secure communication between the VPN server and client devices. Ensure that your VPN software supports industry-standard encryption protocols, such as AES (Advanced Encryption Standard).
- Disable unnecessary services: Disable any unnecessary services and protocols on your VPN server that are not directly related to VPN functionality. This minimizes the potential attack surface of your server.
- Implement strong access controls: Set up strong access controls to limit who can access your VPN server. Use secure passwords, implement two-factor authentication, and regularly review and update user accounts and privileges.
- Monitor logs and system alerts: Regularly review logs and system alerts to identify any unusual activities or potential security breaches. Implement a centralized logging system to consolidate and analyze log data effectively.
- Regularly back up server configuration and data: Schedule regular backups of your VPN server’s configuration files, certificates, and other critical data. Store backups securely offline or in a separate location to minimize the impact of data loss or server compromise.
- Perform periodic security audits: Conduct regular security audits of your VPN server infrastructure to identify any vulnerabilities or weaknesses. Address any identified issues promptly to maintain the security of your server.
- Limit physical access to the server: If hosting your VPN server on-premises, ensure that physical access to the server is restricted to authorized personnel only. Use secure data center or server room facilities to protect against physical theft or tampering.
It’s essential to stay informed about the latest security practices and follow the recommendations provided by your VPN software vendor and security experts. Implementing these security measures will help protect your VPN server and ensure the privacy and integrity of your network connections.
Remember, securing your VPN server is an ongoing process. Regularly review and update your security measures to adapt to changing threats and ensure the continued security of your VPN infrastructure.
Testing your VPN connection
Once you have set up and secured your VPN server, it is essential to thoroughly test your VPN connection to ensure its functionality and reliability. Testing helps verify that the VPN server is correctly configured and that clients can establish a secure connection. Here’s a step-by-step guide to testing your VPN connection:
- Connect client devices: Connect the client devices you intend to use to access your VPN server. This can include laptops, desktops, smartphones, or tablets.
- Check client configurations: Verify that the VPN client configurations are correctly set up on the client devices. Ensure that the VPN server address, authentication credentials, and other required settings are entered accurately.
- Establish VPN connections: Initiate VPN connections from the client devices using the appropriate VPN client software. Connect to the VPN server using the provided server address, authenticate using the configured credentials, and establish a secure VPN tunnel.
- Verify IP address assignment: Once the VPN connection is established, check that the client devices are assigned IP addresses from the designated IP address pool. This ensures proper network connectivity.
- Test network connectivity: Perform various network connectivity tests to verify that the VPN connection is functioning correctly. Ping remote IP addresses to ensure proper network routing, access network resources to ensure they are accessible, and test internet connectivity to ensure secure and encrypted data transmission.
- Transfer data: Transfer data between client devices and network resources to ensure that files and information can be securely transmitted across the VPN connection. This confirms that the encryption and decryption processes are functioning as expected.
- Measure performance: Evaluate the performance of your VPN connection by conducting speed tests and assessing latency. Compare the performance with and without the VPN connection to ensure that there are no significant drops in speed or performance.
- Test for DNS leaks: Verify that DNS requests are correctly routed through the VPN server. Use online tools or dedicated DNS leak testing websites to check if your DNS queries are leaking outside of the VPN tunnel.
- Test failover and scalability: If you have implemented failover mechanisms or load balancing, simulate server failures or high traffic periods to ensure that the failover and load balancing mechanisms function as intended.
- Perform regular maintenance: Continuously monitor and maintain your VPN server. Regularly validate the VPN connections, update the VPN software, and perform periodic tests to ensure that the VPN server remains in optimal condition.
Testing your VPN connection thoroughly is crucial to identify any issues, ensure the proper functioning of your VPN server, and provide a reliable and secure VPN experience for your users. If any problems are encountered during testing, refer to the VPN software documentation or consult with your IT administrator for troubleshooting and resolution.
Remember to test your VPN connection periodically to adapt to changing network conditions and security requirements. Regular testing helps maintain the performance and security of your VPN infrastructure.
Troubleshooting common issues
While setting up and maintaining a VPN server, you may encounter certain common issues that can hinder the proper functioning of your VPN connection. It’s important to be prepared to troubleshoot and resolve these issues to ensure the smooth operation of your VPN server. Here are some common VPN issues and troubleshooting steps:
- Connection establishment failures: If users are unable to establish a VPN connection, ensure that the VPN server is running and accessible. Check that the server firewall settings allow incoming VPN connections, and verify that the client configuration settings are correct.
- Authentication failures: If users are experiencing authentication failures, verify that the usernames and passwords are entered correctly and check for any case-sensitive issues. Ensure that the authentication method configured on the server matches the client-side authentication settings.
- Low bandwidth or slow speeds: If you experience slow VPN speeds or limited bandwidth, check your internet connection for stability and speed. Optimize your VPN server and client configurations for better performance. Consider using a more powerful server or upgrading your internet connection.
- DNS resolution issues: If DNS resolution is not working correctly through the VPN, check the DNS server settings on both the VPN server and client devices. Ensure that DNS traffic is correctly routed through the VPN tunnel and that there are no DNS leaks.
- Network resource access problems: If users are unable to access network resources through the VPN, verify that the routing and firewall settings on the VPN server allow proper access. Ensure that the VPN clients are assigned the correct IP addresses and that network resource permissions are properly configured.
- Client compatibility and configuration problems: If certain clients are encountering compatibility issues or have problems configuring the VPN connection, ensure that the client software is up to date and compatible with the VPN server. Double-check the client configuration settings to ensure accuracy.
- Logging and error analysis: Enable detailed logging on your VPN server to capture any error messages or warnings. Review the logs to identify any specific error codes or patterns that may indicate the cause of the issue. Use this information to troubleshoot and resolve the problem.
- Firewall and port blocking: If users are unable to connect to the VPN server from certain networks or locations, it’s possible that those networks or locations are blocking the required VPN ports. Check your server firewall and network devices to ensure that the necessary ports are open and accessible.
- Operating system compatibility: Ensure that your VPN server and client devices are running compatible operating systems. Update the operating systems and VPN software to their latest versions to ensure maximum compatibility.
- Seek external assistance: If you are unable to resolve the issue after troubleshooting, seek help from forums, user communities, or professional support services. They can provide specific guidance and solutions for your VPN server issues.
Remember, troubleshooting VPN issues can vary depending on the specific VPN software and configuration. Consult the documentation provided by your VPN software vendor and reach out to support resources for assistance in resolving complex issues.
By effectively troubleshooting and resolving common VPN issues, you can maintain a stable and secure VPN connection, ensuring continuous availability of your VPN server for your users.
Conclusion
Setting up your own VPN server can provide you with a secure and private connection to the internet, offering protection for your data and online activities. By following the steps outlined in this article, you can create a VPN server that meets your specific needs and requirements.
We started by understanding the concept of a VPN and why it is essential in today’s interconnected world. From there, we explored the process of choosing the right server hardware, installing the operating system, and configuring network interfaces. We then covered the installation of VPN software, setting up authentication, and securing the VPN server to protect against potential threats.
Testing the VPN connection and troubleshooting common issues are crucial steps to ensure the proper functioning of your VPN server. Through thorough testing and effective troubleshooting, you can identify and resolve any issues that may arise, providing a reliable and secure VPN experience.
Remember, maintaining the security and performance of your VPN server is an ongoing process. Regularly review and update your security measures, keep your software and operating system up to date, and stay informed about the latest trends and best practices in VPN technology.
By taking control of your online privacy and security through your own VPN server, you can browse the internet with confidence and peace of mind, knowing that your data is protected. Whether for personal use or to secure your business network, setting up a VPN server puts you in control of your online connections and ensures a safer digital experience.
So, now it’s time to get started and embark on the journey of creating your own VPN server. Enjoy the benefits of enhanced security, privacy, and freedom as you securely navigate the digital world.