Introduction
Do you admire the timeless, nostalgic look of film photography? Are you looking to recreate that vintage and artistic feel in your digital photos? Look no further! In this article, we will explore various techniques to make your digital photos look like they were taken on film. From choosing the right camera to applying film presets and mastering editing techniques, we’ll guide you through each step of the process.
While digital photography has revolutionized the way we capture images, many photographers still long for the distinctive qualities of film. Film photos have a certain depth, texture, and color rendition that can be challenging to replicate with digital technology alone. However, with the advancements in software and editing tools, it is now possible to recreate that classic film look in a digital format.
By blending the best of both worlds – the convenience and versatility of digital cameras and the aesthetics of film – you can take your photography to a whole new level. Whether you’re a professional photographer or an amateur enthusiast, learning how to achieve a filmic look can add a unique touch to your images and set them apart from the crowd.
In the following sections, we will delve into the fundamental techniques that will help you create stunning digital photos that resemble film. From understanding the qualities that define the film look to mastering editing techniques, we will provide you with a comprehensive guide to transform your digital images into works of art.
Understanding the Film Look
Before you embark on your journey to make your digital photos look like film, it’s essential to understand what exactly gives film its unique characteristics. Film photography has a distinct charm that is often associated with a vintage, timeless aesthetic. By comprehending the key elements that contribute to the film look, you’ll be better equipped to recreate it in your digital images.
One of the defining characteristics of film is its natural and organic grain structure. Film grain adds texture and depth to an image, giving it a raw and authentic feel. Digital cameras, on the other hand, tend to produce cleaner and smoother images due to their sensor technology. To emulate the film grain, you can apply various grain filters or presets to your digital images during the editing process.
Color rendition is another important factor in achieving the film look. Different film stocks have unique color profiles, producing distinct hues and tones. For example, some films may have warm, earthy tones, while others may lean towards cooler colors. Understanding the color palette associated with different film stocks will help you in selecting and adjusting colors in your digital photos to mimic that filmic aesthetic.
The dynamic range of film is also worth noting. Film has the ability to capture a wide range of tones and details, even in high-contrast scenes. Digital cameras, although capable of capturing a broad range of tones, may sometimes struggle to handle extreme contrasts. To replicate the film look, you can experiment with techniques such as exposure blending or using graduated filters to maintain detail in both highlight and shadow areas.
Lastly, the characteristic image softness or the “filmic” look is another significant element to consider. Film has a natural softness that adds a dreamy and romantic quality to the images. This softness can be the result of various factors, including lens characteristics, film emulsion, and the printing process. In digital photography, you can simulate this softness by applying slight blurring or utilizing dedicated plugins or filters that mimic the film’s optical properties.
By understanding the key components that contribute to the film look, you can further appreciate the art of film photography and ultimately replicate its qualities in your digital images. In the following sections, we will explore various techniques and tools to help you achieve the filmic aesthetic you desire.
Choosing the Right Camera
When it comes to making your digital photos look like film, selecting the right camera is a crucial first step. While any digital camera can be used, certain camera models and settings can help you achieve a more film-like look. Here are some considerations to keep in mind:
Camera with Manual Controls: Opt for a camera that allows you to have full control over the settings, such as aperture, shutter speed, and ISO. Manual control gives you the flexibility to adjust these parameters to emulate the film exposure and achieve the desired look.
Full Frame or Film-Like Sensor: Cameras with a full-frame sensor or a larger APS-C sensor tend to produce images that have a shallower depth of field and better low-light performance, similar to film. These sensors capture more light, resulting in a more filmic quality to your photos.
Customizable Picture Profiles: Some higher-end cameras offer customizable picture profiles that mimic the characteristics of different film stocks. These profiles often include adjustments to color rendition, contrast, and saturation, enabling you to achieve a film-like look straight out of the camera.
Shoot in RAW: Shooting in RAW format preserves more image data, allowing for greater flexibility in post-processing. This is important when trying to achieve the film look, as you can make precise adjustments to colors, tones, and contrast during editing without sacrificing image quality.
Experiment with Film Simulation Modes or Presets: Many digital cameras, especially those from Fujifilm, offer built-in film simulation modes that emulate the characteristics of popular film stocks. These modes apply specific color profiles, grain, and tone curves to mimic the look of film. Alternatively, you can also find film presets or filters that can be applied in post-processing software.
Taking the time to choose a camera that suits your needs and desired film look can significantly impact the results. Whether opting for a camera with manual controls, a larger sensor, or customizable picture profiles, the right camera can serve as a solid foundation for achieving stunning film-like digital images.
Selecting the Proper Settings
Once you have chosen the right camera, the next step in making your digital photos look like film is selecting the proper settings. Adjusting various camera settings can help you achieve the desired filmic look and enhance the overall aesthetics of your images. Here are some important settings to consider:
ISO: In film photography, different film stocks have different ISO ratings, which impacts the sensitivity to light and overall image quality. To mimic the film look, it’s important to understand the behavior of digital sensors in terms of noise and dynamic range. Experiment with different ISO settings to find the balance between capturing enough light and minimizing noise in your images.
Aperture: Controlling the aperture allows you to adjust the depth of field in your photos, which can contribute to a more film-like look. Film cameras often have a shallower depth of field due to the characteristics of the lenses used. By shooting with a wider aperture (low f-stop number), you can achieve a similar shallow depth of field, blurring the background and drawing attention to the main subject.
Shutter Speed: Just like with film photography, the choice of shutter speed can help you capture motion or create intentional blur in your images. Slower shutter speeds can add a sense of movement and a dreamy quality to your photos, while faster shutter speeds can freeze action. Experiment with different shutter speeds to achieve the desired effect in your images.
White Balance: Adjusting the white balance can play a significant role in achieving the desired color tone and temperature in your photos. Film stocks have distinctive color characteristics, so understanding the color palette associated with different films can help you choose the right white balance setting or make adjustments during post-processing.
Metering Mode: Metering modes determine how the camera measures the light in a scene. Evaluative or matrix metering modes are commonly used for a balanced exposure across the frame. However, if you prefer the film look with more emphasis on shadows or highlights, consider using spot or center-weighted metering modes to achieve the desired effect.
Exposure Compensation: Manipulating the exposure compensation can help you achieve the proper exposure for a film-like look. Film has a different dynamic range compared to digital sensors, so adjusting the exposure compensation can add the desired amount of brightness or darkness to your images.
Experimentation is key when selecting the proper camera settings to achieve a film-like look. Don’t be afraid to try different combinations of ISO, aperture, shutter speed, white balance, metering modes, and exposure compensation. By understanding how these settings influence the final outcome, you can create digital photos that closely resemble the look and feel of film.
Working with Light
Light plays a fundamental role in photography, and when trying to create a film-like look, understanding how to work with light becomes crucial. Film photography often has a distinct quality in the way it captures and interacts with light, and by paying attention to lighting techniques, you can enhance the filmic aesthetic of your digital photos.
Natural Light: Film photography is often associated with the use of natural light. To replicate this look, consider shooting during the golden hour – the period shortly after sunrise or before sunset when the light is soft, warm, and diffused. Avoid shooting in harsh, direct sunlight, as it can create strong shadows and high contrast that may be challenging to replicate the film look.
Soft Lighting: Film photos often have a soft, diffused lighting that adds to their dreamy and nostalgic feel. You can achieve a similar effect by using diffusers or softboxes to soften the light source. Alternatively, you can take advantage of natural diffusers, such as shooting through sheer curtains or shooting in overcast conditions, to create a softer lighting effect.
Backlighting: Backlighting can lend a mystical and ethereal quality to your photos, characteristics often associated with film photography. Experiment with shooting against the light source to create silhouettes or to add a soft glow around your subject. Be mindful of lens flare, which can also contribute to the film look, but use it sparingly for creative effect.
Playing with Shadows: Creating and utilizing shadows can add drama and depth to your images, enhancing the overall filmic aesthetic. Embrace the interplay between light and shadow, and experiment with different lighting setups to achieve interesting and visually appealing compositions.
Practical Lighting Techniques: In addition to natural light, you can use artificial lighting techniques to enhance the film look. Consider using incandescent bulbs or warm-toned LED lights to create a soft, warm, and nostalgic ambiance. Experiment with different lighting setups, such as placing a lamp off to the side or using light bouncing techniques, to create interesting and moody lighting effects.
Remember, understanding and working with light is a key aspect of achieving a film-like look in your digital photos. Whether you’re shooting outdoors or using artificial lighting, pay attention to the quality, direction, and interplay of light to create a visually captivating and nostalgic atmosphere reminiscent of film photography.
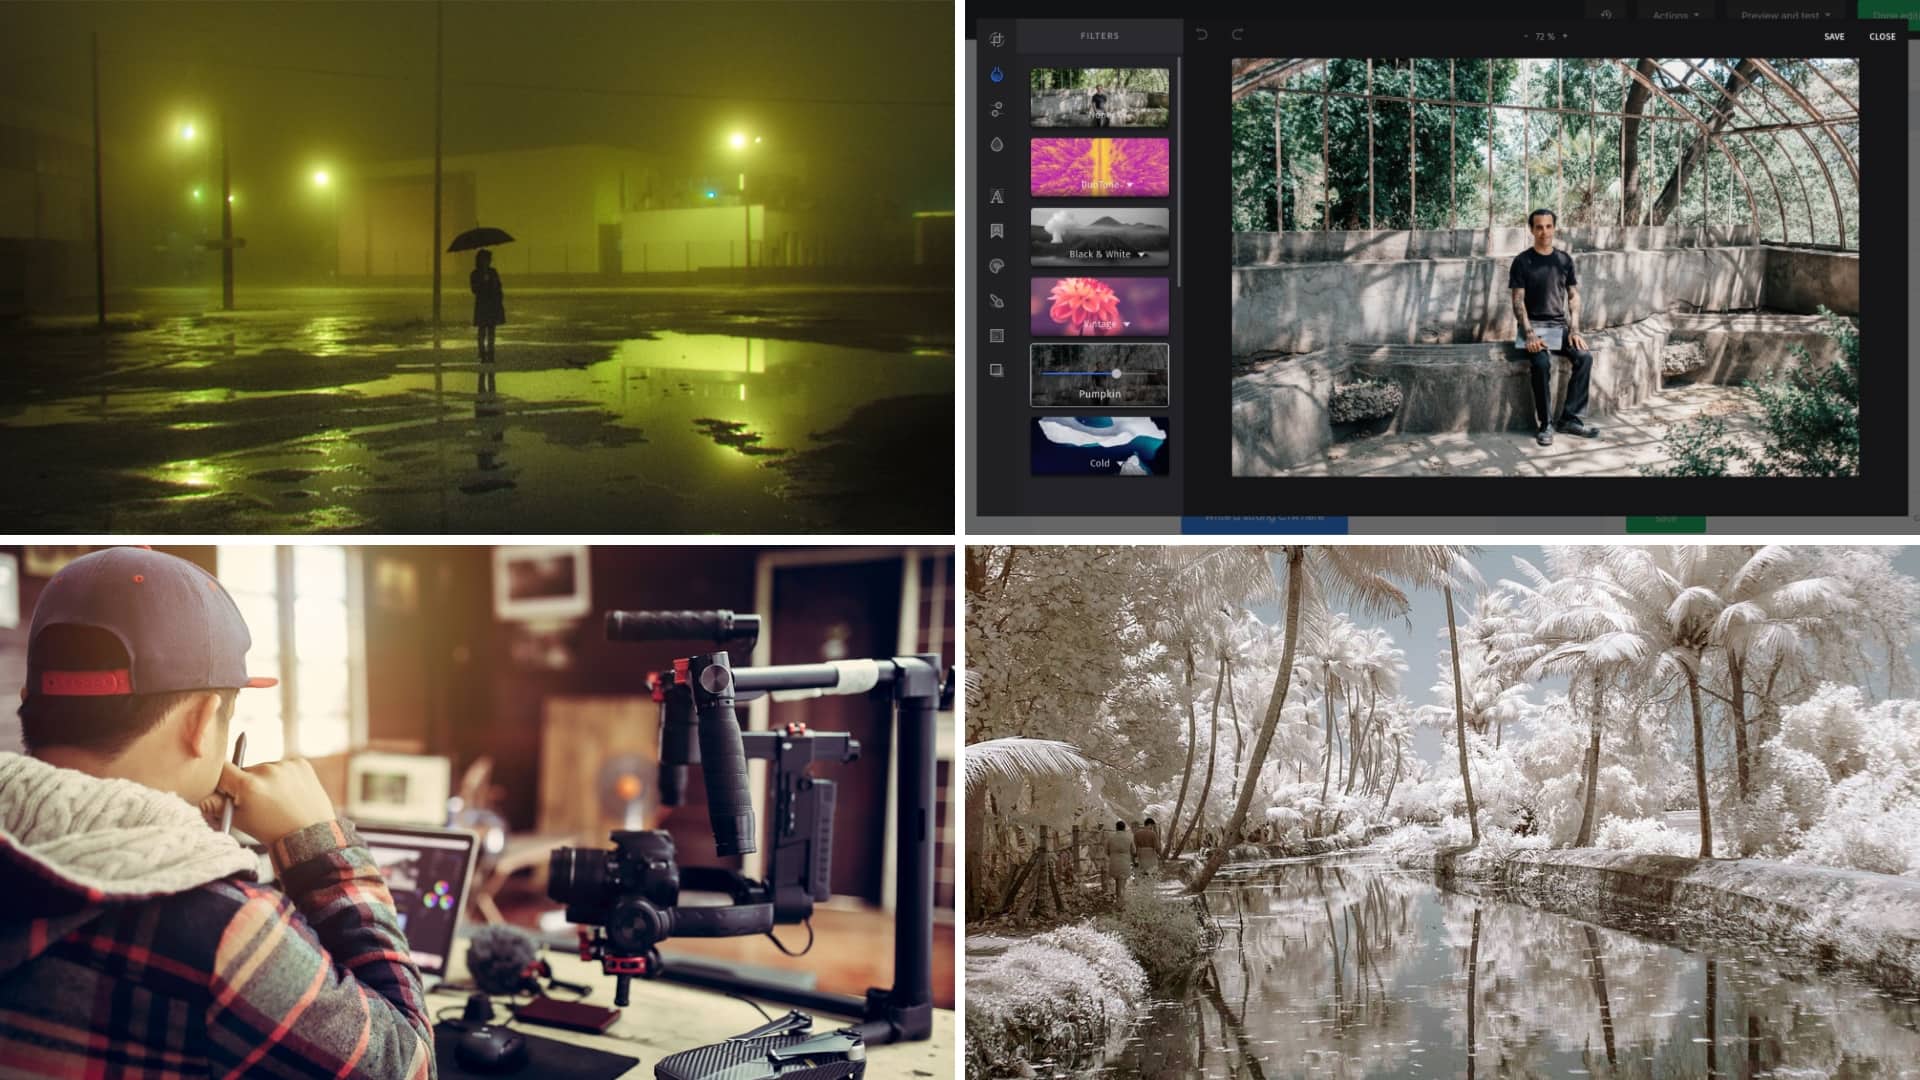
Applying Film Presets
One of the quickest and easiest ways to make your digital photos look like film is by using film presets or filters during the editing process. Film presets are pre-designed settings that mimic the characteristics of specific film stocks, applying color grading, tonal adjustments, and grain to your images. Here’s how you can apply film presets to achieve a filmic look:
1. Select a Film Preset: There are various film preset packs available online, offering a wide range of options. Look for presets that closely resemble the film stocks you wish to replicate. Experiment with different presets to find the one that best suits your desired film look.
2. Apply the Preset: Once you’ve chosen a suitable film preset, apply it to your digital photo. Most preset packs come with instructions on how to install and use them in your preferred photo editing software. Typically, you can apply presets with a single click, instantly transforming your image’s colors, tones, and overall mood.
3. Make Adjustments: While presets can do wonders in achieving a film look, it’s essential to fine-tune the settings to suit your specific image. Play around with the preset’s adjustments, such as exposure, contrast, saturation, and hue, to ensure the desired outcome. Each photo is unique, so don’t be afraid to experiment and make tweaks accordingly.
4. Customizing Grain: Film is characterized by its distinct grain structure, and adding grain to your digital photos can enhance the filmic aesthetic. Many film presets include built-in grain effects, but you can also customize the grain separately using editing software. Adjust the strength, size, and texture of the grain to achieve the desired level of film-like texture.
5. Refine the Edit: After applying the film preset and making adjustments, you may want to refine the edit further. This could involve tweaking the white balance, fine-tuning the exposure, or enhancing specific areas of the image. Don’t hesitate to spend time on these finer details to achieve the best possible film-like result.
6. Compare Before and After: Before finalizing your edit, it’s always a good practice to compare the before and after versions of your image. This helps you to assess the effectiveness of the film preset and adjustments you’ve made, ensuring that your photo truly reflects the desired filmic look.
By using film presets, you can quickly transform your digital photos to emulate the look and feel of various film stocks. However, it’s important to note that presets are not a one-size-fits-all solution. The key is to experiment, make adjustments, and consider the overall aesthetic you wish to achieve, resulting in unique and visually captivating digital images reminiscent of film photography.
Mastering Film-like Editing Techniques
While applying film presets can give your photos an instant filmic look, mastering film-like editing techniques can take your images to the next level, allowing for more creative control and customization. Here are some key techniques to help you achieve a film-like look during the editing process:
1. Color Grading: Film photography is known for its distinctive color palettes. To achieve a similar look, experiment with color grading techniques to adjust the hues, saturation levels, and overall color balance of your images. Consider desaturating certain colors or applying split toning to create a specific atmosphere or mood.
2. Adjusting Tonal Range: Film photos often have a unique tonal range, with rich shadows and smooth gradients. Utilize editing tools to enhance the shadows, highlights, and midtones of your photos, aiming for a balanced and natural tonal range. Avoid clipping the highlights or shadows excessively to maintain detail and achieve a filmic aesthetic.
3. Curves and Levels: Utilize curves and levels adjustments to fine-tune the overall tonality and contrast of your images. Film typically has a gentle contrast curve, so avoid excessive contrast adjustments that can result in a digital or harsh look. Pay attention to the shape of the curves and maintain smooth transitions between tones.
4. Texture and Clarity: Film has a unique texture and clarity that can be replicated during the editing process. Experiment with techniques like adding subtle grain, enhancing texture, or selectively sharpening certain areas to achieve a more film-like look. Be subtle and cautious with these adjustments, as overdoing them can result in an unnatural or unrealistic appearance.
5. Dodging and Burning: Dodging and burning techniques can help you selectively lighten or darken specific areas of your images. Use these techniques to add depth, highlight focal points, or create a sense of dimension in your photos. Pay attention to subtle nuances and make adjustments in a way that mimics the organic and delicate dodging and burning process done in film darkrooms.
6. Emulating Film Grain: Adding film grain to your digital photos can contribute to the overall film-like look. Experiment with various grain overlays or utilize specialized plugins to create a natural and organic film-like grain structure. Adjust the strength and size of the grain to achieve the desired level of texture and authenticity.
7. Honing Attention to Details: The key to achieving a filmic look lies in the attention to small details. Be meticulous in removing distractions, retouching imperfections, and ensuring a clean and polished final image. Pay attention to composition, cropping, and framing to create visually engaging photos that evoke the nostalgia and artistic feel associated with film.
Mastering film-like editing techniques takes practice, but by honing your skills in color grading, tonal adjustments, texture enhancement, and attention to detail, you can create digital images that closely resemble the aesthetic qualities of film photography. Remember, each image is unique, so trust your creative instincts and explore different editing techniques to achieve the desired film-like look.
Enhancing Film Grain and Texture
Film grain and texture play a significant role in creating the characteristic look and feel of film photography. While digital images tend to be cleaner and smoother, adding film grain and texture during the editing process can help replicate the organic and nostalgic qualities of film. Here are some techniques to enhance film grain and texture in your digital photos:
1. Film Grain Overlays: One of the easiest ways to add film grain to your digital photos is by using grain overlay textures. These textures simulate the grain structure of various film stocks and can be blended into your images using layer blend modes in editing software. Experiment with different types and strengths of grain overlays to find the one that best matches the film look you desire.
2. Grain Filters and Plugins: There are dedicated grain filters and plugins available that allow you to add realistic film grain to your photos. These tools often provide greater control over the grain size, intensity, and distribution. Adjust these settings to achieve the desired level of film-like grain, ensuring it complements the overall aesthetic of your image.
3. Custom Grain Adjustments: For more control and customization, you can manually create your own film grain effect. This involves creating a new layer in your editing software and using noise or texture filters to generate grain. Adjust the opacity and blending mode of the grain layer to blend it seamlessly with your image. Experiment with different filters and settings to achieve the desired filmic texture.
4. Texture Overlays: Film photography often has a unique texture that can enhance the overall nostalgic feel. Overlaying texture images, such as scanned film textures or aged paper textures, can add depth and character to your digital photos. Experiment with blending modes, opacity adjustments, and masking techniques to incorporate texture in a way that enhances the film-like qualities of your images.
5. Base Adjustments: Before applying grain and texture, ensure that your base image is properly adjusted. Pay attention to exposure, contrast, and color balance to create a solid foundation for the film-like enhancements. Making adjustments to the base image will ensure that the added grain and texture complement the overall aesthetic rather than masking or distracting from it.
6. Grain Distribution: Film grain is not uniformly distributed across an image. It tends to be more noticeable in the shadows and less apparent in the highlights. To achieve a more realistic film grain effect, consider applying different levels of grain intensity using masks or adjustment brushes. This ensures that the grain appears natural and enhances the overall composition rather than detracting from it.
Remember, the goal is not to overdo the grain and texture, but to enhance the filmic qualities of your digital photos. Strive for a balance that adds depth, character, and a touch of nostalgia to your images, while still maintaining clarity and overall image quality. With practice and experimentation, you can master the art of enhancing film grain and texture, capturing the timeless charm of film photography in your digital images.
Adding Vignettes and Light Leaks
Vignettes and light leaks are common elements found in film photography that can add a vintage and artistic touch to your digital photos. These effects, when used subtly and intentionally, can enhance the filmic aesthetic and evoke a sense of nostalgia. Here are some techniques to add vignettes and light leaks to your images:
1. Vignettes: Vignetting refers to the gradual darkening of the edges of an image, drawing the viewer’s attention towards the center. To add a vignette effect, you can use editing software and adjust the levels or curves to darken the corners and edges. Experiment with different shapes, intensities, and sizes of vignettes to find the one that suits your image and desired film look.
2. Light Leaks: Light leaks occur when light leaks into the camera and affects the film, resulting in colorful streaks or patches. While digital cameras don’t naturally produce light leaks, you can add them during the editing process to introduce a vintage and imperfect vibe. Use light leak overlays or create your own with gradient tools and color adjustments. Experiment with different positions, shapes, and colors to mimic the organic and unpredictable nature of light leaks.
3. Overlay Blending Modes: To blend vignettes and light leaks seamlessly into your images, utilize blending modes in your editing software. Overlay, soft light, or screen blending modes often work well for these effects. Experiment with different blending modes and adjust the opacity to achieve the desired level of subtlety and integration.
4. Custom Masking: To apply vignettes and light leaks selectively, create custom masks using gradient or brush tools. This allows you to control the areas where the effects are applied, ensuring they enhance the composition and focal points of your image. Be mindful of the natural flow of light and consider the placement of your subject when applying these effects.
5. Color and Opacity Adjustments: To further refine the vignettes and light leaks, make color and opacity adjustments. Experiment with desaturating or shifting the hues of the vignette or light leak to match the overall color palette of your image. Adjust the opacity to ensure that the effects are subtle and blend harmoniously with the rest of the photo.
6. Embrace Imperfections: Film photography often embraces imperfections and unpredictability. Don’t be afraid to experiment and embrace the organic nature of vignettes and light leaks. Emphasize the uniqueness and character they bring to your images, allowing them to contribute to the overall filmic look rather than appearing artificial or overdone.
When adding vignettes and light leaks, it’s important to strike a balance between enhancing the filmic aesthetic and maintaining the overall quality and integrity of your image. Use these effects selectively and purposefully, considering the composition and mood you wish to create. With practice and experimentation, you can add vignettes and light leaks that amplify the nostalgic charm of film photography in your digital photos.
Balancing Colors to Achieve a Filmic Look
Color plays a vital role in creating a filmic look in your digital photos. Film stocks are known for their unique color characteristics and distinct color palettes, which can evoke different moods and emotions. By understanding how to balance colors effectively, you can enhance the filmic aesthetic and recreate the nostalgic feel of film photography. Here are some techniques to help you achieve a filmic look through color balancing:
1. Color Calibration: The first step in achieving a filmic look is to calibrate the colors in your image. Start by adjusting the white balance to ensure accurate color representation. Consider the lighting conditions and the desired mood of your photo. Experiment with warm or cool tones to match the specific film look you want to achieve.
2. Saturation and Vibrance: Film photographs often have a unique saturation and vibrance that can be replicated during the editing process. Increase or decrease the overall saturation and vibrance levels to find the right balance for your image. Avoid oversaturating the colors, as subtlety is key when aiming for a film-like aesthetic.
3. Color Grading: Color grading involves adjusting individual colors to create a specific mood and tone. Utilize color grading tools such as the Color Lookup Table (LUT) or the Hue/Saturation adjustment layer to fine-tune the colors in your image. Consider the characteristic color palettes of different film stocks and experiment with manipulating specific color channels to achieve a similar look.
4. Split Toning: Split toning is a technique that involves applying different color hues to the highlights and shadows of an image. This can help evoke the color palettes associated with certain film stocks. Experiment with warm tones in the shadows and cool tones in the highlights to create a balanced and harmonious color balance. Adjust the balance and intensity of the split tones to achieve the desired effect.
5. Film Stock Emulation: There are various film emulation presets and plugins available that can help you achieve the color characteristics of specific film stocks. These tools apply complex color transformations and adjustments to closely replicate the look and feel of shooting with film. Experiment with these presets or plugins to find the one that best matches your desired filmic aesthetic.
6. Fine-tuning Hues: Pay attention to individual hues in your image and make subtle adjustments to achieve a more filmic look. For example, warmer skin tones, cooler blues, or desaturated greens can contribute to a vintage and nostalgic feel. Avoid making drastic changes that may result in unnatural or artificial-looking colors.
Remember, achieving a filmic look through color balancing requires experimentation, attention to detail, and a good understanding of the desired mood and aesthetic. Take inspiration from the color palettes of different film stocks and strive to create a cohesive and harmonious balance of colors in your images. With practice and a discerning eye, you can effectively recreate the captivating and distinct color characteristics of film photography in your digital photos.
Conclusion
Capturing the timeless and nostalgic look of film photography in your digital photos is an exciting creative endeavor. By understanding the qualities that define the film look and mastering various techniques, you can achieve stunning results that closely resemble the aesthetics of shooting with film. From choosing the right camera and selecting proper settings to working with light, applying film presets, and mastering film-like editing techniques, each step guides you towards creating images that evoke a captivating and unique filmic atmosphere.
Understanding the film look involves paying attention to elements such as grain, color rendition, dynamic range, and softness. By emulating these characteristics, either through careful camera settings or strategic editing adjustments, you can bring your digital photos closer to the look and feel of film photography. Applying film presets or editing techniques allows for further refinement and customization, enabling you to achieve specific filmic aesthetics and emulate the qualities of different film stocks.
While the techniques mentioned in this article can help you in achieving a film-like look, it’s important to remember that there is no one-size-fits-all approach. Experimentation, creativity, and personal style play integral roles in finding your own unique interpretation of the filmic aesthetic. By honing your skills, paying attention to detail, and developing an understanding of the elements that contribute to the film look, you can elevate your digital photos to evoke nostalgia, creativity, and artistic expression.
So whether you’re a professional photographer looking to add a new dimension to your work or an enthusiastic hobbyist wanting to create stunning images with the charm of film, embrace the journey of making your digital photos look like film. With passion, dedication, and an understanding of the techniques discussed in this article, you can continue to refine your craft and create digital images that transport viewers to a bygone era with the timeless allure of film photography.