Introduction
Setting the default printer in Chrome can significantly streamline your printing experience, making it more convenient and efficient. By designating a default printer, you can eliminate the hassle of selecting a printer each time you need to print a document from your web browser. This simple yet powerful feature can save you time and effort, allowing you to focus on your tasks without unnecessary interruptions.
In this guide, we will walk you through the straightforward process of setting your default printer in Chrome. Whether you're using Chrome for work, school, or personal purposes, this essential customization can enhance your overall browsing experience. With just a few clicks, you can ensure that your preferred printer is always ready to fulfill your printing needs, eliminating the need to manually select it every time you hit the print button.
Now, let's delve into the step-by-step instructions to empower you with the knowledge and confidence to take control of your printing settings in Chrome. Whether you're a seasoned Chrome user or just getting started with this popular web browser, mastering this fundamental feature will undoubtedly simplify your printing workflow and contribute to a more seamless and enjoyable browsing experience.
Step 1: Open Chrome Settings
To begin the process of setting your default printer in Chrome, the first step is to access the browser's settings. This can be easily accomplished by clicking on the three vertically aligned dots located in the top-right corner of the Chrome window. These dots represent the Chrome menu, which houses a plethora of essential options for customizing your browsing experience.
Upon clicking the menu, a dropdown list will appear, presenting a range of functions and settings. At the bottom of this list, you will find the "Settings" option, denoted by a gear icon. Clicking on "Settings" will redirect you to a new tab within the browser, dedicated to Chrome's extensive customization options.
Alternatively, you can directly access the Chrome settings by typing "chrome://settings/" into the address bar and hitting "Enter". This shortcut provides immediate access to the browser's settings, bypassing the need to navigate through the menu.
Once you have successfully accessed the Chrome settings, you are one step closer to configuring your default printer. This initial step lays the foundation for the subsequent actions that will enable you to streamline your printing process and enhance your overall browsing experience.
By familiarizing yourself with the location of the Chrome settings and mastering the art of accessing them swiftly, you are poised to navigate through the various customization options with ease. This foundational knowledge will serve you well as you progress through the subsequent steps, empowering you to harness the full potential of Chrome's features and tailor them to your specific preferences.
With the Chrome settings now at your fingertips, you are ready to embark on the next phase of this straightforward yet impactful process. The journey to setting your default printer in Chrome continues with the next step, where you will delve deeper into the browser's advanced settings to further refine your printing configuration.
Step 2: Select Advanced Settings
After successfully accessing the Chrome settings, the next pivotal step in configuring your default printer involves delving into the advanced settings. This phase of the process allows for a more nuanced level of customization, empowering you to fine-tune your printing preferences with precision.
To navigate to the advanced settings, you can simply scroll down the main settings page until you encounter the "Advanced" option. Clicking on "Advanced" will unveil a plethora of additional customization choices, including those related to printing.
Once you have accessed the advanced settings, you will find a section labeled "Printing". This is where you will discover the essential options for managing your default printer and other printing-related configurations. Among the available choices, you will encounter the "Google Cloud Print" option, which plays a pivotal role in defining your default printer.
By clicking on "Google Cloud Print", you will be presented with a range of printing settings, including the ability to add or remove printers, manage print jobs, and, most importantly, set your default printer. This intuitive interface provides a seamless and user-friendly platform for customizing your printing preferences to align with your specific needs and workflow.
Upon selecting the "Google Cloud Print" option, you will be directed to a dedicated page where you can effortlessly designate your preferred printer as the default option. This straightforward process involves simply clicking on the desired printer from the list of available options, effectively establishing it as the default choice for all your printing needs within the Chrome browser.
By navigating through the advanced settings and leveraging the intuitive interface provided by Google Cloud Print, you are poised to take full control of your printing configurations. This pivotal step in the process empowers you to seamlessly integrate your preferred printer into the Chrome browser, ensuring that it is readily available whenever you need to print documents, web pages, or any other content from your browser.
With the advanced settings now at your disposal, you have successfully traversed a crucial phase in the journey to setting your default printer in Chrome. This foundational knowledge and hands-on experience with the advanced printing configurations will undoubtedly enhance your overall browsing experience, streamlining your printing workflow and contributing to a more efficient and enjoyable interaction with the Chrome browser.
As you proceed to the next step, you will further solidify your mastery of Chrome's printing capabilities, culminating in the seamless integration of your preferred printer as the default option within the browser. This essential customization will undoubtedly elevate your printing experience, allowing you to focus on your tasks without the unnecessary burden of manually selecting a printer each time you need to print.
Step 3: Set Default Printer
Setting the default printer in Chrome is the final and crucial step in this comprehensive process. By designating a default printer, you ensure that all your printing needs within the Chrome browser are seamlessly directed to your preferred printing device, eliminating the need to manually select it each time you initiate a print command. This streamlined approach not only saves time and effort but also contributes to a more efficient and hassle-free printing experience.
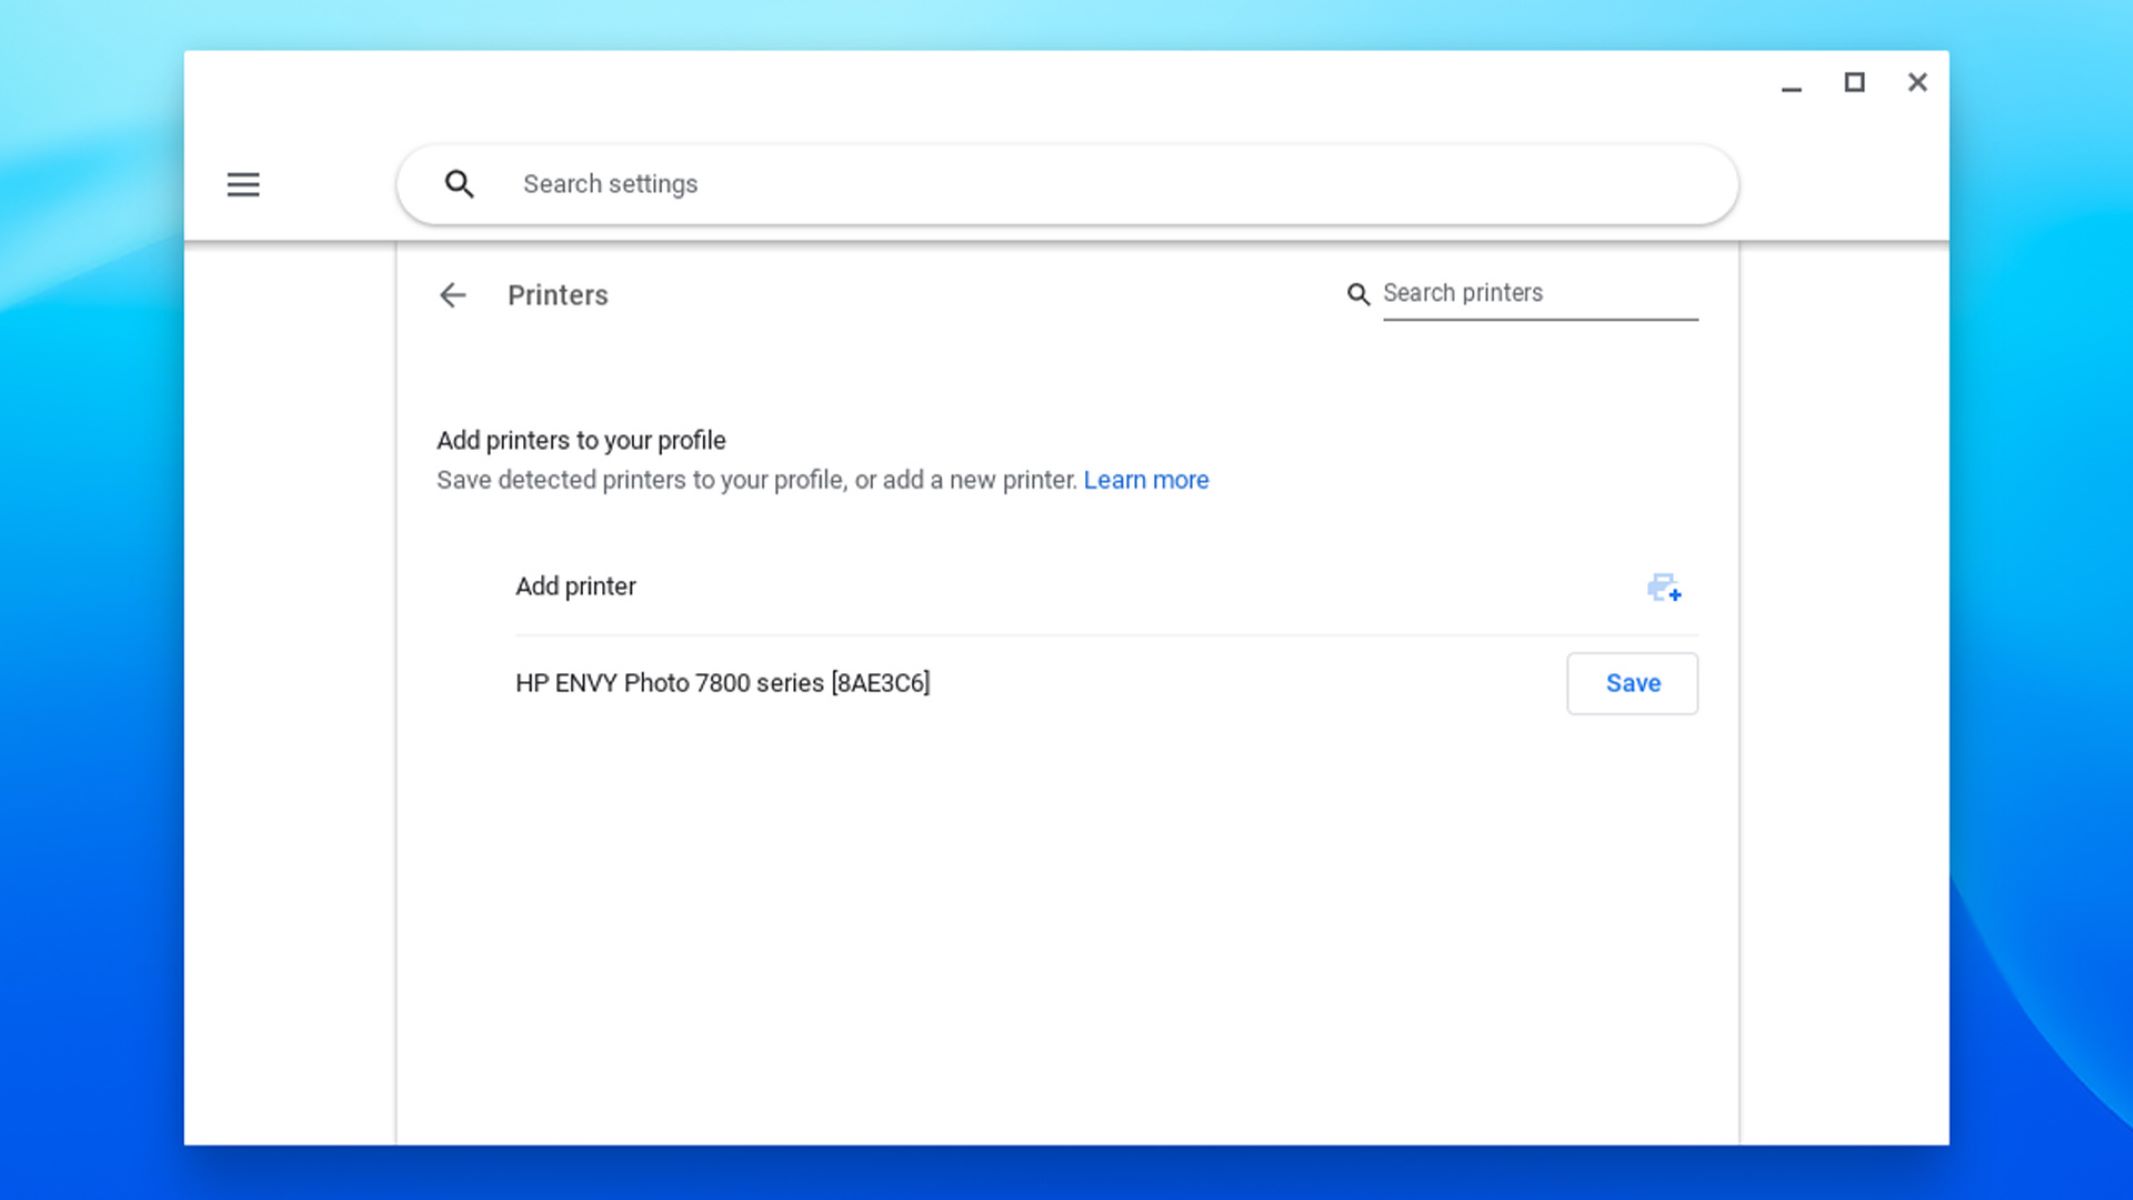
Upon accessing the Google Cloud Print interface within the advanced settings of Chrome, you will be presented with a list of available printers that are linked to your Google account. This intuitive interface allows you to effortlessly select your preferred printer and designate it as the default option for all printing tasks originating from the Chrome browser.
To set your default printer, simply locate the desired printer from the list and click on the corresponding option to establish it as the default choice. Once this action is completed, the selected printer will be seamlessly integrated into the Chrome browser as the primary printing device, ready to fulfill your printing needs with unparalleled convenience and efficiency.
By designating a default printer, you empower Chrome to automatically direct all print commands to your preferred device, eliminating the need for manual intervention and streamlining the printing process. Whether you rely on your printer for work-related documents, academic assignments, or personal projects, this fundamental customization ensures that your printing workflow remains smooth and uninterrupted, allowing you to focus on your tasks without unnecessary distractions.
The ability to set a default printer in Chrome represents a pivotal customization that aligns the browser with your specific printing preferences, contributing to a more personalized and user-centric browsing experience. This essential feature not only enhances the practicality of printing from Chrome but also reflects the browser's commitment to empowering users with intuitive and impactful customization options.
With your default printer now seamlessly integrated into the Chrome browser, you have successfully completed the process of configuring your printing preferences to align with your specific needs and workflow. This foundational customization ensures that your preferred printer is always at your fingertips, ready to transform digital content into tangible documents with unparalleled ease and efficiency.
By mastering the process of setting your default printer in Chrome, you have unlocked a powerful capability that enhances your overall browsing experience, streamlines your printing workflow, and contributes to a more seamless and enjoyable interaction with the popular web browser.
Conclusion
In conclusion, mastering the process of setting your default printer in Chrome represents a pivotal customization that can significantly enhance your overall browsing experience. By seamlessly integrating your preferred printer into the Chrome browser, you empower yourself with a streamlined and efficient printing workflow, eliminating the need to manually select a printer each time you initiate a print command.
The ability to designate a default printer in Chrome reflects the browser's commitment to empowering users with intuitive and impactful customization options. This fundamental feature not only enhances the practicality of printing from Chrome but also aligns the browser with your specific printing preferences, contributing to a more personalized and user-centric browsing experience.
By configuring your default printer, you ensure that all your printing needs within the Chrome browser are seamlessly directed to your preferred printing device. This streamlined approach not only saves time and effort but also contributes to a more efficient and hassle-free printing experience, allowing you to focus on your tasks without unnecessary interruptions.
Furthermore, the process of setting your default printer in Chrome provides valuable insight into the browser's advanced settings and customization options. By navigating through the intuitive interface provided by Google Cloud Print, you gain hands-on experience with fine-tuning your printing preferences with precision, empowering you to tailor the browser to your specific needs and workflow.
Ultimately, the seamless integration of your preferred printer as the default option within the Chrome browser represents a significant milestone in optimizing your printing workflow. Whether you rely on your printer for work-related documents, academic assignments, or personal projects, this essential customization ensures that your printing workflow remains smooth and uninterrupted, allowing you to transform digital content into tangible documents with unparalleled ease and efficiency.
In essence, the process of setting your default printer in Chrome not only simplifies your printing workflow but also reflects the browser's commitment to empowering users with impactful customization options. By mastering this fundamental feature, you elevate your overall browsing experience, contributing to a more seamless and enjoyable interaction with the popular web browser.