Introduction
Setting a website as your homepage on Safari can be a convenient way to streamline your browsing experience. By doing so, you can ensure that your favorite website is readily accessible whenever you launch the Safari browser. Whether it's a news website, a search engine, or a social media platform, customizing your homepage can save you time and effort by eliminating the need to manually navigate to your preferred site each time you open your browser.
In this guide, we will walk you through the simple steps to set a website as your homepage on Safari. By following these instructions, you can personalize your browsing experience and tailor Safari to suit your specific needs and preferences. Whether you're using Safari on your Mac, iPhone, or iPad, these steps will enable you to effortlessly establish your desired website as the default homepage, ensuring that it's the first thing you see when you launch the browser.
Now, let's delve into the step-by-step process of configuring your Safari browser to open with your preferred website, allowing you to kickstart your browsing sessions with ease and efficiency.
Step 1: Open Safari
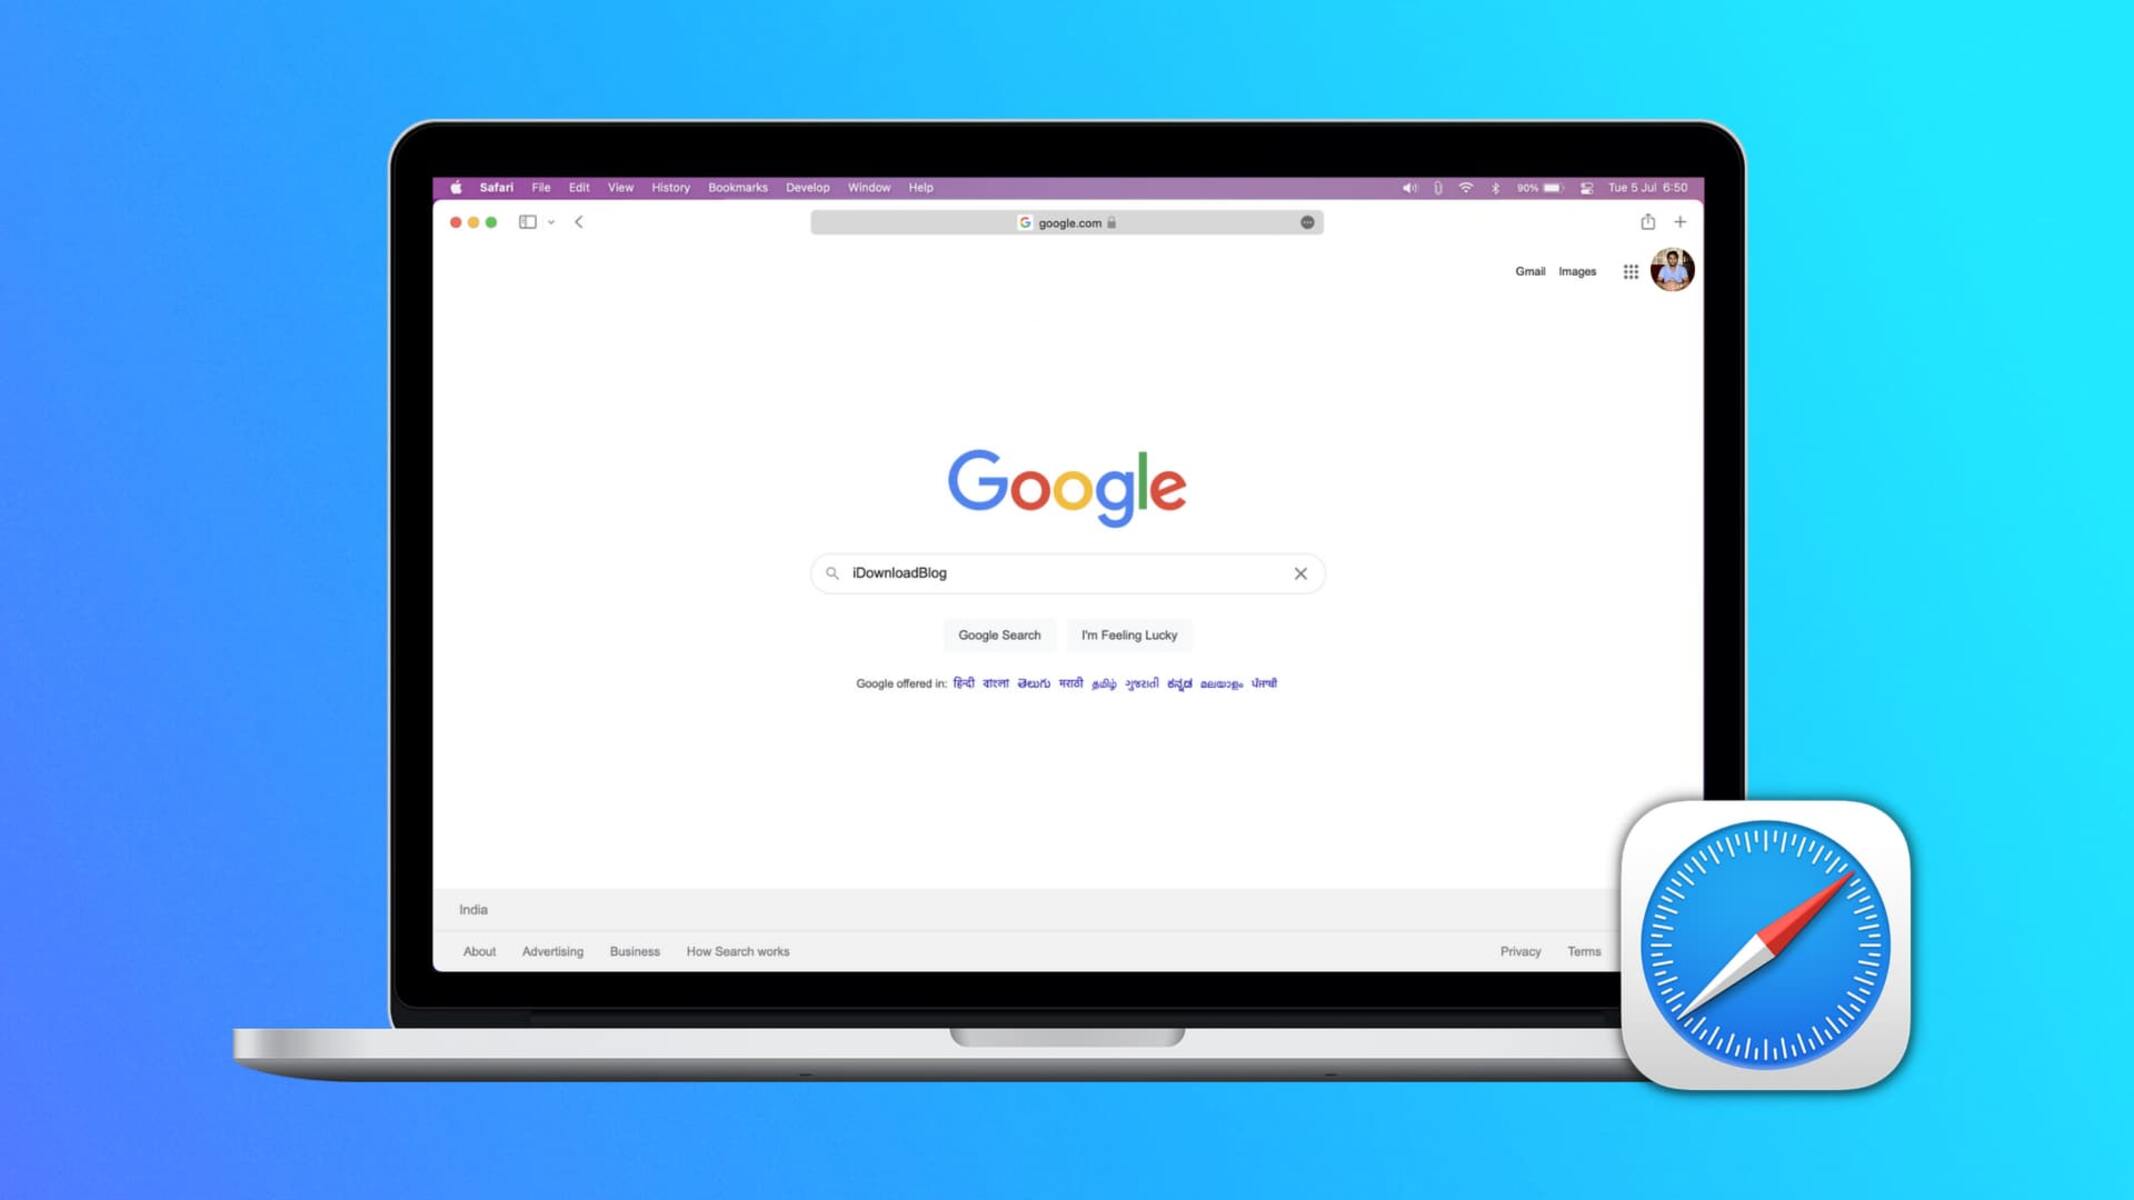
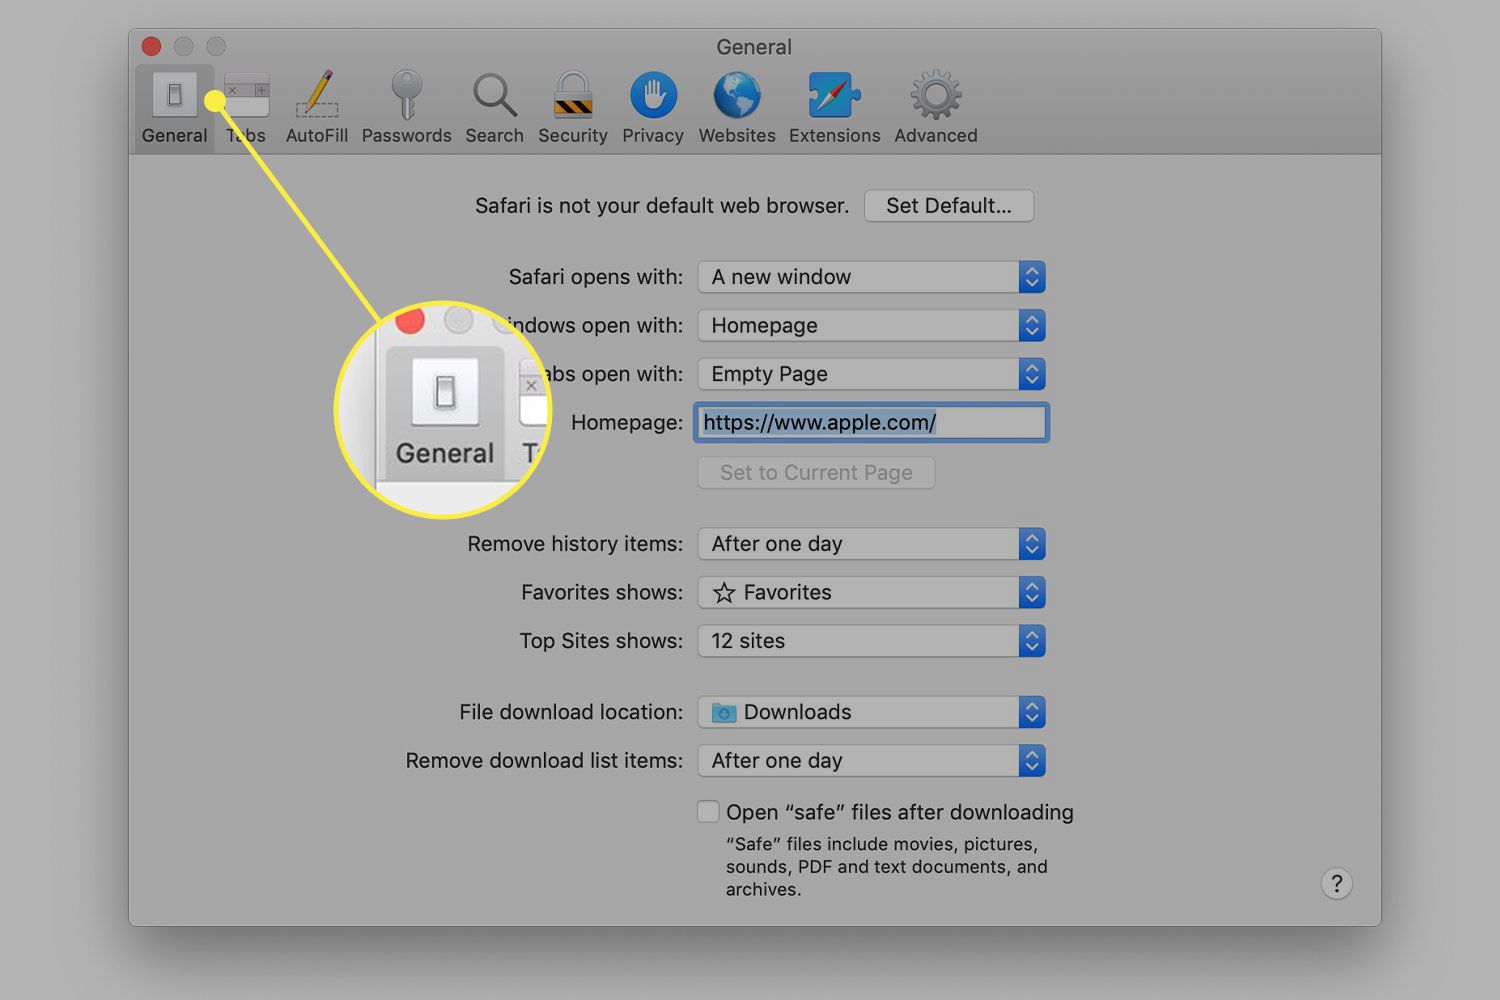
To begin the process of setting a website as your homepage on Safari, you'll first need to open the Safari browser on your device. Whether you're using a Mac, iPhone, or iPad, launching Safari is the initial step towards customizing your browsing experience.
If you're using a Mac, you can easily open Safari by clicking on its icon located in the dock at the bottom of your screen or by searching for "Safari" using Spotlight and then clicking on the Safari app from the search results. Alternatively, you can access Safari from the Applications folder in Finder by navigating to the "Applications" directory and selecting the Safari app.
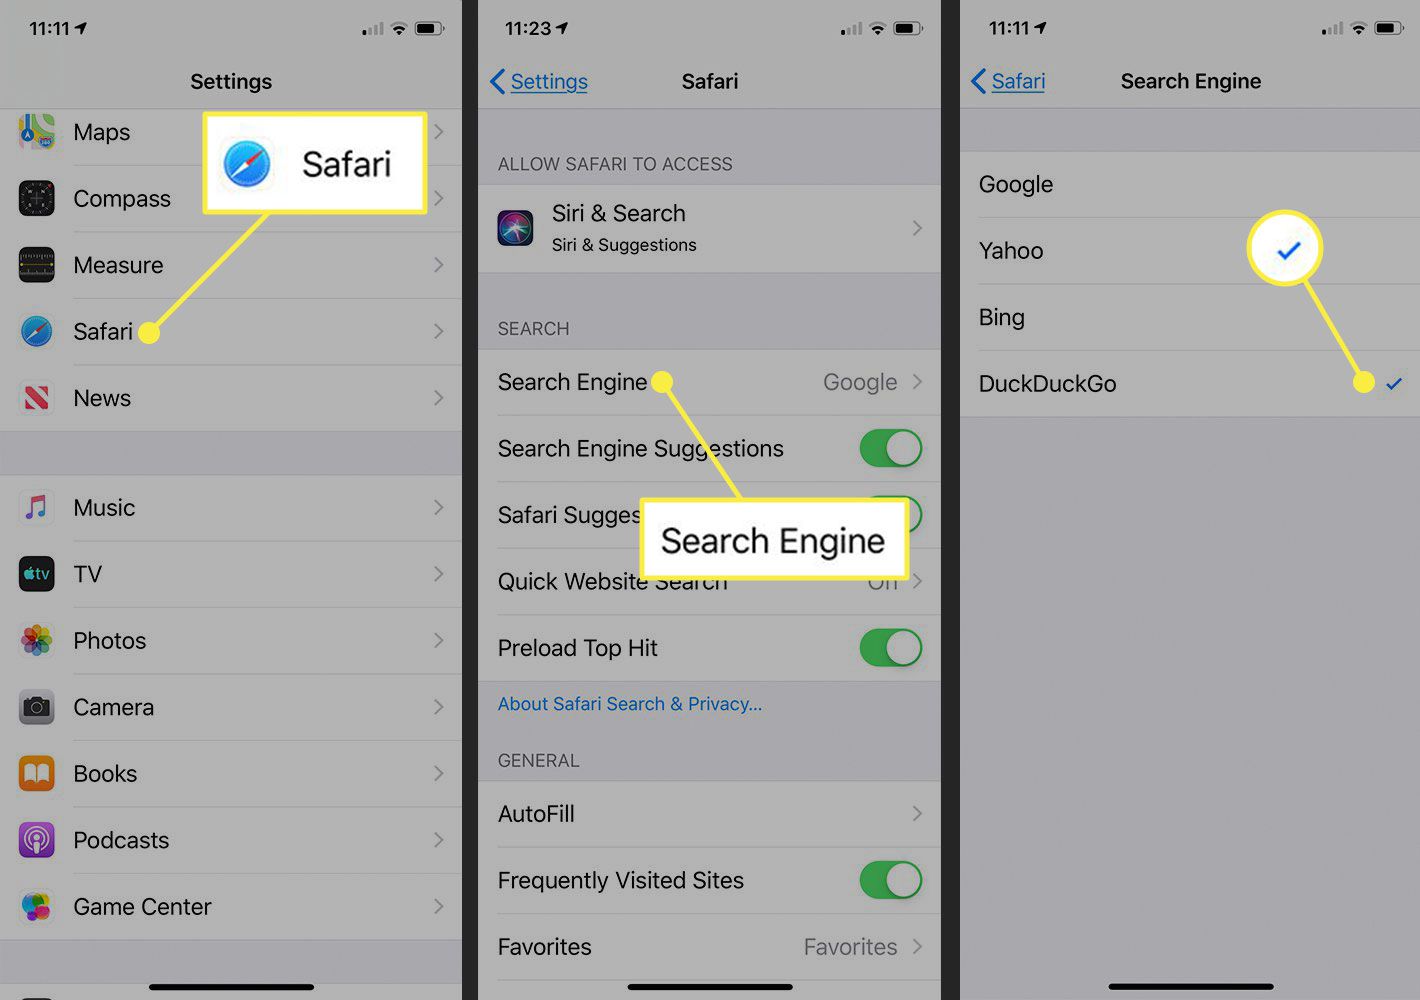
For iPhone or iPad users, locating the Safari app on your home screen and tapping on its icon will swiftly launch the browser, setting the stage for the subsequent steps in the process of setting your desired website as the homepage.
Once Safari is open and ready for use, you're all set to proceed to the next step, which involves navigating to the specific website that you wish to designate as your homepage. This straightforward process allows you to seamlessly transition to the subsequent steps, ultimately enabling you to personalize your browsing experience and optimize your Safari browser to suit your preferences.
With Safari now open, you're ready to embark on the next step of this user-friendly process, which will guide you through the seamless configuration of your preferred website as the default homepage.
Step 2: Go to the website you want to set as homepage
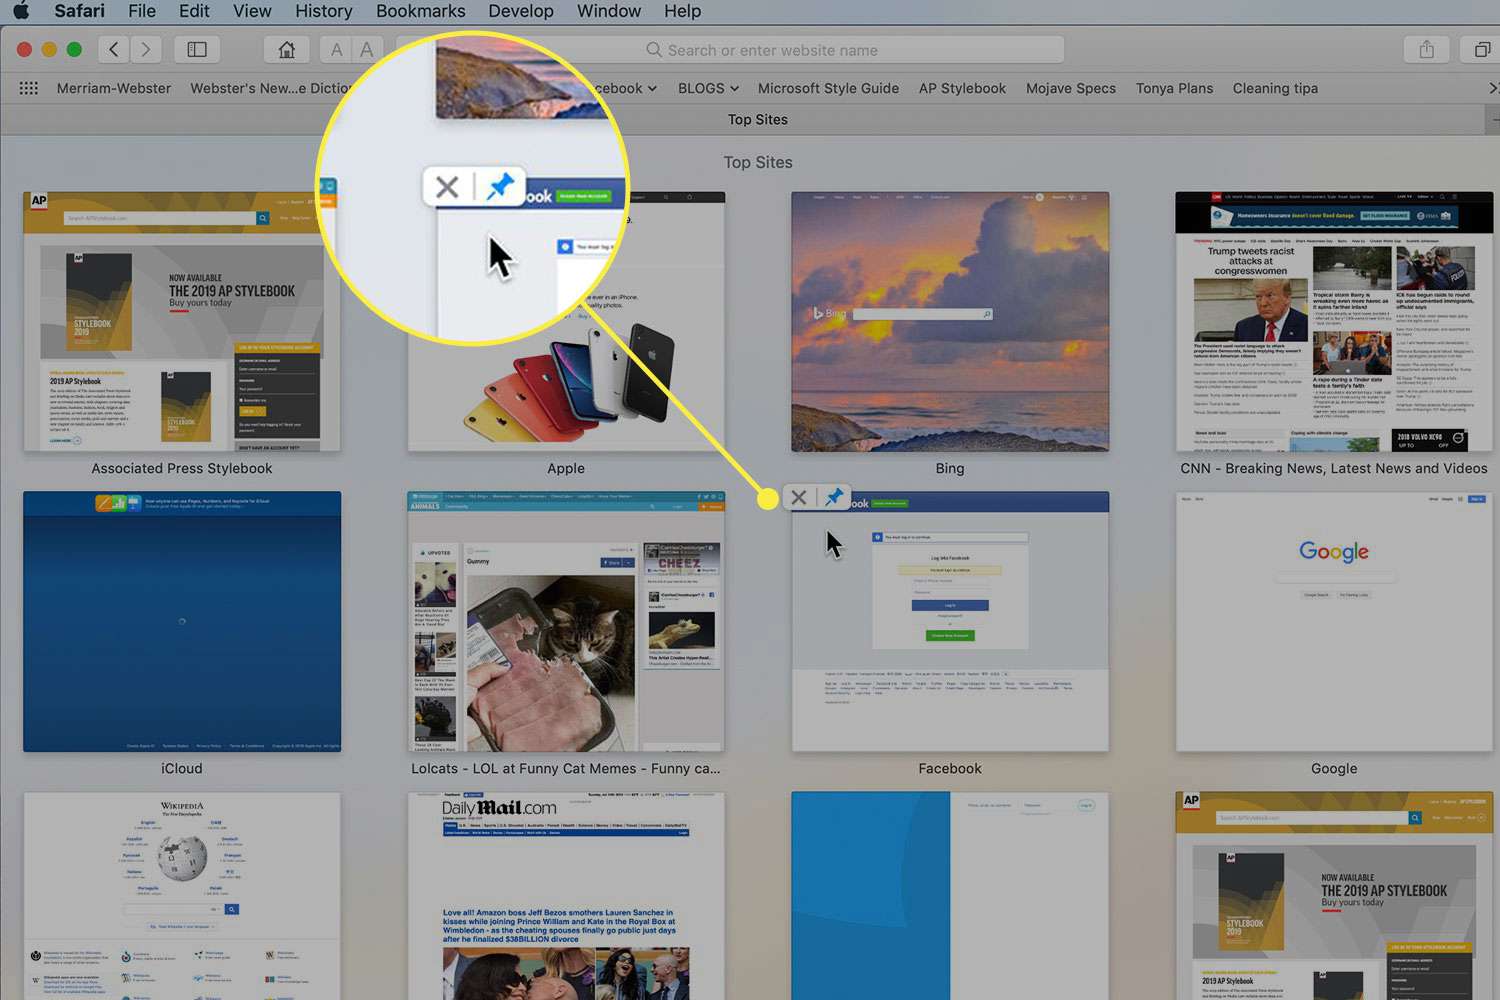
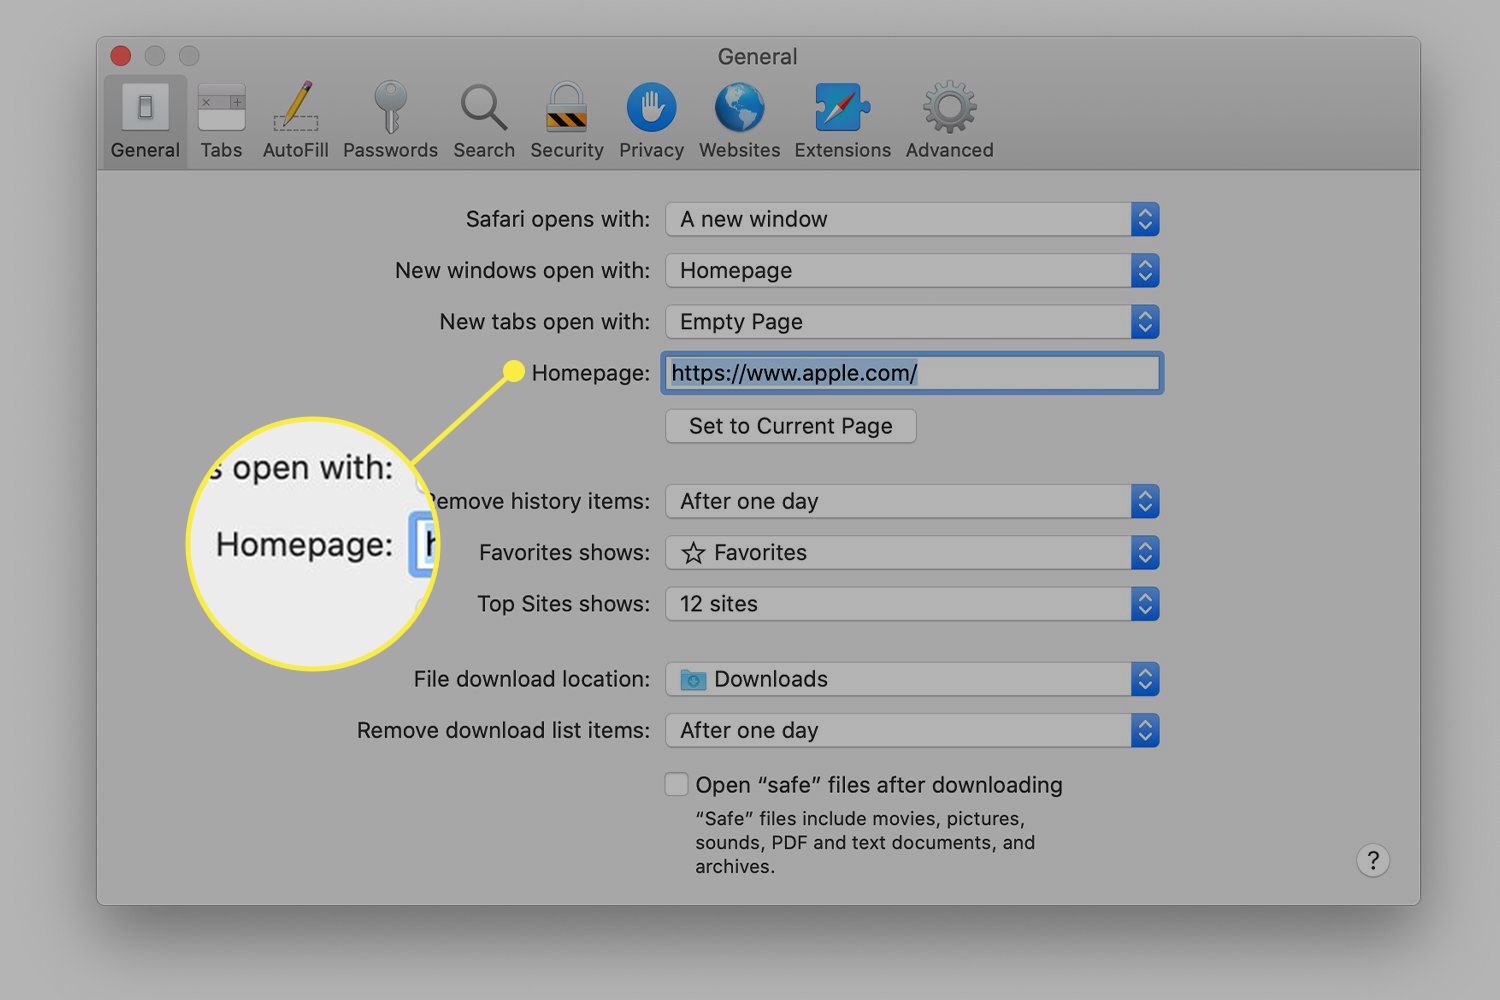
Once Safari is open on your device, the next step involves navigating to the website that you intend to set as your homepage. This website could be your favorite news portal, a search engine, a social media platform, or any other site that you frequently visit and wish to access immediately upon launching the Safari browser.
To proceed, simply enter the URL of the desired website into the address bar at the top of the Safari browser window. Alternatively, if the website is already bookmarked or listed in your browsing history, you can access it by clicking on the appropriate bookmark or selecting it from the history section.
If you're unsure about the URL or the specific website you want to set as your homepage, take a moment to explore and identify the site that best aligns with your preferences and browsing habits. Consider factors such as the site's relevance, frequency of visitation, and the value it adds to your browsing experience.
Upon reaching the website, take a moment to navigate through its pages and ensure that it indeed corresponds to the one you wish to designate as your homepage. Familiarize yourself with the site's layout, content, and any personalized features it may offer. This step allows you to reaffirm your choice and ascertain that the selected website resonates with your browsing needs and preferences.
By navigating to the website you want to set as your homepage, you're one step closer to customizing your Safari browsing experience. This simple yet crucial step sets the stage for the subsequent actions that will enable you to seamlessly integrate your preferred website into the Safari browser, ensuring that it's readily accessible each time you launch the browser.
With the website of your choice now loaded in Safari, you're ready to proceed to the next step, which involves utilizing the browser's functionality to add the site as your personalized homepage. This intuitive process will empower you to streamline your browsing experience and enhance your efficiency when accessing your preferred website through Safari.
Step 3: Click on the Share button
After navigating to the website you wish to set as your homepage, the next step involves clicking on the "Share" button within the Safari browser. This action initiates the process of customizing your browsing experience by adding the selected website as your personalized homepage.
On Safari for Mac, the "Share" button is typically located in the toolbar at the top of the browser window. It is represented by an icon featuring a square with an arrow pointing upwards, symbolizing the action of sharing or saving the current webpage. Clicking on this button unveils a dropdown menu that offers a range of options for interacting with the webpage, including sharing it via email, message, or AirDrop, as well as adding it to your bookmarks or reading list.
For iPhone and iPad users, the "Share" button is prominently displayed at the bottom of the Safari browser window. It is identifiable by the square icon with an arrow pointing upwards, positioned alongside the address bar. Tapping on this button triggers the display of a menu containing various actions, such as sharing the webpage, adding it to your reading list, or creating a shortcut to the page on your home screen.
By clicking on the "Share" button, you are presented with a set of convenient options that enable you to interact with the webpage in diverse ways. This functionality empowers you to seamlessly integrate the selected website into your browsing routine, allowing you to streamline access to the site and enhance your overall browsing efficiency.
Upon clicking the "Share" button, you will be poised to proceed to the subsequent step, which involves selecting the specific option that enables you to add the website as your homepage. This intuitive process paves the way for the seamless customization of your Safari browser, ensuring that your preferred website is readily accessible each time you launch the browser.
With the "Share" button now activated and the menu of options at your disposal, you are primed to advance to the next step, which will guide you through the process of designating the chosen website as your personalized homepage. This user-friendly process empowers you to tailor your browsing experience to align with your preferences, ultimately enhancing your satisfaction and efficiency when using Safari.
Step 4: Select "Add to Home Screen"
After clicking on the "Share" button within the Safari browser, the subsequent step involves selecting the option to "Add to Home Screen." This pivotal action allows you to seamlessly integrate the chosen website into your browsing routine by creating a direct shortcut to the site on your device's home screen.
When you opt to "Add to Home Screen," Safari presents you with a streamlined interface that enables you to customize the appearance and functionality of the shortcut. This includes the ability to name the shortcut, which is particularly useful for identifying the website at a glance amidst other icons on your home screen. By assigning a clear and recognizable name to the shortcut, you can effortlessly distinguish it from other app icons, ensuring quick and intuitive access to your designated homepage.
Furthermore, the "Add to Home Screen" feature allows you to preview the icon representing the shortcut. This visual representation provides an opportunity to personalize the appearance of the shortcut, ensuring that it aligns with your visual preferences and complements the overall aesthetics of your home screen. Whether it's a news website, a productivity tool, or a social media platform, customizing the icon enhances the visual appeal of your home screen while facilitating seamless navigation to your preferred website.
Upon finalizing the customization of the shortcut, you simply need to click the "Add" button, which confirms your selection and adds the shortcut to your device's home screen. This straightforward process ensures that your chosen website is readily accessible with a single tap, eliminating the need to launch Safari and manually navigate to the site each time you wish to access it.
By selecting "Add to Home Screen," you effectively establish a direct link to your preferred website, streamlining your browsing experience and enhancing your efficiency when accessing the site. This intuitive feature empowers you to seamlessly integrate the website into your digital ecosystem, ensuring that it's prominently featured on your home screen and readily available whenever you need to engage with its content.
With the website now successfully added to your home screen, you have effectively personalized your browsing experience, enabling swift and convenient access to your designated homepage. This seamless integration of your preferred website into your device's home screen exemplifies the user-centric approach of Safari, allowing you to tailor your browsing environment to align with your specific needs and preferences.
Step 5: Name the shortcut and click "Add"
After selecting "Add to Home Screen" and customizing the appearance of the shortcut, the next crucial step involves naming the shortcut and finalizing the process by clicking "Add." This pivotal action allows you to personalize the shortcut by assigning a distinct and recognizable name, ensuring seamless identification and swift access to your designated homepage.
When naming the shortcut, it's essential to choose a label that clearly reflects the website it represents. This could be the name of the website itself, a concise abbreviation, or a customized title that resonates with your browsing habits. By selecting a descriptive and memorable name, you can effortlessly distinguish the shortcut amidst other icons on your home screen, facilitating intuitive navigation to your preferred website.
The naming process also presents an opportunity to infuse a personal touch, allowing you to tailor the shortcut's label to align with your preferences. Whether it's a news portal, a social media platform, or an online marketplace, the chosen name should encapsulate the essence of the website, enabling quick recognition and seamless integration into your digital ecosystem.
Upon finalizing the name of the shortcut, the last step entails clicking the "Add" button, confirming your selection and adding the customized shortcut to your device's home screen. This straightforward action solidifies the integration of your preferred website into your browsing environment, ensuring that it's prominently featured and readily accessible with a single tap.
By naming the shortcut and clicking "Add," you complete the process of setting a website as your homepage on Safari, culminating in the seamless integration of your preferred website into your digital routine. This user-centric approach empowers you to personalize your browsing experience, facilitating swift and convenient access to your designated homepage directly from your device's home screen.
With the customized shortcut now added to your home screen, you have successfully tailored your browsing environment to align with your specific needs and preferences. This intuitive process exemplifies Safari's commitment to user empowerment, allowing you to effortlessly configure your browser and optimize your digital experience to suit your individual requirements.