Introduction
Clearing the cache for a specific website in the Chrome browser can be a valuable troubleshooting step to resolve issues such as outdated content, slow loading times, or website errors. The cache is a temporary storage location for files that are downloaded by your browser to display websites. While the cache helps in speeding up the browsing experience by storing frequently accessed data, it can sometimes lead to issues when it contains outdated or corrupted files.
By clearing the cache for a specific website, you can ensure that your browser fetches the latest version of the site's files, potentially resolving any display or functionality issues. This process can also be beneficial when a website's updates or changes are not reflected accurately in your browser.
In this guide, we will walk through the steps to clear the cache for a specific website in the Chrome browser. Whether you are a regular internet user or a web developer seeking to ensure that your website is displayed correctly for all visitors, understanding how to clear the cache for a specific website can be a valuable skill. Let's dive into the steps to accomplish this task and ensure a seamless browsing experience.
Step 1: Open Chrome Browser
To begin the process of clearing the cache for a specific website in the Chrome browser, the first step is to open the browser itself. Chrome is one of the most popular web browsers, known for its speed, simplicity, and user-friendly interface. Whether you are using a Windows, Mac, or Linux computer, launching Chrome is typically a straightforward task.
If you are using a Windows operating system, you can open Chrome by clicking on the Chrome icon located on your desktop or by searching for "Chrome" in the Windows Start menu and selecting it from the search results. Alternatively, you can also access Chrome by clicking on the taskbar icon if it has been pinned there for quick access.
For Mac users, launching Chrome involves locating the Chrome icon in the Applications folder or the Dock. Simply click on the Chrome icon to open the browser and proceed to the next step.
Once Chrome is open, you will be greeted by the familiar interface, featuring the address bar, tabs, and various menu options. The clean and intuitive design of Chrome makes it easy to navigate and access the features needed to manage browsing data, including clearing the cache for specific websites.
With Chrome now open and ready for use, you are prepared to move on to the next step in the process of clearing the cache for a specific website. This involves accessing the site settings within Chrome, where you can manage various aspects of website data, including clearing the cache for specific sites.
Now that Chrome is at your fingertips, let's proceed to the next step and delve into the process of accessing site settings to clear the cache for a specific website.
Step 2: Access Site Settings
Accessing site settings in the Chrome browser is a crucial step in clearing the cache for a specific website. Site settings allow users to manage permissions and data for individual websites, providing granular control over various aspects of the browsing experience. Here's how to access site settings in Chrome:
-
Navigate to the Website: Begin by navigating to the specific website for which you intend to clear the cache. Enter the website's URL in the address bar and press Enter to load the site. This step ensures that you are accessing the site settings for the correct website.
-
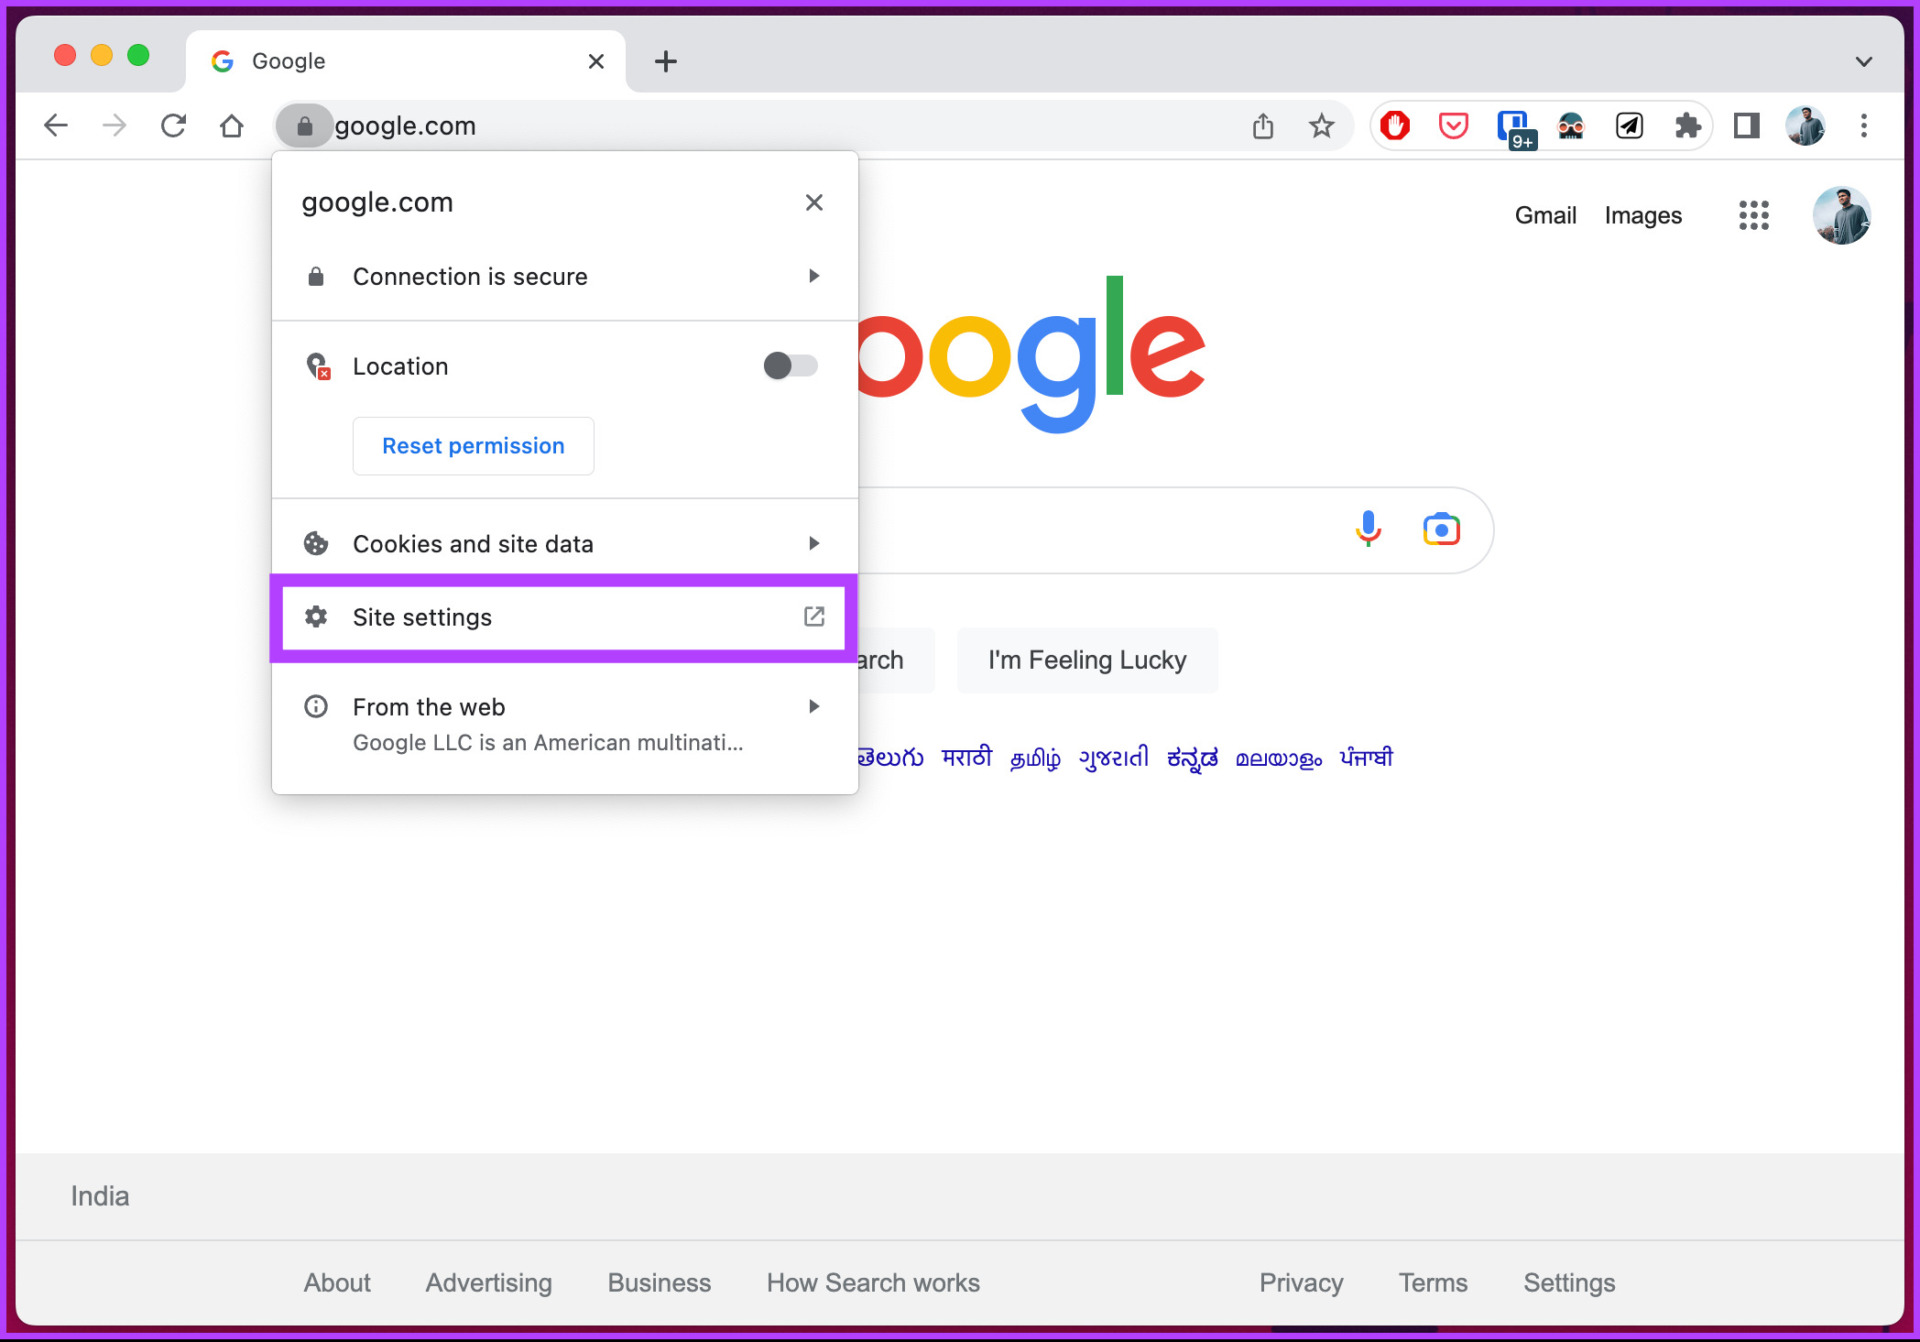
Click on the Padlock Icon: Once the website is loaded, look for the padlock icon located to the left of the website's URL in the address bar. Clicking on this padlock icon will open a dropdown menu containing various site-related options.
-
Select "Site Settings": In the dropdown menu, locate and click on the "Site settings" option. This action will redirect you to the site settings page within Chrome, where you can manage permissions, view site information, and adjust various settings related to the specific website you are visiting.
-
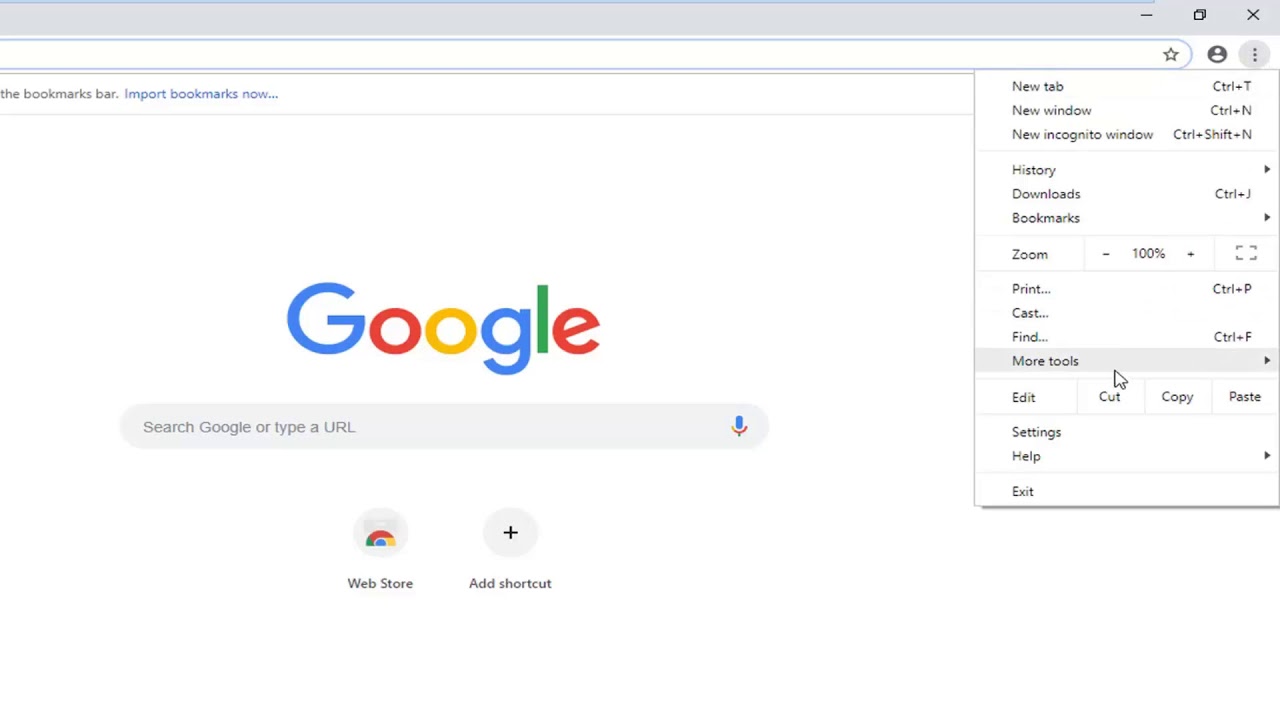
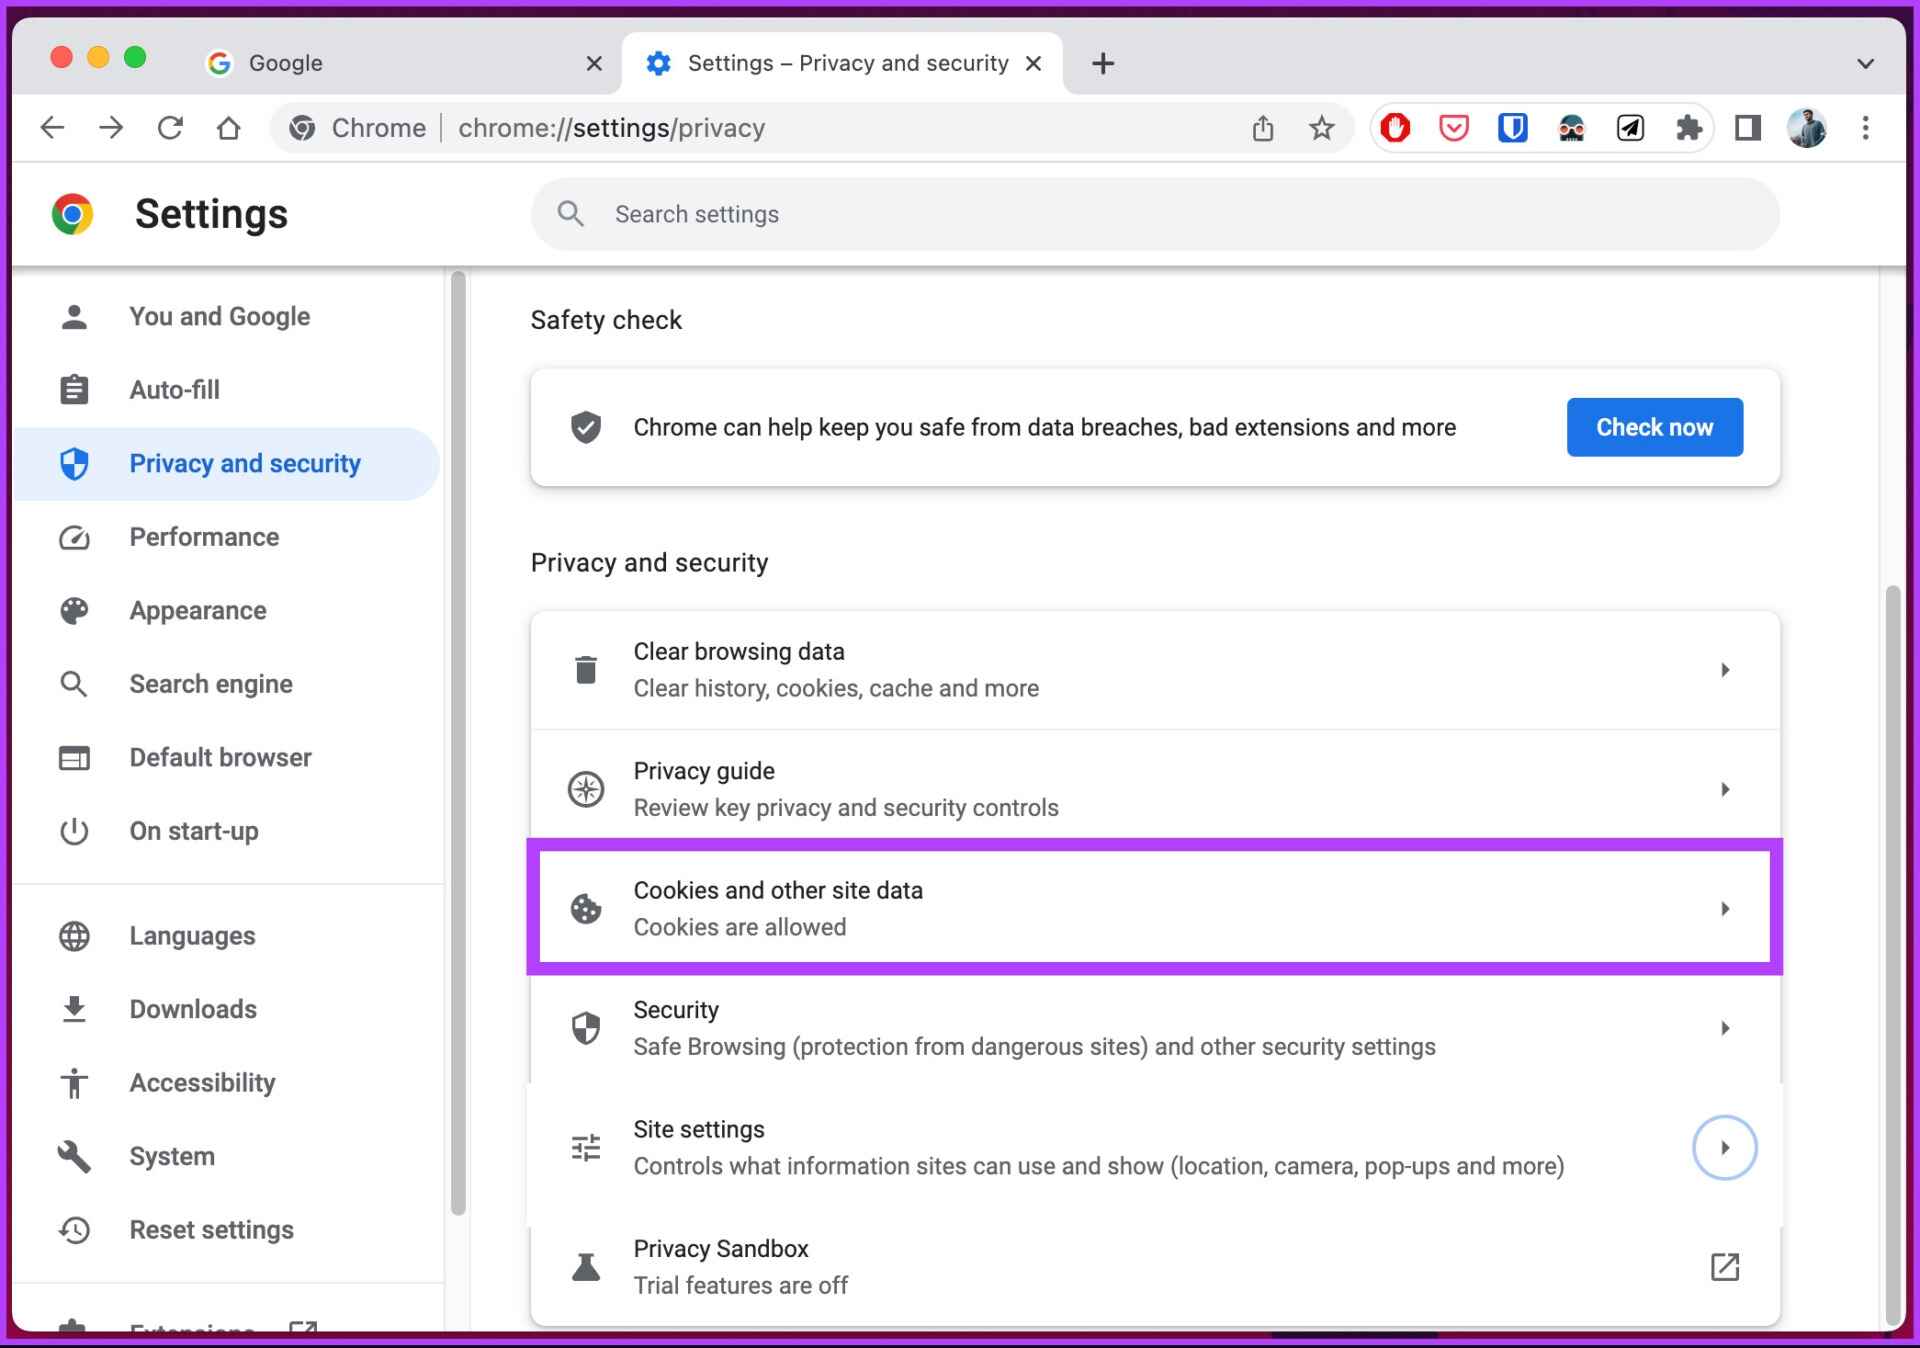
Alternatively, Use the Chrome Menu: Another way to access site settings is by clicking on the three-dot menu icon in the top-right corner of the Chrome browser window. From the menu that appears, select "Settings" to access the browser settings. Within the settings page, navigate to the "Privacy and security" section and click on "Site settings." This will lead you to the site settings page, where you can manage permissions and data for individual websites.
By following these steps, you can easily access the site settings for a specific website in the Chrome browser. Once you have accessed the site settings, you are ready to proceed to the next step, which involves clearing the cache for the selected website. This process ensures that you have the necessary access to manage site-specific data and settings, empowering you to address cache-related issues effectively.
With site settings now accessible, let's move on to the next step and explore the process of clearing the cache for the specific website within Chrome.
Step 3: Clear Cache for Specific Website
Now that you have accessed the site settings for the specific website in the Chrome browser, you are ready to proceed with clearing the cache for that site. Clearing the cache for a specific website ensures that your browser fetches the latest version of the site's files, potentially resolving any display or functionality issues caused by outdated or corrupted cache data. Here's how to clear the cache for a specific website in Chrome:
-
Locate the "Clear Data" Option: Within the site settings page, scroll down to find the "Clear data" section. This section allows you to manage the data stored by the specific website, including cookies, cached images and files, and other site data.
-
Click on "Clear Data": Once you have located the "Clear data" section, click on the "Clear data" button. This action will prompt a confirmation dialog to appear, asking if you want to clear the data for the specific website.
-
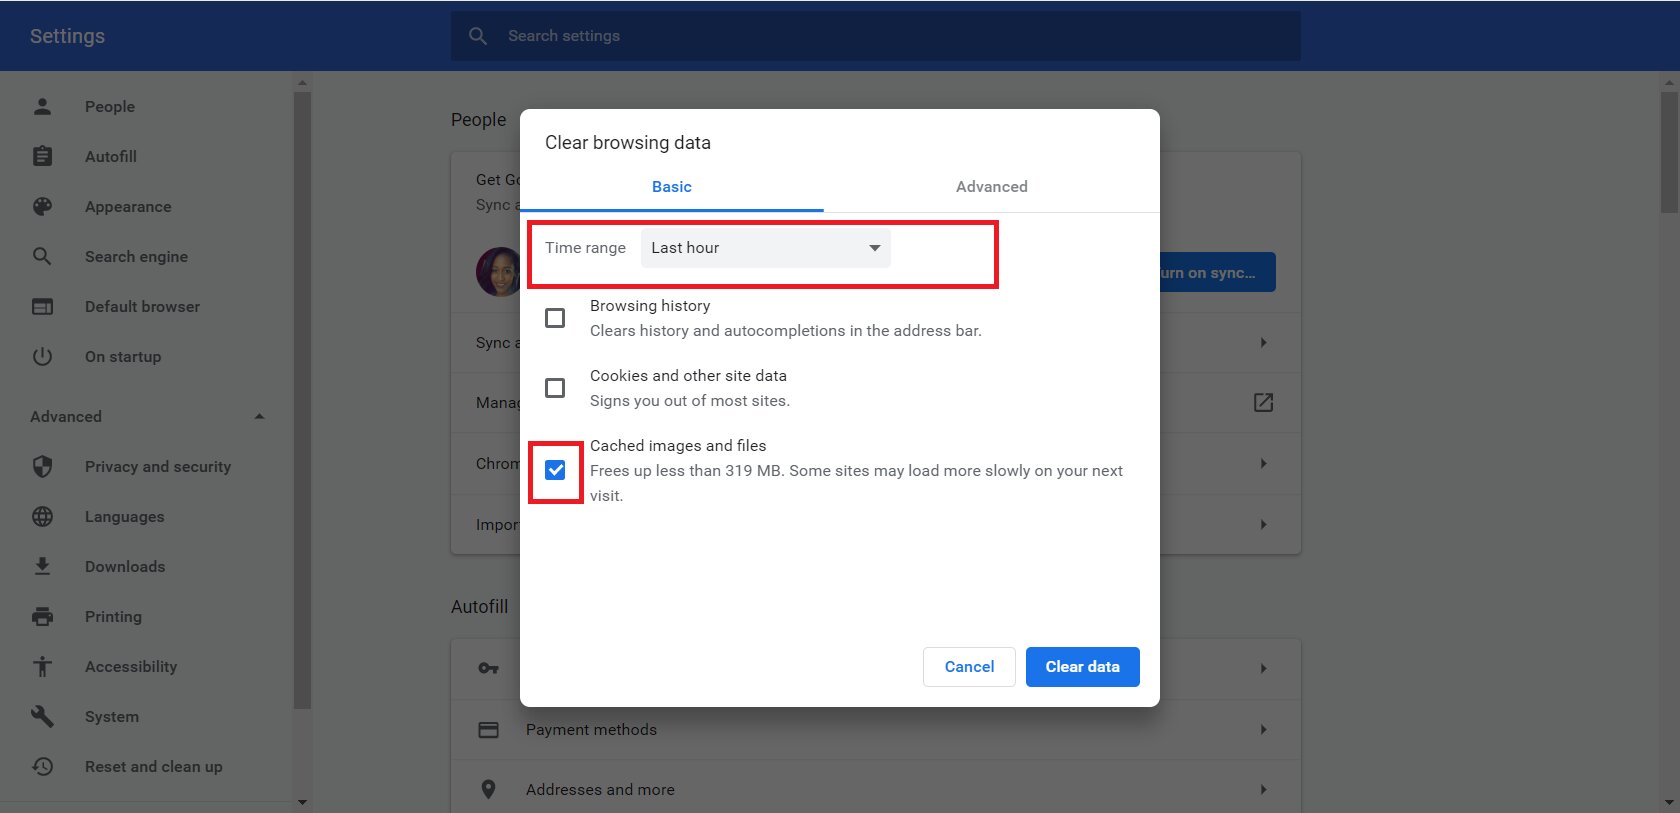
Confirm the Clearing of Data: In the confirmation dialog, ensure that the checkbox next to "Cached images and files" is selected. This option specifically targets the cached data for the website, which is what you want to clear to resolve any cache-related issues.
-
Click on "Clear": After confirming the selection of "Cached images and files," click on the "Clear" button within the confirmation dialog. This action instructs Chrome to clear the cached data for the specific website, ensuring that the next time you visit the site, the browser will fetch the latest files without relying on outdated cache data.
-
Verify the Cache Clearance: Once the data is cleared, you can verify the cache clearance by revisiting the specific website. Upon reloading the site, Chrome will fetch the latest files and data, reflecting any recent updates or changes made to the website. This verification step confirms that the cache for the specific website has been successfully cleared.
By following these steps, you can effectively clear the cache for a specific website in the Chrome browser. This process empowers you to address cache-related issues and ensure a seamless browsing experience when accessing the selected website. Whether you are a regular internet user or a web developer seeking to troubleshoot display or functionality issues, understanding how to clear the cache for a specific website is a valuable skill that enhances your control over the browsing experience.
With the cache for the specific website now cleared, you have successfully completed the process of managing site-specific data within the Chrome browser. This capability allows you to maintain a clean and up-to-date browsing environment, ensuring that you can enjoy the latest content and functionality offered by your favorite websites.
Conclusion
In conclusion, the ability to clear the cache for a specific website in the Chrome browser is a valuable skill that empowers users to maintain a seamless browsing experience. By following the outlined steps, you can effectively address issues related to outdated or corrupted cache data, ensuring that your browser fetches the latest version of a website's files. This process is particularly beneficial for web developers, regular internet users, and anyone seeking to troubleshoot display or functionality issues on a specific website.
Clearing the cache for a specific website involves accessing the site settings within Chrome, where users can manage permissions and data for individual websites. By navigating to the site settings and utilizing the "Clear data" option, you can specifically target the cached images and files associated with the selected website, ultimately resolving any cache-related issues.
The ability to clear the cache for a specific website enhances your control over the browsing experience, ensuring that you can enjoy the latest content and functionality offered by your favorite websites. Whether you are a web developer striving to ensure that your website is displayed correctly for all visitors or a regular internet user seeking to address slow loading times or outdated content, understanding how to clear the cache for a specific website is a valuable skill.
By following the step-by-step guide provided in this article, you have gained the knowledge and capability to manage site-specific data within the Chrome browser effectively. This skill empowers you to maintain a clean and up-to-date browsing environment, ensuring that you can enjoy a seamless and optimized browsing experience.
In today's digital landscape, where websites continuously evolve and update their content, the ability to clear the cache for a specific website is an essential aspect of managing and troubleshooting the browsing experience. By incorporating this skill into your browsing routine, you can ensure that your interactions with websites are consistently smooth, responsive, and reflective of the latest updates and changes.
As you continue to explore the vast and dynamic online world, remember that the knowledge and skills acquired in managing site-specific data within the Chrome browser contribute to a more enjoyable and efficient browsing experience. Embrace the empowerment that comes with understanding and utilizing the tools available to you, and navigate the digital realm with confidence and ease.