Introduction
Welcome to the world of Uninterruptible Power Supply (UPS) batteries! These compact powerhouses are essential for providing backup power during outages or fluctuations in the main electrical supply. However, to ensure their optimal performance and longevity, regular maintenance is crucial.
One important aspect of UPS battery maintenance is checking the water level. UPS batteries are typically of the flooded lead-acid type, which means they require periodic refilling with distilled water. Checking the water level in your UPS battery is a simple yet vital task that shouldn’t be overlooked.
By regularly monitoring and maintaining the water level in your UPS battery, you can prevent potential issues such as overheating, reduced battery life, and even failure. In this article, we will guide you on how to check the water level in a UPS battery, the tools required, and the precautions you need to take.
Before we delve into the step-by-step process of checking the water level, let’s understand why this task is so important.
Importance of Checking UPS Battery Water Level
Regularly checking the water level in your UPS battery is crucial to ensure its proper function and longevity. Here are some key reasons why this task is of utmost importance:
- Optimal Battery Performance: The water level in a UPS battery directly affects its performance. The battery cells need to be submerged in electrolyte (a mixture of water and sulfuric acid) for the chemical reaction to occur and generate electricity. If the water level is too low, the plates inside the battery may become exposed and lead to reduced performance.
- Prevents Battery Overheating: When the water level is below the recommended range, the battery can overheat during charging cycles. Excessive heat can cause damage to the battery, shorten its lifespan, and even create safety hazards such as leakage or explosion.
- Extends Battery Life: By maintaining the water level within the acceptable range, you can extend the lifespan of your UPS battery. This ensures that you get the maximum return on your investment and avoid the hassle of replacing the battery frequently.
- Prevents Damage to Other Components: A low water level in the battery can lead to increased charging voltage, which can affect other components of the UPS system, such as the inverter or charger. This can result in malfunctions or premature failure of these components, leading to costly repairs or replacement.
- Ensures Reliability of Backup Power: During a power outage or voltage fluctuation, your UPS battery should seamlessly kick in to provide backup power. However, if the water level is neglected and drops too low, the battery may be unable to supply the required power, leaving your critical equipment vulnerable to disruptions.
By paying attention to the water level in your UPS battery, you can avoid these potential issues and ensure that your backup power system is always ready when you need it. Now that we understand the importance of checking the water level, let’s move on to the tools required for this task.
Tools Required to Check Water Level
Checking the water level in a UPS battery requires a few simple tools that are easy to acquire. Make sure you have the following items before you begin:
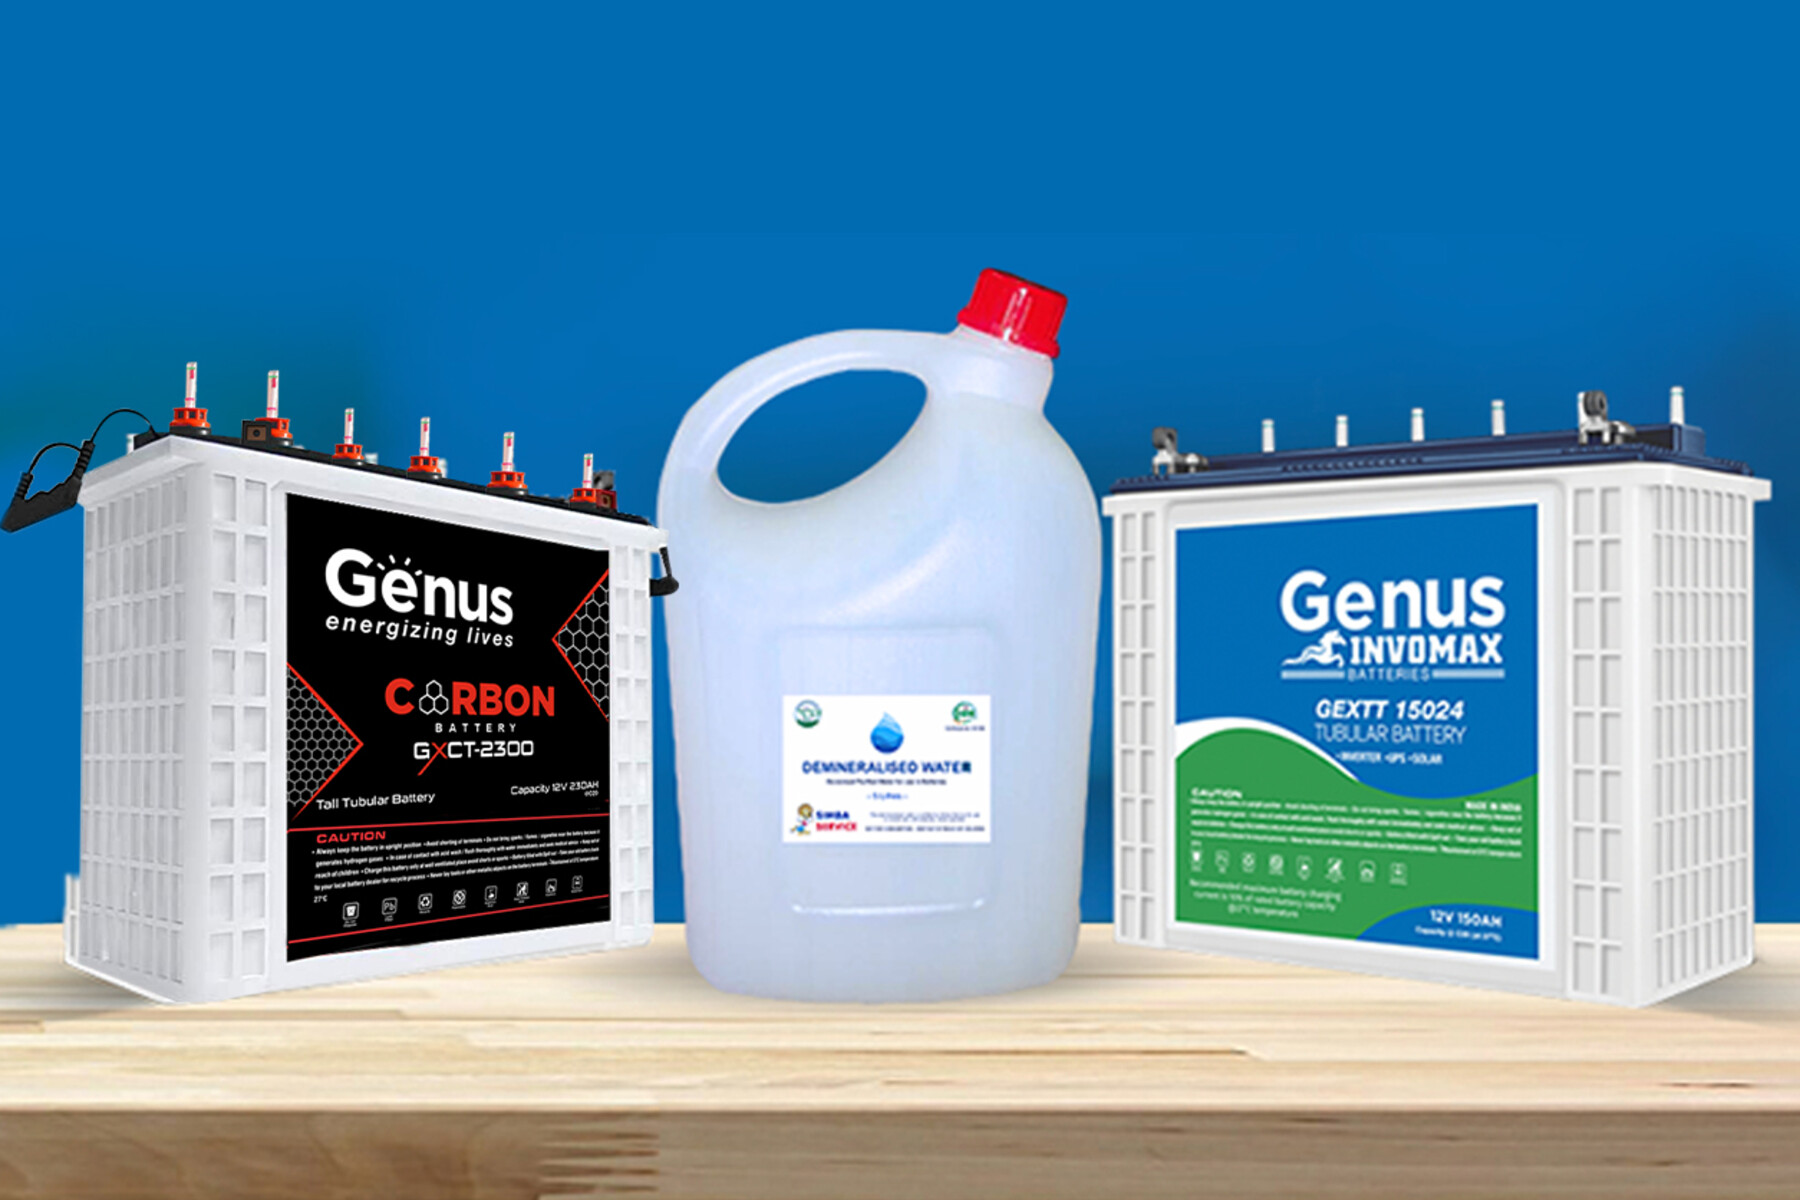
- Distilled Water: Distilled water is essential for topping up the water level in your UPS battery. It is important to use distilled water to prevent impurities and mineral deposits from interfering with the battery’s performance. You can find distilled water at most supermarkets or hardware stores.
- Safety Gloves and Goggles: Safety should always be a priority when handling batteries. Wearing protective gloves and goggles will prevent any potential contact with the electrolyte or the battery terminals. This protects you from harmful substances and prevents accidents.
- Flashlight: A flashlight will come in handy to provide proper lighting while checking the water level in the battery. Some batteries may be located in dimly lit areas, and having a flashlight will help you clearly see the water level and avoid any mistakes.
- Watering Syringe or Funnel: To fill the battery with distilled water, you will need either a watering syringe or a funnel. These tools help you carefully pour the water into the battery cells without spilling or overfilling.
- Multi-Meter or Hydrometer (Optional): While not necessary, having a multi-meter or hydrometer can provide additional information about the battery’s health. These tools measure the voltage or specific gravity of the electrolyte, giving you an idea of the battery’s overall condition.
Once you have these tools at hand, you are ready to proceed with checking the water level in your UPS battery. In the next section, we will provide you with a detailed step-by-step guide to ensure you perform this task correctly and effectively.
Step-by-Step Guide to Check Water Level in a UPS Battery
Now that you have gathered the necessary tools, let’s walk through the step-by-step process of checking the water level in your UPS battery.
- Safety First: Put on your gloves and goggles to protect yourself from any potential hazards. Make sure you are working in a well-ventilated area.
- Turn off the UPS: Before accessing the battery compartment, turn off the UPS and disconnect it from the power source. This ensures your safety and prevents any mishaps during the inspection.
- Open the Battery Compartment: Depending on the model of your UPS, the battery compartment may be located at the front or back of the unit. Carefully remove the cover or panel to expose the batteries.
- Check the Water Level: With the flashlight in hand, inspect the battery cells to determine the water level. Each cell has a transparent or translucent casing that allows you to see the electrolyte inside. Ideally, the water level should be around 1/4 inch above the top of the plates. If the water level is below this mark, it needs to be topped up.
- Add Distilled Water: Using the watering syringe or funnel, pour distilled water into each cell until the water level reaches the recommended mark. Take your time and avoid overfilling, as this can lead to electrolyte leakage during charging.
- Replace the Battery Compartment Cover: Once you have finished filling the cells with distilled water, securely put the battery compartment cover back in place.
- Reconnect and Turn on the UPS: Once everything is secured, reconnect the UPS to the power source and turn it back on. Ensure that the battery is charging correctly and that the ups is functioning normally.
It is important to note that different UPS models may have slight variations in the process, so always refer to the manufacturer’s instructions for specific guidance. Additionally, if you are not comfortable performing this maintenance task yourself, it is recommended to consult a professional.
Next, we will discuss some precautions to keep in mind while checking the water level in your UPS battery to ensure a safe and effective process.
Precautions to Take While Checking Water Level
While checking the water level in your UPS battery is a relatively simple task, it is important to follow some precautions to ensure your safety and the proper functioning of the battery. Here are some key precautions to keep in mind:
- Wear Protective Gear: Always put on safety gloves and goggles before handling the battery. This protects you from coming into contact with the electrolyte, which can be corrosive and harmful.
- Work in a Well-Ventilated Area: Ensure that there is proper ventilation in the area where you are checking the water level. This reduces the risk of inhaling any fumes that may be emitted by the battery.
- Use Distilled Water: Only use distilled water for topping up the battery. Using tap water or other types of water can introduce impurities that may negatively affect the battery’s performance.
- Do Not Overfill: Avoid overfilling the battery cells with water during the topping-up process. Overfilling can lead to electrolyte leakage, which can cause damage to the battery and its surrounding components.
- Handle Batteries with Care: Be cautious while handling the batteries and avoid dropping them or causing any impact to the casing. This can damage the battery and potentially cause injury.
- Follow Manufacturer’s Instructions: Always refer to the UPS manufacturer’s instructions for specific guidelines on checking the water level in your particular model. Different UPS systems may have unique requirements or precautions.
- Consult a Professional if Unsure: If you are unsure about performing this maintenance task yourself or have any concerns, it is recommended to consult a professional or contact the manufacturer for assistance.
By taking these precautions, you can ensure a safe and effective process of checking the water level in your UPS battery. Remember, proper maintenance is key to the longevity and optimal performance of your UPS system.
Now that we have covered the precautions, let’s move on to understanding the signs that indicate a low water level in a UPS battery.
Signs that Indicate Low Water Level in a UPS Battery
Monitoring the water level in your UPS battery is essential for maintaining its performance and preventing damage. Here are some signs that indicate a low water level in a UPS battery:
- Visible Low Water Level: The most obvious sign is when you can visually see that the water level in the battery cells is below the recommended mark. This can be observed when inspecting the cells during routine maintenance.
- Reduced Battery Backup Time: If you notice a significant decrease in the battery backup time during power outages, it could be an indication of a low water level. As the water level decreases, the battery’s capacity to store energy diminishes, resulting in shorter backup times.
- Inconsistent Battery Charging or Discharging: When the water level in the battery is low, it can disrupt the charging and discharging process. You may observe irregular charging cycles or a shorter time between charges, indicating that the battery is not operating at its optimum level.
- Increased Heat Generation: If you notice that the UPS or battery compartment is excessively hot, it may be due to a low water level. When the electrolyte is insufficient, the battery can overheat during charging, leading to excessive heat generation.
- Corroded Battery Terminals: A low water level can cause the battery terminals to become corroded. Corrosion may appear as a white, powdery substance on the terminals. This is a result of the acidic nature of the electrolyte being exposed to air due to the low water level.
- Unusual Sounds or Odors: Any strange sounds or smells coming from the UPS or battery compartment can be indicative of a low water level. These sounds and odors may be a result of the battery working harder than it should due to insufficient electrolyte.
If you notice any of these signs, it is crucial to check the water level in your UPS battery and take the necessary steps to top it up. Regular monitoring and maintenance will help ensure the smooth and reliable operation of your UPS system.
Now that we have discussed the signs of a low water level, let’s move on to understanding how often you should check the water level in a UPS battery.
How Often Should You Check the Water Level in a UPS Battery?
The frequency at which you should check the water level in your UPS battery can vary depending on various factors. However, as a general guideline, it is recommended to check the water level every three to six months.
The actual frequency may depend on the following factors:
- Battery Type: Different types of batteries have different rates of water evaporation. Flooded lead-acid batteries, commonly used in UPS systems, tend to require more frequent water level checks compared to other battery types.
- Environmental Conditions: The ambient temperature and humidity levels can affect the rate at which water evaporates from the battery. In hotter and drier climates, the water level may decrease more rapidly, requiring more frequent checks.
- Battery Usage: The usage pattern of your UPS system also influences the frequency of water level checks. If your UPS experiences frequent power outages or operates at higher loads, the battery may require more regular maintenance.
- Manufacturer’s Recommendations: It is important to refer to the manufacturer’s guidelines for your specific UPS model. The manufacturer may provide specific recommendations on how often to check the water level in the battery for optimal performance and warranty compliance.
Regularly monitoring the water level in your UPS battery ensures that you catch any low water levels before they adversely affect the battery’s performance or cause damage. It is always better to be proactive and perform regular checks rather than waiting for obvious signs of a low water level to appear.
By incorporating water level checks into your routine maintenance schedule, you can prevent potential issues and maximize the lifespan of your UPS battery.
Now that you have a good understanding of how often to check the water level, let’s wrap up this article.
Conclusion
Checking the water level in your UPS battery is a vital maintenance task that should not be overlooked. By regularly monitoring and maintaining the water level, you can ensure optimal battery performance, prevent overheating, extend battery life, and enhance the overall reliability of your backup power system.
In this article, we discussed the importance of checking the water level in a UPS battery and provided a step-by-step guide to help you perform this task effectively. We also highlighted the precautions to take while checking the water level and identified the signs that indicate a low water level in your UPS battery.
Remember to gather the necessary tools, such as distilled water, safety gloves, goggles, a flashlight, and a watering syringe or funnel, before starting the process. Take precautions to protect yourself and handle the batteries with care.
Depending on the battery type, environmental conditions, battery usage, and manufacturer’s recommendations, you should check the water level every three to six months. Regular checks will ensure that you catch any low water levels before they lead to performance issues or damage.
By incorporating this simple maintenance task into your routine, you can maximize the lifespan of your UPS battery and ensure the reliability of your backup power system.
Remember, if you are unsure about performing the water level check yourself or have any concerns, it is always advisable to consult a professional or reach out to the manufacturer for assistance.
With proper maintenance and regular monitoring of the water level, you can enjoy a seamless and uninterrupted power supply whenever you need it.


