Introduction
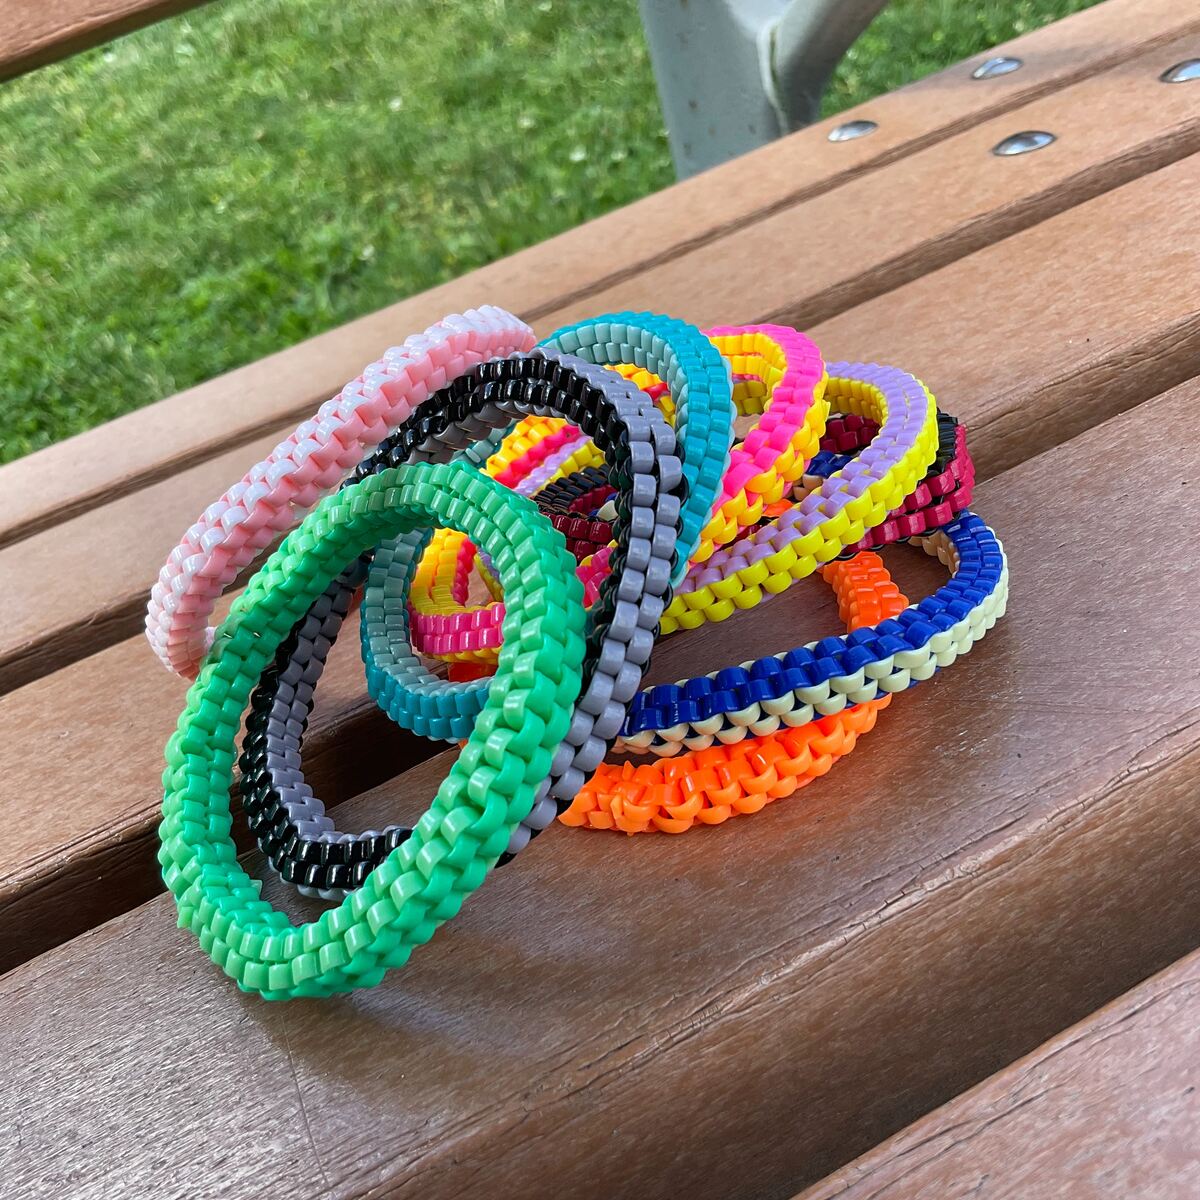
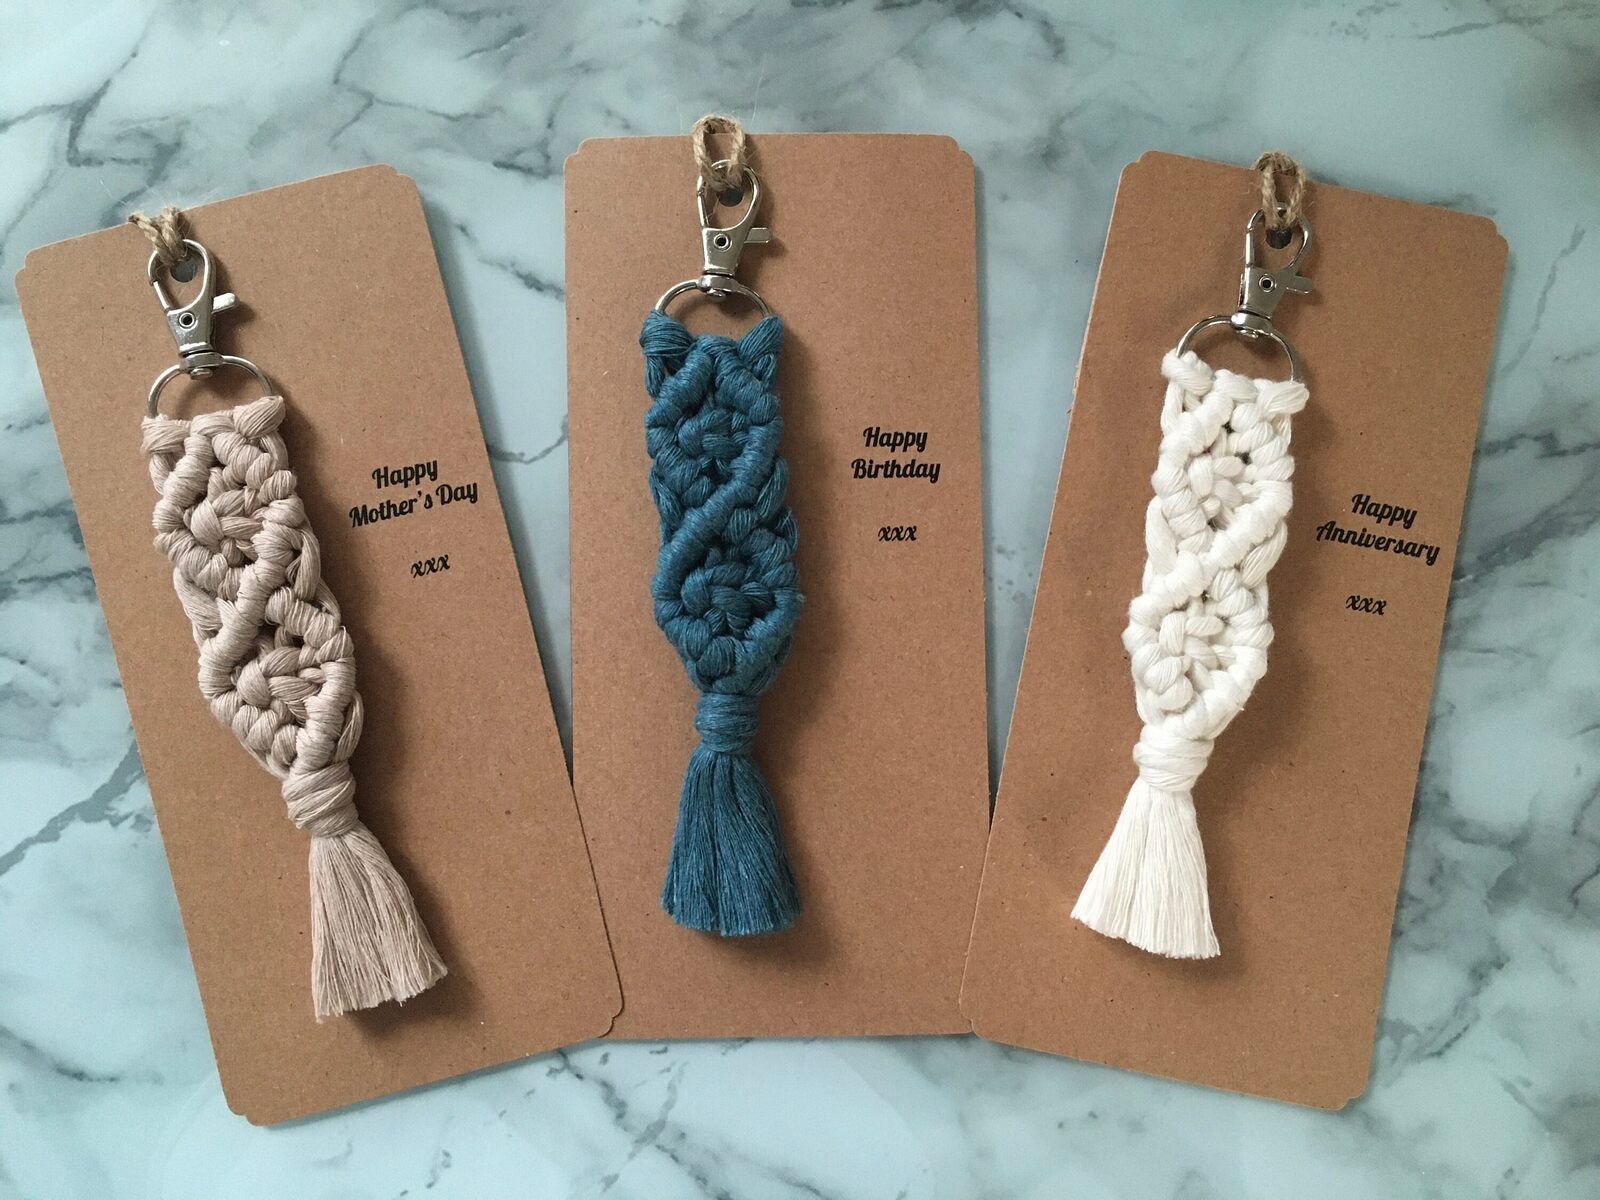
Crafting spiral lanyards is a fun and practical way to add a personal touch to your accessories. Whether you want to spruce up your keychain, create a unique ID holder, or make a stylish lanyard for your phone, learning how to weave a spiral lanyard is a valuable skill that opens up a world of creative possibilities. This step-by-step guide will walk you through the process, from gathering the necessary materials to completing your very own spiral lanyard.
Not only is making a spiral lanyard an enjoyable and satisfying craft project, but it also allows you to customize your lanyard to suit your preferences. With a wide range of cord colors and textures available, you can tailor your lanyard to match your style or create a thoughtful handmade gift for a friend or family member.
By following the instructions in this guide, you will gain valuable insight into the art of lanyard making. The process of weaving a spiral lanyard involves mastering basic knotting techniques and understanding the principles of creating a symmetrical and visually appealing pattern. As you progress through each step, you will develop a deeper appreciation for the craftsmanship and attention to detail required to produce a high-quality spiral lanyard.
Whether you are a novice crafter looking to explore a new hobby or an experienced artisan seeking to expand your repertoire, crafting spiral lanyards offers a delightful and practical way to express your creativity. So, gather your supplies and prepare to embark on an exciting journey of lanyard weaving, where each twist and turn brings you closer to completing a stunning and functional accessory.
Materials Needed
To embark on the creative journey of crafting spiral lanyards, you will need a few essential materials to ensure a smooth and enjoyable weaving process. Here's a comprehensive list of the items required to get started:
-
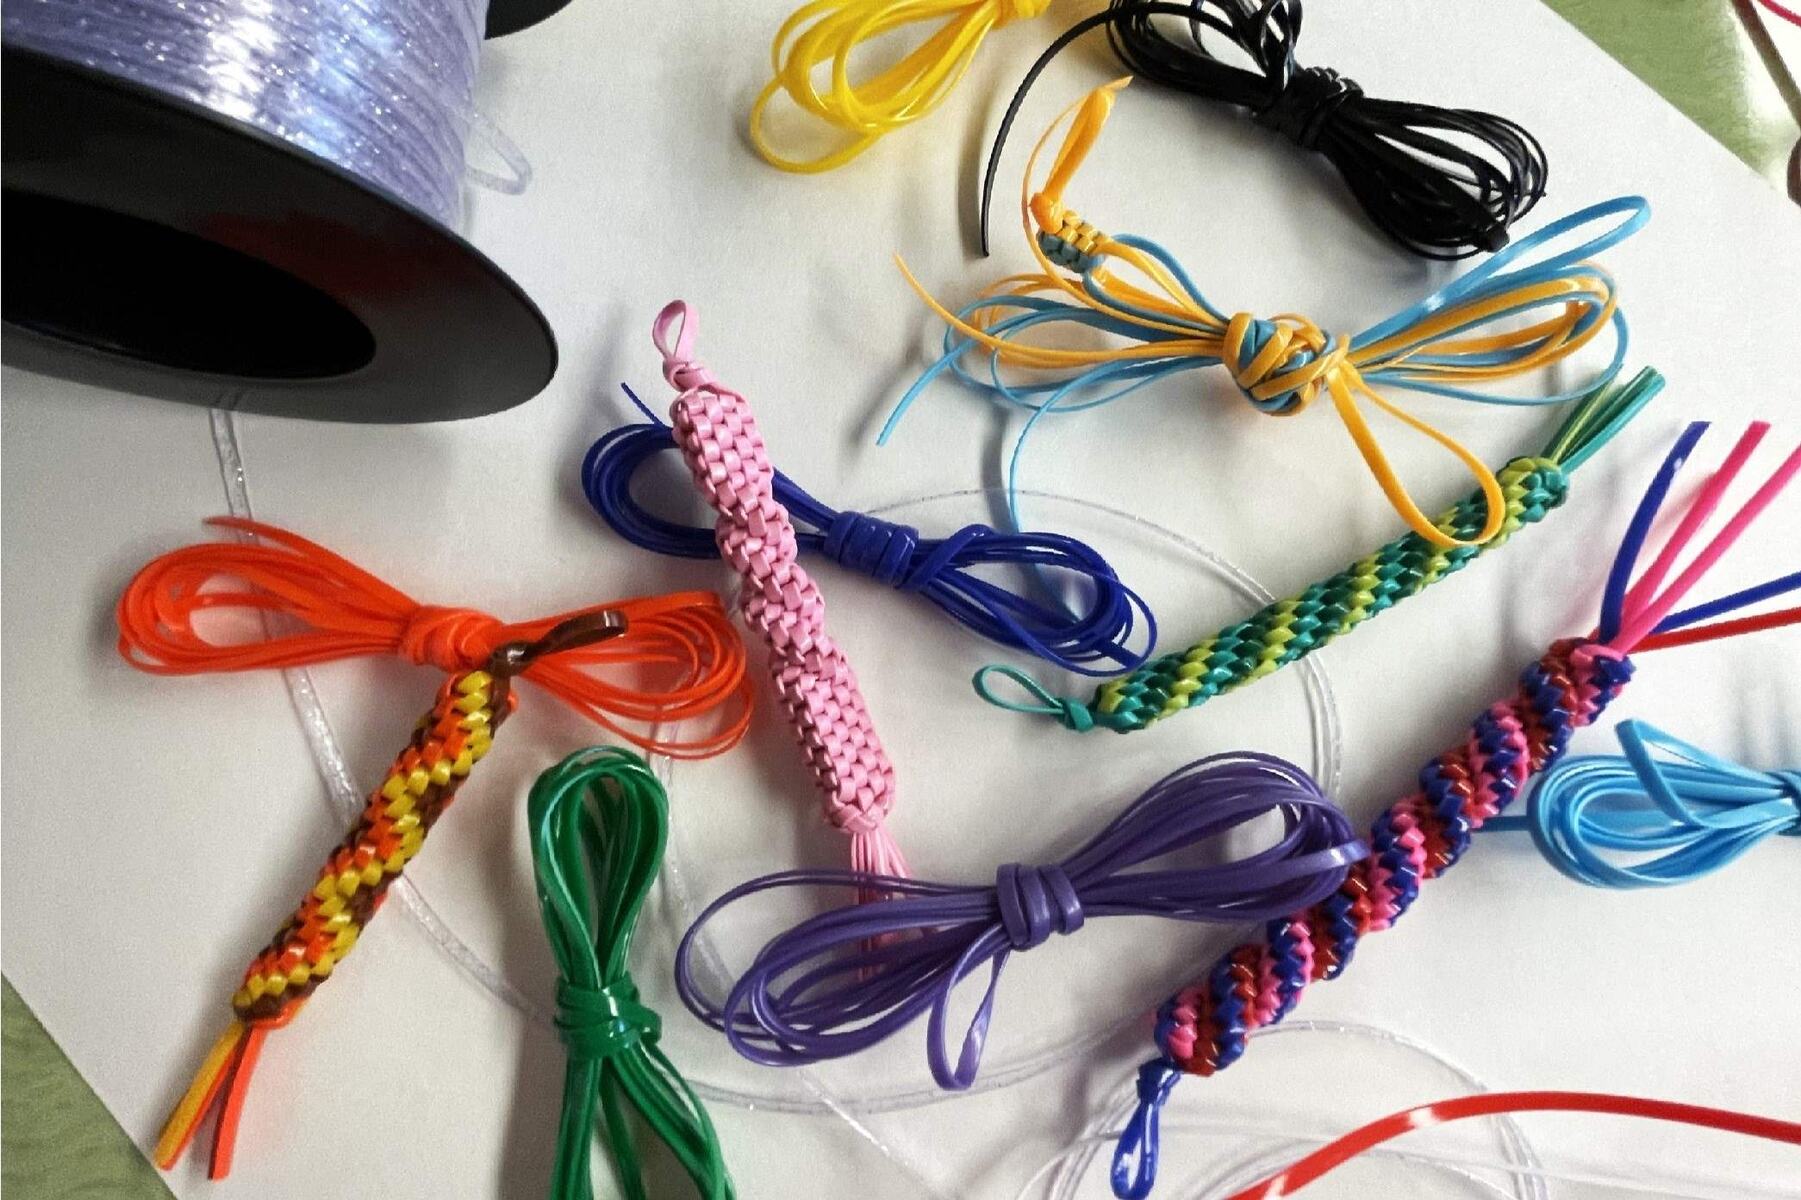
Lanyard Cord: The primary material for crafting a spiral lanyard is the lanyard cord. Choose a durable and visually appealing cord that aligns with your design preferences. Nylon and satin cords are popular choices due to their strength and vibrant color options.
-
Scissors: A pair of sharp scissors is essential for cutting the cord to the desired length and trimming any excess material during the weaving process.
-
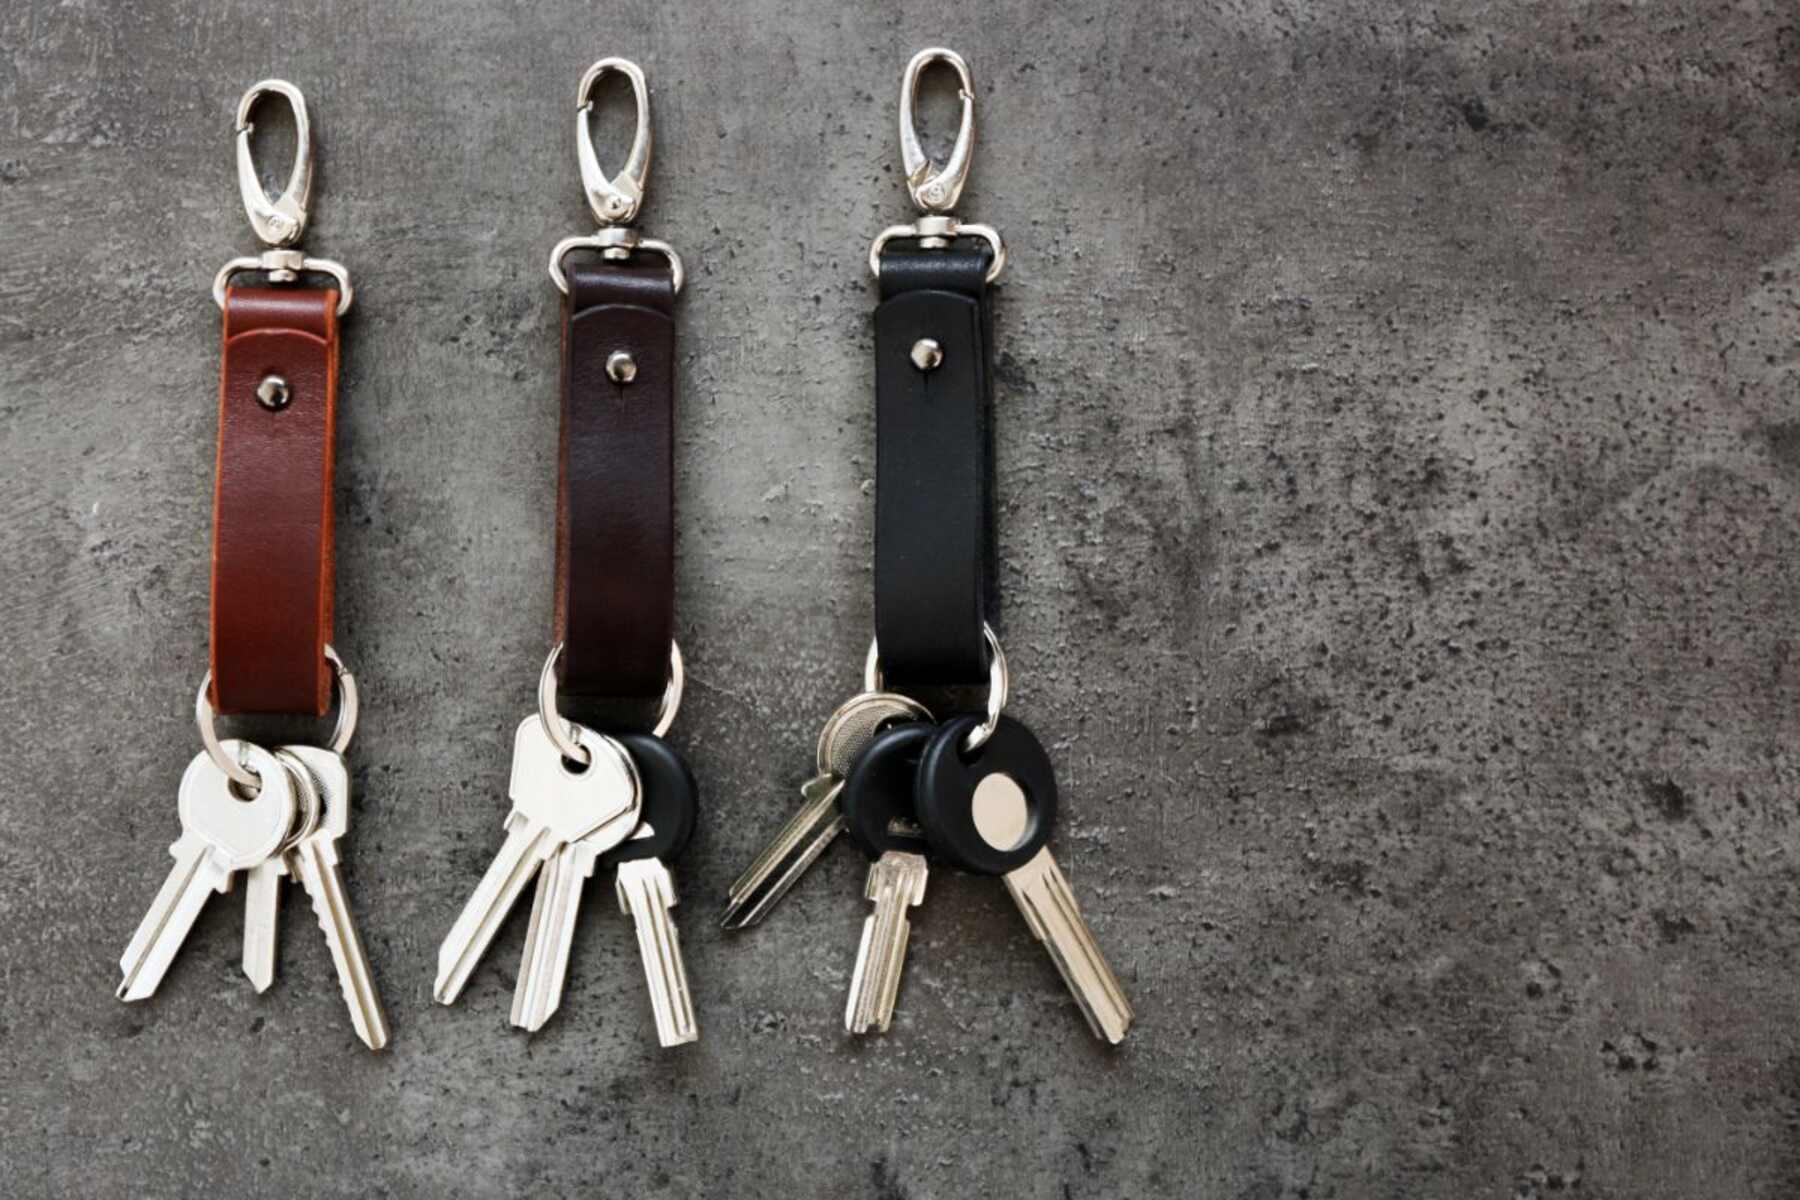
Keychain Ring or Swivel Hook: Depending on the intended use of the lanyard, you will need a keychain ring or swivel hook to attach keys, ID badges, or other items. These attachments provide functionality and convenience to the finished lanyard.
-
Lighter or Fray Check: To prevent the ends of the cord from fraying, a lighter or fray check can be used to seal the cut edges. This ensures a neat and polished appearance for your completed lanyard.
-
Ruler or Measuring Tape: Accurate measurements are crucial for achieving the desired length of the lanyard. A ruler or measuring tape will help you cut the cord to the appropriate size before beginning the weaving process.
-
Optional Embellishments: If you wish to personalize your lanyard further, consider incorporating decorative beads, charms, or pendants into the design. These embellishments add a touch of individuality and flair to the finished lanyard.
By ensuring that you have these materials on hand, you will be well-prepared to dive into the art of crafting spiral lanyards. With the right tools at your disposal, you can focus on honing your weaving skills and creating lanyards that are both visually captivating and functional. Now that you've gathered your supplies, it's time to move on to the next step: measuring and cutting the cord.
Step 1: Gather Your Supplies
Before delving into the intricate art of weaving a spiral lanyard, it's crucial to gather all the necessary supplies to ensure a seamless and enjoyable crafting experience. The process of creating a spiral lanyard requires precision and attention to detail, making it essential to have the right materials at your disposal. By assembling the following items, you'll set the stage for a successful lanyard-making endeavor:
Lanyard Cord
The lanyard cord serves as the foundational element of your spiral lanyard. Choose a cord that not only complements your personal style but also offers durability and flexibility. Nylon and satin cords are popular choices due to their strength and wide array of vibrant colors, allowing you to tailor the lanyard to your preferences.
Scissors
A pair of sharp scissors is indispensable for cutting the cord to the desired length and neatly trimming any excess material during the weaving process. Opt for precision scissors that allow for clean and accurate cuts, ensuring that your lanyard maintains a polished appearance throughout the crafting journey.
Keychain Ring or Swivel Hook
To add functionality to your lanyard, you'll need a keychain ring or swivel hook. These attachments provide a secure means of connecting keys, ID badges, or other items to the lanyard. When selecting a keychain ring or swivel hook, consider the intended use of the lanyard to ensure that it accommodates your specific needs.
Lighter or Fray Check
To prevent the ends of the cord from fraying and unraveling, a lighter or fray check is essential. By carefully applying heat from a lighter or using fray check, you can seal the cut edges of the cord, resulting in a tidy and professional finish for your completed lanyard.
Ruler or Measuring Tape
Accurate measurements are paramount in achieving the desired length of the lanyard. A ruler or measuring tape will enable you to precisely cut the cord to the appropriate size before commencing the weaving process. This attention to detail ensures that your lanyard meets your specifications and serves its intended purpose effectively.
Optional Embellishments
For those seeking to infuse a personalized touch into their lanyard, optional embellishments such as decorative beads, charms, or pendants offer an avenue for creative expression. These adornments can elevate the visual appeal of the lanyard, adding a unique and personalized touch to the finished product.
By meticulously gathering these supplies, you pave the way for a smooth and gratifying lanyard-making experience. With the essential materials at your fingertips, you're ready to embark on the next step: measuring and cutting the cord to initiate the weaving process.
Step 2: Measure and Cut the Cord
Once you have gathered your lanyard cord and essential crafting tools, it's time to embark on the pivotal step of measuring and cutting the cord. This stage sets the foundation for the weaving process and lays the groundwork for creating a lanyard of the desired length.
Begin by selecting the lanyard cord of your choice, ensuring that it aligns with your aesthetic preferences and functional requirements. Whether you opt for a vibrant nylon cord or a sleek satin variant, the cord's color and texture should resonate with your envisioned lanyard design.
Using a ruler or measuring tape, carefully measure the desired length for your spiral lanyard. Consider the intended use of the lanyard, whether it's for holding keys, ID badges, or other items, and tailor the length accordingly. It's essential to factor in the additional length required for knotting and attaching the keychain ring or swivel hook.
Once you've determined the appropriate length, use a pair of sharp scissors to make a clean and precise cut, ensuring that the ends are neat and free from fraying. For added durability and a professional finish, you can use a lighter to gently melt the cut ends of the cord, sealing them to prevent unraveling.
Attention to detail during the measuring and cutting process is paramount, as it directly impacts the functionality and visual appeal of the finished lanyard. By meticulously following these steps, you set the stage for a seamless transition to the next phase: creating the initial loop for your spiral lanyard.
With the cord measured and cut to perfection, you are now poised to delve into the intricate art of weaving a captivating spiral pattern. This meticulous approach ensures that your lanyard not only meets your specifications but also reflects a high standard of craftsmanship. As you progress through the subsequent steps, the precision and care invested in measuring and cutting the cord will become evident in the flawless execution of your spiral lanyard.
Step 3: Create the Initial Loop
With the lanyard cord measured and cut to precision, the next pivotal step in crafting a spiral lanyard is creating the initial loop. This foundational element sets the stage for the intricate weaving process and forms the starting point from which the spiral pattern will gracefully unfold.
To begin, take the cut length of cord and fold it in half, ensuring that the ends are aligned. This creates a loop at one end of the cord, with the two loose ends extending from the opposite side. The loop serves as the anchor point for commencing the weaving process, and its size will determine the diameter of the lanyard's central loop.
With the loop formed, secure it by tying a tight overhand knot near the fold. This knot anchors the loop securely in place, providing a stable foundation for the subsequent weaving steps. Ensure that the knot is snug and well-positioned, as it will bear the tension of the weaving process and contribute to the lanyard's structural integrity.
As you fasten the initial loop, pay close attention to the alignment and tension of the cord, as these factors influence the symmetry and overall appearance of the lanyard. The initial loop not only marks the beginning of the weaving journey but also serves as a pivotal reference point for maintaining the desired shape and dimensions throughout the process.
A well-crafted initial loop sets the stage for a seamless transition to the subsequent steps, where the intricate spiral pattern will gradually take shape. As the lanyard evolves, the precision and care invested in creating the initial loop will manifest in the uniformity and visual appeal of the finished spiral lanyard.
By mastering the art of forming the initial loop with finesse and attention to detail, you lay the groundwork for a lanyard that exudes craftsmanship and artistry. With the initial loop securely in place, you are now ready to embark on the captivating journey of weaving the spiral pattern, where each knot and twist brings you closer to completing a stunning and functional lanyard.
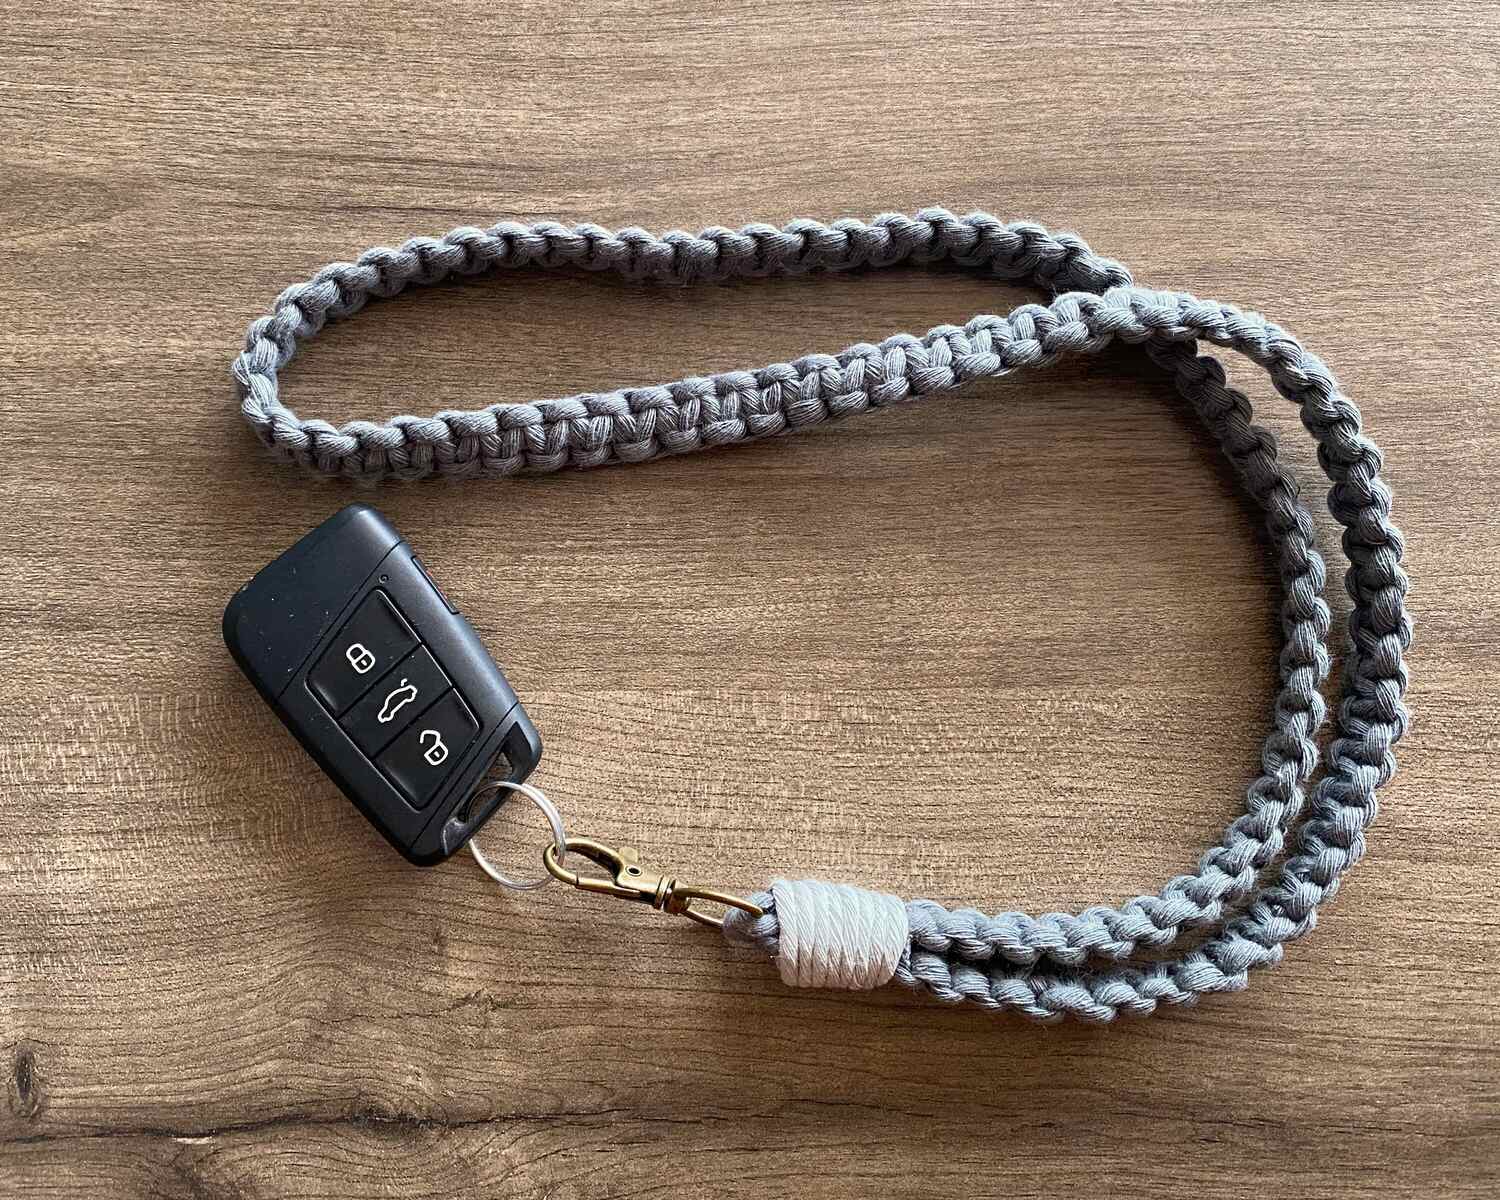
Step 4: Start the Spiral Pattern
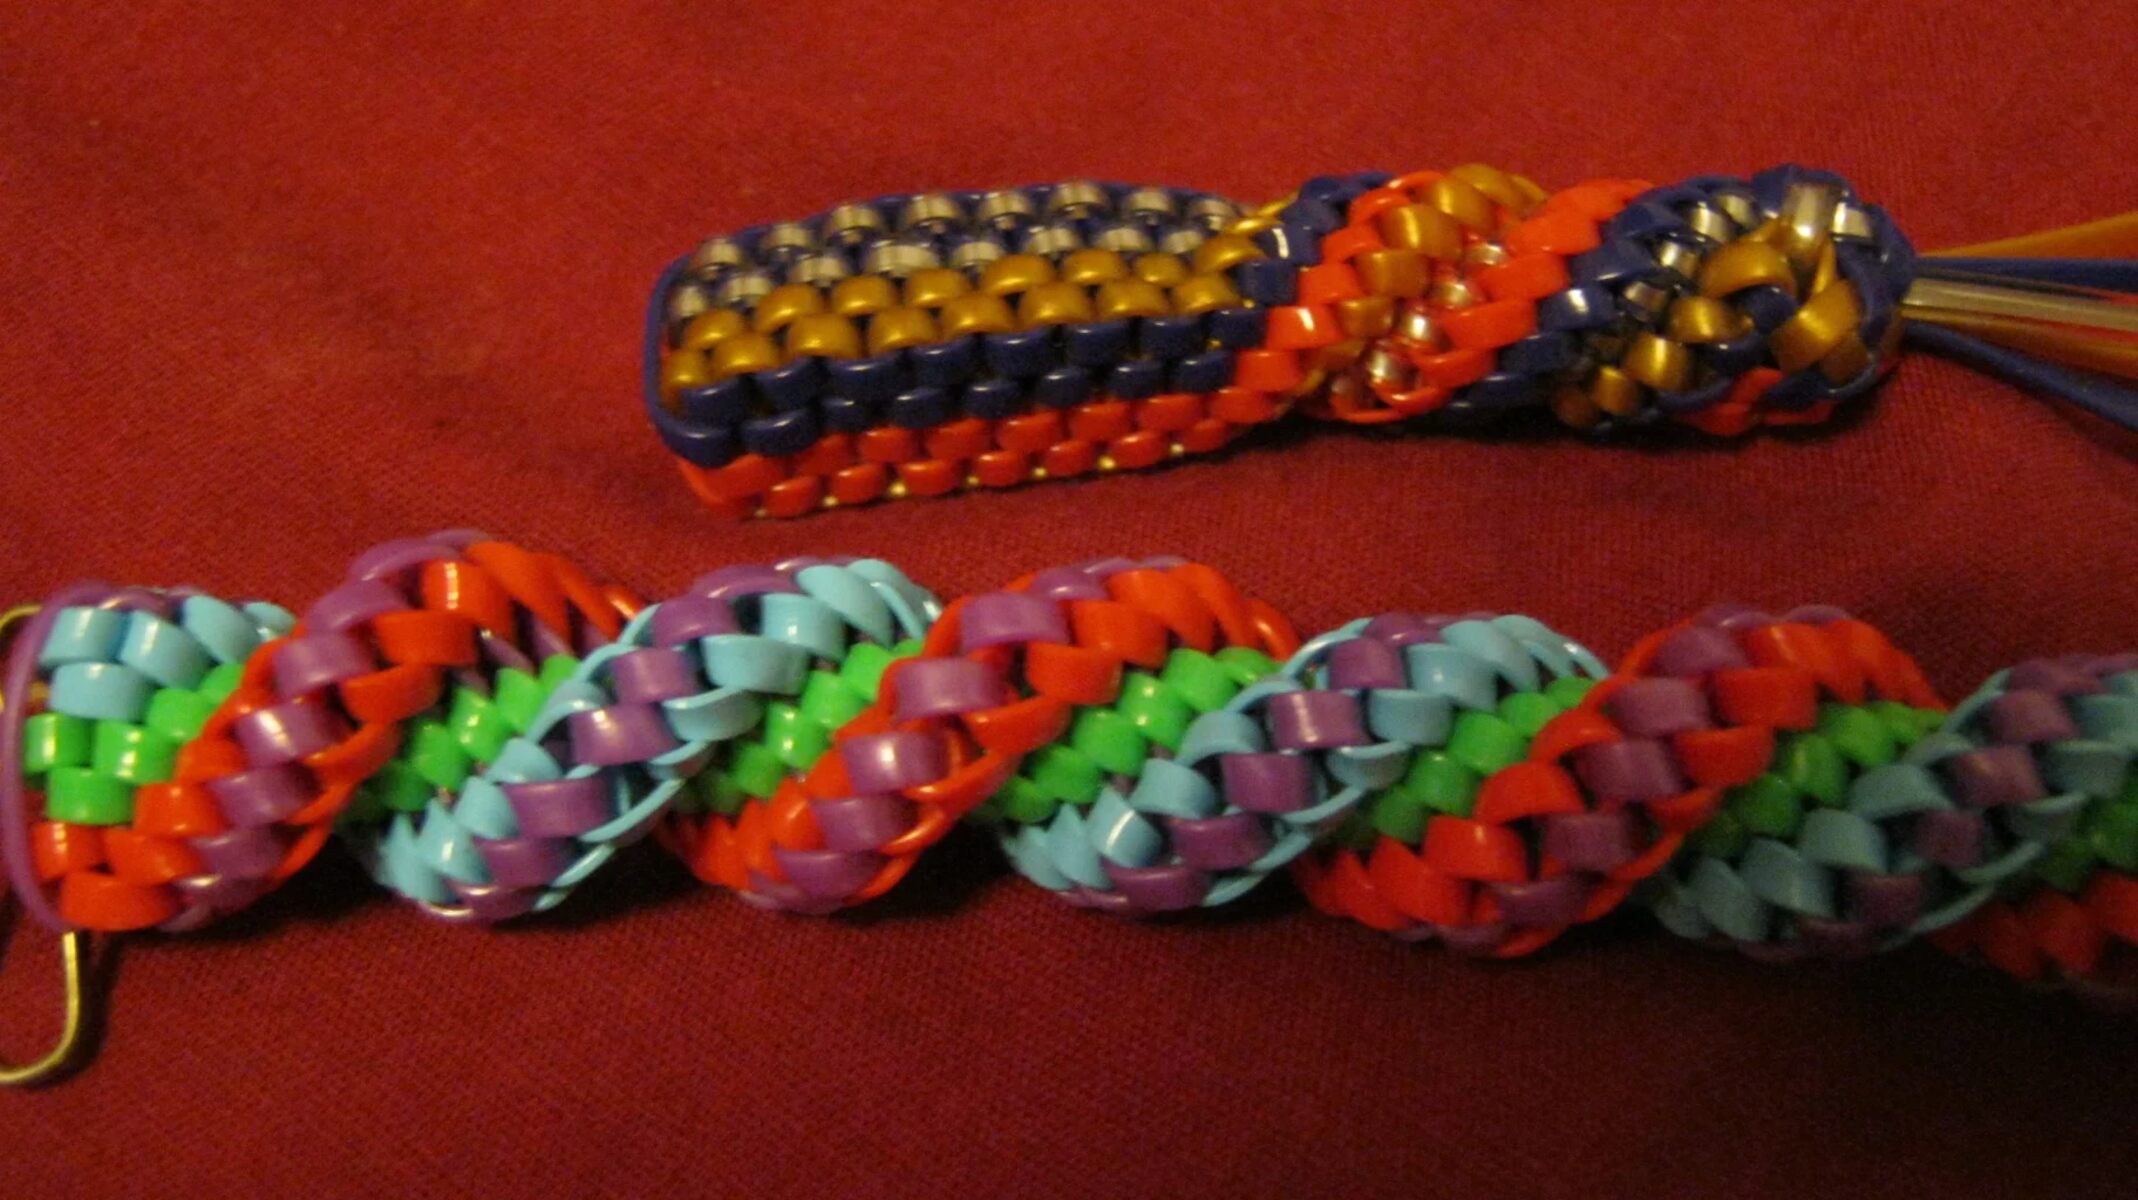
With the initial loop securely in place, you are now poised to embark on the captivating process of weaving the spiral pattern, a defining element that infuses the lanyard with visual intrigue and structural integrity. The spiral pattern not only enhances the aesthetic appeal of the lanyard but also contributes to its strength and durability, making it a fundamental aspect of the weaving journey.
To initiate the spiral pattern, separate the two loose ends of the lanyard cord, ensuring that they are positioned parallel to each other. With one end designated as the working cord and the other as the holding cord, you are ready to commence the weaving process. The working cord will form the twists and knots that create the spiral effect, while the holding cord serves as the stable anchor around which the pattern evolves.
Begin by taking the working cord and crossing it over the holding cord, forming a loop behind the holding cord and emerging through the center of the loop. This establishes the foundational knot that sets the spiral pattern in motion. As you tighten the knot, ensure that it is snug and positioned neatly against the previous knot, maintaining uniformity and consistency throughout the weaving process.
With the first knot secured, continue the pattern by repeating the process, this time crossing the working cord over the holding cord in the opposite direction. As each knot is formed, the spiral pattern gradually unfolds, creating a visually captivating and symmetrical design. Consistency in the tension and positioning of the knots is crucial, as it determines the uniformity and balance of the spiral pattern.
As you progress through the weaving process, the spiral pattern will begin to take shape, showcasing the meticulous craftsmanship and attention to detail invested in each knot and twist. The rhythmic repetition of crossing the working cord over the holding cord yields an enchanting spiral effect, infusing the lanyard with a touch of elegance and artistry.
Mastering the art of initiating the spiral pattern with precision and finesse sets the stage for a seamless transition to the subsequent steps, where the lanyard will evolve into a stunning and functional accessory. As the spiral pattern unfolds, the dedication and skill invested in weaving each twist and knot will be evident in the captivating visual appeal and structural integrity of the finished lanyard.
With the spiral pattern gracefully taking shape, you are now poised to continue the weaving journey, where each twist and turn brings you closer to completing a lanyard that reflects the artistry and craftsmanship inherent in the intricate process of lanyard making.
Step 5: Continue the Spiral Pattern
As the captivating spiral pattern begins to take form, the weaving process enters a mesmerizing phase where each twist and knot contributes to the lanyard's visual allure and structural integrity. Continuing the spiral pattern demands a harmonious interplay of precision and creativity, as the rhythmic repetition of weaving gradually transforms the lanyard into a stunning and functional accessory.
With the foundation of the initial loop and the commencement of the spiral pattern established, the next step involves maintaining the momentum of the weaving process. As you continue the spiral pattern, ensure that the knots are consistently positioned and tightened, creating a seamless progression that accentuates the lanyard's symmetry and aesthetic appeal. The rhythmic interplay of the working cord and holding cord yields an enchanting spiral effect, infusing the lanyard with a touch of elegance and artistry.
Each carefully crafted knot contributes to the lanyard's structural integrity, ensuring that it remains resilient and reliable for its intended use. Whether you're crafting a lanyard for keys, ID badges, or other items, the meticulous continuation of the spiral pattern guarantees a finished product that not only captivates the eye but also serves its practical purpose with unwavering functionality.
As the weaving journey unfolds, the evolving spiral pattern reflects the dedication and skill invested in each twist and knot. The symmetrical and visually captivating design that emerges from the continued spiral pattern is a testament to the craftsmanship inherent in the art of lanyard making. With each progression, the lanyard becomes a tangible embodiment of the artisan's meticulous attention to detail and unwavering commitment to creating a high-quality accessory.
The ongoing continuation of the spiral pattern marks a pivotal stage in the lanyard-making process, where the fusion of creativity and precision yields a masterpiece of functional artistry. With each knot and twist, the lanyard evolves into a personalized creation that not only reflects the artisan's skill but also carries the potential to serve as a thoughtful handmade gift or a cherished personal accessory.
As the spiral pattern gracefully unfolds, the weaving journey enters a phase where the lanyard's transformation becomes increasingly evident. The dedication and artistry invested in continuing the spiral pattern pave the way for a seamless transition to the subsequent steps, where the lanyard will evolve into a stunning and functional accessory, resonating with the craftsmanship and creativity inherent in the intricate process of lanyard making.
Step 6: Finish the Lanyard
As the weaving journey nears its culmination, the final step involves completing the lanyard with finesse and precision, ensuring that every knot and twist harmonizes to deliver a polished and functional accessory. The meticulous attention to detail invested in finishing the lanyard is pivotal, as it culminates in a creation that embodies the artisan's dedication to craftsmanship and artistry.
To finish the lanyard, carefully continue the spiral pattern until the desired length is achieved, ensuring that the weaving remains consistent and symmetrical. As the lanyard approaches its completion, the last few knots and twists serve as the crowning touches that elevate the accessory to a state of consummate artistry.
Once the desired length is attained, carefully secure the final knot, ensuring that it aligns seamlessly with the preceding knots to maintain the lanyard's uniformity and visual appeal. The last knot signifies the culmination of the weaving journey, encapsulating the artisan's skill and dedication in a tangible form of functional art.
After securing the final knot, trim any excess cord with precision, ensuring that the ends are neat and free from fraying. Using a pair of sharp scissors, carefully trim the cord to achieve a clean and polished finish, further enhancing the lanyard's aesthetic appeal and professional quality.
To prevent the trimmed ends from unraveling, apply a small amount of fray check or gently melt the cut edges with a lighter, ensuring that the cord remains intact and tidy. This final step adds a touch of finesse to the lanyard, preserving its durability and visual appeal for prolonged use.
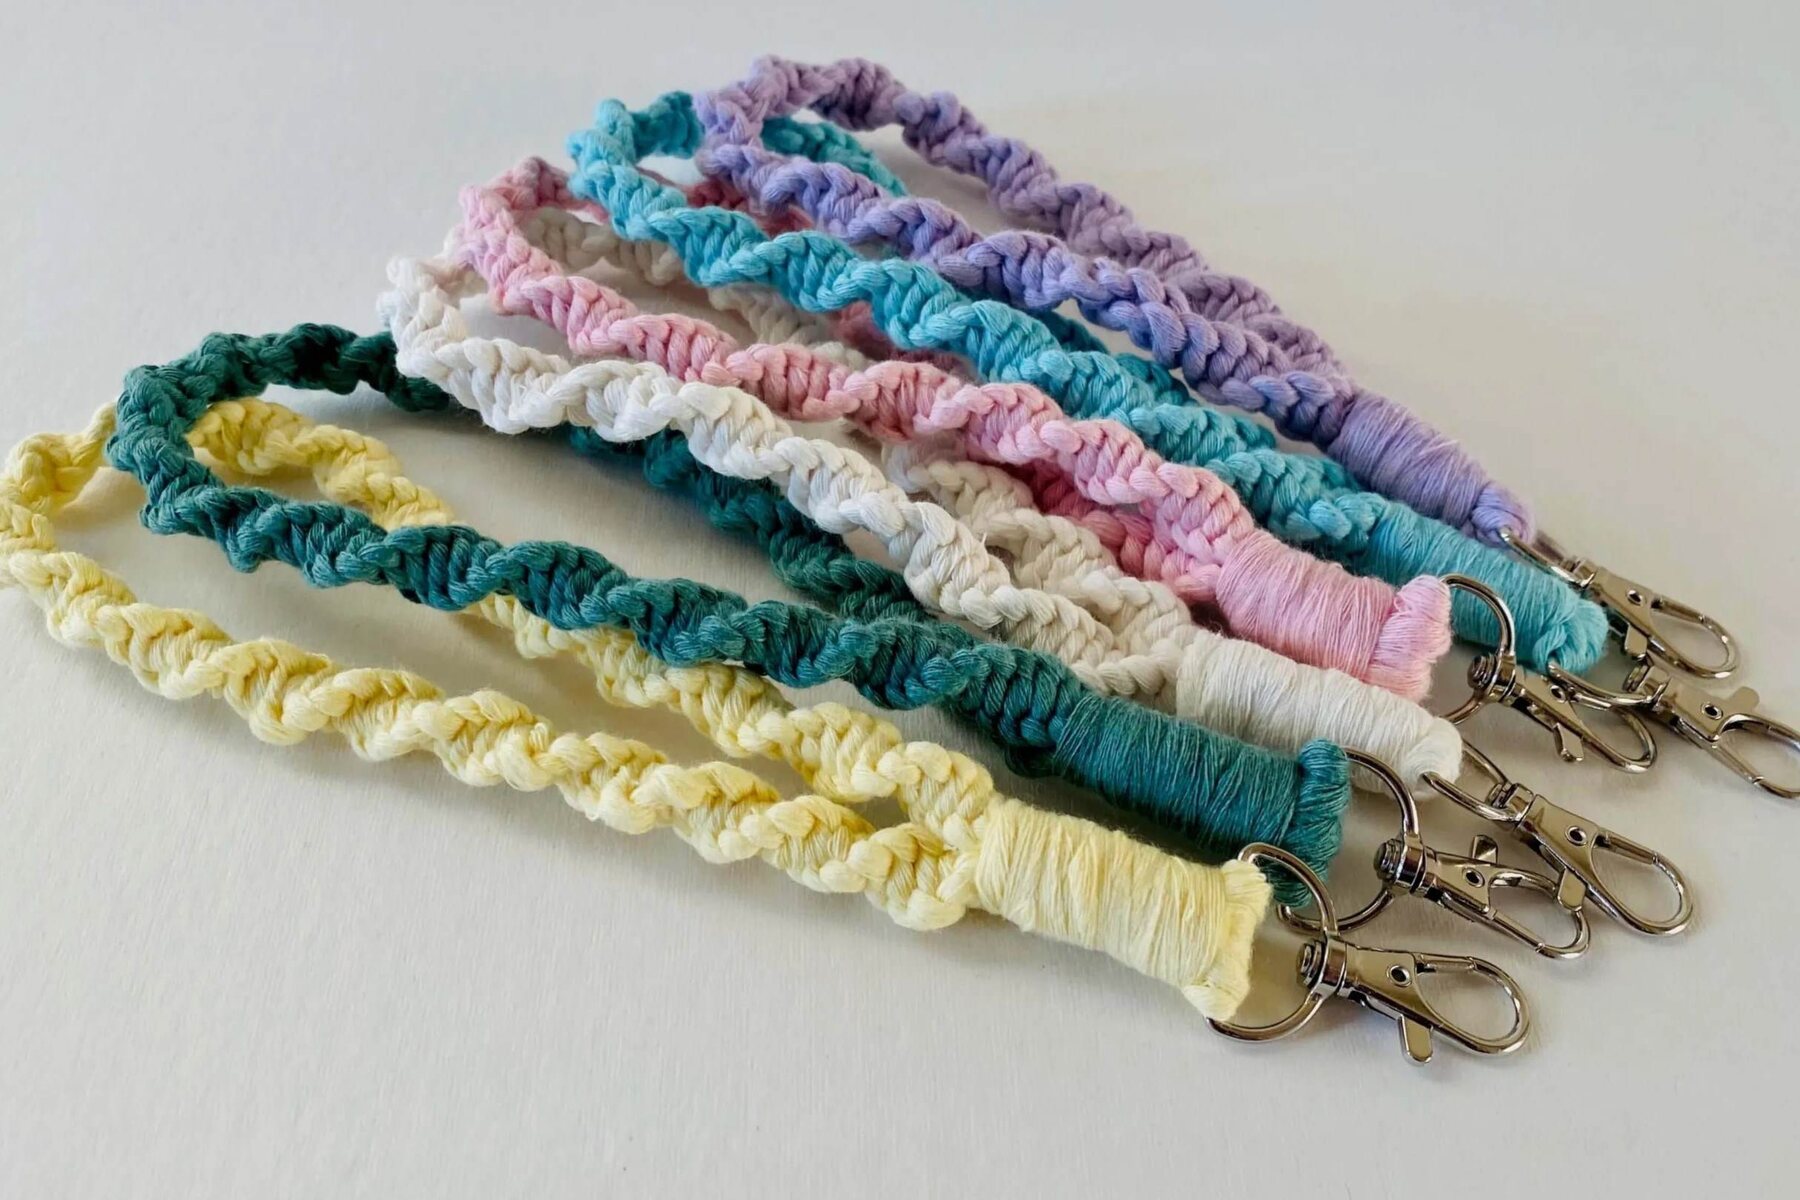
With the lanyard meticulously finished, take a moment to admire the completed creation, showcasing the culmination of the artisan's dedication and skill. Whether it's a vibrant accessory for personal use or a thoughtful handmade gift, the finished lanyard stands as a testament to the artistry and craftsmanship inherent in the intricate process of lanyard making.
The completion of the lanyard marks the fulfillment of the weaving journey, where each twist and knot has contributed to the creation of a stunning and functional accessory. As the finished lanyard rests in your hands, it embodies the artisan's unwavering commitment to precision and creativity, resonating with the potential to serve as a cherished and personalized adornment in daily life.
Conclusion
In conclusion, the art of crafting spiral lanyards encapsulates a harmonious blend of creativity, precision, and dedication to craftsmanship. From gathering the essential materials to meticulously weaving the intricate spiral pattern, each step in the lanyard-making journey reflects the artisan's unwavering commitment to producing a stunning and functional accessory.
As the final knot is secured and the lanyard reaches completion, it stands as a tangible embodiment of the artisan's skill and artistry. The meticulous attention to detail invested in every twist and knot culminates in a creation that not only captivates the eye but also serves as a practical and personalized adornment in daily life.
Crafting spiral lanyards offers a fulfilling and enjoyable means of expressing creativity while producing a functional accessory with a touch of personalized flair. Whether it's a vibrant addition to your own collection of accessories or a thoughtful handmade gift for a friend or loved one, the lanyard serves as a testament to the artistry and dedication inherent in the weaving process.
Furthermore, the journey of lanyard making fosters a deeper appreciation for the intricacies of knotting techniques and the art of creating symmetrical and visually captivating patterns. It presents an opportunity for individuals to explore a new craft or expand their repertoire, delving into the world of lanyard weaving with enthusiasm and curiosity.
The completion of a spiral lanyard signifies not only the culmination of a creative endeavor but also the beginning of a functional and versatile accessory's journey. Whether it's used to hold keys, ID badges, or other items, the lanyard stands as a testament to the artisan's dedication to producing high-quality and visually appealing creations.
In essence, the art of crafting spiral lanyards transcends the mere act of weaving cords; it embodies the artisan's passion for creating personalized and functional accessories that resonate with artistry and individuality. The completion of each lanyard marks the celebration of creativity, skill, and dedication, culminating in a tangible creation that carries the potential to brighten and personalize everyday experiences.