Introduction
Welcome to this step-by-step guide on how to download Unreal Engine 5, one of the most powerful and popular game development engines available. Whether you’re a seasoned developer or a beginner looking to dive into the world of game development, Unreal Engine 5 offers a wide range of tools and features to bring your creative visions to life.
Unreal Engine 5 introduces groundbreaking technology that pushes the limits of what is achievable in real-time graphics. With its state-of-the-art rendering capabilities, improved lighting system, and enhanced tools for creating and manipulating 3D assets, Unreal Engine 5 sets a new standard for visual fidelity and immersive experiences.
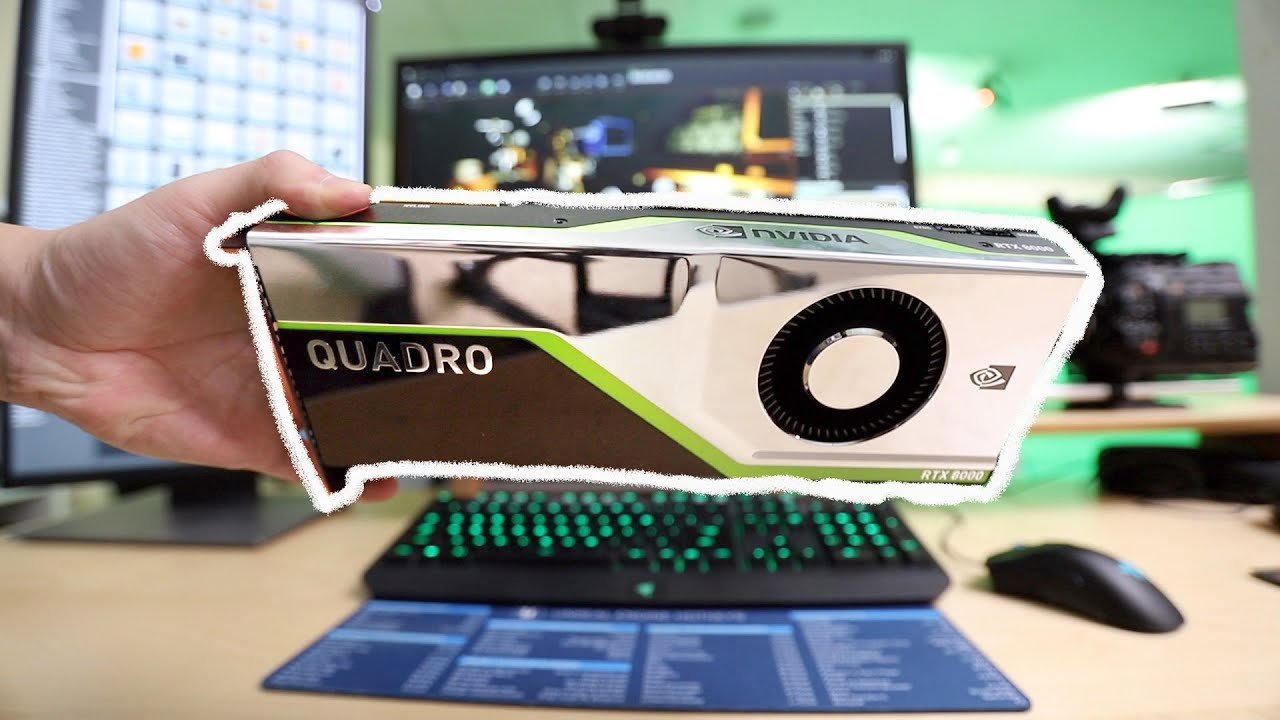
Before we dive into the process of downloading and installing Unreal Engine 5, it’s important to note that the engine requires a powerful computer system to run smoothly. Make sure your hardware meets the recommended system requirements, including a capable graphics card, sufficient RAM, and ample storage space.
Additionally, it’s worth mentioning that Unreal Engine 5 is available for free to download and use for personal projects, including non-commercial and educational purposes. However, there may be licensing fees and royalties associated with commercial projects, so be sure to review the applicable terms and conditions provided by Epic Games.
In this guide, we’ll take you through each step of the process, from preparing for the download to setting up Unreal Engine 5 and creating a basic project. By the end of this tutorial, you’ll be equipped with the knowledge and tools necessary to start your journey as an Unreal Engine 5 developer.
So, without further ado, let’s get started and unleash the power of Unreal Engine 5!
Preparing for the Download
Before you download Unreal Engine 5, there are a few things you need to consider and prepare for. Taking these steps beforehand will ensure a smooth installation process and a better overall experience with the engine.
Check System Requirements: Unreal Engine 5 is a resource-intensive application, so it’s crucial to ensure that your computer meets the minimum system requirements. Epic Games provides detailed specifications on their website, including the required operating system version, processor, graphics card, RAM, and storage space. It’s recommended to have a computer that exceeds these minimum requirements for optimal performance.
Create an Epic Games Account: To download Unreal Engine 5, you’ll need to create an account with Epic Games. Visit the Epic Games website and sign up for an account if you don’t have one already. This account will also give you access to additional resources, forums, and support related to Unreal Engine.
Decide on a Project Folder: Once you download Unreal Engine 5, it will require a significant amount of disk space to store project files and engine-related data. Decide on a location on your computer where you want to store these files. Make sure you have enough available space in that folder to accommodate the size of your projects.
Ensure a Stable Internet Connection: Unreal Engine 5 is a large download, so a stable and reliable internet connection is essential. Make sure you have a strong and uninterrupted internet connection before initiating the download. This will help prevent any interruptions or corruptions during the download process.
Backup Important Files: Before you start the download, it’s always a good idea to back up any important files or documents on your computer. While the installation process shouldn’t affect your personal files, having a backup gives you peace of mind in case of unforeseen issues.
By taking these preparatory steps, you’ll ensure a smooth and successful download and installation of Unreal Engine 5. Once you have completed these preparations, you are ready to move on to the next step and begin the download process.
Downloading Unreal Engine 5
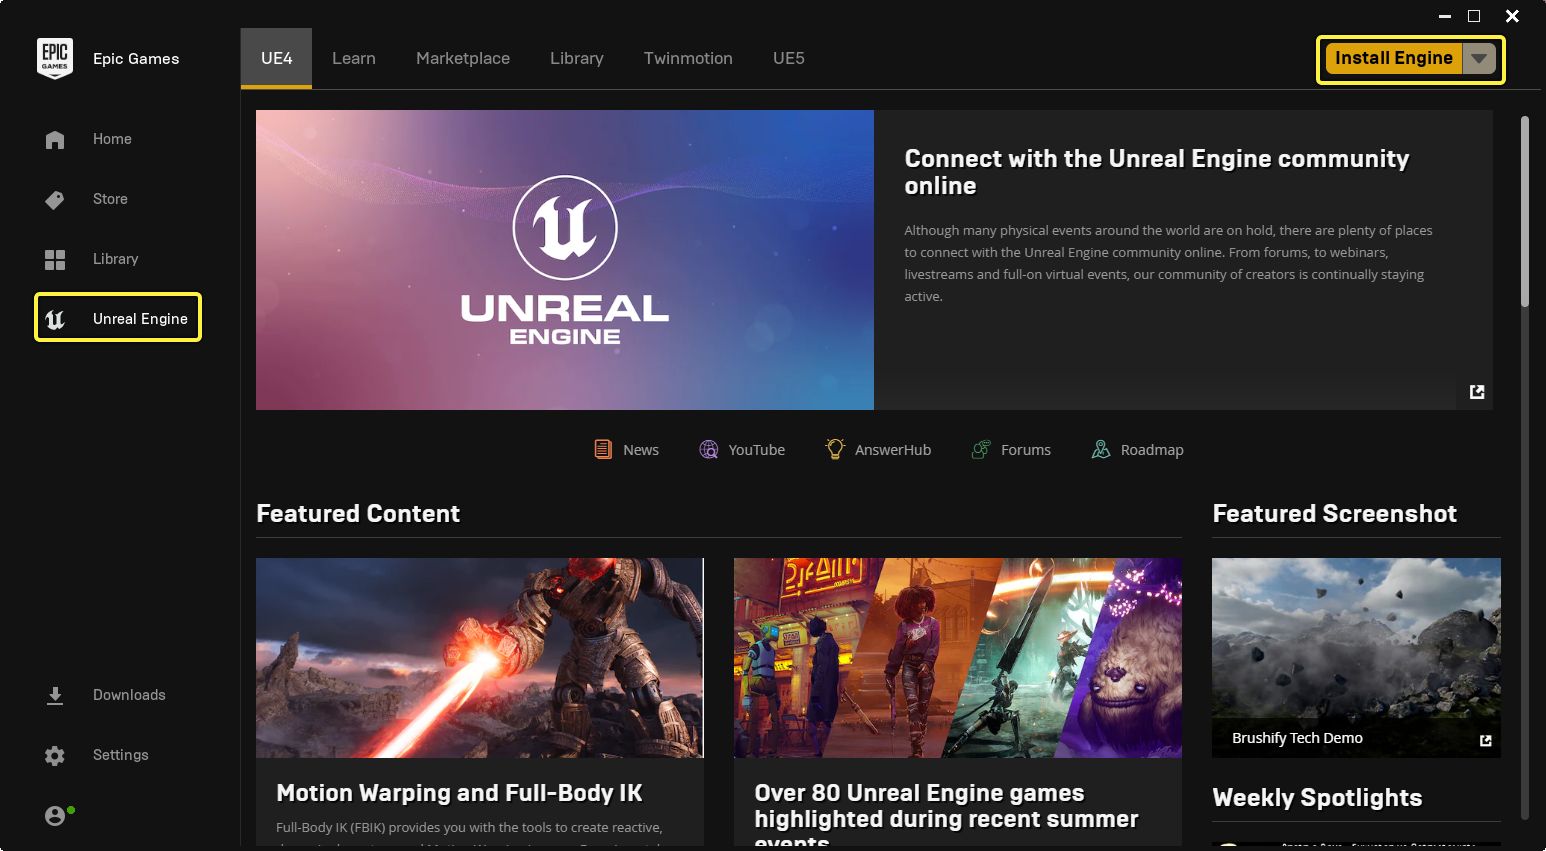
Now that you’ve completed the necessary preparations, it’s time to download Unreal Engine 5. Follow these steps to get started:
- Open your preferred web browser and visit the official Unreal Engine website.
- Click on the “Get Unreal” button or navigate to the “Downloads” section.
- Sign in to your Epic Games account. If you don’t have an account, you’ll need to create one.
- Once you’re signed in, you’ll be directed to the Unreal Engine download page. Here, you’ll find the latest version of the engine available for download.
- Choose either the Windows or macOS version, depending on your operating system.
- Select the desired version of Unreal Engine 5 that you want to download. If you’re not sure, it’s recommended to go with the latest stable release.
- Review and accept the terms and conditions presented by Epic Games.
- Click on the “Download” button to initiate the download process.
- Depending on your internet connection speed, the download may take some time. Sit back and let the download complete.
- Once the download is finished, navigate to the folder where you chose to save the installer file.
- Double-click on the installer file to launch the installation wizard.
Follow the on-screen instructions provided by the installation wizard to complete the installation process. It may take some time to install Unreal Engine 5, as it needs to extract and configure all the necessary files and components.
Once the installation is complete, you’re ready to start harnessing the power of Unreal Engine 5. Congratulations! You’ve successfully downloaded Unreal Engine 5 and can now begin creating incredible interactive experiences.
In the next sections, we’ll guide you through the process of setting up Unreal Engine 5, creating a new project, importing assets, and building your level. So, let’s move on to the next step!
Installing Unreal Engine 5
With Unreal Engine 5 downloaded, it’s time to install the engine on your computer. Follow these steps to complete the installation process:
- Navigate to the folder where you saved the Unreal Engine 5 installer file.
- Double-click on the installer file to launch the installation wizard.
- Read and review the End User License Agreement (EULA) presented by Epic Games.
- Click on the “Accept” button to agree to the terms and proceed with the installation.
- Select the installation location on your computer where you want to install Unreal Engine 5. It’s recommended to use the default destination folder unless you have a specific reason to choose a different location.
- Choose any additional components or features you want to install alongside Unreal Engine 5. You can select additional tools, plugins, and content examples based on your specific needs.
- Click on the “Install” button to start the installation process.
- Wait for the installation to complete. This may take some time, depending on your computer’s speed and performance.
- Once the installation finishes, you’ll receive a notification indicating that Unreal Engine 5 has been successfully installed on your computer.
- Close the installation wizard and navigate to the installation folder if it doesn’t automatically open.
- Double-check that the Unreal Engine 5 files and folders are properly installed and located in the specified destination folder.
With Unreal Engine 5 successfully installed, you’re now ready to start exploring its vast array of tools and features. Whether you’re interested in creating games, architectural visualizations, or virtual reality experiences, Unreal Engine 5 offers the tools and flexibility to bring your ideas to life.
In the next sections, we’ll guide you through the process of setting up Unreal Engine 5 for your desired project and provide you with the essential knowledge to get started with creating amazing content. So, let’s continue our journey with Unreal Engine 5!
Setting Up Unreal Engine 5 for One Level Only
Once you’ve installed Unreal Engine 5, it’s time to set up the engine for your specific project. In this section, we’ll guide you through the process of configuring Unreal Engine 5 for a single-level project.
Follow these steps to set up Unreal Engine 5 for one level:
- Launch Unreal Engine 5 by double-clicking on the Unreal Engine icon on your desktop or navigating to the installation folder and opening the engine executable.
- When prompted, sign in to your Epic Games account to access the full features and functionalities of the engine.
- Once you’re in the Unreal Engine editor, go to the “File” menu in the toolbar and select “New Project”.
- In the New Project window, select “Blueprint” as the project type. Blueprints provide a visual scripting system that allows for rapid prototyping and development without the need for extensive coding knowledge.
- Choose a suitable project template based on your project requirements and preferences. For a single-level project, the “First Person” or “Third Person” templates are common choices.
- Specify the project’s name and location on your computer. Choose a descriptive name that reflects the purpose of your project.
- Click on the “Create Project” button to generate the project files and open the project in the editor.
- Once the project is open, familiarize yourself with the Unreal Engine editor interface, including the viewport, content browser, details panel, and various toolbars. Explore the different tabs and menus to gain an understanding of the available features.
- Now that you have set up Unreal Engine 5 for your single-level project, you can start building and designing your level using the powerful tools and functionalities provided by the engine.
Remember to save your project regularly to avoid losing any progress. Unreal Engine 5 offers an autosave feature, but it’s always a good practice to manually save your work.
With Unreal Engine 5 set up for a single-level project, you’re now ready to unleash your creativity and bring your ideas to life within the engine’s intuitive and powerful environment.
In the next sections, we’ll guide you through the process of creating a new project, importing 3D assets, setting up lighting and materials, building your level, and testing your creation. So, let’s continue the journey with Unreal Engine 5!
Creating a New Project
With Unreal Engine 5 set up and ready, it’s time to create a new project. Whether you’re starting from scratch or building upon an existing project template, Unreal Engine makes it easy to create and customize your projects. Follow these steps to create a new project:
- Launch Unreal Engine 5 by double-clicking on the Unreal Engine icon or opening the engine executable from the installation folder.
- Sign in to your Epic Games account if prompted.
- In the Unreal Engine editor, go to the “File” menu in the toolbar and select “New Project”.
- In the New Project window, choose the desired project type based on your needs. There are various templates available, such as games, architectural visualizations, virtual reality experiences, and more.
- Specify a name and location for your project. Choose a name that reflects the project’s purpose and select a suitable location on your computer.
- Choose any additional settings or features specific to your project, such as the target platform and project description. You can also enable starter content or plugins if desired.
- Click on the “Create Project” button to generate the project files and open your new project in the Unreal Engine editor.
Once your project is created, you’ll be greeted with a blank canvas ready for your creative endeavors. Familiarize yourself with the Unreal Engine editor interface, including the viewport, content browser, details panel, and various toolbars. Take some time to explore the different tabs and menus to learn about the available features and tools.
In addition to starting from scratch, Unreal Engine 5 also supports the option to import existing projects or assets created in previous engine versions. This can be useful if you want to build upon your previous work or collaborate with others on an ongoing project.
Remember to save your project regularly to avoid losing any progress. Unreal Engine 5 offers an autosave feature, but it’s always a good practice to manually save your work.
Now that you’ve created a new project in Unreal Engine 5, you’re ready to start building your world and bringing your creative vision to life.
In the next sections, we’ll guide you through the process of importing 3D assets, setting up lighting and materials, building your level, and testing your creation. So, let’s continue the journey with Unreal Engine 5!
Importing 3D Assets
One of the exciting aspects of working with Unreal Engine 5 is the ability to bring your 3D assets into your projects. Whether you create your own assets or utilize pre-made assets from online sources, Unreal Engine provides a straightforward process for importing these assets. Follow these steps to import 3D assets into your project:
- In the Unreal Engine editor, make sure you are working in the project where you want to import the 3D assets. If not, create a new project or open the desired project.
- Locate the 3D assets on your computer that you want to import into your project. Supported file formats for 3D assets include FBX, OBJ, and others.
- In the content browser, right-click on the folder where you want to store the imported assets and select “Import”. If you don’t have a specific folder, you can create a new one by right-clicking and selecting “New Folder”.
- In the import dialog box, navigate to the location of the 3D assets on your computer and select the files you want to import. You can select multiple files if needed.
- Adjust the import settings as necessary. Unreal Engine allows you to set options such as scale, rotation, materials, and collision properties. Make sure to review the settings to ensure the assets are imported correctly.
- Click on the “Import” button to begin the import process. Depending on the size and complexity of the assets, this may take some time.
- Once the assets are imported, they will appear in the content browser under the selected folder. You can then drag and drop them into your level or utilize them in other parts of your project.
It’s important to note that Unreal Engine 5 provides a powerful material editor that allows you to enhance the appearance of your 3D assets. You can create materials, apply textures, adjust shaders, and more to achieve the desired visual effects.
By importing 3D assets into your Unreal Engine 5 project, you can enhance the visual quality and bring your vision to life in a more detailed and immersive way.
In the next sections, we’ll guide you through the process of setting up lighting and materials, building your level, saving your progress, and testing your creation. So, let’s continue the journey with Unreal Engine 5!
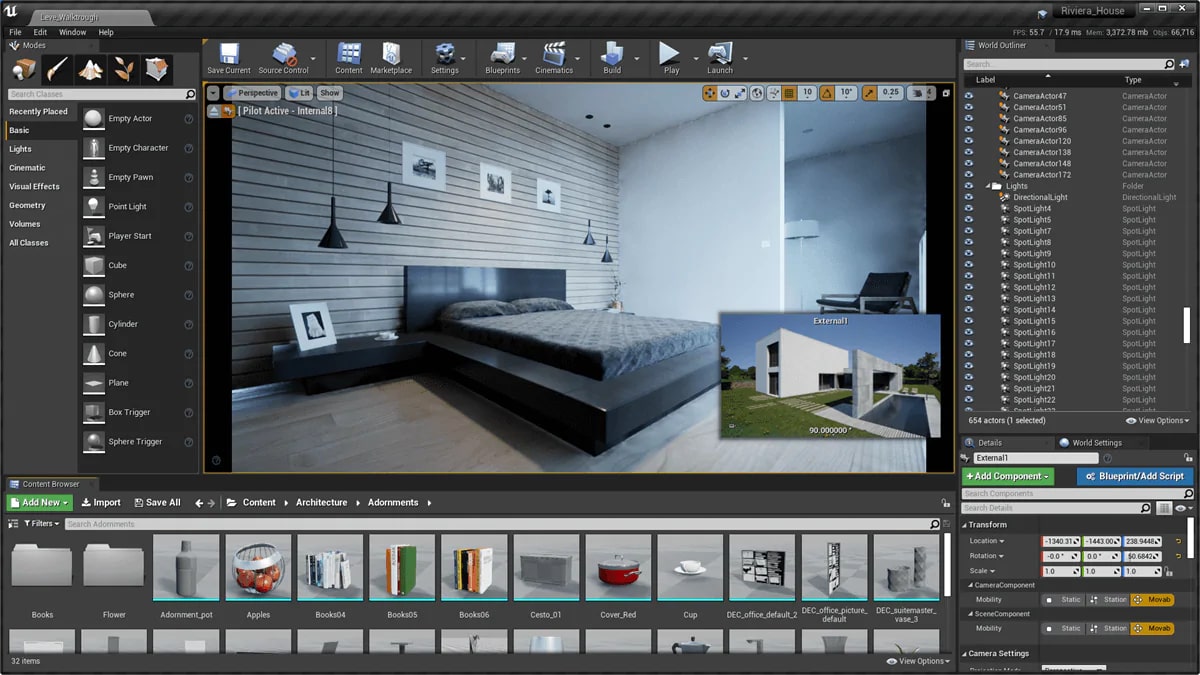
Setting Up Lighting and Materials
Lighting and materials play a crucial role in creating a realistic and visually stunning scene in Unreal Engine 5. By setting up proper lighting and materials, you can bring your 3D assets to life and create a cohesive and immersive environment. Follow these steps to set up lighting and materials in your project:
- Open your project in the Unreal Engine editor and navigate to the level or scene where you want to set up lighting and materials.
- Explore different lighting options available in Unreal Engine 5. You can use dynamic lighting, static lighting, or a combination of both. Dynamic lighting allows for real-time changes in lighting, while static lighting provides more realistic and optimized lighting results.
- Place light sources (such as directional, point, or spotlights) in your scene. Consider the mood and ambiance you want to create, and position your light sources accordingly. Experiment with different lighting angles, colors, and intensities to achieve the desired effect.
- Adjust the lighting settings using the Lightmass settings and the Lightmass Importance Volume. These settings control the quality, bounce lighting, and global illumination in your scene.
- When it comes to materials, Unreal Engine 5 offers a powerful material editor that allows you to create and customize materials for your 3D assets. Double-click on a specific asset in the content browser to open the material editor.
- Inside the material editor, you can create and modify materials by connecting different nodes. Adjust parameters such as color, roughness, metallic, and other properties to achieve the desired visual appearance. You can also apply textures and use material functions to create more complex effects.
- Preview your materials in the viewport or use the material instance feature to create variations of a base material. Material instances allow you to modify specific attributes of the material without affecting the original material.
- Apply the materials to your 3D assets by dragging and dropping them onto the respective meshes in the viewport or applying them through the details panel.
- Continuously iterate and refine the lighting and materials as you explore your scene in the viewport. Adjust the position and properties of light sources and fine-tune your material settings to achieve the desired visual impact.
Exploring the available lighting and material settings in Unreal Engine 5 will enable you to create visually compelling and realistic scenes that enhance the immersive experience of your project.
In the next sections, we’ll guide you through the process of building your level, saving your progress, and testing your creation. So, let’s continue the journey with Unreal Engine 5!
Building the Level
Building the level in Unreal Engine 5 is an essential step in creating a fully immersive and interactive experience. It involves placing and arranging 3D assets, defining the layout, and adding gameplay elements. Follow these steps to build your level:
- Open your project in the Unreal Engine editor and navigate to the level where you want to build your scene.
- Start by placing your 3D assets in the level. You can drag and drop assets from the content browser into the viewport or use the placement tools provided by Unreal Engine.
- Arrange the assets in a way that creates an appealing and cohesive composition. Consider the desired gameplay experience, visual flow, and player navigation when positioning objects.
- Experiment with different scale, rotations, and variations in asset placement to create a diverse and interesting environment.
- Add additional elements such as terrain, landscape, foliage, and architectural structures to enhance the visual appeal and create a more immersive experience.
- Utilize Unreal Engine’s level editing tools to modify and sculpt the terrain, adjust the size of the environment, and create interesting landscapes.
- Place and configure gameplay elements such as triggers, spawn points, interactive objects, enemies, or puzzles to add depth and interactivity to your level.
- Use Unreal Engine’s blueprint system to define the behavior and interactions of your gameplay elements. Blueprints allow you to create intuitive and visually-driven logic without the need for extensive coding knowledge.
- Preview your level by navigating and exploring it in the editor’s viewport. This will help you identify any issues or areas that need further refinement.
- Iterate and refine your level based on player feedback and playtesting. Make adjustments to the layout, asset placement, lighting, and gameplay elements to create a balanced and engaging experience.
Remember to save your progress regularly as you build your level to avoid losing any changes. Unreal Engine’s autosave feature can help ensure your work is protected.
Building a level in Unreal Engine 5 requires creativity, experimentation, and attention to detail. Take the time to refine your level and make it a memorable and enjoyable experience for players.
In the next sections, we’ll guide you through the process of saving your progress, testing your creation, and concluding your project. So, let’s continue the journey with Unreal Engine 5!
Saving and Testing the Level
Once you have built your level in Unreal Engine 5, it’s important to save your progress regularly to ensure you don’t lose any changes. Additionally, testing your level is a critical step to ensure that the gameplay, visuals, and overall experience are working as intended. Here are the steps to save and test your level:
- Before saving your level, make sure you have a clear and descriptive name for it. This will help you easily identify and differentiate between levels in your project.
- To save your level, you can go to the “File” menu and select “Save” or use the keyboard shortcut Ctrl+S (Command+S on macOS).
- Consider creating regular backups of your project, especially before making significant changes or modifications to your level. This will provide an extra layer of protection in case of any unforeseen issues.
- Once your level is saved, it’s time to test it. Playtesting is crucial to ensuring that your level functions properly and provides an engaging gameplay experience.
- In the Unreal Engine editor, click on the Play button located at the top of the viewport. This will launch the game in a simulated mode, allowing you to experience the level as a player would.
- While playtesting, pay close attention to the flow of the level, the functionality of gameplay elements, the performance of the assets, and any potential bugs or issues that may arise.
- Note any areas that require adjustments or improvements based on your playtesting experience. Take into account the feedback of testers and make necessary refinements to enhance the overall quality of your level.
- Make sure to save your level after making any modifications based on the feedback received during playtesting.
- Continue to iterate and refine your level through a cycle of testing, feedback, and improvement to create the best possible gameplay experience.
Regular saving and thorough playtesting are vital steps in the development process of your level. By implementing these practices, you can ensure that your level is stable, enjoyable, and delivers an engaging experience to players.
In the next section, we’ll conclude your journey with Unreal Engine 5 and provide some final thoughts. So, let’s wrap up this guide!
Conclusion
Congratulations on completing this step-by-step guide on downloading, installing, and using Unreal Engine 5. You are now equipped with the knowledge and tools to embark on your journey as an Unreal Engine developer. Unreal Engine 5 offers a vast array of features and capabilities, empowering you to create immersive and visually stunning experiences for games, architectural visualizations, virtual reality projects, and more.
In this guide, we covered the essential steps, including preparing for the download, downloading and installing Unreal Engine 5, setting up the engine for a single level, creating new projects, importing 3D assets, setting up lighting and materials, building the level, and testing your creation. By following these steps, you have gained a solid foundation to create your own innovative projects within Unreal Engine 5.
Remember, as you continue your journey with Unreal Engine 5, never stop exploring and learning. Utilize the wealth of resources available, such as online tutorials, documentation, and the Unreal Engine community, to expand your skills and enhance your creations.
Unreal Engine 5 is a powerful tool that unleashes your creativity and allows you to bring your visions to life. Embrace the potential it offers and let your imagination soar.
Thank you for joining us on this guide, and we wish you great success and fulfillment in your Unreal Engine 5 journey!