Introduction
Welcome to this guide on how to download custom maps on Pavlov Shack! If you’re a fan of virtual reality first-person shooters, then you’re probably familiar with Pavlov Shack, a popular game available on the Oculus Quest. While Pavlov Shack offers a fantastic collection of maps right out of the box, the ability to download and play custom maps opens up a whole new world of possibilities.
Pavlov Shack, developed by davevillz, is a VR adaptation of the popular PC game Pavlov VR. It brings a fast-paced and intense multiplayer shooting experience to the Oculus Quest headset. The game features a variety of game modes, such as Team Deathmatch, Search and Destroy, and Gun Game, which keep players engaged and entertained for hours on end.
Custom maps are user-created levels that you can download and add to your Pavlov Shack game. These maps offer unique environments, exciting challenges, and diverse gameplay experiences that can greatly enhance your enjoyment of the game. Whether you want to battle it out in a zombie-infested town, compete in a futuristic sci-fi arena, or explore a realistic military base, custom maps provide endless possibilities for players to explore and enjoy.
In this guide, we’ll walk you through the step-by-step process of downloading and installing custom maps on Pavlov Shack. You’ll need to have an Oculus Quest headset, a computer with the SideQuest software installed, and a sense of adventure. Don’t worry if you’re not a tech wizard – the process is relatively straightforward, and we’ll provide detailed instructions to help you along the way.
So, are you ready to take your Pavlov Shack experience to the next level? Let’s dive into the world of custom maps and see how you can start playing them on your Oculus Quest!
What is Pavlov Shack?
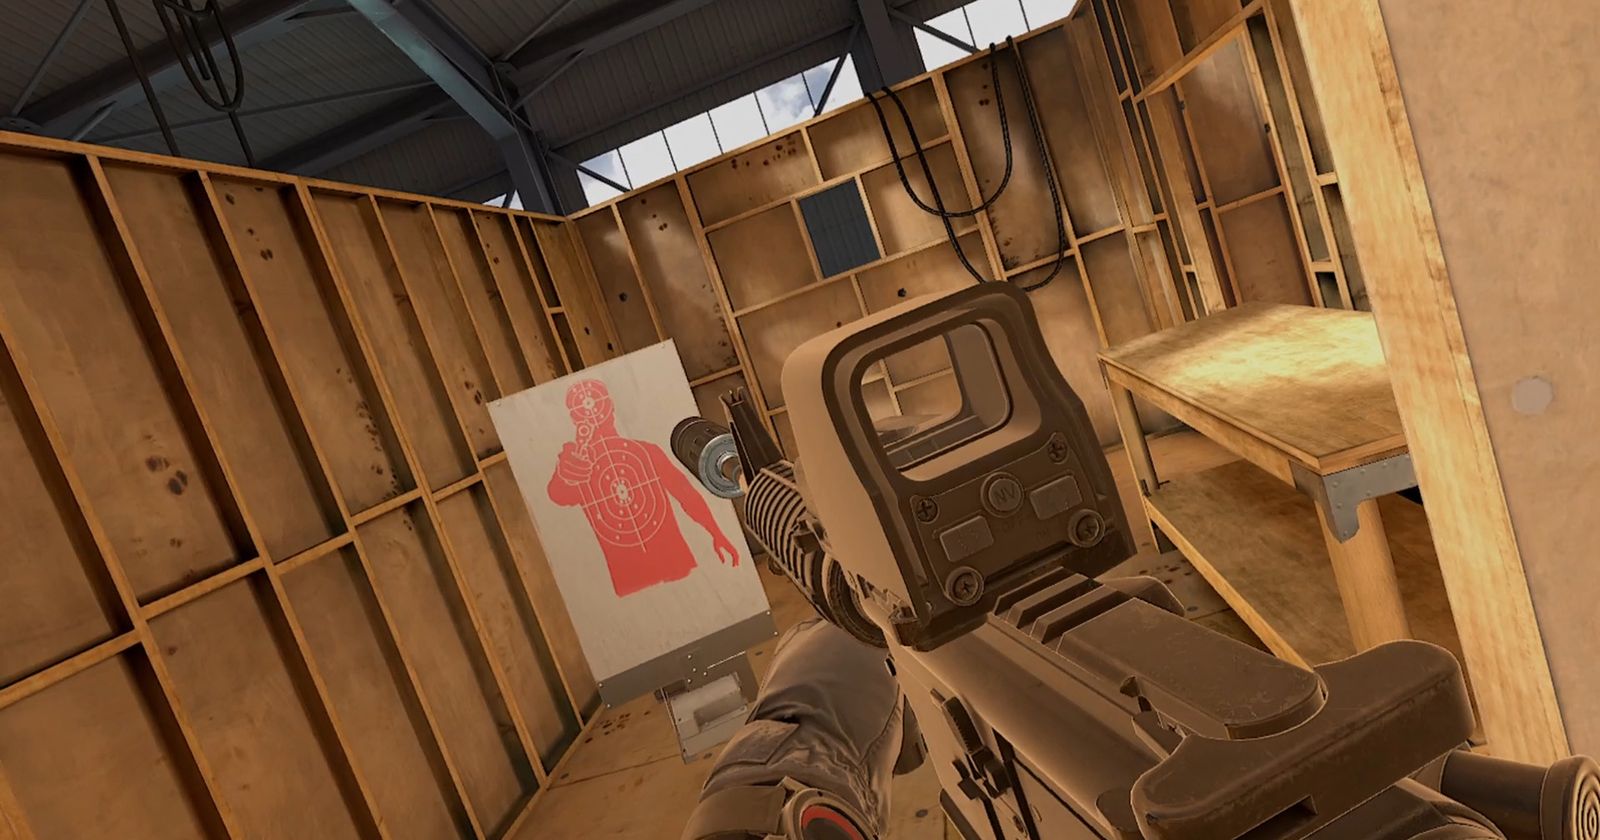
Pavlov Shack is a virtual reality (VR) game that brings the thrilling shooting experience to the Oculus Quest headset. Developed by davevillz, it is a standalone version of the popular PC game Pavlov VR. Pavlov Shack offers a multiplayer first-person shooter experience with a wide range of game modes, from classic team deathmatch to exhilarating search and destroy missions. The game has gained a strong following thanks to its fast-paced gameplay, realistic weapon mechanics, and engaging multiplayer battles.
One of the standout features of Pavlov Shack is its commitment to community and customization. While the game comes with a selection of maps created by the developers, what sets it apart is the ability to download and play custom maps. This allows players to not only enjoy the maps created by the developers but also explore and experience unique user-generated content.
Custom maps in Pavlov Shack come in various themes and settings. You can step into the haunting corridors of an abandoned hospital, navigate through elaborate mazes, or engage in intense firefights in rustic urban environments. The diversity of the custom maps ensures that there is something for everyone, catering to different play styles and preferences.
Playing custom maps in Pavlov Shack opens up a world of creativity and imagination. It allows players to experience new challenges, discover hidden areas, and engage in fresh gameplay scenarios. Whether you prefer close-quarters combat or long-range sniping, there are custom maps tailored to suit your preferences.
Custom maps also foster a strong sense of community within the Pavlov Shack player base. Players can share their creations, showcase their design skills, and collaborate with other map creators. This collaboration and sharing of ideas contribute to the constant growth of new and exciting custom maps, ensuring that there is always fresh content to explore and enjoy.
Overall, Pavlov Shack offers an immersive and engaging VR shooting experience, with the added bonus of being able to download and play custom maps. Whether you’re a fan of the game looking to expand your horizons or a newcomer eager to explore the creativity of the player community, Pavlov Shack’s custom maps provide endless opportunities for thrilling and unique gameplay experiences.
Why Would You Want to Download Custom Maps?
Downloading custom maps for Pavlov Shack opens up a world of exciting possibilities and enhances your overall gaming experience. Here are a few reasons why you might want to download custom maps:
1. Variety and Exploration: Custom maps offer a wide range of environments and settings that are not available in the base game. Whether you want to battle it out in a post-apocalyptic wasteland, explore ancient ruins, or participate in a virtual replica of a real-world location, custom maps provide a refreshing change of scenery and endless opportunities for exploration.
2. Unique Challenges: Custom maps often come with innovative gameplay mechanics and objectives that introduce new challenges and gameplay dynamics. You may encounter unique enemy types, intricate puzzles, or time-sensitive missions. These custom maps can push your skills to the limit and provide a fresh and engaging experience.
3. Community Creations: Custom maps are created by the Pavlov Shack community, which means you have the chance to play levels crafted by talented and passionate players. The creativity and dedication of map creators can lead to unique and well-designed experiences that rival or even surpass the official maps in terms of quality and enjoyment.
4. Replay Value: Once you’ve mastered the official maps in Pavlov Shack, custom maps offer a way to keep the game fresh and exciting. With an ever-growing library of custom maps to choose from, you can always find something new and challenging to keep you engaged and entertained for hours on end.
5. Freedom of Expression: Custom maps give players the opportunity to express their creativity and showcase their design skills. If you have a vision for a unique map or want to recreate a favorite location from a movie or game, downloading custom maps allows you to bring those ideas to life and share them with the Pavlov Shack community.
6. Community Engagement: Engaging with the custom maps community in Pavlov Shack can be a rewarding experience. You can provide feedback to map creators, collaborate on projects, and even participate in community events and competitions centered around custom maps. This level of interaction adds a social component to your gaming experience and fosters a sense of community and camaraderie among players.
With all these benefits in mind, downloading custom maps for Pavlov Shack is a fantastic way to expand your gaming horizons, challenge your skills, and connect with a passionate community. So why not immerse yourself in the world of custom maps and take your Pavlov Shack experience to the next level?
Step 1: Install SideQuest
The first step in downloading custom maps for Pavlov Shack is to install SideQuest, a platform that allows you to easily manage and install content on your Oculus Quest headset. SideQuest is a valuable tool that provides a user-friendly interface for sideloading apps and games onto your device, including custom maps for Pavlov Shack.
Here’s how you can install SideQuest:
1. Download SideQuest: Visit the SideQuest website (https://sidequestvr.com) and download the appropriate version of SideQuest for your operating system (Windows, macOS, or Linux). SideQuest is free to download and use, so you won’t need to worry about any costs involved.
2. Install SideQuest: Once the download is complete, open the installer file and follow the instructions to install SideQuest on your computer. The installation process is straightforward and should only take a few minutes.
3. Connect Your Oculus Quest: After installing SideQuest, power on your Oculus Quest headset and connect it to your computer using a compatible USB-C cable. Ensure that your headset is in “Developer Mode” (we will cover how to enable this in the next step).
4. Allow USB Debugging: On your Oculus Quest headset, a prompt will appear asking if you want to allow USB debugging. Select “Allow” to enable the connection between SideQuest and your device. This will allow you to transfer files and install custom maps.
5. Launch SideQuest: Once the connection is established, launch SideQuest on your computer. You should see your connected Oculus Quest headset listed in the top left corner of the SideQuest window. If your headset is not detected, ensure that it is properly connected and follow any on-screen prompts that appear.
With SideQuest successfully installed and your Oculus Quest connected, you are now ready to move on to the next step: enabling developer mode on your headset. This will allow you to install custom content onto your device, including the custom maps for Pavlov Shack.
It’s important to note that SideQuest is a third-party software and is not officially affiliated with Oculus. However, it has been widely used by the VR community for sideloading content and is a trusted platform for managing custom content on the Oculus Quest.
Step 2: Enable Developer Mode on Your Oculus Quest
Before you can start installing custom maps on your Oculus Quest using SideQuest, you’ll need to enable “Developer Mode” on your headset. Developer Mode grants you the necessary permissions to sideload content onto your device, including the custom maps for Pavlov Shack. Enabling Developer Mode is a straightforward process:
1. Open the Oculus App on your Smartphone: From your smartphone, open the Oculus app that is connected to your Oculus Quest headset. Ensure that your phone is connected to the internet and logged into the same Oculus account that you use with your headset.
2. Navigate to Settings: Once in the Oculus app, tap on the “Devices” icon located at the bottom of the screen. Then, select your Oculus Quest headset from the device list.
3. Select More Settings: Once you have selected your Oculus Quest headset, scroll down and tap on the “…” button located to the right of your headset’s name. This will open the additional settings for your headset.
4. Enable Developer Mode: In the additional settings menu, scroll down and find the “Developer Mode” option. Tap on the toggle switch to enable Developer Mode. You may be prompted with a warning about the risks of enabling Developer Mode, as it allows the installation of third-party applications. Read through the warning and tap “Enable” to confirm.
5. Confirm Developer Mode on the Oculus Quest: After enabling Developer Mode in the Oculus app, put on your Oculus Quest headset. You will be prompted with a confirmation message asking whether you want to enable Developer Mode. Use the Oculus Touch controllers to select “Confirm” and enable Developer Mode on your headset.
Once Developer Mode is enabled on your Oculus Quest, you will have the necessary permissions to install custom maps and other sideloaded content through SideQuest. It’s important to note that enabling Developer Mode does come with potential risks, as it allows the installation of applications from unofficial sources. Ensure that you only install content from trusted sources to mitigate any security concerns.
With Developer Mode successfully enabled on your Oculus Quest, you’re now ready to proceed to the next step: downloading the custom maps for Pavlov Shack.
Step 3: Download the Custom Maps
Now that you have SideQuest installed and Developer Mode enabled on your Oculus Quest, it’s time to download the custom maps for Pavlov Shack. Here’s how:
1. Launch SideQuest: Open the SideQuest application on your computer. Ensure that your Oculus Quest is still connected to your computer via the USB-C cable.
2. Navigate to the Pavlov Shack Section: In the SideQuest window, locate the navigation menu on the left-hand side. Look for the “Games” category and expand it. Within the “Games” category, locate and select “Pavlov Shack.”
3. Browse the Available Custom Maps: In the Pavlov Shack section, you will find a list of available custom maps to choose from. Take some time to explore the various options and read the descriptions to find maps that pique your interest.
4. Select and Download a Custom Map: Once you’ve found a custom map you want to download, click on it to access the map’s details page. On this page, you will find information about the map, including its size, rating, and any additional requirements. To proceed with the download, click the “Install” button.
5. Monitor Download Progress: After initiating the download, you will see a progress bar indicating the status of the installation. Larger maps may take longer to download, so be patient and let SideQuest complete the process. Make sure not to disconnect your Oculus Quest during the download.
6. Repeat for Additional Custom Maps: If you want to download multiple custom maps, simply repeat Steps 3 and 4 for each map you wish to add to your Pavlov Shack game. SideQuest allows you to download and install as many custom maps as you desire.
7. Install Pavlov Shack on your Oculus Quest: If you haven’t already, ensure that the base Pavlov Shack game is installed on your Oculus Quest. You can find the official Pavlov Shack game on the Oculus Store and install it as you would with any other application.
That’s it! You have successfully downloaded the custom maps for Pavlov Shack through SideQuest. The next step is to connect your Oculus Quest to your computer and transfer the custom maps onto your device. We will cover this process in detail in the next step. Get ready to experience a fresh and exciting gameplay with your new custom maps!
Step 4: Connect Your Oculus Quest to Your Computer
In order to transfer the custom maps you downloaded from SideQuest onto your Oculus Quest, you’ll need to connect your headset to your computer. Here’s how you can do it:
1. Grab Your USB-C Cable: Locate the USB-C cable that came with your Oculus Quest headset. It should have a USB-C connector on one end and a USB Type-A (standard USB) connector on the other end.
2. Connect Your Oculus Quest to Your Computer: Take the USB-C end of the cable and plug it into the port on your Oculus Quest headset. Then, take the USB Type-A end of the cable and plug it into a USB port on your computer.
3. Put on Your Oculus Quest Headset: Once the Oculus Quest is connected to your computer, put on your headset. Ensure that you can see the Oculus Home interface and that it is not in sleep mode. This allows you to grant necessary permissions for file transfer.
4. Check Your Headset for Permissions: On your Oculus Quest, a prompt will appear asking if you trust the connection to the computer. Use the Oculus Touch controllers to select “Allow” or “Always Allow” to establish the connection between your headset and your computer. Granting this permission allows files to be transferred between the devices.
5. Check for Connection in SideQuest: With your Oculus Quest connected to your computer, navigate back to the SideQuest application on your computer. In the top left corner of the SideQuest window, you should see the name of your connected Oculus Quest headset listed. This confirms that the connection has been successfully established.
Once your Oculus Quest is connected to your computer, you’re now ready to transfer the custom maps from SideQuest onto your headset. The next step will guide you through the process of enabling file transfer in SideQuest and copying the custom maps onto your Oculus Quest.
Keep in mind that a stable and reliable USB connection between your computer and Oculus Quest is crucial for smooth file transfer. If you encounter any issues, try using a different USB port, ensuring the cable is securely connected, or restarting both your computer and the Oculus Quest.
Step 5: Open SideQuest and Enable File Transfer
Now that your Oculus Quest is connected to your computer, it’s time to open the SideQuest application and enable file transfer. This will allow you to copy the custom maps from your computer to your Oculus Quest. Here’s how you can do it:
1. Launch SideQuest: Open the SideQuest application on your computer if it’s not already open. You should see the main dashboard with various options and information about your connected Oculus Quest headset.
2. Enable File Transfer Mode: On the SideQuest dashboard, locate and click on the “Currently Installed Apps” section. This will expand the section to show the list of apps installed on your Oculus Quest.
3. Access App Settings: Find the “Pavlov Shack” app in the list and click on the gear icon next to it. This will open the App Settings page specifically for Pavlov Shack.
4. Enable File Transfer: Within the Pavlov Shack App Settings, you will find an option to enable “File Transfer” mode. Toggle the button to enable file transfer for Pavlov Shack. Enabling this mode ensures that you can copy the custom maps from your computer to the appropriate directory on your Oculus Quest.
5. Confirm File Transfer: After enabling File Transfer mode, a confirmation prompt will appear in SideQuest. This prompt will ask you to confirm that you want to perform the operation. Click “Okay” to confirm.
6. Prepare to Transfer Custom Maps: With File Transfer mode enabled, you can now minimize the SideQuest application and navigate to the directory on your computer where you have downloaded the custom maps for Pavlov Shack. These maps should typically be in an easily accessible location, such as your Downloads folder or a dedicated folder for custom maps.
By following these steps, you have successfully opened SideQuest and enabled the necessary file transfer mode to copy the custom maps from your computer to your Oculus Quest. Now, it’s time to move on to the next step and proceed with transferring the custom maps to your headset.
Step 6: Transfer the Custom Maps to Your Oculus Quest
With SideQuest running and file transfer enabled, you’re now ready to transfer the custom maps you downloaded onto your Oculus Quest. Follow these steps to complete the transfer:
1. Locate the Custom Maps: Open the folder on your computer where you have downloaded the custom maps for Pavlov Shack. Ensure that the folder is easily accessible and that you can navigate to it quickly.
2. Connect your Oculus Quest to your computer: Ensure that your Oculus Quest is connected to your computer via the USB-C cable and that the connection is stable.
3. Locate the Pavlov Shack Directory: In SideQuest, click on the “My Computer” section located on the left-hand side of the dashboard. This will display the file structure of your Oculus Quest.
4. Explore the Oculus Quest file system: Navigate through the file structure displayed in SideQuest until you locate the “Pavlov-Shack” folder. This folder contains the necessary directories for Pavlov Shack and is where you will copy the custom maps.
5. Transfer the Custom Maps: Drag and drop the custom maps from the folder on your computer into the appropriate “maps” directory within the “Pavlov-Shack” folder on SideQuest. You can typically find the “maps” directory within the “Pavlov-Shack” folder by following the path “/sdcard/Pavlov/Content/Maps/”.
6. Monitor the Transfer Process: During the transfer, you will see a progress bar indicating the status of the file transfer in SideQuest. The time it takes to complete the transfer will depend on the size of the custom maps. Be patient and allow the transfer to finish without interruption.
7. Verify the Custom Maps: Once the transfer is complete, navigate to the “maps” directory in SideQuest and verify that the custom maps are present. Ensure that the file names and formats are correct to ensure compatibility with Pavlov Shack.
8. Safely Disconnect your Oculus Quest: After confirming that the custom maps have been successfully copied, you can safely disconnect your Oculus Quest from your computer. Unplug the USB-C cable from both your headset and your computer.
By following these steps, you have successfully transferred the custom maps onto your Oculus Quest using SideQuest. The next step will guide you on how to install and access the custom maps within the Pavlov Shack game itself.
Step 7: Launch Pavlov Shack
Now that you have transferred the custom maps onto your Oculus Quest, it’s time to launch Pavlov Shack and start exploring the new gameplay experiences that await you. Follow these steps to launch the game:
1. Put on Your Oculus Quest: Ensure that your Oculus Quest headset is charged and turned on. Put on the headset and adjust it for a comfortable fit.
2. Navigate to the Oculus Home: From the Oculus Home interface, use the Oculus Touch controllers to navigate to the “Library” section. The Library is where you can find all the games and applications installed on your Oculus Quest.
3. Locate Pavlov Shack: Browse through your Library and locate the Pavlov Shack game. It should be listed among your installed games or in the “Unknown Sources” section if you installed it through SideQuest.
4. Select and Start Pavlov Shack: Using the Oculus Touch controllers, hover over the Pavlov Shack game icon and press the “Select” button to start the game. You will be taken to the Pavlov Shack loading screen.
5. Wait for Pavlov Shack to Load: The loading screen may take a few moments to load the game. Use this time to ensure that your Oculus Quest controllers are charged and properly connected.
6. Prepare for Gameplay: Once Pavlov Shack has finished loading, you will be in the game’s main menu. Take a moment to familiarize yourself with the menu options and settings before diving into the custom maps.
7. Access the Custom Maps: Navigate through the Pavlov Shack menu to find the custom maps section. The location of this section may vary depending on the game’s updates and changes. Look for options such as “Custom Maps,” “Workshop,” or “Community Maps.”
8. Choose and Load a Custom Map: Select the desired custom map from the available options. Depending on the map and your network speed, it may take a short while for the map to load. Once loaded, you will be immersed in the world of the custom map.
With Pavlov Shack launched and the custom maps loaded, you’re now ready to embark on exciting gaming adventures. Explore the unique environments, engage in thrilling firefights and challenges, and enjoy the custom maps created by the Pavlov Shack community.
Remember to regularly check for updates and new custom maps to keep your Pavlov Shack experience fresh and enjoyable. Have fun exploring the diverse gameplay experiences that the custom maps offer!
Step 8: Install Custom Maps in Pavlov Shack
Now that you have launched Pavlov Shack and accessed the custom maps section, it’s time to install the custom maps and get ready to dive into the exciting gameplay. Follow these steps to install custom maps in Pavlov Shack:
1. Access the Custom Maps Section: Within Pavlov Shack, navigate to the custom maps section. Look for options such as “Custom Maps,” “Workshop,” or “Community Maps.” The location of this section may vary depending on the game’s updates and changes.
2. Browse the Available Custom Maps: Once in the custom maps section, you will see a list of available custom maps. Take some time to explore the different maps, read their descriptions, and check any ratings or reviews provided by the community.
3. Select a Custom Map: Choose the custom map you want to install. Click or select it to access the map details and installation options.
4. Install the Custom Map: Within the map details, you will find an option to install the custom map. Depending on the game’s interface, this option may be a button, a checkbox, or a confirmation prompt. Click or select the appropriate option to start the installation process.
5. Wait for the Installation to Complete: The installation process will vary in duration depending on the size of the custom map and the performance of your Oculus Quest. Be patient and allow the installation to complete without interruption. You can monitor the progress on-screen if the game provides a progress bar or status indicator.
6. Repeat for Additional Custom Maps: If desired, repeat steps 3 to 5 for any additional custom maps you want to install. Pavlov Shack allows you to install multiple custom maps to expand your gameplay options.
7. Confirm Successful Installation: Once the installation is complete, you should see a confirmation message or indication that the custom map has been successfully installed in Pavlov Shack. Check the custom maps section to ensure that the newly installed maps are listed.
8. Start Playing the Custom Maps: With the custom maps successfully installed, you can start playing them in Pavlov Shack. Depending on the game’s interface, this may involve selecting the desired map from the custom maps section, choosing it from in-game menus, or joining specific servers that host the custom maps.
By following these steps, you have successfully installed the custom maps in Pavlov Shack and are now ready to experience the unique and thrilling gameplay that these maps offer. Enjoy exploring different environments, engaging in challenging missions, and battling opponents in the custom maps created by the Pavlov Shack community.
Step 9: Enjoy Playing Custom Maps in Pavlov Shack
Now that you have installed the custom maps in Pavlov Shack, it’s time to dive into the exciting gameplay experiences they offer. Follow these steps to enjoy playing custom maps in Pavlov Shack:
1. Launch Pavlov Shack: Start by launching Pavlov Shack on your Oculus Quest. Put on your headset, navigate to the game in your Library, and open it using the Oculus Touch controllers.
2. Access the Custom Maps Section: Within Pavlov Shack, navigate to the custom maps section. Look for options such as “Custom Maps,” “Workshop,” or “Community Maps.” This is where you can find the custom maps you downloaded and installed.
3. Choose a Custom Map: Browse through the available custom maps and choose the one you want to play. Consider factors such as map size, game mode, and player counts to select a map that suits your preferences.
4. Join or Host a Server: Depending on the custom map, you may need to join a specific server or lobby that hosts it. Look for server options related to the custom maps, and select the one that matches the map you want to play on.
5. Explore and Engage: Once you have joined the appropriate server or lobby, you will be transported to the custom map. Take some time to explore the different areas, learn the layout, and discover any unique gameplay mechanics or objectives.
6. Engage in Firefights and Complete Objectives: Engage in thrilling firefights with other players and work together with your team to complete objectives specific to the custom map. Enjoy the intense action and strategic gameplay that the custom maps offer.
7. Interact with the Community: While playing custom maps, take the time to interact with the Pavlov Shack community. Share your experiences, provide feedback to map creators, and engage in discussions and events centered around the custom maps.
8. Discover New Maps: Regularly check for new custom maps released by the community. Explore different themes, gameplay styles, and challenges as you discover and download new custom maps to keep your Pavlov Shack experience fresh and exciting.
By following these steps, you can fully immerse yourself in the world of custom maps in Pavlov Shack. Enjoy the unique and diverse gameplay experiences that the custom maps offer, challenge your skills, and have fun engaging with the passionate community of Pavlov Shack players.
Conclusion
Congratulations! You have successfully learned how to download and play custom maps in Pavlov Shack on your Oculus Quest. By following the step-by-step guide, you have expanded your gaming experience with unique environments, exciting challenges, and diverse gameplay offered by the custom maps.
Pavlov Shack, a virtual reality first-person shooter game, provides an excellent base experience, and the ability to download and install custom maps takes the game to a whole new level. With the help of SideQuest and enabling Developer Mode on your Oculus Quest, you gained the necessary tools to access and install these user-generated maps.
Through SideQuest, you explored a diverse range of custom maps created by the passionate Pavlov Shack community. From futuristic sci-fi arenas to post-apocalyptic wastelands and everything in between, these custom maps delivered fresh and engaging experiences to enhance your gameplay.
Remember, the process involved installing SideQuest, enabling Developer Mode, downloading the custom maps, transferring them to your Oculus Quest, and launching Pavlov Shack to access and enjoy the custom maps.
Don’t forget to regularly check for new custom maps and updates within Pavlov Shack to discover fresh content, engage with the community, and expand your gameplay options. Pavlov Shack’s custom maps not only provide variety and unique challenges but also foster a sense of community and creativity.
So, grab your Oculus Quest, launch Pavlov Shack, venture into the custom maps section, and immerse yourself in exciting and immersive gameplay experiences. Enjoy the thrill of battles, explore intriguing environments, and connect with fellow players who share your love for Pavlov Shack.
Thank you for following along this guide, and we hope you have an amazing time playing custom maps in Pavlov Shack on your Oculus Quest!