Introduction
Creating a video game controller out of paper can be a fun and rewarding DIY project for gaming enthusiasts. Whether you're looking for a creative way to customize your gaming experience or simply want to try your hand at crafting a functional controller, this step-by-step guide will walk you through the process. While a paper game controller may not offer the same functionality as a traditional one, the satisfaction of building your own unique gaming accessory is unparalleled. This project is also a great way to exercise your creativity and resourcefulness, as it requires minimal materials and can be customized to suit your preferences.
In this guide, you'll learn how to design, cut, and assemble a paper game controller, complete with buttons and joysticks. The end result will be a basic, yet functional, controller that can be used for simple gaming experiences. Whether you're a casual gamer looking for a fun project or a parent seeking a hands-on activity for kids, making a paper game controller is an enjoyable and budget-friendly endeavor. So, gather your materials and get ready to embark on this imaginative journey of crafting a unique gaming accessory from the comfort of your own home.
Materials Needed
Before diving into the creative process of making a paper game controller, it’s essential to gather the necessary materials. The beauty of this project lies in its simplicity and accessibility, as most of the items required are likely already available in your home. Here’s what you’ll need to get started:
- Sheets of sturdy paper or cardstock: These will serve as the primary material for constructing the controller. Opt for paper that is durable enough to withstand handling and pressing of buttons.
- Scissors: A reliable pair of scissors is essential for cutting out the various components of the controller with precision.
- Glue or tape: To assemble the different parts of the controller, you’ll need glue or tape to ensure they stay securely in place.
- Markers or colored pencils: Adding a touch of personalization and creativity to your controller is made possible with markers or colored pencils. These will allow you to decorate the controller and make it uniquely yours.
- Buttons and small objects for joysticks: Depending on the design and functionality you envision for your paper game controller, consider using small objects such as buttons or beads for the controller’s buttons and joysticks.
- Ruler: A ruler will come in handy for measuring and ensuring straight, precise cuts as you craft the controller’s components.
With these basic materials at your disposal, you’re well-equipped to embark on the exciting journey of creating your very own paper game controller. Once you’ve gathered these items, you’re ready to move on to the next steps of designing, cutting, and assembling your unique gaming accessory.
Step 1: Designing the Controller
Designing the layout of your paper game controller is the first crucial step in bringing your DIY project to life. This stage allows for creativity and personalization, as you have the freedom to customize the appearance and functionality of the controller according to your preferences. Here’s a simple guide to help you design your paper game controller:
Begin by sketching a rough outline of the controller on a sheet of paper. Consider the size and shape you want for your controller, ensuring that it is comfortable to hold and use. Take inspiration from existing game controllers or let your imagination run wild to create a design that suits your gaming style.
Next, mark the positions where the buttons and joysticks will be placed. Keep in mind the ergonomics and functionality of the controller, ensuring that the buttons are easily accessible and the joysticks are positioned comfortably for gaming. You can use household items such as coins or small circular objects to trace the shapes of the buttons and joysticks for accuracy.
Once you have the basic layout sketched out, consider any additional features you may want to incorporate, such as decorative elements or personalized designs. This is your opportunity to infuse the controller with your unique style, whether it’s adding patterns, colors, or even custom graphics.
After finalizing the design, review and make any necessary adjustments to ensure that it aligns with your vision for the paper game controller. Once you’re satisfied with the layout, you’re ready to move on to the next step: cutting out the pieces and bringing your design to life.
By carefully planning and designing the controller, you set the stage for a personalized and functional gaming accessory that reflects your creativity and gaming preferences. With the design in place, you’re now prepared to proceed to the exciting phase of crafting the physical components of the paper game controller.
Step 2: Cutting Out the Pieces
With your controller design meticulously planned, it’s time to bring it to life by cutting out the necessary components from the sturdy paper or cardstock. This step requires precision and attention to detail to ensure that the pieces fit together seamlessly. Here’s a guide to cutting out the pieces for your paper game controller:
Using a sharp pair of scissors, carefully cut along the outlines of the controller components that you sketched in the design phase. Take your time to maintain accuracy, as clean and precise cuts are essential for the successful assembly of the controller.
As you cut out each piece, pay close attention to any intricate details or small tabs that need to be included for assembly. These details may include slots for inserting buttons, tabs for securing the sides of the controller, or any other specific features that you incorporated into the design.
Ensure that the edges of the cut pieces are smooth and free from any jagged edges or irregularities. This will contribute to the overall appearance and structural integrity of the paper game controller once it is assembled.
As you complete the cutting process, lay out the individual pieces to assess how they fit together and make any necessary adjustments. This step allows you to confirm that the components align with your initial design and that they are ready for the next phase of assembly.
By taking the time to carefully cut out each piece, you are laying the foundation for a well-crafted and visually appealing paper game controller. The precision and care invested in this step will be evident as you progress to the assembly phase, where the individual components will come together to form the complete controller.
Step 3: Assembling the Controller
Assembling the components of your paper game controller is an exciting phase that brings your design to fruition. This step requires patience and attention to detail to ensure that the controller is sturdy and functional. Here’s a step-by-step guide to assembling your paper game controller:
Begin by organizing the cut-out pieces of the controller in a clear and logical manner, ensuring that you have all the necessary components at hand. This preparation will streamline the assembly process and prevent any confusion or oversight.
Using glue or tape, carefully join the various components of the controller according to your design. Pay close attention to the alignment and positioning of each piece to ensure that they fit together seamlessly. Take your time to allow the adhesive to set and bond the pieces securely.
If your design includes tabs or slots for securing the sides or adding structural support, make sure to fold and insert them as intended. This will contribute to the stability and durability of the assembled controller.
As you progress through the assembly, periodically assess the overall structure of the controller to ensure that it is taking shape as envisioned. Make any necessary adjustments to the alignment or assembly to maintain the integrity of the controller.
Once the main components are securely assembled, allow the controller to dry or set according to the instructions of the adhesive used. This step is crucial for ensuring that the controller is solid and stable before proceeding to the next phase of adding buttons and joysticks.
By methodically assembling the components of the controller, you are one step closer to completing your paper game controller. The care and precision invested in this phase will result in a well-constructed and visually appealing gaming accessory that is ready for the final touches.
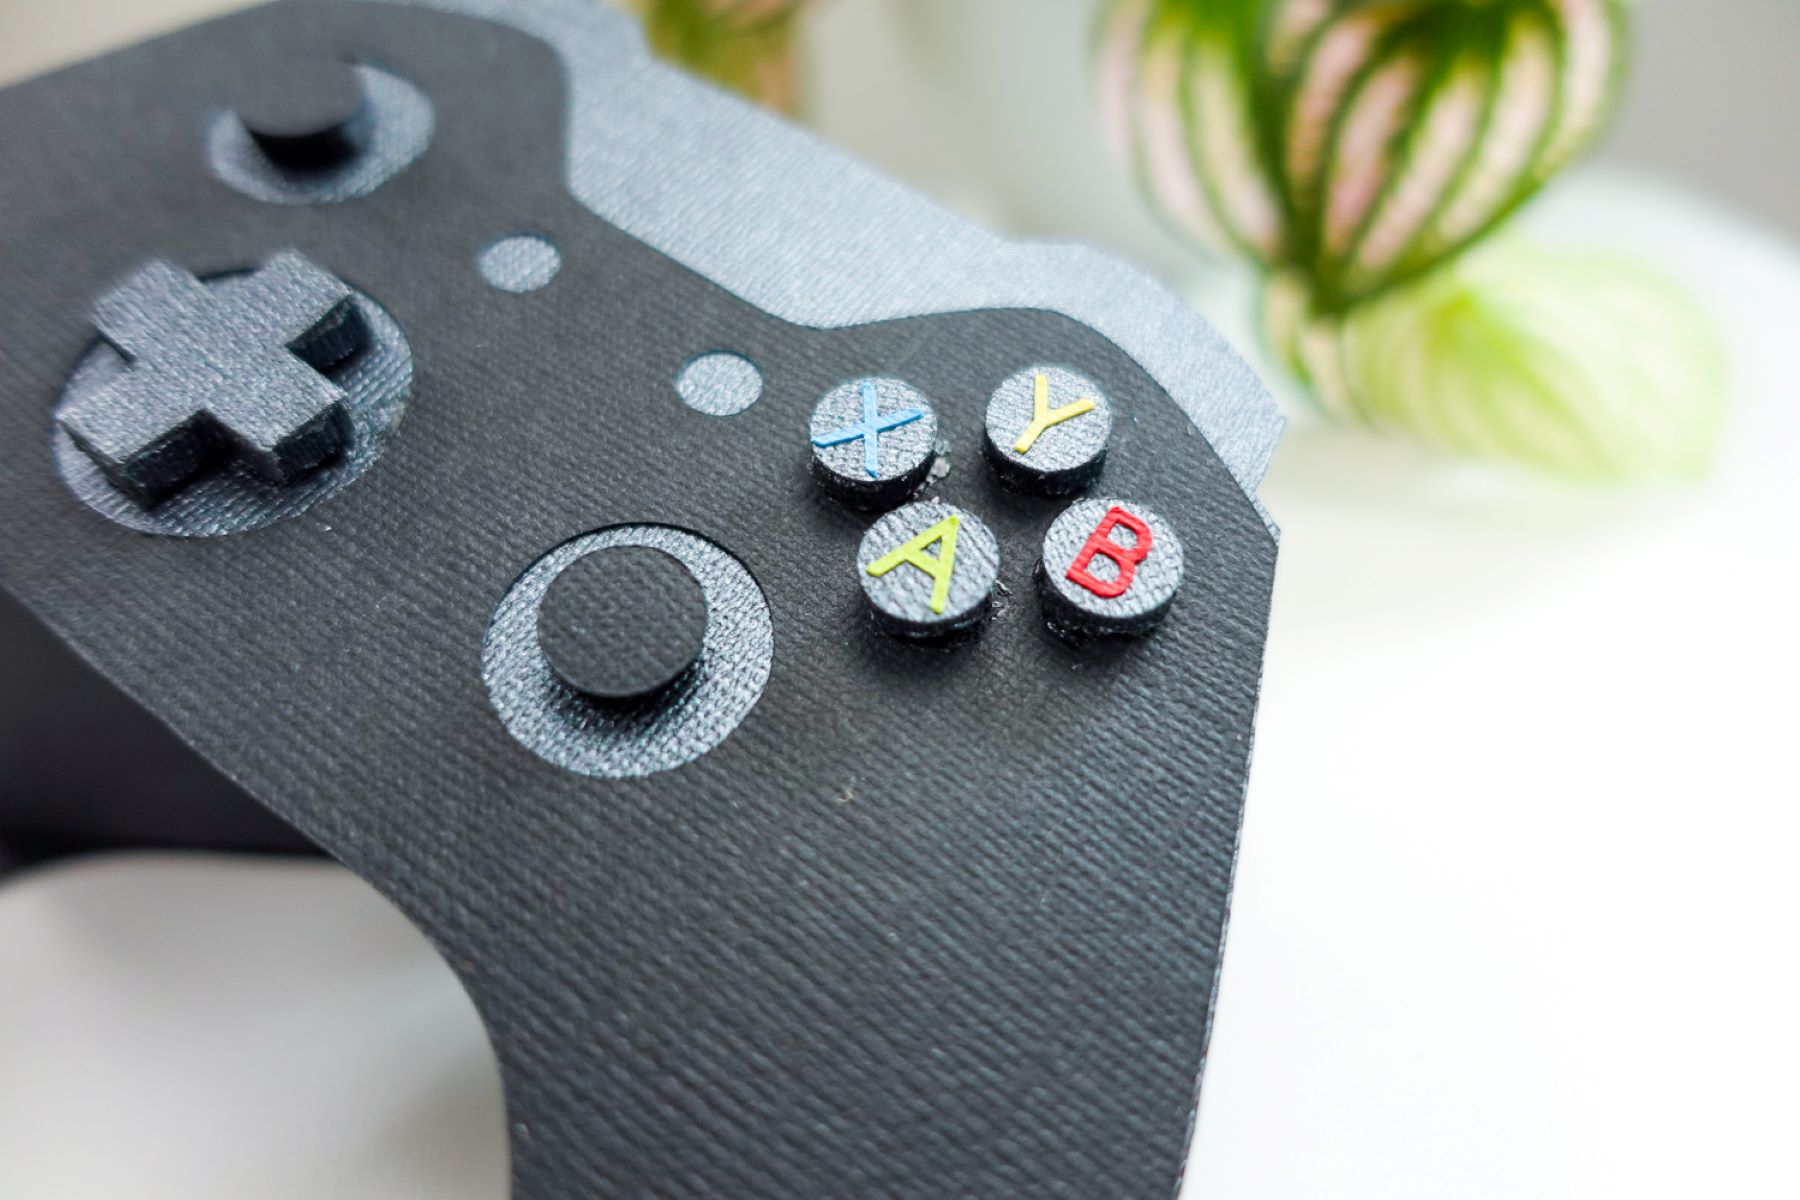
Step 4: Adding Buttons and Joysticks
With the main structure of the paper game controller assembled, it’s time to add the essential components that will bring it to life: the buttons and joysticks. This step introduces functionality to your DIY gaming accessory and allows for customization based on your gaming preferences. Here’s a guide to adding buttons and joysticks to your paper game controller:
Begin by determining the placement of the buttons and joysticks on the controller based on your initial design. Consider the ergonomics and ease of use, ensuring that the buttons are positioned comfortably for gaming and that the joysticks allow for smooth and precise movements.
If you’re using small objects such as buttons or beads for the controller’s buttons, affix them securely to the designated positions using glue or tape. Ensure that they are firmly attached and that they allow for responsive interaction when pressed during gaming.
For the joysticks, consider using small objects that can be manipulated easily for directional control. Secure these objects in place, ensuring that they are positioned accurately and allow for smooth movement in all directions.
As you add the buttons and joysticks, test their functionality to ensure that they are responsive and aligned with your gaming preferences. Make any necessary adjustments to the positioning or attachment of the components to optimize their usability.
Once the buttons and joysticks are in place and functioning as intended, take a moment to appreciate the transformation of your paper game controller into a tactile and interactive gaming accessory. The addition of these components enhances the controller’s functionality and sets the stage for the final step: testing your paper game controller.
By carefully adding buttons and joysticks to your paper game controller, you are elevating it from a visually appealing craft project to a functional gaming accessory. The attention to detail and precision invested in this phase will result in a controller that is ready to be put to the test in the gaming arena.
Step 5: Testing Your Paper Game Controller
After completing the construction and customization of your paper game controller, it’s time to put it to the test and experience the satisfaction of gaming with your own DIY creation. This final step allows you to assess the functionality and usability of the controller, ensuring that it meets your gaming needs. Here’s a guide to testing your paper game controller:
Connect your paper game controller to a compatible gaming platform or device, ensuring that it is securely linked for a seamless gaming experience. Whether you’re using a computer, gaming console, or mobile device, make sure that the controller is recognized and ready for use.
Launch a game that is compatible with the controller and begin navigating through the menus and gameplay to gauge the responsiveness and functionality of the controller. Test the buttons and joysticks to ensure that they accurately translate your inputs into on-screen actions.
Engage in gameplay that requires varied and precise inputs, such as movement, jumping, or combat, to assess the controller’s performance under different gaming scenarios. Pay attention to the comfort and ergonomics of the controller as you immerse yourself in the gaming experience.
Take note of any areas where the controller excels and areas where it may benefit from adjustments or enhancements. This feedback will inform any future modifications or refinements to the controller to optimize its performance and usability.
Involve friends or family members in the testing process to gather additional perspectives on the controller’s functionality and user experience. Their insights can provide valuable feedback for further improving the controller.
By thoroughly testing your paper game controller, you gain a comprehensive understanding of its capabilities and limitations, allowing you to make informed decisions about potential refinements or future DIY projects. The testing phase marks the culmination of your creative journey, as you witness the tangible results of your efforts in the form of a functional and unique gaming accessory.