Introduction
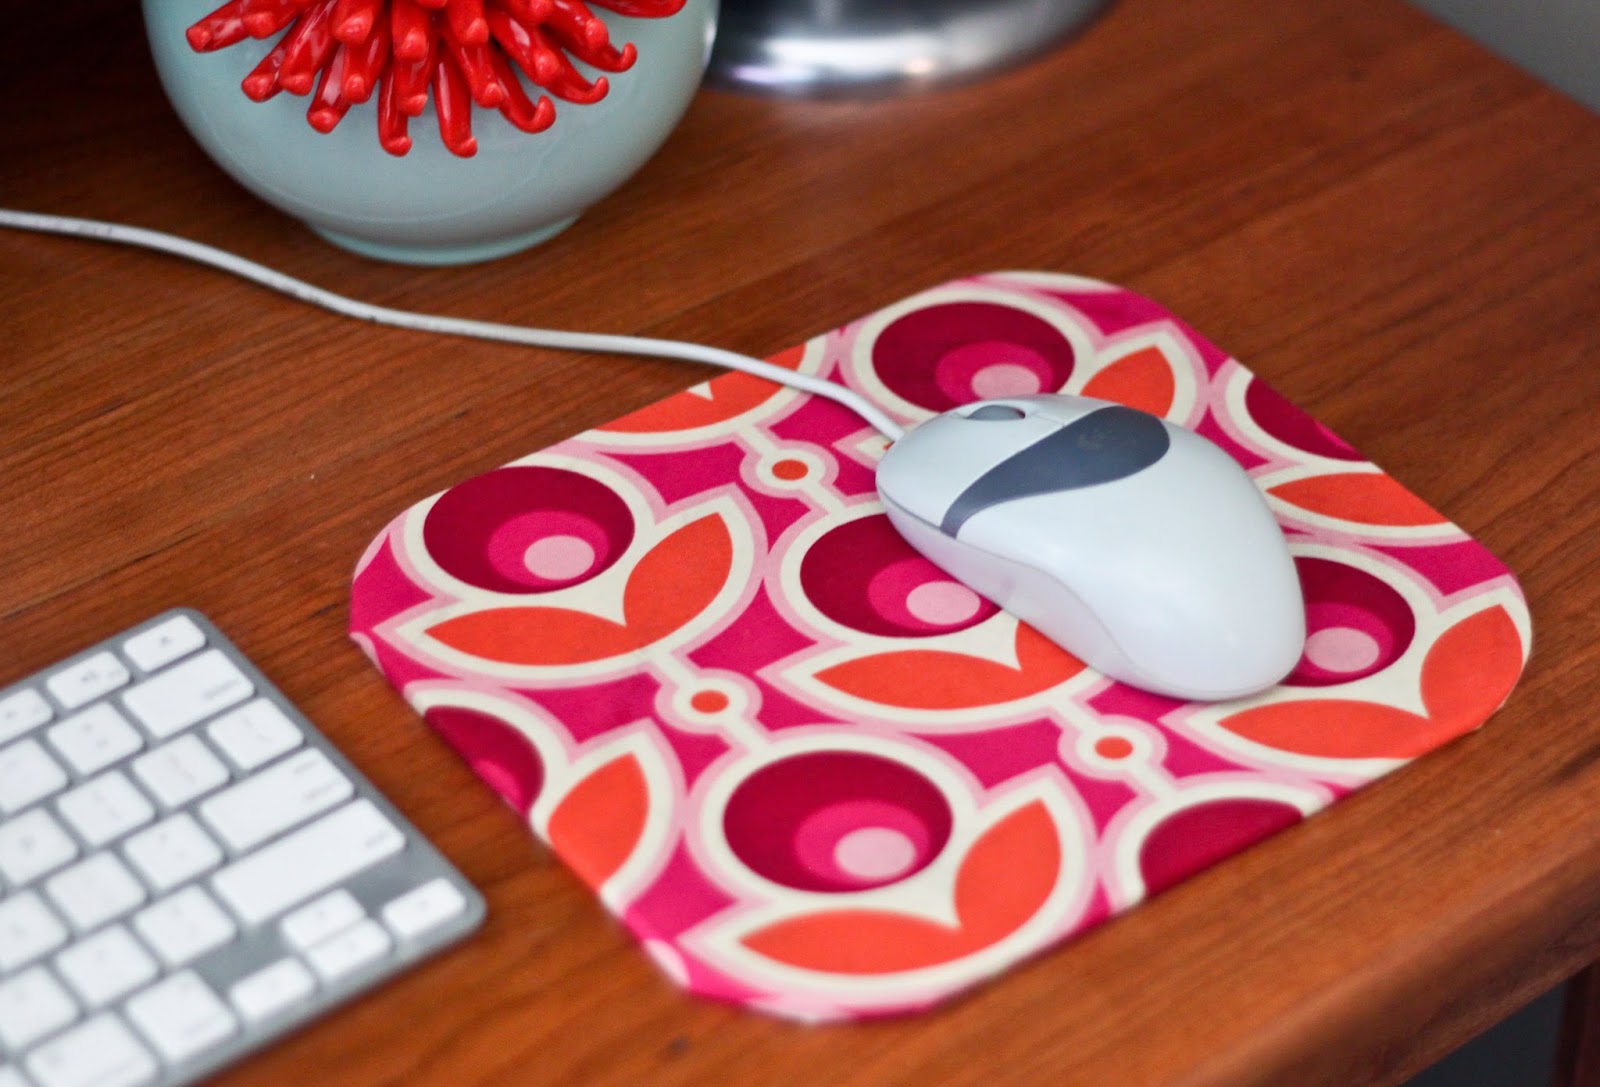
Creating a makeshift mouse pad can be a practical solution when you find yourself without one. Whether you're in a pinch or simply looking for a budget-friendly alternative, making your own mouse pad can be a fun and rewarding DIY project. By using readily available materials, you can craft a functional surface that allows your mouse to glide smoothly and accurately.
In this guide, we will explore the step-by-step process of making a makeshift mouse pad. From choosing a suitable surface to securing the padding, you'll learn how to create a practical and effective mouse pad using items you may already have at home. This DIY approach not only provides a quick fix for a missing mouse pad but also allows for customization to suit your specific preferences and needs.
Let's dive into the materials and steps needed to craft your very own makeshift mouse pad. Whether you're a student, a professional, or a casual computer user, having the ability to fashion a functional mouse pad on the fly can be a valuable skill. So, let's get started on this creative and practical endeavor.
Materials Needed
Before embarking on the journey of creating your makeshift mouse pad, it’s essential to gather the necessary materials. The beauty of this DIY project lies in its simplicity and the ability to utilize common household items. Here’s what you’ll need:
- A Suitable Surface: Look for a smooth, flat surface that provides a stable base for your mouse. This could be a sturdy piece of cardboard, a smooth tabletop, a wooden desk, or any other flat and even surface that accommodates your mouse movements.
- Padding Material: To ensure smooth and precise mouse tracking, you’ll need a padding material to create the necessary friction and support. This can be achieved with items such as a piece of cloth, a soft sponge, a microfiber towel, or even a piece of foam.
- Adhesive (Optional): Depending on the padding material chosen, you may need adhesive to secure it to the chosen surface. Double-sided tape or a non-permanent adhesive can be used to keep the padding in place.
- Scissors (if necessary): If you need to trim the padding material to fit the surface, a pair of scissors will be handy for precise cutting.
Once you have these materials at your disposal, you’ll be ready to proceed with the step-by-step process of creating your makeshift mouse pad. The simplicity and accessibility of these materials make this DIY project not only practical but also an opportunity to exercise creativity and resourcefulness.
Step 1: Choose a Suitable Surface
The first step in creating a makeshift mouse pad is selecting a suitable surface that provides the necessary stability and smoothness for optimal mouse performance. Consider the following options when choosing your surface:
- Cardboard: If you’re looking for a quick and readily available surface, a piece of sturdy cardboard can serve as an excellent base for your makeshift mouse pad. Ensure that the cardboard is flat and free from any bumps or creases that could hinder mouse movement.
- Tabletop or Desk: A smooth tabletop or desk surface can also be used as a makeshift mouse pad. Ensure that the surface is clean and free from any debris that could interfere with mouse tracking.
- Wooden Surface: If you prefer a more durable base, a wooden desk or tabletop can provide a stable and long-lasting surface for your makeshift mouse pad.
It’s important to choose a surface that complements your specific needs and preferences. Whether you prioritize portability, durability, or simply making use of readily available materials, the chosen surface sets the foundation for the functionality of your makeshift mouse pad.
Once you’ve identified the surface that best suits your requirements, you’re ready to move on to the next step of gathering the padding material to enhance the surface and create an optimal mousing experience. With the surface chosen, you’re one step closer to crafting a practical and personalized makeshift mouse pad that meets your unique needs.
Step 2: Gather Padding Material
After choosing a suitable surface for your makeshift mouse pad, the next step involves gathering the padding material. The padding is essential for providing the necessary friction and support to ensure smooth and accurate mouse movements. Here are some common materials that can be used for padding:
- Cloth: A piece of cloth, such as a microfiber towel or a soft fabric, can serve as an effective padding material. The smooth texture of the cloth allows the mouse to glide effortlessly while maintaining precise tracking.
- Sponge or Foam: A soft sponge or a piece of foam can be utilized to create a cushioned surface for your makeshift mouse pad. These materials offer a comfortable and supportive base for your mouse, enhancing the overall mousing experience.
- Additional Options: Depending on availability, other materials such as a felt pad, a piece of felt fabric, or even a soft piece of leather can be repurposed as padding for your makeshift mouse pad.
When selecting the padding material, consider factors such as the thickness, texture, and ability to provide a smooth mousing surface. The goal is to create a comfortable and functional pad that facilitates effortless mouse movements while ensuring precise tracking.
Once you’ve gathered the padding material, you’re ready to move on to the next step of securing the padding to the chosen surface. This crucial step will bring together the chosen surface and the padding material to create a cohesive and effective makeshift mouse pad. With the padding material in hand, you’re well on your way to crafting a personalized and practical solution for your mousing needs.
Step 3: Secure the Padding to the Surface
With the suitable surface and padding material in hand, the next step in creating a makeshift mouse pad involves securing the padding to the chosen surface. This crucial step ensures that the padding remains in place, providing a stable and reliable mousing surface. Here’s how you can secure the padding to the surface:
- Position the Padding: Place the selected padding material onto the chosen surface, ensuring that it aligns with the dimensions of the surface and leaves ample space for mouse movements.
- Trim if Necessary: If the padding material is larger than the surface or requires trimming to fit perfectly, use a pair of scissors to carefully adjust the dimensions, ensuring a precise fit.
- Adhesive Application: Depending on the padding material chosen, apply a non-permanent adhesive or double-sided tape to the underside of the padding. This will secure the padding to the surface without leaving any permanent residue.
- Press and Smooth: Once the adhesive is applied, carefully press the padding onto the surface, smoothing out any wrinkles or air bubbles to create a uniform and flat mousing surface.
By following these steps, you can effectively secure the padding to the surface, creating a functional and reliable makeshift mouse pad. The secure attachment of the padding ensures that it remains in place during use, providing a consistent and smooth mousing experience.
Upon completing this step, you’ll have successfully brought together the chosen surface and padding material, creating a personalized and effective makeshift mouse pad. With the padding securely in place, you’re ready to test your DIY creation and experience the seamless functionality it offers for your everyday computing needs.
Step 4: Test Your Makeshift Mouse Pad
After completing the steps of choosing a suitable surface, gathering padding material, and securing the padding to the surface, it’s time to put your makeshift mouse pad to the test. Testing the functionality of your DIY creation is essential to ensure that it provides a smooth and reliable mousing experience. Here’s how you can test your makeshift mouse pad:
- Mouse Movement: Use your mouse on the newly crafted pad to assess the smoothness and accuracy of its movements. Pay attention to how the mouse glides across the surface and whether it tracks your movements precisely.
- Comfort and Support: Evaluate the comfort and support provided by the makeshift mouse pad. Ensure that the padding material offers a cushioned and ergonomic surface for prolonged use.
- Stability and Durability: Test the stability and durability of the pad by applying varying degrees of pressure during mouse movements. The pad should remain firmly in place and withstand regular use without shifting or degrading in performance.
By conducting these tests, you can determine the effectiveness of your makeshift mouse pad and make any necessary adjustments to enhance its functionality. Whether you’re using it for work, gaming, or general computer use, the testing phase allows you to fine-tune your DIY creation to meet your specific needs.
Upon successfully testing your makeshift mouse pad, you’ll have achieved a practical and personalized solution for your mousing requirements. The ability to create a functional mouse pad using readily available materials demonstrates resourcefulness and creativity, providing a budget-friendly alternative to store-bought options.
With the testing phase complete, you can now enjoy the seamless and tailored mousing experience offered by your DIY makeshift mouse pad. Whether at home, in the office, or on the go, your personalized creation is ready to enhance your computing endeavors with its practicality and functionality.
Conclusion
Creating a makeshift mouse pad is not only a practical solution for immediate needs but also a testament to resourcefulness and creativity. By following the steps outlined in this guide, you’ve learned how to craft a functional and personalized mouse pad using everyday materials. From choosing a suitable surface to securing the padding and testing the functionality, each step has allowed you to tailor the makeshift mouse pad to your specific preferences and needs.
Through this DIY endeavor, you’ve exercised ingenuity and problem-solving skills, demonstrating that a practical solution can be crafted from simple and accessible materials. Whether you’ve repurposed cardboard, cloth, or sponge, the ability to fashion a reliable mouse pad reflects the spirit of innovation and adaptability.
Furthermore, the process of creating a makeshift mouse pad encourages a hands-on approach, fostering a sense of accomplishment and self-sufficiency. By customizing the pad to your liking and ensuring its functionality, you’ve embraced the opportunity to create a personalized tool that enhances your daily computing experience.
As you continue to explore DIY solutions and creative endeavors, the skills and resourcefulness gained from making a makeshift mouse pad can be applied to various aspects of your life. Whether it’s finding alternative uses for common items or crafting practical tools, the experience of creating a makeshift mouse pad serves as a testament to the power of innovation and adaptability.
With your newly crafted makeshift mouse pad ready for use, you’re equipped with a practical and personalized solution that reflects your creativity and problem-solving abilities. Embrace the spirit of DIY innovation and continue to explore the possibilities of crafting functional tools from everyday materials, enriching your daily experiences with ingenuity and resourcefulness.