Introduction
Welcome to the world of Logitech MX Mechanical Keyboards! If you've recently acquired this sleek and high-performance keyboard, you're likely eager to dive into its exceptional features and elevate your typing experience. The Logitech MX Mechanical Keyboard is renowned for its responsive keys, customizable settings, and ergonomic design, making it a top choice for professionals, gamers, and enthusiasts alike.
In this comprehensive guide, we'll walk you through the process of unboxing, connecting, and customizing your Logitech MX Mechanical Keyboard. By the end of this tutorial, you'll have a deep understanding of how to seamlessly integrate this advanced peripheral into your computing setup and tailor it to your specific preferences.
Whether you're a seasoned tech aficionado or a newcomer to the world of mechanical keyboards, this step-by-step guide will equip you with the knowledge and confidence to make the most of your Logitech MX Mechanical Keyboard. So, without further ado, let's embark on this exciting journey to unlock the full potential of your new keyboard!
Step 1: Unboxing the Logitech MX Mechanical Keyboard
Unboxing the Logitech MX Mechanical Keyboard is an experience in itself. As you carefully open the sleek packaging, you'll be greeted by the keyboard's modern and stylish design, exuding a premium feel from the moment you lay eyes on it. The package typically includes the keyboard, a USB-C to USB-A cable for charging and connectivity, and the user manual.
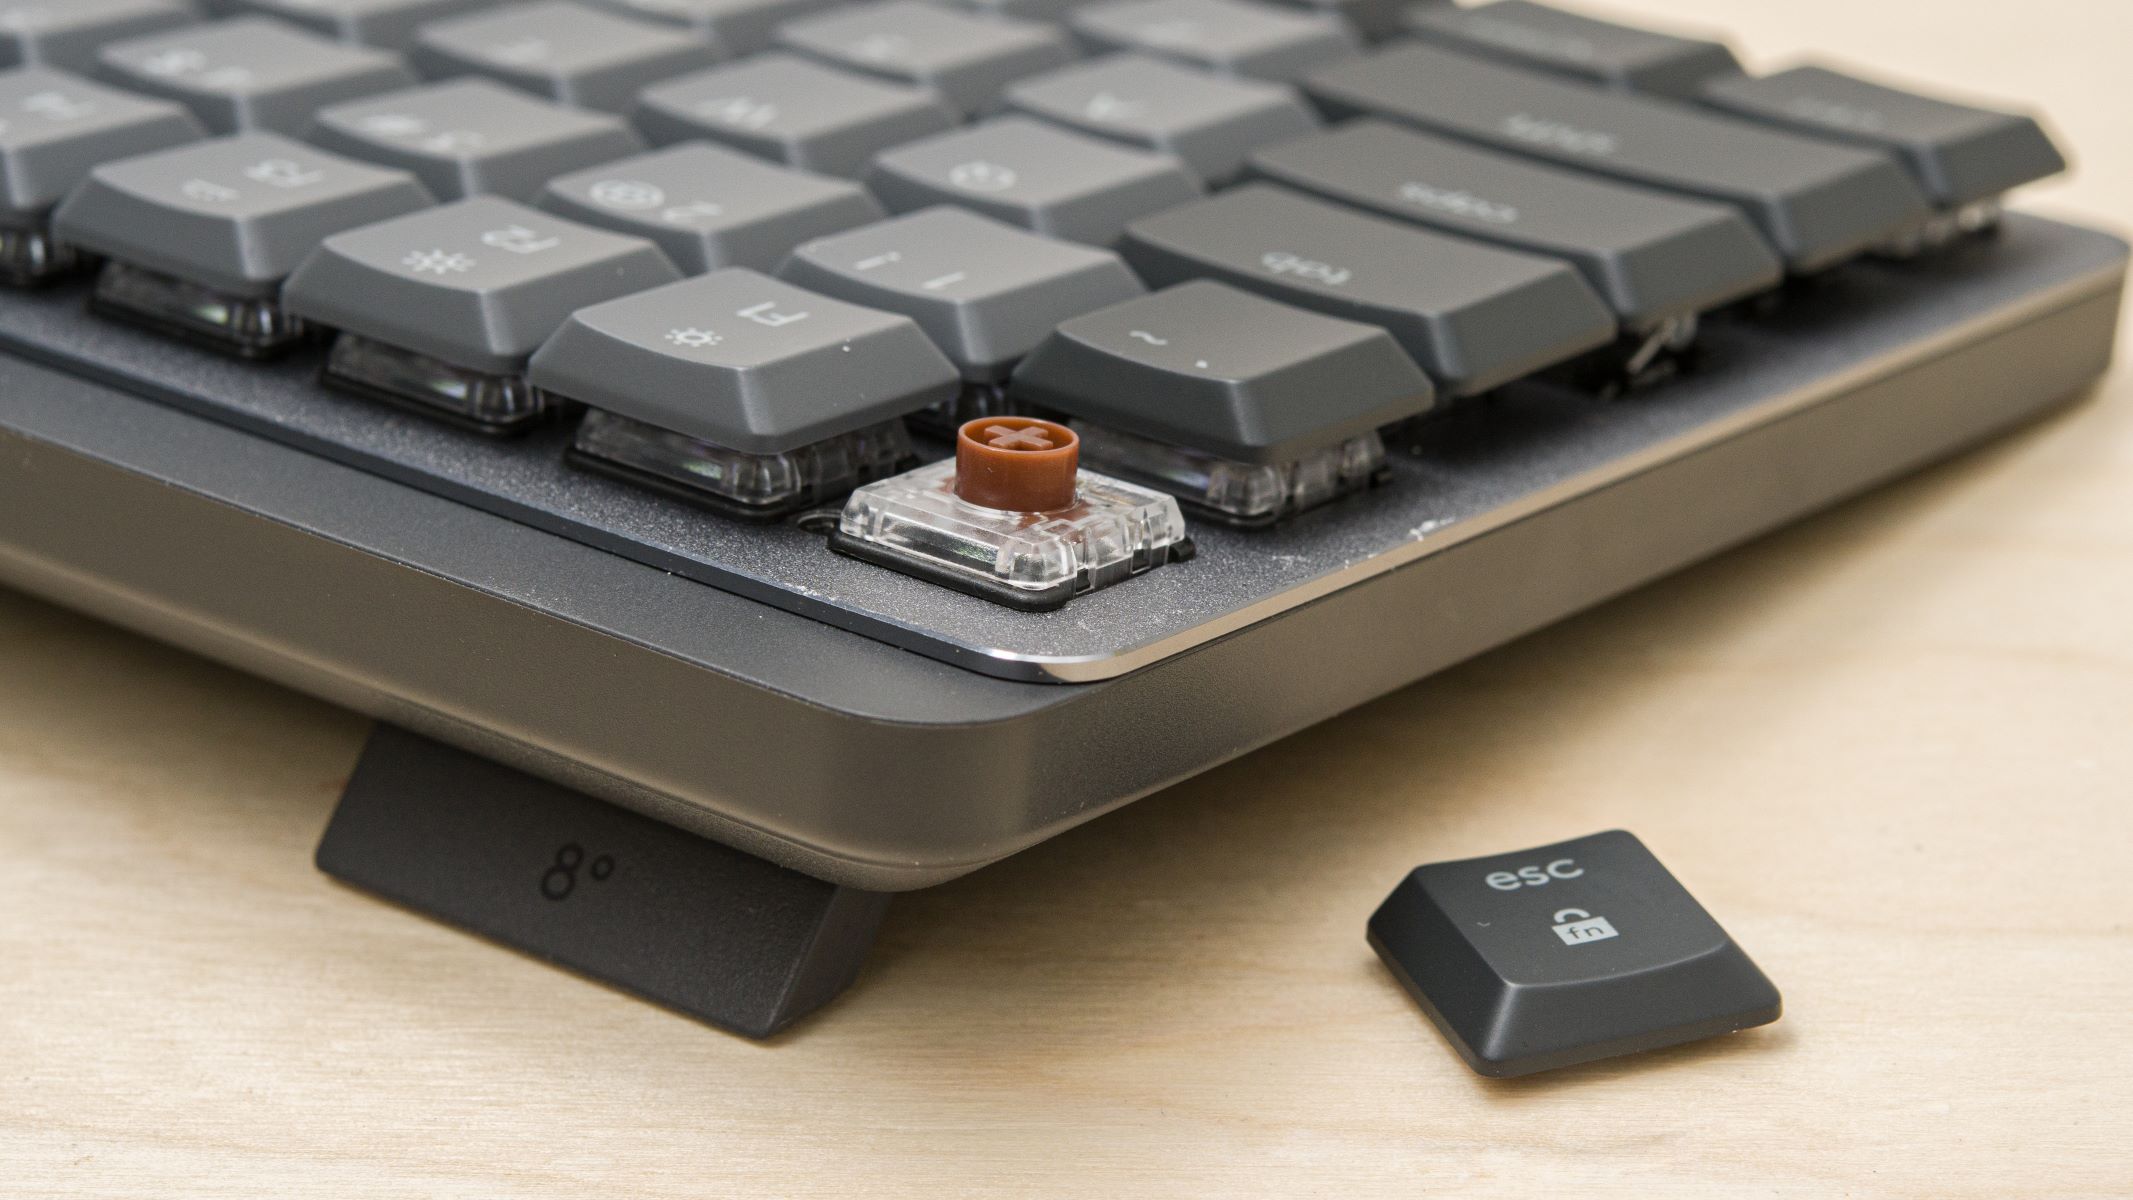
Upon lifting the keyboard, you'll immediately notice its solid build and satisfying heft, reflecting the quality craftsmanship that Logitech is renowned for. The low-profile keys, comfortable wrist rest, and durable construction are all testaments to the keyboard's thoughtful design. The backlighting, if available on your model, adds a touch of elegance and functionality, allowing for seamless typing in various lighting conditions.
As you explore the contents of the package, take a moment to appreciate the attention to detail that Logitech has put into ensuring a delightful unboxing experience. From the protective packaging to the inclusion of essential accessories, every aspect is geared towards making your first encounter with the Logitech MX Mechanical Keyboard truly memorable.
Now that you've unboxed this exceptional keyboard, you're ready to move on to the next step: connecting it to your computer. This is where the true magic begins, as you prepare to unleash the full potential of the Logitech MX Mechanical Keyboard and elevate your typing and gaming endeavors to new heights.
Step 2: Connecting the Keyboard to Your Computer
Now that you've unboxed your Logitech MX Mechanical Keyboard, it's time to connect it to your computer and immerse yourself in its exceptional performance. The keyboard utilizes a versatile USB-C to USB-A cable for connectivity, ensuring compatibility with a wide range of devices. Whether you're using a desktop computer, laptop, or even a gaming console, the Logitech MX Mechanical Keyboard seamlessly integrates into your setup.
Begin by locating an available USB port on your computer. The USB-C end of the cable plugs into the port on the keyboard, ensuring a secure and reliable connection. Once connected, the keyboard immediately springs to life, ready to deliver a responsive and immersive typing experience.
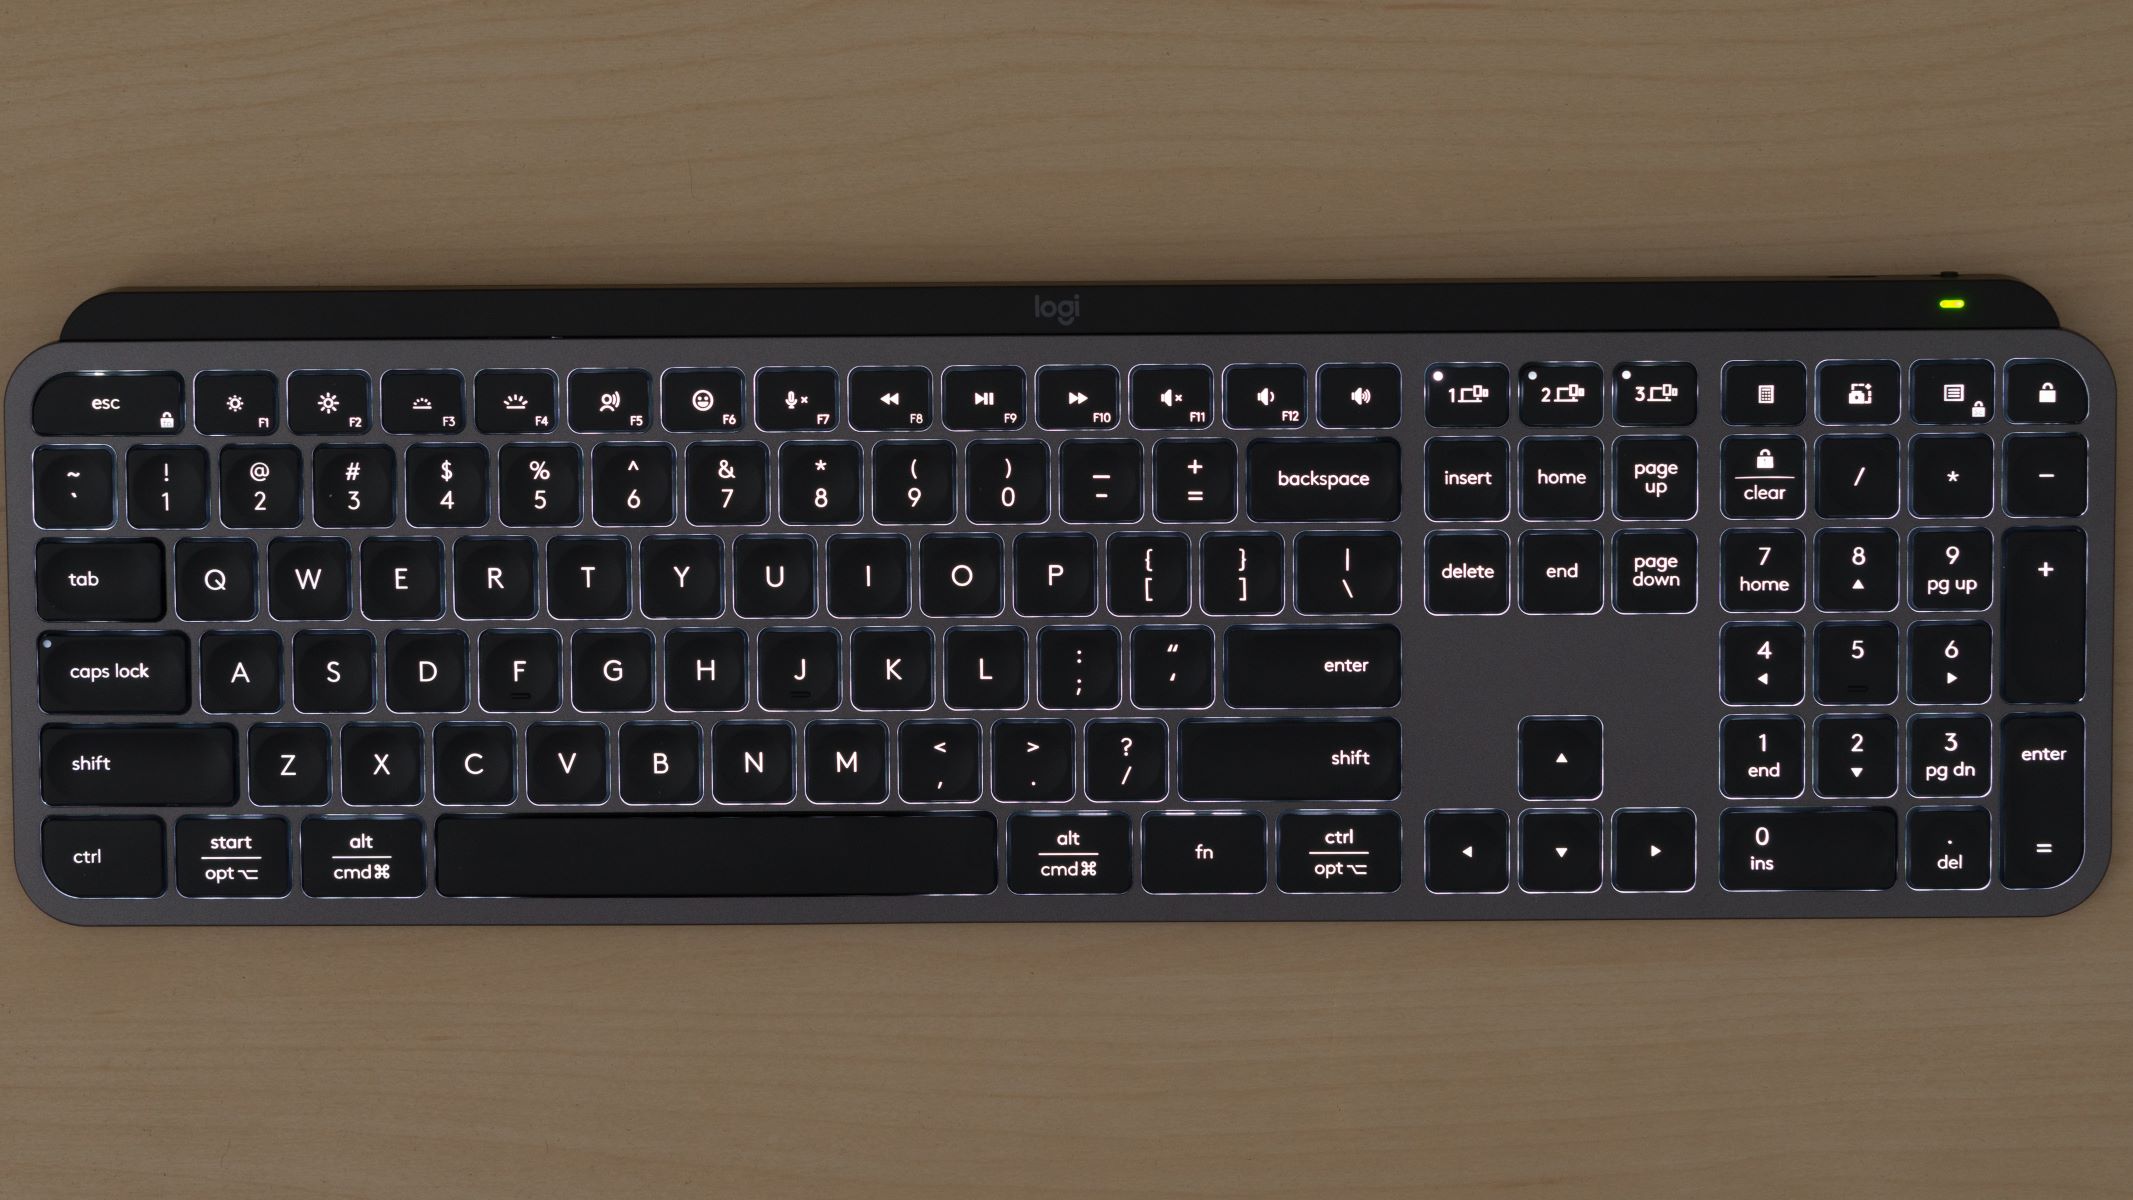
As the keyboard establishes a connection with your computer, you'll notice the captivating backlighting, if your model includes this feature, adding a touch of sophistication to your workspace. The gentle glow of the keys not only enhances visibility in dimly lit environments but also accentuates the keyboard's modern aesthetics.
With the keyboard now seamlessly connected to your computer, you're poised to explore its full range of features and customization options. Whether you're a productivity enthusiast aiming for unparalleled typing efficiency or a gaming aficionado seeking precise and responsive controls, the Logitech MX Mechanical Keyboard is primed to exceed your expectations.
Now that your Logitech MX Mechanical Keyboard is successfully connected, let's proceed to the next step: installing the Logitech Options software. This will unlock a treasure trove of customization and personalization features, allowing you to tailor the keyboard to your exact preferences and elevate your computing experience to new heights.
Step 3: Installing Logitech Options Software
Installing the Logitech Options software is a pivotal step in unleashing the full potential of your Logitech MX Mechanical Keyboard. This intuitive software serves as the gateway to a myriad of customization options, allowing you to personalize the keyboard to suit your unique preferences and workflow. Whether you’re aiming to fine-tune key assignments, adjust backlighting settings, or create custom profiles for different applications, Logitech Options empowers you to harness the full capabilities of your keyboard.
Begin by navigating to the official Logitech website or the designated support page for the Logitech Options software. Here, you’ll find the latest version of the software tailored to your specific operating system, ensuring seamless compatibility and optimal performance. Once downloaded, launch the installer and follow the straightforward on-screen instructions to complete the installation process.
Upon launching Logitech Options for the first time, you’ll be greeted by a user-friendly interface that presents a wealth of customization possibilities. From reassigning keys to creating custom shortcuts, the software provides a high degree of flexibility, allowing you to tailor the keyboard’s functionality to align with your unique workflow and preferences.
One of the standout features of Logitech Options is its ability to create application-specific profiles, enabling the keyboard to adapt dynamically based on the active application. This level of customization ensures that your keyboard seamlessly transitions between tasks, whether you’re engaged in creative design work, intense gaming sessions, or productivity-driven endeavors.
With Logitech Options installed and configured to your liking, you’ve unlocked a new realm of possibilities for your Logitech MX Mechanical Keyboard. The software serves as a catalyst for enhancing your productivity, creativity, and overall computing experience, making every keystroke a seamless and personalized interaction tailored to your unique needs.
Now that you’ve installed the Logitech Options software, let’s proceed to the next step: customizing your keyboard settings. This will allow you to fine-tune the keyboard’s behavior, lighting effects, and functionality to create a truly personalized and optimized typing and gaming experience.
Step 4: Customizing Keyboard Settings
Customizing the settings of your Logitech MX Mechanical Keyboard is where the magic truly happens. With the Logitech Options software at your disposal, you have a wide array of customization features at your fingertips, allowing you to tailor the keyboard to your specific needs and preferences.
One of the key customization options offered by Logitech Options is the ability to reassign keys. This feature enables you to remap keys according to your workflow, creating shortcuts and commands that align with your habits and usage patterns. Whether you prefer a customized layout for gaming, programming, or productivity tasks, the keyboard adapts to your unique requirements with ease.
Furthermore, the backlighting settings provide a canvas for personalization, allowing you to fine-tune the lighting effects to match your aesthetic preferences and functional needs. Whether you opt for a subtle and professional backlighting scheme for work or a vibrant and dynamic setup for gaming, the keyboard’s lighting can be tailored to create the perfect ambiance for your computing endeavors.
Logitech Options also offers the ability to create and manage custom profiles for different applications. This means that the keyboard can dynamically switch between configurations based on the active application, ensuring that your keystrokes are optimized for the task at hand. Whether you’re transitioning from creative design software to a spreadsheet application, the keyboard seamlessly adapts to enhance your efficiency and workflow.
Additionally, the software provides advanced control over the keyboard’s functionality, allowing you to fine-tune parameters such as key responsiveness, repeat rate, and more. This level of customization ensures that every keystroke is precisely tailored to your preferences, resulting in a seamless and responsive typing experience.
By customizing the settings of your Logitech MX Mechanical Keyboard, you’re not only personalizing its functionality but also optimizing it to align with your unique computing needs. The ability to tailor the keyboard to your preferences ensures that every interaction with the device is intuitive, efficient, and tailored to your specific requirements.
With the keyboard settings now customized to your liking, you’ve unlocked the full potential of your Logitech MX Mechanical Keyboard, creating a personalized and optimized typing and gaming experience that caters to your unique preferences and workflow.
Conclusion
Congratulations on successfully navigating the journey of unboxing, connecting, and customizing your Logitech MX Mechanical Keyboard. Throughout this comprehensive guide, you’ve embarked on a seamless and empowering experience, unlocking the full potential of this exceptional peripheral.
From the moment you unboxed the keyboard and marveled at its sleek design to the process of connecting it to your computer and immersing yourself in its responsive performance, every step has been a testament to the thoughtful craftsmanship and advanced capabilities of the Logitech MX Mechanical Keyboard.
By installing the Logitech Options software, you’ve delved into a realm of customization and personalization, tailoring the keyboard to your unique preferences and workflow. The ability to reassign keys, fine-tune backlighting settings, and create application-specific profiles has empowered you to create a truly personalized and optimized typing and gaming experience.
As you’ve customized the keyboard settings to align with your specific needs, you’ve not only enhanced its functionality but also integrated it seamlessly into your computing ecosystem, ensuring that every keystroke is intuitive, efficient, and tailored to your preferences.
With your Logitech MX Mechanical Keyboard now fully integrated and customized, you’re poised to embark on a journey of enhanced productivity, creativity, and immersive gaming experiences. The keyboard stands as a testament to the seamless fusion of advanced technology, ergonomic design, and personalized functionality, elevating every interaction with your computer to new heights.
As you continue to explore the capabilities of your Logitech MX Mechanical Keyboard, remember that the journey of customization and personalization is ongoing. Whether you’re fine-tuning settings for a specific task, creating new profiles for different applications, or simply reveling in the responsive and ergonomic design of the keyboard, the possibilities for optimization and personalization are endless.
Embrace the versatility and advanced features of your Logitech MX Mechanical Keyboard, and let it serve as a reliable companion in your computing endeavors, empowering you to achieve more, create more, and immerse yourself in a truly personalized and optimized typing and gaming experience.