Introduction
Are you using TNG E-wallet and wondering how to withdraw money from it? Look no further! In this guide, we’ll walk you through each step of the process, making it easy for you to access your funds whenever you need them.
TNG E-wallet is a popular mobile payment app that allows you to make fast and secure payments, either online or offline. It offers a wide range of features, including bill payments, money transfers, and wallet top-ups. With its user-friendly interface and widespread acceptance, TNG E-wallet has become a preferred choice for many Malaysians looking for a convenient and hassle-free digital payment solution.
While using your TNG E-wallet for various transactions is a breeze, withdrawing money from it may seem a little daunting at first. However, with our step-by-step guide, you’ll be able to navigate the withdrawal process effortlessly.
Before we dive into the steps, let’s go over the requirements you’ll need to fulfill in order to withdraw money from your TNG E-wallet.
What is TNG E-wallet?
TNG E-wallet, also known as Touch ‘n Go eWallet, is a digital payment app that allows you to store funds and make cashless transactions conveniently. Developed by Touch ‘n Go, one of Malaysia’s leading payment solutions providers, TNG E-wallet aims to revolutionize the way Malaysians make payments in their day-to-day lives.
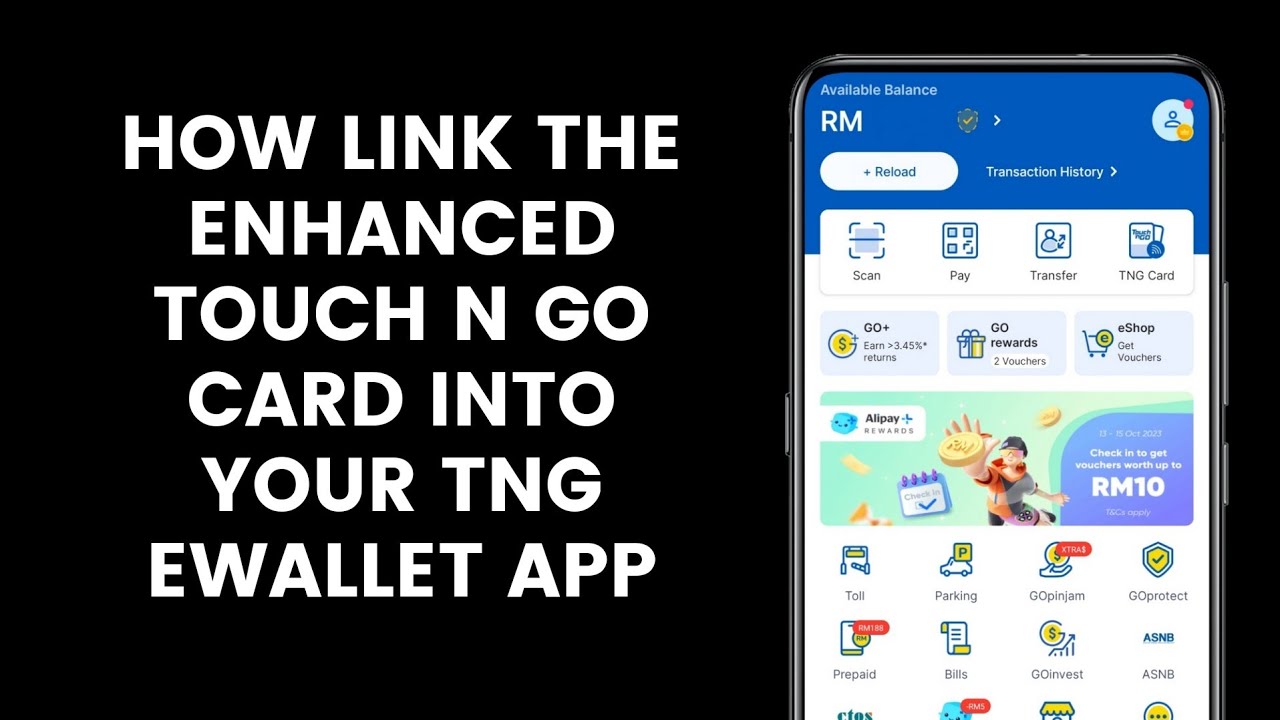
With TNG E-wallet, you can link your physical Touch ‘n Go card to the app, allowing you to perform various transactions with just a few taps on your smartphone. It eliminates the need to carry cash or physical cards, making it a secure and convenient option for making payments at both online and offline merchants.
One of the standout features of TNG E-wallet is its wide acceptance across merchants in Malaysia. Whether you’re shopping at a retail store, dining at a restaurant, or refueling at a petrol station, chances are high that you’ll be able to use TNG E-wallet to make your payment. This wide network of acceptance makes it incredibly versatile and accessible for users.
Aside from making payments, TNG E-wallet also offers additional features and services. For example, you can use it to pay for tolls at expressways, parking fees at designated parking lots, or even top-up your mobile prepaid credits conveniently. This versatility makes TNG E-wallet a one-stop solution for a range of financial transactions.
Moreover, TNG E-wallet offers various promotions and rewards to its users. From cashback on groceries to discounts on movie tickets, there are plenty of incentives to encourage consumers to use the app. These perks make TNG E-wallet not only a convenient payment method but also a money-saving tool.
Now that you have a better understanding of what TNG E-wallet is, let’s move on to the requirements you’ll need to fulfill in order to withdraw money from your TNG E-wallet.
Requirements for Withdrawing Money
In order to withdraw money from your TNG E-wallet, there are a few requirements that you need to fulfill. These requirements ensure the security and authentication of your transaction, providing a seamless and protected withdrawal process.
1. Verified TNG E-wallet Account: You must have a verified TNG E-wallet account to withdraw money. This involves completing the registration process and verifying your identity through the app’s verification procedures.
2. Sufficient Balance: You need to have enough funds in your TNG E-wallet to cover the withdrawal amount. Make sure to top up your wallet if you anticipate needing to withdraw a larger sum.
3. Withdrawal Limits: There may be withdrawal limits depending on your account type and level of verification. These limits safeguard against unauthorized transactions and potential risks.
4. Withdrawal Method: TNG E-wallet offers various withdrawal methods, such as bank transfers or cash withdrawal at authorized withdrawal points. Depending on your preference and convenience, choose the appropriate withdrawal method.
5. Valid Identification: For certain withdrawal methods, you may need to provide a valid identification document, such as your National Identity Card (MyKad) or passport. This is to ensure the legality and authenticity of the transaction.
6. Stable Internet Connection: To initiate and complete the withdrawal process, you’ll need a stable internet connection. This ensures that the necessary information is transmitted securely and that you receive real-time updates on your transaction.
These requirements are essential for a smooth and secure withdrawal process. It’s important to ensure that you meet all of these requirements before proceeding with your withdrawal request. Now that you are aware of the requirements, let’s move on to the steps involved in withdrawing money from your TNG E-wallet.
Steps to Withdraw Money from TNG E-wallet
Withdrawing money from your TNG E-wallet is a straightforward process that can be completed in just a few simple steps. Follow the steps below to access your funds:
Step 1: Open the TNG E-wallet App
Open the TNG E-wallet app on your smartphone. Make sure you have a stable internet connection for a smooth transaction.
Step 2: Login to Your Account
Enter your login credentials (email/username and password) to access your TNG E-wallet account. If you haven’t registered yet, follow the app’s registration process to create an account.
Step 3: Navigate to the “Withdraw” Section
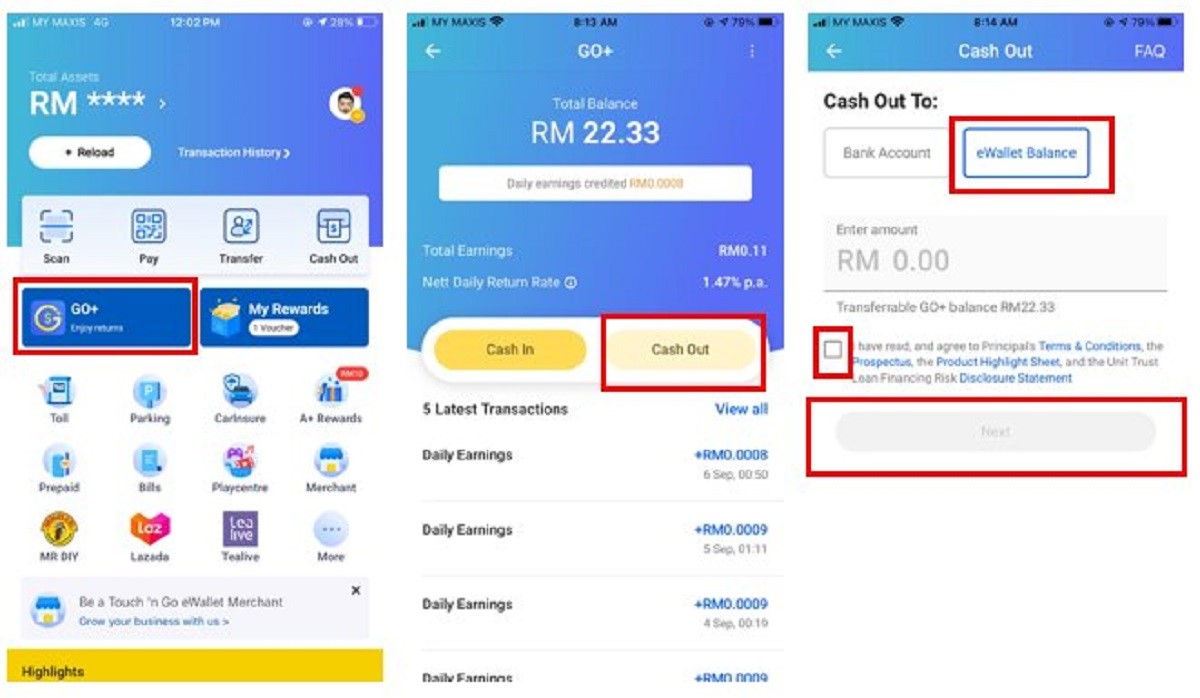
Once you are logged in, locate and select the “Withdraw” or “Cash Out” option from the app’s main menu. This will take you to the withdrawal screen.
Step 4: Enter Withdrawal Amount
Specify the amount you want to withdraw from your TNG E-wallet. Make sure the amount does not exceed your available balance. Double-check for any fees or charges associated with the withdrawal, if applicable.
Step 5: Select Withdrawal Method
Choose your preferred withdrawal method from the available options. This may include bank transfer, ATMs, or authorized withdrawal points. Select the most convenient method for you.
Step 6: Confirm Withdrawal Details
Review your withdrawal details carefully, including the withdrawal amount and the selected withdrawal method. Make sure all information is accurate before proceeding.
Step 7: Authenticate Your Transaction
Follow the app’s authentication process to validate your withdrawal request. This may involve providing additional authentication methods, such as fingerprint recognition or a one-time password (OTP), depending on the security settings of your TNG E-wallet account.
Step 8: Receive Withdrawal Confirmation
Once your withdrawal request is successfully processed, you will receive a confirmation message or notification from the app. This will also reflect in your transaction history within the TNG E-wallet app.
Following these steps will ensure a smooth and successful money withdrawal process from your TNG E-wallet. Remember to keep track of your transaction history and any associated charges for your reference.
Step 1: Open the TNG E-wallet App
The first step to withdraw money from your TNG E-wallet is to open the TNG E-wallet app on your smartphone. This requires you to have the app installed on your device. If you haven’t downloaded it yet, you can find the TNG E-wallet app in the Google Play Store for Android devices or the App Store for iOS devices.
Once you have the app installed, locate the TNG E-wallet icon on your smartphone’s home screen or app drawer. Tap on the icon to open the app.
Ensure that you have a stable internet connection to ensure a smooth transaction process. It’s also recommended to have sufficient battery life on your device to complete the process without any interruptions.
When you open the TNG E-wallet app, you’ll be greeted with the login screen. If you have an existing TNG E-wallet account, you can proceed to enter your login credentials.
If you don’t have an account yet, you can easily create one by tapping on the registration or sign-up option provided on the login screen. Follow the prompts to enter your personal information, such as your name, email address, and phone number. You may also need to create a password for your account.
After successfully logging in or creating an account, you will be directed to the main interface of the TNG E-wallet app. This is where you can access various features and functions, including the option to withdraw money. Keep in mind that the exact location of the “Withdraw” option may vary depending on the app version, but it is typically accessible from the main menu.
In the next step, we’ll explore how to log in to your TNG E-wallet account. It’s an essential step to ensure the security of your funds and access the necessary functions within the app.
Step 2: Login to Your Account
After opening the TNG E-wallet app, the next step in withdrawing money is to login to your account. Logging in ensures the security of your funds and allows you to access all the features and functions of your TNG E-wallet account.
On the login screen of the TNG E-wallet app, you will typically see two fields – one for your email or username and another for your password. Enter the email or username associated with your TNG E-wallet account into the designated field.
Next, enter your password. Make sure to input your password accurately and ensure that the caps lock is turned off to avoid any errors. If you have forgotten your password, most apps provide a “Forgot Password” option that allows you to reset it.
Once you have filled in your login credentials, tap on the “Login” button or a similar option to initiate the login process. The app will then validate your credentials and, if they are correct, grant you access to your TNG E-wallet account.
If you are logging in to your account for the first time on a new device, you may be prompted to verify your identity through additional security measures. This could include a one-time password (OTP) sent to your registered mobile number or email, fingerprint authentication, or facial recognition.
It is crucial to ensure the confidentiality of your login information and not share it with anyone. This safeguards your account and prevents unauthorized access to your funds.
Once you have successfully logged in, you will be directed to the main interface of the TNG E-wallet app, where you can access various features and functions. From here, you can proceed to the next step of the money withdrawal process, which involves navigating to the “Withdraw” or “Cash Out” section within the app.
In the following step, we will guide you on how to navigate to the “Withdraw” section within the TNG E-wallet app, where you can specify the withdrawal amount and choose your preferred withdrawal method.
Step 3: Navigate to the “Withdraw” Section
Once you have successfully logged in to your TNG E-wallet account, the next step in withdrawing money is to navigate to the “Withdraw” section within the app. This section allows you to initiate the process of withdrawing funds from your TNG E-wallet.
The exact location of the “Withdraw” section may vary depending on the app version, but it is typically accessible from the main menu or the dashboard of your TNG E-wallet app.
On the main interface of the TNG E-wallet app, look for a menu icon, usually represented by three horizontal lines or a grid of squares. This icon is often located in the upper-left or upper-right corner of the screen. Tap on the menu icon to expand the options.
Within the expanded menu, you may see various options related to your TNG E-wallet account, such as “Top-up”, “Send Money”, or “Rewards”. Look for an option specifically labeled as “Withdraw” or “Cash Out”. Tap on this option to access the withdrawal screen.
If your app has a search function, you can utilize it to quickly find the “Withdraw” section by entering relevant keywords, such as “withdraw”, “cash out”, or “withdrawal”. This will help to narrow down the menu options and locate the desired section more efficiently.
Once you have identified and tapped on the “Withdraw” option, you will be directed to the withdrawal screen. Here, you will find the necessary fields and instructions to complete the money withdrawal process.
Keep in mind that the layout and design of the withdrawal screen may differ between app versions, but the essential elements will still be present. These elements include the ability to input the withdrawal amount, select the withdrawal method, and review the withdrawal details before proceeding.
In the next step, we will guide you on how to enter the withdrawal amount in the TNG E-wallet app and ensure that it is within the available balance of your account.
Step 4: Enter Withdrawal Amount
After navigating to the “Withdraw” section within the TNG E-wallet app, the next step is to enter the amount you wish to withdraw from your account. This step allows you to specify the exact sum of money you want to transfer out of your TNG E-wallet.
On the withdrawal screen, you will typically find a field provided for you to enter the withdrawal amount. Tap on the designated field to activate the numeric keypad or the input method for entering the amount.
Make sure to enter the withdrawal amount accurately, taking into account any decimal places or formatting requirements specified by the app. Double-check the amount to ensure its correctness before proceeding to the next step.
It’s important to note that your withdrawal amount should not exceed the available balance in your TNG E-wallet. Attempting to withdraw an amount greater than your available balance may result in an error or unsuccessful withdrawal.
If you wish to withdraw your entire available balance, you may have the option of selecting a “Max” or “Withdraw All” button provided on the withdrawal screen. Tapping on this button automatically fills in the field with the total amount you can withdraw.
Some apps may impose minimum withdrawal amounts, so make sure your chosen withdrawal amount meets any specified thresholds. If your desired amount is below the minimum, you may need to adjust it accordingly.
Take note that depending on the withdrawal method you choose, there may be associated fees or charges for the transaction. Be mindful of these fees and factor them into your withdrawal amount if necessary.
Once you have entered the withdrawal amount accurately and considered any relevant fees, proceed to the next step where you will select the withdrawal method that suits your needs.
In the following step, we will guide you on how to choose your preferred withdrawal method within the TNG E-wallet app.
Step 5: Select Withdrawal Method
After entering the withdrawal amount in the TNG E-wallet app, the next step is to select the withdrawal method that suits your preferences. TNG E-wallet offers various options for withdrawing funds, allowing you to choose the most convenient and suitable method for your needs.
On the withdrawal screen, you will typically find a list of available withdrawal methods. These may include options such as:
- Bank Transfer: This method allows you to transfer the withdrawn amount directly into your bank account linked to the TNG E-wallet.
- Cash Withdrawal at ATMs: If supported by your TNG E-wallet, this method enables you to withdraw cash from ATMs using a specific withdrawal code or QR code.
- Authorized Withdrawal Points: TNG E-wallet may have authorized partners or agents where you can physically withdraw cash by presenting your TNG E-wallet account information.
Review the list of available withdrawal methods and choose the one that suits your needs the best. Consider factors such as convenience, accessibility, and any associated fees or charges for each withdrawal method.
Some withdrawal methods, such as bank transfers, may require you to input additional details. These could include your bank account number, the name of the recipient bank, and the branch code. Make sure to input these details accurately to ensure a successful withdrawal transaction.
If you are unsure about the specific instructions or requirements for a particular withdrawal method, the TNG E-wallet app may provide additional information or guidance. Look for tooltips, help icons, or support sections within the app to find more details about each withdrawal method.
Once you have chosen your preferred withdrawal method, proceed to the next step where you will confirm the withdrawal details before finalizing the transaction.
In the following step, we will guide you on how to review and confirm the withdrawal details within the TNG E-wallet app.
Step 6: Confirm Withdrawal Details
After selecting your preferred withdrawal method in the TNG E-wallet app, the next step is to confirm the withdrawal details before finalizing the transaction. This step ensures that all the information entered is correct and accurate, minimizing the risk of errors during the withdrawal process.
On the withdrawal screen, you will typically find a summary of the withdrawal details. This includes the withdrawal amount you entered in the previous step and the selected withdrawal method. Take a moment to carefully review this information to ensure its accuracy.
Verify that the withdrawal amount matches your intended withdrawal sum. Check that the selected withdrawal method aligns with your preferences and needs. If you’ve chosen to withdraw to a bank account, double-check that you’ve entered the correct account details.
Pay attention to any additional details or instructions provided by the app related to the selected withdrawal method. For example, if you’ve chosen a cash withdrawal at an authorized point, make sure you know the location and operating hours of the designated point.
Keep in mind that some withdrawal methods may have associated fees or charges. Take note of any fees disclosed and consider them in your decision-making process. It’s vital to be aware of any additional costs to ensure transparency and avoid any surprises during the transaction.
If you have any doubts or need clarification about the withdrawal details, refer to the app’s help section, tooltips, or customer support for assistance. It’s better to seek clarification before proceeding to avoid any complications during the withdrawal process.
Once you have reviewed and confirmed that all the withdrawal details are accurate, proceed to the next step where you will authenticate your transaction through the app’s security measures.
In the following step, we will guide you on how to authenticate your transaction within the TNG E-wallet app to finalize the withdrawal.
Step 7: Authenticate Your Transaction
After confirming the withdrawal details in the TNG E-wallet app, the next step is to authenticate your transaction. This step ensures the security and authorization of the withdrawal, protecting your funds from unauthorized access.
The authentication process may vary depending on the security settings and features of your TNG E-wallet app. Here are some common authentication methods used:
- Fingerprint or Face Recognition: If your device supports biometric authentication, you may be prompted to place your finger on the fingerprint scanner or use facial recognition to verify your identity before proceeding with the withdrawal.
- One-Time Password (OTP): You may receive a unique one-time password via SMS or email, which you need to enter into the app to confirm the transaction. This adds an extra layer of security by ensuring that the person initiating the withdrawal has access to the registered contact information.
- Security Questions: In some cases, you may need to answer security questions or provide specific details that you previously set up as part of your account’s security measures. This helps to authenticate and verify your identity before processing the withdrawal.
Follow the prompts provided by the app to complete the authentication process. Take your time to ensure the accuracy of the entered information and to verify that you’re the authorized user initiating the withdrawal.
It is important to remember that the authentication process may differ based on your app version and any additional settings you have configured for your TNG E-wallet account. Refer to the app’s help section or seek support if you encounter any difficulties during the authentication process.
Once the transaction is successfully authenticated, you can proceed to the final step where you will receive confirmation of your withdrawal.
In the following step, we will guide you on how to receive the withdrawal confirmation within the TNG E-wallet app.
Step 8: Receive Withdrawal Confirmation
After authenticating your transaction in the TNG E-wallet app, you will receive a withdrawal confirmation once the process is completed. This confirmation serves as proof that your withdrawal request has been successfully processed.
Depending on the app’s interface and notification settings, the withdrawal confirmation may be displayed on the screen immediately after authentication, or you may receive a notification via email or SMS. It is recommended to check your app’s notification settings to ensure you receive real-time updates on your transactions.
The withdrawal confirmation typically includes important details about your transaction, such as the withdrawal amount, the selected withdrawal method, and the transaction ID or reference number. It is important to keep a record of these details for future reference or if you need to address any issues related to your withdrawal.
It is advisable to review the withdrawal confirmation carefully to ensure all the information is accurate. Verify that the withdrawal amount matches your intended withdrawal sum and that the selected withdrawal method aligns with your preferences.
If you encounter any discrepancies or have concerns about the confirmation details, it is recommended to reach out to the TNG E-wallet customer support for assistance. They can help clarify any confusion and address any issues that may arise during the withdrawal process.
Keep in mind that the time it takes to receive the withdrawal confirmation may vary depending on the withdrawal method and the processing times of the respective financial institutions involved in the transaction. If you do not receive the confirmation within a reasonable timeframe, it is advisable to contact customer support for further assistance.
With the withdrawal confirmation received, you have successfully completed the process of withdrawing money from your TNG E-wallet. You can now access the withdrawn funds through your selected withdrawal method.
Now that you are familiar with the eight steps involved in withdrawing money from your TNG E-wallet, you can easily access your funds whenever you need them. Remember to keep track of your transaction history and regularly monitor your available balance to ensure accurate financial management.
Conclusion
Withdrawing money from your TNG E-wallet is a simple and convenient process that allows you to access your funds whenever you need them. By following the step-by-step guide outlined in this article, you can navigate through each stage of the withdrawal process with ease.
TNG E-wallet offers various withdrawal methods, such as bank transfers, cash withdrawals at ATMs, and authorized withdrawal points. You can choose the method that suits your needs and preferences, ensuring a seamless and hassle-free withdrawal experience.
Throughout the process, it is essential to ensure the accuracy of the entered information, review the withdrawal details, and authenticate the transaction to ensure the security of your funds and protect against unauthorized access.
Additionally, it is important to stay aware of any applicable fees or charges associated with the withdrawal method you choose. This ensures that you have a clear understanding of the total cost of the transaction and can manage your finances effectively.
Remember to keep track of your transaction history and maintain regular communication with the TNG E-wallet customer support in case you encounter any issues or have any concerns during the withdrawal process.
By following these steps, you can confidently withdraw money from your TNG E-wallet, making it a convenient and efficient way to manage your finances and access your funds whenever you need them.
Now that you have learned how to withdraw money from your TNG E-wallet, you can take full advantage of the app’s features and enjoy the convenience of digital payments with ease.