Introduction
Welcome to the world of cryptocurrency, where digital currencies like Bitcoin and Dogecoin have taken the financial market by storm. If you have been holding onto Dogecoin and want to exchange it for Bitcoin, you’re in the right place. In this guide, we will walk you through the step-by-step process of exchanging Dogecoin for Bitcoin.
Dogecoin, with its adorable Shiba Inu mascot, has gained popularity for its fun and community-driven nature. However, Bitcoin remains the leading cryptocurrency, known for its decentralization and widespread acceptance. By exchanging your Dogecoin for Bitcoin, you can tap into the vast network and potential opportunities offered by this revolutionary digital currency.
Please note that before you proceed with the exchange, ensure that you have a Dogecoin wallet and a Bitcoin wallet. These wallets will serve as your digital vaults to store and manage your cryptocurrencies securely. Once you have set up both wallets, you can move on to the exchange process.
It is essential to choose a reliable and reputable exchange platform for your Dogecoin to Bitcoin conversion. Several cryptocurrency exchanges offer this service, but make sure to do your research and select a platform that meets your requirements. Look for factors such as security, user interface, transaction fees, and customer support to make an informed choice.
Now that you have an overview of what lies ahead, let’s dive into the step-by-step process of exchanging your Dogecoin for Bitcoin. Follow each stage carefully to ensure a smooth and successful transfer. Happy trading!
Step 1: Set up a Dogecoin Wallet
The first step in exchanging Dogecoin for Bitcoin is to set up a Dogecoin wallet. A wallet is a digital storage space where you can securely store and manage your cryptocurrencies. Here’s how you can set up a Dogecoin wallet:
1. Research available Dogecoin wallets: There are various types of wallets available, including web wallets, software wallets, and hardware wallets. Each type offers a different level of security and convenience. Research the options and choose the one that best suits your needs.
2. Select a reputable wallet provider: Look for a trusted and reputable wallet provider that has a good track record of security and reliability. Some popular Dogecoin wallet providers include Dogecoin Core, Exodus, and Coinomi.
3. Download and install the wallet: Once you’ve chosen a wallet provider, visit their official website and download the wallet software. Follow the instructions provided to install the wallet on your computer or mobile device.
4. Create a new wallet: After the installation is complete, open the wallet software and select the option to create a new wallet. You will be prompted to choose a strong password to protect your wallet. Make sure to choose a password that is unique and not easily guessable.
5. Back up your wallet: It’s crucial to create a backup of your wallet to safeguard your funds. Most wallet software will guide you through the process of creating a backup phrase or a recovery seed. Write down this phrase and store it in a safe and secure location. This backup will help you restore your wallet if you ever lose access to your device.
6. Receive your Dogecoin address: Once you have set up your wallet, you will be provided with a unique Dogecoin address. This address is like your account number, and it is used to receive Dogecoin from other users or exchanges.
Congratulations! You have successfully set up a Dogecoin wallet. Now you’re one step closer to exchanging your Dogecoin for Bitcoin. In the next step, we will guide you through the process of setting up a Bitcoin wallet.
Step 2: Set up a Bitcoin Wallet
Now that you have a Dogecoin wallet, the next step is to set up a Bitcoin wallet. A Bitcoin wallet is essential for receiving, storing, and managing your Bitcoins securely. Follow these steps to set up a Bitcoin wallet:
1. Research different Bitcoin wallet options: There are various types of Bitcoin wallets available, including software wallets, hardware wallets, and online wallets. Each type has its own pros and cons in terms of security and convenience. Take some time to research and choose the wallet that best suits your needs.
2. Choose a reputable wallet provider: It’s crucial to select a trusted and reputable Bitcoin wallet provider. Look for providers that have a strong track record of security and user satisfaction. Some popular Bitcoin wallet providers include Electrum, Coinbase, and Ledger Wallet.
3. Download and install the wallet: Visit the official website of your chosen Bitcoin wallet provider and download the wallet software. Follow the installation instructions provided to install the wallet on your computer or mobile device.
4. Create a new wallet: Once the installation is complete, open the wallet software and choose the option to create a new wallet. You may be asked to choose a strong password or PIN to secure your wallet. Make sure to choose a password or PIN that is unique and not easily guessable.
5. Generate a Bitcoin address: After creating your wallet, you will be given a unique Bitcoin address. This address is similar to a bank account number and is used to receive Bitcoins from other users or exchanges. It is important to note that each Bitcoin wallet will have its own unique address.
6. Backup your wallet: Just as with your Dogecoin wallet, it is crucial to create a backup of your Bitcoin wallet. Most wallet software will guide you through the process of creating a backup phrase or a recovery seed. Write down this phrase and store it in a safe and secure place. In case you lose access to your device or your wallet is compromised, this backup will help you restore your Bitcoin wallet.
With your Bitcoin wallet set up, you’re now ready to proceed with the next steps in exchanging your Dogecoin for Bitcoin. In the following sections, we will guide you through finding a suitable exchange platform and creating an account to initiate the exchange process.
Step 3: Find an Exchange Platform
Once you have your Dogecoin and Bitcoin wallets set up, it’s time to find a suitable exchange platform for converting your Dogecoin into Bitcoin. An exchange platform is an online marketplace where you can buy, sell, and trade cryptocurrencies. Here’s how you can find the right exchange platform:
1. Research various exchange platforms: Start by researching different exchange platforms that support the conversion of Dogecoin to Bitcoin. Look for platforms that have a good reputation, transparent fees, a user-friendly interface, and strong security measures. Some popular exchange platforms for cryptocurrencies include Binance, Coinbase, Kraken, and Bittrex.
2. Consider the exchange rates and fees: Compare the exchange rates and fees offered by different platforms. Some platforms may have lower fees but offer less favorable exchange rates, so it’s important to find a balance between the two. Keep in mind that exchange rates fluctuate, so be sure to check the rates at the time of the exchange.
3. Check the availability of the Dogecoin to Bitcoin trading pair: Ensure that the exchange platform supports the trading pair of Dogecoin to Bitcoin. Not all platforms offer this specific trading pair, so verify that it’s available before proceeding.
4. Read user reviews and ratings: Take the time to read user reviews and ratings of different exchange platforms. This will give you insight into the experiences and satisfaction levels of other users. Look for platforms with positive reviews and a good track record of secure and reliable transactions.
5. Consider additional features: Some exchange platforms offer additional features like advanced trading options, mobile apps, and customer support. Assess whether these features are important to you and choose a platform that aligns with your requirements.
By conducting thorough research and considering these factors, you can find a reputable and suitable exchange platform for your Dogecoin to Bitcoin conversion. In the next step, we will guide you through the process of creating an account on the chosen exchange platform.
Step 4: Create an Account on the Exchange
Now that you have chosen a suitable exchange platform for your Dogecoin to Bitcoin conversion, it’s time to create an account on the platform. Creating an account will allow you to access the exchange’s features and perform transactions. Follow these steps to create an account on the exchange:
1. Visit the exchange platform: Open your web browser and visit the official website of the exchange platform you have chosen.
2. Locate the registration/sign-up option: Look for a “Sign up” or “Register” button on the exchange’s website. Click on it to initiate the account creation process.
3. Provide necessary information: The exchange will likely require you to provide some personal information to create an account. This may include your full name, email address, country of residence, and in some cases, identity verification documents. Make sure to provide accurate information as it may be required for account verification and security purposes.
4. Set up two-factor authentication (2FA) if available: Two-factor authentication adds an extra layer of security to your account. It typically involves linking your exchange account to a 2FA app, such as Google Authenticator or Authy. Follow the instructions provided by the exchange to set up 2FA and enhance the security of your account.
5. Agree to the terms and conditions: Read and understand the terms and conditions of the exchange platform. If you agree to them, check the box or click the confirmation button to proceed.
6. Verify your email or phone number: Some exchanges may require email or phone number verification to complete the account creation process. Check your email inbox or follow the instructions provided to verify your account.
7. Create a strong and secure password: Choose a strong and unique password for your exchange account. Make sure to use a combination of uppercase and lowercase letters, numbers, and special characters. Avoid using easily guessable passwords to ensure the security of your account.
8. Complete the registration process: Follow the additional steps provided by the exchange platform to complete the account creation process. This may include setting up additional security features or providing further information.
Once these steps are completed, you will have successfully created an account on the exchange platform. In the next step, we will guide you on funding your Dogecoin wallet to prepare for the exchange.
Step 5: Fund Your Dogecoin Wallet
Now that your account on the exchange platform is set up, it’s time to fund your Dogecoin wallet in preparation for the exchange. Funding your wallet involves transferring Dogecoin from another wallet or an exchange to your newly created wallet on the exchange platform. Here’s how you can fund your Dogecoin wallet:
1. Locate the deposit option: Log in to your exchange account and navigate to the section where you can deposit funds. This is usually found in the “Wallet” or “Funds” section of the platform.
2. Select Dogecoin as the currency: Look for the option to deposit Dogecoin. This will ensure that the funds you transfer are in the form of Dogecoin and will be credited to your Dogecoin wallet on the exchange.
3. Generate a deposit address: The exchange platform will provide you with a unique address to which you can send your Dogecoin. This address is specific to your account on the exchange and should be used for depositing Dogecoin only.
4. Copy the deposit address: Carefully copy the deposit address provided by the exchange platform. It is essential to double-check that the address is correct to ensure your funds are deposited safely.
5. Transfer your Dogecoin: Open your existing Dogecoin wallet or visit another exchange where you hold Dogecoin. Use the withdraw or send function to send your Dogecoin to the deposit address obtained from the exchange platform.
6. Confirm the transaction: After initiating the transfer, it may take some time for the transaction to be confirmed on the Dogecoin network. The confirmation time can vary, but typically it takes around 10-20 minutes for the transaction to be completed.
7. Check your Dogecoin balance: Once the transaction is confirmed, you can check your Dogecoin balance in your wallet on the exchange platform. The deposited funds should now be available for you to use for trading.
Congratulations! You have successfully funded your Dogecoin wallet on the exchange platform. Your Dogecoin is now ready to be exchanged for Bitcoin. In the next step, we will guide you through selecting the Dogecoin to Bitcoin exchange pair and placing your order on the exchange platform.
Step 6: Select the Exchange Pair
With your Dogecoin wallet funded, it’s time to select the exchange pair and determine the amount of Dogecoin you want to exchange for Bitcoin. The exchange pair refers to the specific currencies you wish to trade. In this case, it is Dogecoin and Bitcoin. Follow these steps to select the exchange pair:
1. Navigate to the trading section: Access the trading section of your exchange platform. This is where you can view and select the available currency pairs for trading.
2. Choose the Dogecoin to Bitcoin pair: Look for the Dogecoin (DOGE) and Bitcoin (BTC) trading pair. This pair allows you to exchange your Dogecoin for Bitcoin.
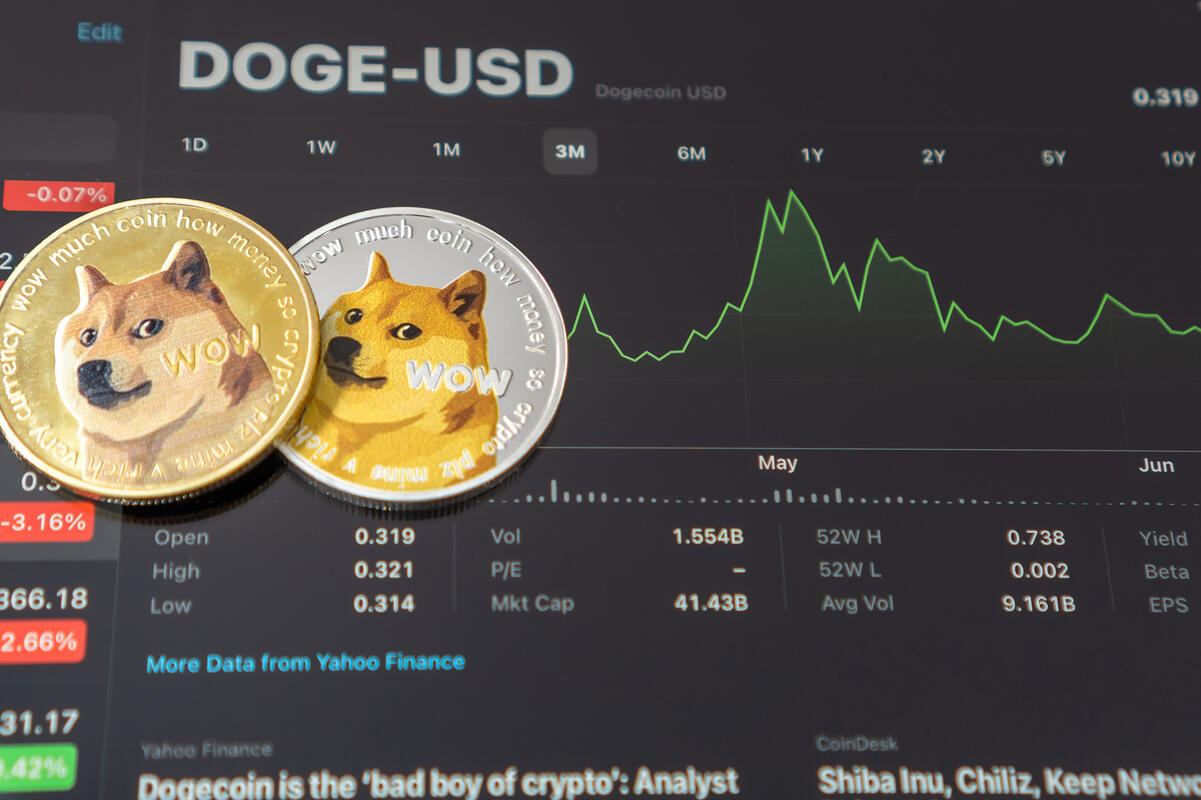
3. Review the exchange rate: Take a look at the current exchange rate for the Dogecoin to Bitcoin pair. Exchange rates constantly fluctuate, so it’s important to consider the rate at the time of your exchange.
4. Determine the amount of Dogecoin to exchange: Decide on the amount of Dogecoin you want to exchange for Bitcoin. You can usually input the amount directly into the trade interface or adjust the slider to set the desired amount.
5. Review any additional options: Some exchange platforms offer additional trading options, such as market orders or limit orders. Market orders allow you to execute the trade at the current market price, while limit orders give you control over the price at which your order is executed. Familiarize yourself with these options and choose the one that suits your needs.
6. Verify the trade details: Before proceeding, double-check the details of your trade. Ensure that the correct exchange pair, amount of Dogecoin to exchange, and any additional options are entered accurately.
7. Place your order: Once you are satisfied with the trade details, place your order on the exchange platform. This will initiate the conversion process, where your Dogecoin will be exchanged for Bitcoin based on the specified exchange rate and amount.
8. Confirmation and execution: After placing your order, the exchange platform will confirm the transaction and execute the trade. Depending on the platform and network congestion, it may take some time for the trade to be completed. Be patient and monitor your account for updates on the status of your exchange.
By following these steps, you can select the Dogecoin to Bitcoin exchange pair and initiate the conversion process. In the next step, we will guide you on what to do once the exchange is complete and you have obtained Bitcoin in your account.
Step 7: Place Your Order
After selecting the exchange pair and determining the amount of Dogecoin you want to exchange for Bitcoin, it’s time to place your order on the exchange platform. Placing an order involves specifying the details of the trade and finalizing the transaction. Follow these steps to place your order:
1. Review the trade details: Before placing your order, carefully review the trade details, including the amount of Dogecoin to be exchanged, the exchange rate, and any additional options.
2. Choose the type of order: Exchange platforms usually offer different order types, such as market orders or limit orders. A market order buys or sells the cryptocurrency at the current market price, whereas a limit order allows you to set a specific price at which you want the trade to be executed. Choose the appropriate order type based on your preferences.
3. Enter the order details: Enter the necessary details for the order, including the amount of Dogecoin you want to sell, the exchange pair (Dogecoin to Bitcoin), and any additional options or instructions provided by the platform.
4. Set the order price (if applicable): If you are placing a limit order, you will need to set the price at which you want the trade to be executed. This allows you to control the price at which the exchange takes place.
5. Check and confirm: Double-check all the order details to ensure accuracy. Once you are satisfied, click the “Place Order” or “Confirm” button to finalize the transaction.
6. Wait for execution: After placing your order, the exchange platform will process it and match it with suitable buyers or sellers. This can take some time depending on market conditions and network congestion. Monitor your account for updates on the status of your order.
7. Monitor the progress: Keep an eye on the progress of your order. The exchange platform will provide updates on the execution of your trade, including when it is matched and completed.
8. Confirm the trade: Once the trade is executed, you will receive a confirmation. Verify that the Bitcoin has been credited to your account and that the corresponding amount of Dogecoin has been deducted.
By following these steps, you can successfully place your order on the exchange platform and initiate the exchange process. In the next step, we will guide you on what to do once the exchange is complete and you have obtained Bitcoin in your account.
Step 8: Wait for the Exchange to Complete
After placing your order to exchange Dogecoin for Bitcoin, you will need to exercise patience and wait for the exchange to complete. The duration of the exchange process can vary depending on several factors, including network congestion and the specific exchange platform. Here’s what to do during this waiting period:
1. Monitor your account: Keep an eye on your exchange platform account and check for updates on the status of your exchange. The platform should provide information on the progress of your order, such as whether it is pending or completed.
2. Be patient: Understand that the exchange process may take some time. The duration can range from a few minutes to several hours, depending on market conditions and the volume of orders being processed by the exchange platform.
3. Avoid making hasty decisions: During the waiting period, it’s important to refrain from making impulsive decisions based on market fluctuations. The exchange rate may change while you wait, but it’s generally advised to stick with your initial trade unless there are significant and favorable market developments.
4. Seek customer support if necessary: If you have any concerns or questions regarding the progress of your exchange, don’t hesitate to reach out to the customer support team of the exchange platform. They should be able to provide you with updates and address any issues you may encounter.
5. Enjoy peace of mind: While waiting for the exchange to complete, take the opportunity to enjoy some peace of mind knowing that your funds are secure in your exchange account. Most reputable platforms have robust security measures in place to protect your assets.
6. Stay informed: Use this time to stay informed about the latest developments in the cryptocurrency market. Keeping up with news and trends can help you make informed decisions and navigate the dynamic nature of the crypto world.
Remember, patience is key during this waiting period. Once the exchange is complete and you have received Bitcoin in your account, you can move on to the next step of withdrawing the Bitcoin to your Bitcoin wallet.
Step 9: Withdraw Bitcoin to Your Bitcoin Wallet
Once the exchange is complete and you have successfully obtained Bitcoin in your exchange platform account, it’s time to withdraw the Bitcoin to your personal Bitcoin wallet. The process of withdrawing ensures that you have full control over your Bitcoin and can securely store them in your own wallet. Follow these steps to withdraw Bitcoin to your Bitcoin wallet:
1. Access the withdrawal section: Login to your exchange platform account and navigate to the withdrawal or funds section. Look for the option to withdraw Bitcoin or BTC.
2. Enter your Bitcoin wallet address: In your Bitcoin wallet, generate a fresh and unique Bitcoin address. Copy this address to your clipboard.
3. Fill in the withdrawal form: In the exchange platform’s withdrawal section, paste the Bitcoin wallet address you copied in the previous step into the designated field. Double-check the address to ensure accuracy, as sending Bitcoin to an incorrect address can result in permanent loss.
4. Specify the withdrawal amount: Enter the amount of Bitcoin you want to withdraw from your exchange platform account to your Bitcoin wallet. Keep in mind that some platforms may have minimum withdrawal requirements, so ensure that your withdrawal amount meets their criteria.
5. Verify the withdrawal details: Review the withdrawal details, including the wallet address and the withdrawal amount, to ensure accuracy. Take note of any withdrawal fees if applicable.
6. Confirm the withdrawal: Once you have verified the withdrawal details, click the “Confirm” or “Withdraw” button to initiate the transaction. Some platforms may require additional verification steps, such as providing a One-Time Password (OTP) or confirming via email.
7. Wait for the transaction to complete: Depending on the network congestion and the exchange platform’s internal processes, it may take some time for the Bitcoin withdrawal to be processed. Be patient and monitor your Bitcoin wallet for incoming transactions.
8. Check your Bitcoin wallet: Once the transaction is confirmed on the blockchain, you should see the Bitcoin reflected in your Bitcoin wallet. Confirm that the correct amount has been deposited into your wallet.
By following these steps, you can securely withdraw your Bitcoin from your exchange platform account and have full control over your funds in your personal Bitcoin wallet. Congratulations, you have successfully completed the process of exchanging Dogecoin for Bitcoin!
Conclusion
Congratulations! You have successfully navigated the process of exchanging Dogecoin for Bitcoin. By following the steps outlined in this guide, you have set up your Dogecoin and Bitcoin wallets, selected a reputable exchange platform, created an account, funded your Dogecoin wallet, selected the exchange pair, placed your order, waited for the exchange to complete, and finally, withdrawn your Bitcoin to your personal wallet.
Exchanging Dogecoin for Bitcoin opens up new possibilities in the world of cryptocurrency. Bitcoin, being the leading digital currency, offers widespread acceptance and numerous opportunities for investment and transactions.
As you continue your journey in the world of cryptocurrency, keep in mind the importance of staying informed and exercising caution. The crypto market can be highly volatile, so it’s crucial to conduct proper research, monitor market trends, and make informed decisions.
Remember to keep your wallets and accounts secure by using strong, unique passwords and implementing two-factor authentication. Safeguard your backup phrases or recovery seeds in a secure location to ensure access to your funds in case of any unforeseen circumstances.
Additionally, be mindful of transaction fees, exchange rates, and the overall security and reputation of the exchange platforms you choose. Conduct thorough research and read user reviews to make informed decisions and protect your investments.
With the knowledge and experience gained from successfully exchanging Dogecoin for Bitcoin, you can now explore the vast opportunities and potential of the cryptocurrency market. Whether you choose to hold your Bitcoin as a long-term investment or use it for various transactions, you are now equipped with the tools and understanding to navigate the intricate world of digital currencies.
Happy trading and investing!