Introduction
Welcome to the fascinating world of cryptocurrency! If you’re keen to get your paws on some Dogecoin, you’ve come to the right place. In this guide, we’ll walk you through the process of purchasing Dogecoin on Coinbase.
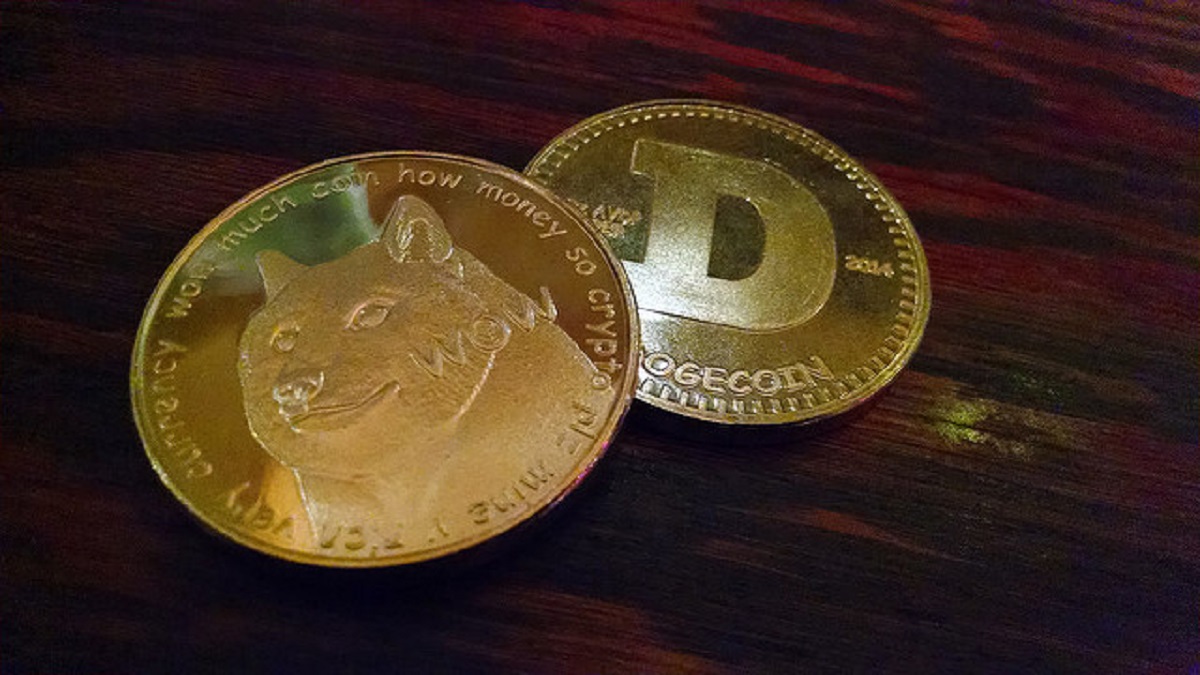
Dogecoin, originally created as a fun and lighthearted digital currency, has gained increasing popularity over the years. Known for its iconic Shiba Inu dog logo, Dogecoin has become a favorite among cryptocurrency enthusiasts and investors alike.
Before we dive into the steps, it’s important to note that Coinbase is one of the most trusted and user-friendly platforms for trading cryptocurrencies. As a reputable exchange, Coinbase provides a secure and straightforward way to buy and sell various digital assets, including Dogecoin.
Whether you’re new to cryptocurrency or already have some experience, purchasing Dogecoin on Coinbase is a straightforward process. By following these steps, you’ll be able to join the Dogecoin community and start investing in this unique digital currency.
So, if you’re ready to embark on this exciting journey, let’s get started by creating a Coinbase account.
Step 1: Create a Coinbase Account
The first step in buying Dogecoin on Coinbase is to create an account. Coinbase is available as both a website and a mobile app, making it convenient for users to access their accounts from anywhere.
To begin, visit the Coinbase website or download the app from your respective app store. Once you have reached the homepage, locate the “Sign Up” or “Get Started” button and click on it.
You will then be prompted to provide your personal details, including your name, email address, and a strong, unique password. It’s important to choose a password that is not easily guessable and to enable two-factor authentication to further enhance the security of your account.
After entering your personal information and password, review the terms and conditions, as well as the privacy policy, and click on the checkbox to indicate your agreement. Finally, click on the “Create Account” button to proceed.
At this point, Coinbase may send a verification email to the address you provided. Open your email inbox, locate the verification email, and click on the verification link. This step is crucial to activate your Coinbase account and gain access to its features.
Once your account is verified, you can log in using your email address and password. Coinbase may also prompt you to set up additional security measures, such as a fingerprint or Face ID login option, to further protect your account.
Congratulations! You have successfully created your Coinbase account, and now you’re ready to move on to the next step: completing your profile.
Step 2: Complete Your Profile
Now that you’ve created your Coinbase account, it’s time to complete your profile. Completing your profile is an essential step in the process, as it provides Coinbase with the necessary information to ensure compliance with regulatory requirements.
To get started, log in to your Coinbase account using your email address and password. Once logged in, you’ll need to navigate to your account settings, which can typically be found in the menu or profile section of the platform.
In the account settings, you’ll find options to update your personal information, including your legal name, date of birth, and residential address. Coinbase is required to collect this information as part of the Know Your Customer (KYC) process, which helps prevent fraud and comply with anti-money laundering regulations.
Take the time to carefully enter the requested information, ensuring its accuracy. Coinbase may require you to provide supporting documentation, such as a government-issued identification document, to verify your identity. This process is in place to protect both you and Coinbase from unauthorized transactions and potential fraudulent activity.
In addition to your personal information, Coinbase may also ask you to provide details about your source of funds and your trading goals. While these questions are optional, providing this information can help Coinbase tailor their services to your specific needs and preferences.
Once you have entered all the necessary details and uploaded any requested documents, review the information to ensure its accuracy. Mistakes or inaccuracies may lead to delays in the verification process. When you’re confident that everything is correct, click on the “Save” or “Submit” button to update your profile.
Completing your profile is an important step in using Coinbase to buy Dogecoin, as it allows you to enjoy the full range of features and benefits offered by the platform. With your profile complete, you’re now ready to move on to the next step: verifying your identity.
Step 3: Verify Your Identity
Verifying your identity is a crucial step in the process of buying Dogecoin on Coinbase. This verification process is essential for Coinbase to comply with regulatory requirements and ensure the security and legitimacy of transactions on their platform.
To begin the verification process, log in to your Coinbase account and navigate to your account settings. Look for the section specifically dedicated to identity verification or KYC (Know Your Customer) verification.
Click on the “Verify Identity” or similar button to start the process. Coinbase will then guide you through the steps required to complete the verification. Typically, this involves providing additional personal information and uploading a clear and valid identification document.
When providing your identification document, make sure to follow Coinbase’s guidelines and requirements. Generally, a government-issued identification document, such as a passport or driver’s license, is accepted. Take a clear photo or scan of both the front and back of your identification document and upload them as directed.
In some cases, Coinbase may require additional documentation to verify your identity fully. This could include proof of address, such as a utility bill or bank statement, or a selfie photo to compare with your identification document.
Once you have uploaded all the necessary documents, double-check that they are clear and legible. Any blurry or unreadable documents may cause delays in the verification process. Once you are confident that your submission is accurate, click on the “Submit Verification” or similar button.
After you have submitted your verification documents, Coinbase’s team will review them. The verification process may take some time, usually ranging from a few minutes to a couple of days. Coinbase will notify you via email regarding the status of your verification.
Verifying your identity is a necessary step to ensure the security and legitimacy of your Coinbase account. Once your identity is successfully verified, you can proceed to the next step: connecting a payment method.
Step 4: Connect a Payment Method
Now that you have created your Coinbase account and verified your identity, it’s time to connect a payment method. Connecting a payment method allows you to fund your Coinbase account and make purchases of Dogecoin.
Start by logging in to your Coinbase account and navigating to the account settings. Look for the section dedicated to payment methods or funding options. Coinbase offers various payment methods, including bank transfers, credit/debit cards, and even cryptocurrency transfers.
If you prefer to use a bank transfer, select the option to link your bank account. Coinbase will guide you through the process of adding your bank account details, which usually involves providing your bank account number and routing number. Coinbase may also require you to verify your bank account by making small deposits and confirming the amounts.
If you prefer to use a credit or debit card, select the option to add a card. Enter the required card details, including the card number, expiration date, and CVV code. Coinbase may also require you to verify the card by entering a unique code sent to your card’s associated phone number or email address.
Once you have connected your chosen payment method, review the information to ensure its accuracy. Double-check the bank account or card details you entered to prevent any potential issues with future transactions.
It’s important to note that Coinbase may have specific requirements or restrictions for certain payment methods. It’s advisable to familiarize yourself with these requirements and ensure that your chosen payment method is compatible with Coinbase.
Once your payment method is successfully connected, you can proceed to the next step: depositing funds into your Coinbase account.
Step 5: Deposit Funds into Your Coinbase Account
Now that you have connected a payment method to your Coinbase account, it’s time to deposit funds. Depositing funds into your Coinbase account allows you to have a balance to use for purchasing Dogecoin and other cryptocurrencies.
To begin, log in to your Coinbase account and navigate to the account dashboard or wallet section. Look for the option to deposit funds or add funds to your account.
Click on the “Deposit” or similar button and select the payment method you connected in the previous step. If you have multiple payment methods linked, choose the one you wish to use for the deposit.
Enter the amount you wish to deposit into your Coinbase account. Coinbase may have minimum and maximum deposit limits, so make sure your amount falls within the allowed range.
Review the details of your deposit, including the payment method and the amount. Double-check that everything is accurate before proceeding.
Once you confirm the details, click on the “Confirm” or “Deposit” button to initiate the deposit. Depending on your chosen payment method, the funds may be instantly available in your Coinbase account, or it may take some time for the transfer to complete.
It’s important to note that Coinbase may charge fees for depositing funds, depending on the payment method used. Take some time to familiarize yourself with Coinbase’s fee structure to ensure you are aware of any associated costs.
Once the funds are successfully deposited into your Coinbase account, you’re one step closer to buying Dogecoin! The deposited amount will be reflected in your account balance, ready to be used for purchasing cryptocurrencies.
With funds in your Coinbase account, you’re now ready to move on to the next step: navigating to the Dogecoin trading page.
Step 6: Navigate to the Dogecoin Trading Page
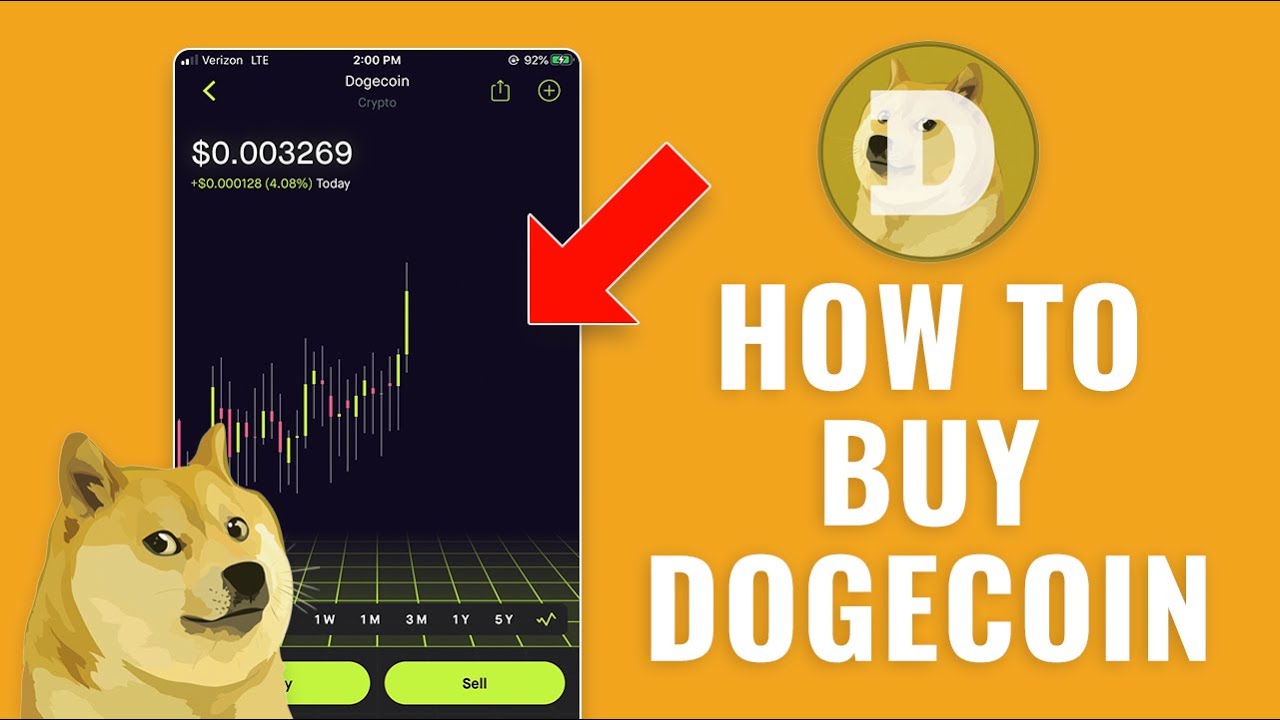
Now that you have funds in your Coinbase account, it’s time to navigate to the Dogecoin trading page. This is where you can view the current price of Dogecoin and place buy orders to acquire this popular cryptocurrency.
Start by logging in to your Coinbase account. Once logged in, you’ll be directed to the account dashboard or homepage. Look for the “Trade” or “Markets” tab, as this is where you’ll find all the available cryptocurrencies for trading.
In the list of cryptocurrencies, locate and click on the Dogecoin (DOGE) trading pair. This will take you to the Dogecoin trading page, where you can view the DOGE/USD (Dogecoin to US Dollar) or DOGE/BTC (Dogecoin to Bitcoin) trading pair.
On the trading page, you’ll find the current price of Dogecoin, along with various charts showing the price history and market trends. Take some time to familiarize yourself with the information provided, as it can help you make more informed decisions when buying Dogecoin.
Alongside the charts, you’ll find the option to place a buy order. Coinbase offers different order types, including market orders and limit orders. A market order allows you to buy Dogecoin at the current market price, while a limit order allows you to set a specific price at which you want to buy.
Decide on the type of order you want to place and enter the amount of Dogecoin you wish to purchase. Coinbase will show you the estimated cost of the order based on the current market price. Review the details of your order to ensure it meets your requirements.
If you’re satisfied with the order details, click on the “Buy” or “Place Order” button to finalize the transaction. Coinbase will then execute the order and deduct the funds from your Coinbase account.
It’s important to note that the execution of market orders is generally instant, while limit orders may not be executed immediately if the market price doesn’t reach your specified limit. Be aware of this when choosing your order type.
Congratulations! You have successfully navigated to the Dogecoin trading page and are now ready to place your buy order. The next step is to review and confirm your purchase before finalizing the transaction.
Step 7: Place a Dogecoin Order
With the Dogecoin trading page open and your desired order type selected, it’s time to place your Dogecoin order on Coinbase. This step involves specifying the amount of Dogecoin you want to buy and confirming the purchase details before finalizing the transaction.
Start by reviewing the order details on the trading page. Ensure that the order type, such as market or limit order, is correct, and double-check the amount of Dogecoin you intend to purchase.
If you wish to proceed with the order, enter the amount of Dogecoin you want to buy. Coinbase provides a user-friendly interface that allows you to enter the amount in various formats, such as the number of coins or the equivalent value in your chosen currency.
As you enter the amount, Coinbase will display the estimated cost of the order based on the current market price. Take a moment to review this information to ensure it aligns with your intended purchase and budget.
If you’re satisfied with the order details, click on the “Buy” or “Place Order” button to initiate the purchase. Coinbase may prompt you to confirm the order one last time to prevent any accidental or mistaken transactions. Carefully review the order summary before proceeding.
Once you confirm the order, Coinbase will execute the purchase and deduct the necessary funds from your Coinbase account balance. The newly acquired Dogecoin will then be added to your Coinbase wallet, where you can view your holdings and track their value over time.
It’s important to note that the execution of market orders is generally instant, and you will immediately see the purchased Dogecoin in your account. However, if you placed a limit order, the execution may take some time if the market price does not reach your specified limit.
Congratulations! You have successfully placed your Dogecoin order on Coinbase. The final step in the process is to review and confirm the details of your order.
Step 8: Review and Confirm Your Order
Once you have placed your Dogecoin order on Coinbase, it’s crucial to review and confirm the details of your order before finalizing the transaction. This step ensures that all the information is accurate, and you are making the right purchase decision.
After clicking on the “Buy” or “Place Order” button, Coinbase may present you with a confirmation page or a summary of your order. Take the time to carefully review this information.
Check the order type to ensure it matches your intention. If you selected a market order, verify that the Dogecoin is being purchased at the current market price. If you opted for a limit order, double-check that the specified price is correct.
Review the amount of Dogecoin you are buying to make sure it aligns with your desired investment or trading goals. Ensure that the estimated cost of the order matches your expectations and aligns with the funds available in your Coinbase account.
Additionally, consider Coinbase’s transaction fees, which may be applicable to your order. Confirm that you understand and are comfortable with the fees associated with the purchase. Coinbase provides transparent fee information, so take the time to familiarize yourself with the fee structure if you haven’t already done so.
If everything looks accurate and you are satisfied with the details of your order, proceed to confirm the purchase. Coinbase may ask for a final confirmation to ensure that you intended to place the order.
After confirming the order, Coinbase will execute the transaction and complete the purchase of Dogecoin on your behalf. You will receive a confirmation message or notification indicating that your order has been processed.
Once the transaction is complete, the purchased Dogecoin will be added to your Coinbase wallet. You can view your holdings and track the value of your Dogecoin investment over time.
It’s important to note that once an order is confirmed and executed, it cannot be reversed. Take the time to review the details of your order before completing the transaction to avoid any potential mistakes or regrets.
Congratulations! You have reviewed and confirmed your Dogecoin order on Coinbase. The final step in the process is to securely store your Dogecoin to ensure the safety and accessibility of your investment.
Step 9: Store Your Dogecoin Securely
After purchasing Dogecoin on Coinbase, it’s crucial to store your investment securely. Proper storage ensures the safety and protection of your digital assets from potential threats such as hackers or unauthorized access.
Coinbase provides a built-in wallet for storing your Dogecoin within their platform. This is a convenient option for beginners or those who prefer an easy-to-use solution. However, it’s important to note that storing your cryptocurrencies on an exchange comes with certain risks.
For stronger security and control over your Dogecoin, consider transferring them to a personal wallet. A personal wallet, also known as a software wallet or hardware wallet, grants you full control over your private keys and protects your Dogecoin offline.
To set up a personal wallet, research and choose a reputable wallet provider that supports Dogecoin. Popular options include hardware wallets like Ledger or software wallets like Coinomi or Exodus. Follow the instructions provided by the wallet provider to create and secure your wallet.
When transferring your Dogecoin from Coinbase to your personal wallet, locate the withdrawal or send feature within the Coinbase platform. Select your Dogecoin wallet as the destination and enter the address provided by your personal wallet. Double-check the address to ensure accuracy.
Before finalizing the transfer, Coinbase may require you to confirm the transaction via email or two-factor authentication. This extra layer of security helps protect your Dogecoin during the transfer process.
Once the transfer is complete, your Dogecoin will be stored securely in your personal wallet. Ensure that you keep your wallet’s seed phrase or recovery phrase in a safe place, preferably offline. This seed phrase allows you to recover your wallet and access your Dogecoin if your device is lost or damaged.
Regularly update and maintain the security of your personal devices to prevent malware or hacking attempts. Avoid sharing sensitive information about your wallet or your private keys with anyone.
Periodically review and update your wallet software to ensure you have the latest security patches and enhancements. Stay informed about any potential vulnerabilities or updates within the Dogecoin community to protect your investment.
By securely storing your Dogecoin, you can have peace of mind knowing that your digital assets are safeguarded. This concludes the process of buying Dogecoin on Coinbase and storing it securely in a personal wallet.
Conclusion
Congratulations on successfully learning how to buy Dogecoin on Coinbase! By following the step-by-step guide outlined in this article, you have gained the knowledge and understanding to navigate the cryptocurrency world and acquire this popular digital asset.
We started by creating a Coinbase account, completing our profile, verifying our identity, and connecting a payment method. Then, we deposited funds into our Coinbase account and learned how to navigate to the Dogecoin trading page. Next, we placed a Dogecoin order, reviewed and confirmed the details, and focused on storing our investment securely.
Remember, Coinbase is a trusted and user-friendly platform for buying and selling cryptocurrencies. However, it’s important to always exercise caution, do thorough research, and stay informed about market trends and potential risks when engaging in any cryptocurrency transactions.
Consider expanding your knowledge of cryptocurrencies, blockchain technology, and investment strategies to make informed decisions along your crypto journey. Stay updated on industry news, follow reputable sources, and consult with experienced investors or financial advisors if needed.
Cryptocurrency investments come with risks, including market volatility, regulatory changes, and cybersecurity threats. Only invest what you can afford to lose and diversify your investment portfolio to spread the risk. Remember that past performance is not indicative of future results.
Lastly, remain vigilant in protecting your personal and financial information. Be wary of phishing attempts, keep your passwords secure, and enable two-factor authentication whenever possible. Backup your wallet and preserve your recovery phrase offline to ensure access to your digital assets.
Now that you have the knowledge and confidence to buy Dogecoin, it’s time to embark on your cryptocurrency journey. Keep exploring and learning about the fascinating world of crypto, and always approach it with a curious and informed mindset.
Good luck and happy trading!