Introduction
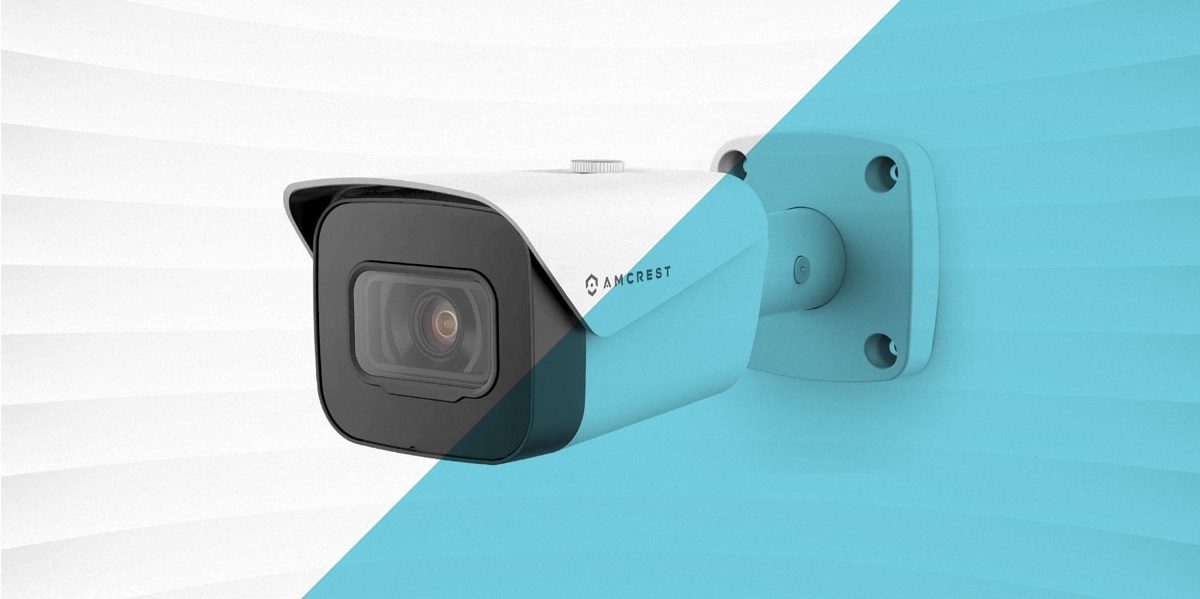
Welcome to the world of Amcrest cameras! These powerful devices offer top-notch security and surveillance capabilities, allowing you to monitor your home or business with ease. One of the standout features of Amcrest cameras is the ability to enable Peer-to-Peer (P2P) functionality. P2P technology allows direct communication between multiple devices without the need for a central server. This enables you to access your camera’s live feed remotely, whether you’re at home or on the go.
In this guide, we’ll walk you through the process of enabling P2P on your Amcrest camera. We’ll cover everything you need to know, from accessing the camera interface to configuring the P2P settings. By the end of this article, you’ll have a solid understanding of how to leverage the P2P feature to enhance your surveillance experience.
Before we dive into the steps, it’s important to note that enabling P2P on your Amcrest camera requires a few prerequisites. Firstly, you need to have an Amcrest camera that supports P2P functionality. You can check the product specifications or consult the user manual to verify this. Additionally, you’ll need a stable internet connection to ensure smooth communication between your camera and the remote viewing device.
Now that we’ve covered the basics, let’s get started with enabling P2P on your Amcrest camera.
Step 1: Accessing the Amcrest Camera Interface
To enable P2P on your Amcrest camera, you’ll first need to access the camera’s interface. Here’s how you can do it:
- Connect your Amcrest camera to a power source and ensure that it is properly connected to your network. You can use an Ethernet cable or connect the camera to your Wi-Fi network, depending on the model.
- Launch a web browser on your computer or mobile device that is connected to the same network as your Amcrest camera.
- In the address bar of your web browser, enter the default IP address of your Amcrest camera. The default IP address is typically printed on a sticker that can be found on the camera itself or provided in the user manual. If you’re unsure, you can try the default IP address for Amcrest cameras, which is usually
192.168.1.108. - Press “Enter” to access the login page of the camera’s interface. You will be prompted to enter the username and password for your camera. If you haven’t changed the default credentials, you can find them in the user manual or on the sticker attached to the camera.
- Once you’ve entered the correct login credentials, click on the “Login” or “Sign In” button to proceed.
- After successful login, you will be redirected to the main dashboard of the Amcrest camera interface. Here, you can access various settings and features of your camera.
Keep in mind that the steps may vary slightly depending on the specific model of your Amcrest camera. However, the general process of accessing the camera interface remains the same. If you encounter any issues or need further assistance, refer to the user manual or contact Amcrest support for guidance.
Step 2: Enabling Peer-to-Peer (P2P) on the Amcrest Camera
Once you have accessed the Amcrest camera interface, it’s time to enable Peer-to-Peer (P2P) functionality. Here’s how you can do it:
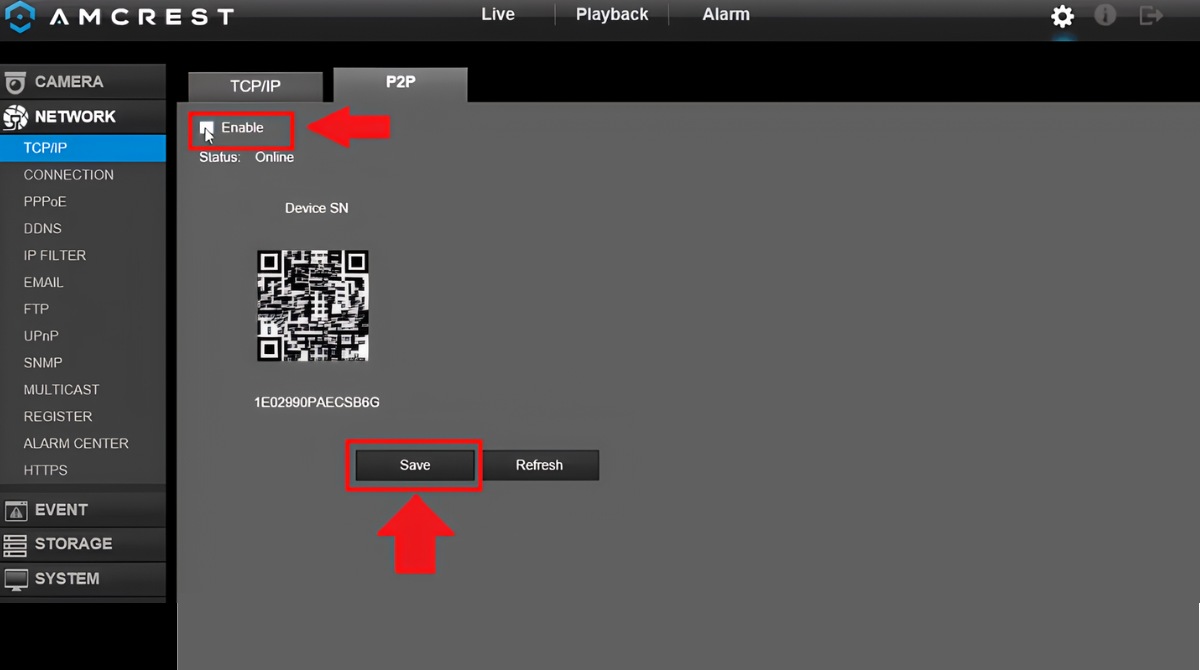
- On the camera interface dashboard, look for the “Settings” or “Configuration” tab. Click on it to expand a list of options.
- Select the “Network” or “Network Configuration” option from the list. This will open the network settings page.
- In the network settings, locate the “P2P” or “Peer-to-Peer” section. Depending on your camera model, this section may be found under “Advanced Settings” or a similar submenu.
- Once you’ve found the P2P section, you will see an option to enable or disable P2P functionality. Toggle the switch or check the box to enable P2P.
- Save the changes by clicking on the “Apply” or “Save” button. This will activate the P2P feature on your Amcrest camera.
Congratulations! You’ve successfully enabled Peer-to-Peer (P2P) on your Amcrest camera. This means that you can now connect to your camera remotely using the P2P technology, without the need for complicated port forwarding or router configurations.
Enabling P2P simplifies the process of accessing your camera’s live feed from anywhere in the world. Whether you’re using a computer, smartphone, or tablet, you can easily view the camera’s footage with just a few clicks or taps.
Keep in mind that enabling P2P on your Amcrest camera may come with additional security considerations. It is recommended to follow best practices in securing your camera, such as setting up strong login credentials and keeping the firmware up to date.
In the next step, we’ll explore how to configure the P2P settings to further optimize your camera’s performance. Follow along to make the most out of your Amcrest camera’s P2P functionality.
Step 3: Configuring P2P Settings
After enabling Peer-to-Peer (P2P) on your Amcrest camera, it’s time to configure the P2P settings to ensure optimal performance and security. Follow these steps to configure the P2P settings:
- On the camera interface dashboard, navigate to the “Settings” or “Configuration” tab, similar to the previous steps.
- Look for the “Network” or “Network Configuration” option and access it to open the network settings page.
- Within the network settings, locate the P2P section and find the P2P settings or configuration options.
- Here, you’ll find various settings related to P2P functionality. These settings may include options for setting up a P2P username and password, enabling or disabling QR code scanning, or specifying the maximum number of concurrent P2P connections.
- Configure the P2P settings according to your preferences. It is recommended to set a strong P2P username and password to protect your camera from unauthorized access.
- Once you’ve adjusted the P2P settings, save the changes by clicking on the “Apply” or “Save” button.
By configuring the P2P settings, you can customize your Amcrest camera’s P2P functionality to meet your specific needs. For example, setting a unique P2P username and password adds an extra layer of security to your camera, preventing unauthorized access.
Additionally, enabling QR code scanning allows for quick and convenient setup of remote viewing on mobile devices. By scanning the camera’s unique QR code, you can easily connect to the camera without having to manually enter the IP address or other details.
Remember to regularly review and update your P2P settings, especially if there are any changes in your network configuration or security requirements. By keeping your P2P settings up to date, you can ensure a secure and seamless remote viewing experience with your Amcrest camera.
In the next step, we’ll test the P2P connection to confirm that everything is working as expected. Follow along to verify the successful setup of P2P on your Amcrest camera.
Step 4: Testing the P2P Connection
Now that you have enabled and configured Peer-to-Peer (P2P) on your Amcrest camera, it’s time to test the P2P connection to ensure everything is functioning correctly. Follow these steps to test the P2P connection:
- On your computer or mobile device, open your preferred web browser.
- Enter the Amcrest camera’s P2P URL or navigate to the P2P section of the camera interface. The P2P URL is typically in the format
p2p://([camera_ID]), where [camera_ID] represents the unique identifier of your camera. - Press “Enter” or click “Go” to initiate the P2P connection.
- You should now be able to see the live feed from your Amcrest camera within the web browser. This indicates that the P2P connection is successful.
- You can also test the P2P connection on a mobile device by downloading the Amcrest View app from the App Store or Google Play Store. Install the app, sign in with your credentials, and access the live feed to verify the P2P connection.
If you encounter any issues during the P2P connection test, double-check the P2P settings on your Amcrest camera and ensure that you have entered the correct P2P URL or used the correct method to access the live feed.
If the P2P connection is successful, congratulations! You have successfully enabled and tested the P2P functionality on your Amcrest camera. You can now remotely access your camera’s live feed from anywhere using the P2P technology, without the need for complex network configurations.
Remember to take necessary security precautions when accessing your camera remotely, such as setting strong login credentials, regularly updating firmware, and using secure connections over Wi-Fi or cellular networks.
With a properly configured and tested P2P connection, you can enjoy peace of mind knowing that your Amcrest camera is readily accessible and providing you with reliable surveillance capabilities.
Conclusion
Enabling Peer-to-Peer (P2P) on your Amcrest camera opens up a world of possibilities for remote monitoring and surveillance. By following the steps outlined in this guide, you should now have a clear understanding of how to enable, configure, and test the P2P functionality on your Amcrest camera.
We started by accessing the camera interface, which allowed us to access the settings and configuration options. From there, we enabled P2P functionality and configured the necessary settings to ensure optimal performance and security. Finally, we tested the P2P connection to confirm that everything was working as expected.
With P2P enabled, you can now enjoy the convenience of accessing your Amcrest camera’s live feed from anywhere in the world. Whether you’re monitoring your home, office, or any other location, remote viewing is made simple and straightforward through P2P technology.
It’s important to note that while P2P offers convenience, it’s crucial to prioritize security. Be diligent in setting strong login credentials, regularly updating firmware, and maintaining a secure network connection.
If you encounter any difficulties or have specific questions related to your Amcrest camera’s P2P functionality, don’t hesitate to refer to the user manual or reach out to Amcrest support for assistance. They will be able to provide you with further guidance and troubleshooting steps.
Now that you’re equipped with the knowledge to enable and utilize P2P on your Amcrest camera, take full advantage of this feature to enhance your surveillance experience and keep an eye on what matters most to you.