Introduction
Launching a project on Kickstarter can be an exciting endeavor, but sometimes circumstances change, and you may find yourself in a situation where you need to delete a Kickstarter project. Whether it’s due to a change in plans, unforeseen challenges, or simply a project that didn’t gain the traction you had hoped for, knowing how to delete a Kickstarter project is essential.
However, it’s important to note that deleting a Kickstarter project is not a decision to be taken lightly. Kickstarter has its guidelines and policies in place to ensure the integrity and transparency of the platform. Before deleting a project, it’s crucial to understand these guidelines and assess the viability of your project.
In this article, we will provide you with a step-by-step guide on how to delete a Kickstarter project. We’ll also highlight the differences between cancelling and deleting a project, as they have different implications for you as a creator and for the backers who have supported your project.
By following the proper procedure and understanding the implications, you can navigate through the process of deleting a Kickstarter project with confidence. So, let’s dive into the details and learn how to remove a project from Kickstarter.
Understanding Kickstarter Guidelines
Before embarking on the process of deleting a Kickstarter project, it is crucial to familiarize yourself with Kickstarter’s guidelines. These guidelines not only define the rules for launching a project but also outline the responsibilities of creators and the expectations for project updates, communication, and fulfillment.
One of the key aspects of Kickstarter’s guidelines is that projects on the platform must fall under one of the designated categories: art, comics, crafts, dance, design, fashion, film & video, food, games, journalism, music, photography, publishing, technology, and theater. Projects not related to these categories will not be accepted on Kickstarter.
Additionally, Kickstarter has strict rules against prohibited items, including illegal items, drugs, weapons, and certain hazardous materials. It is essential to review the guidelines and ensure your project adheres to the platform’s rules to avoid potential issues in the future.
Moreover, as a project creator, you have the responsibility to provide transparent and accurate information about your project. This includes clearly communicating the project’s risks and challenges, setting realistic funding goals, and delivering on the promises made to backers. Kickstarter holds creators accountable for meeting these expectations, and failure to do so can lead to negative consequences.
By understanding and adhering to Kickstarter’s guidelines, you can ensure a smooth and compliant project experience. Take the time to review these guidelines thoroughly, as they will provide valuable insights into the process of deleting a Kickstarter project.
Assessing Project Viability
Before proceeding with the deletion of a Kickstarter project, it’s essential to carefully assess the viability of your project. This evaluation will help you make an informed decision and determine if deleting the project is the best course of action.
Firstly, consider the progress and interest generated by your project. Has it gained significant traction with backers? Have you received enough funding to successfully carry out the project? If your project has not received substantial support or it doesn’t seem feasible to fulfill the rewards, it may be worth considering deleting the project.
Secondly, evaluate the current status of your project. Are there any unforeseen obstacles or changes that make it impossible to proceed? For example, if you were planning to deliver physical products, but now face manufacturing or supply chain difficulties, it might be necessary to delete the project to avoid disappointing backers.
Additionally, carefully analyze the project timeline and any potential delays or setbacks. If you realize that the project will not be completed within a reasonable timeframe, it’s important to be transparent with your backers and consider deleting the project to avoid providing false expectations.
Furthermore, consider external factors that may affect the success of your project. Has there been a significant shift in market trends or competition? Is the demand for your project diminishing or being superseded by other similar offerings? Taking these factors into account will assist you in determining if continuing with the project is viable.
Assessing project viability requires an honest evaluation of various aspects, including funding, progress, challenges, and market conditions. By carefully considering these factors, you can make an informed decision on whether to proceed with the project or delete it.
Cancelling vs Deleting a Kickstarter Project
When considering removing a project from Kickstarter, it’s important to understand the distinction between cancelling and deleting a project. These terms have different implications for both the project creator and the backers involved.
Cancelling a project: Cancelling a Kickstarter project means stopping the project before the funding period ends. This can be done for various reasons, such as realizing it’s not feasible to meet the project goals, facing unexpected challenges, or making significant changes to the project. When a project is cancelled, backers’ pledges are voided, and no funds are collected.
Deleting a project: Deleting a Kickstarter project, on the other hand, occurs after the funding period has ended. If you delete a project, it means removing all traces of the project from the Kickstarter platform. This action is irreversible and removes all information, updates, comments, and pledges associated with the project. Backers will not be able to access the project page or any project-related details.
Choosing between cancelling and deleting a project depends on the specific circumstances and the stage of the project. Cancelling a project is appropriate if you realize early on that it cannot be successfully executed or if you need to make significant changes. It allows you to communicate openly with backers and void their pledges without any irreversible consequences.
However, if the project has already concluded and you no longer wish for it to be visible on Kickstarter, deleting the project is the appropriate option. Deleting a project removes it entirely from the platform, providing a clean break and allowing you to start fresh or pursue alternative avenues without any lingering project presence.
Consider the implications for both yourself and your backers when deciding between cancelling and deleting a Kickstarter project. Communication and transparency with your backers throughout the process are crucial to maintain trust and manage expectations, regardless of the chosen course of action.
Steps to Delete a Kickstarter Project
Deleting a Kickstarter project involves a few straightforward steps. However, it’s important to note that once a project is deleted, it cannot be recovered. So, ensure that this is the right decision for your project before proceeding.
Here are the steps you need to follow to delete a Kickstarter project:
- Step 1: Log in to Your Kickstarter Account
- Step 2: Navigate to Project Dashboard
- Step 3: Select the Project You Want to Delete
- Step 4: Click on “Edit Project” Button
- Step 5: Scroll Down to the Bottom of the Edit Page
- Step 6: Click on “Delete Project” Option
- Step 7: Confirm Deletion
Visit the Kickstarter website and log in to your account using your credentials. Make sure you have access to the account associated with the project you wish to delete.
Once logged in, navigate to your Kickstarter account’s main dashboard. From there, you’ll be able to access all the projects you have launched or backed.
Scroll through your list of projects and locate the specific project you wish to delete. Click on the project to access its dedicated project page.
On the project page, locate the “Edit Project” button. This button is usually located on the right-hand side of the project page, near the project’s title and description. Click on it to proceed with editing the project.
After clicking on the “Edit Project” button, you will be redirected to the project’s edit page. Scroll down to find the bottom section of the edit page, where additional project settings are available.
Within the additional project settings, you will find the “Delete Project” option. Click on this option to initiate the process of deleting your project from Kickstarter.
A confirmation prompt will appear after selecting the “Delete Project” option. Read through the prompt carefully as it will outline the consequences and irreversibility of deleting the project. If you’re certain about the deletion, confirm your decision to complete the process.
Once you have followed these steps and confirmed the deletion, your Kickstarter project will be permanently removed from the platform. All associated information, updates, comments, and pledges will be permanently deleted.
Take the time to double-check your decision before proceeding with the deletion. Communicate with your backers and stakeholders, providing them with an explanation for the project’s deletion to maintain transparency and trust.
Step 1: Login to Your Kickstarter Account
The first step in the process of deleting a Kickstarter project is to log in to your Kickstarter account. This step ensures that you have the necessary access and permissions to delete the project.
To log in to your Kickstarter account, follow these simple instructions:
- Visit the Kickstarter website by opening a web browser and entering “www.kickstarter.com” in the address bar.
- On the Kickstarter homepage, look for the “Log in” button at the top right corner of the screen. Click on it.
- You will be directed to the login page, where you will need to enter your email address and password associated with your Kickstarter account.
- After entering your login credentials, click on the “Log in” button to proceed.
Once you have successfully logged in to your Kickstarter account, you are ready to move on to the next step in the process of deleting your Kickstarter project.
It is important to ensure that you have access to the account that is associated with the project you want to delete. If you have multiple Kickstarter accounts or are accessing an account shared with others, confirm that you have the necessary permissions to delete the project.
Remember to keep your login credentials secure and confidential to protect your Kickstarter account from unauthorized access. If you encounter any issues during the login process, consider resetting your password or reaching out to Kickstarter’s customer support for assistance.
By successfully logging in to your Kickstarter account, you have gained the initial access required to proceed with deleting your Kickstarter project. Now, let’s move on to the next step in the process, navigating to the project dashboard.
Step 2: Navigate to Project Dashboard
Once you have logged in to your Kickstarter account, the next step in deleting a Kickstarter project is to navigate to the project dashboard. The project dashboard is where you can access and manage all the projects you have launched or backed on the Kickstarter platform.
Follow these steps to find and access the project dashboard:
- After logging in, you will be directed to the Kickstarter homepage.
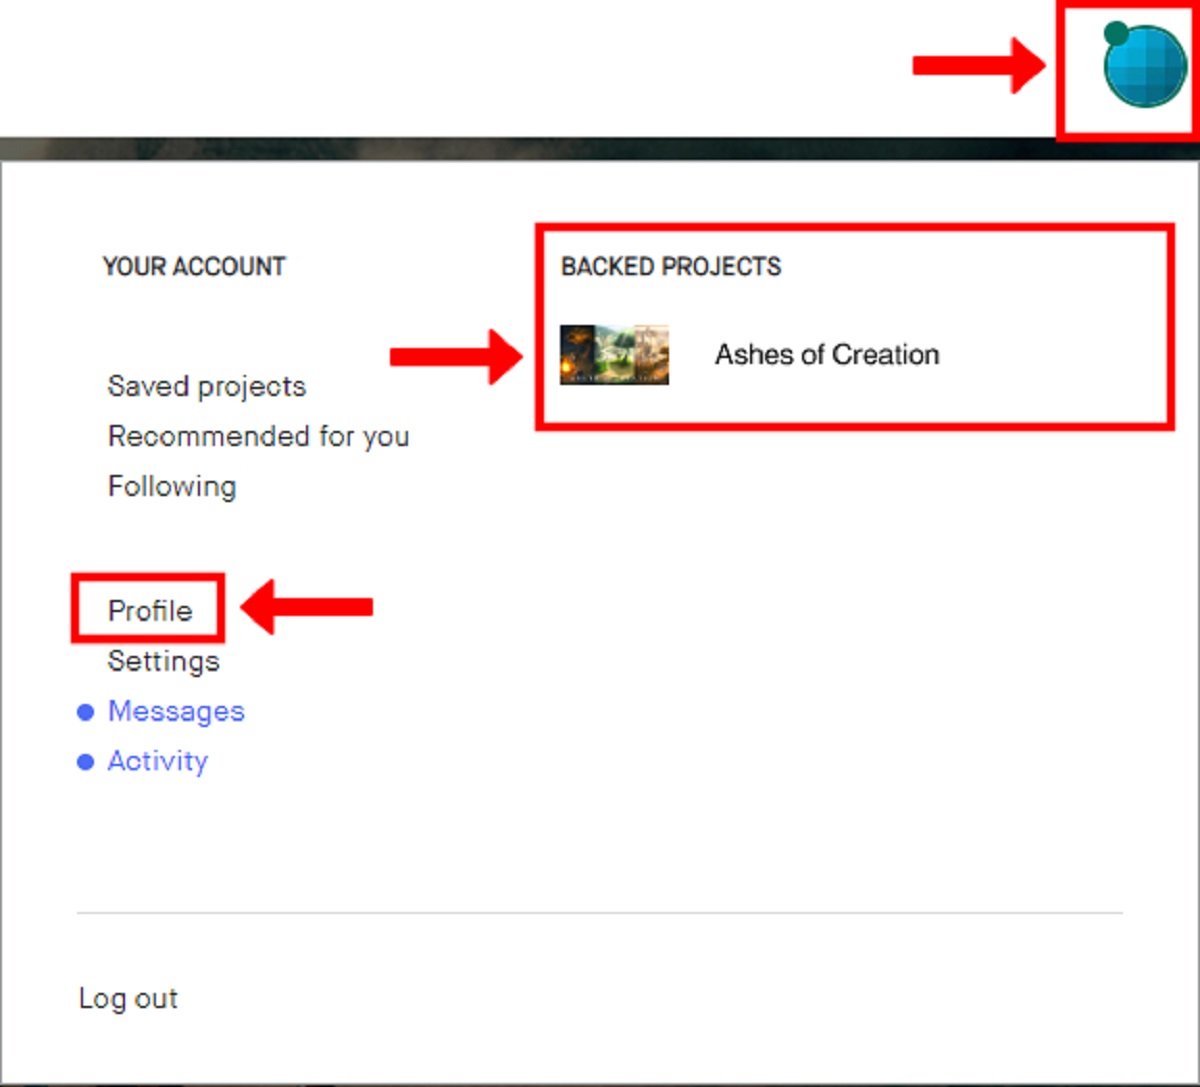
- Look for the user menu at the top right corner of the screen. This menu typically displays your profile picture or initials.
- Click on the menu, and a drop-down list of options will appear.
- From the drop-down list, select the option that says “My Projects” or “Project Dashboard”.
Once you have clicked on the “My Projects” or “Project Dashboard” option, you will be redirected to a page that displays all the projects associated with your Kickstarter account.
The project dashboard provides an overview of each project, including the project’s thumbnail, title, funding status, and any recent updates. You can easily manage, edit, or delete your projects from this dashboard.
If you have launched multiple projects, you may need to scroll through the list or use the search function to locate the specific project you wish to delete. Take your time to find the correct project, as deleting a project is irreversible.
Navigating to the project dashboard is a crucial step in deleting a Kickstarter project. Once you have accessed the project dashboard, you are ready to proceed with selecting the project you want to delete in the next step.
Step 3: Select the Project You Want to Delete
After successfully accessing the project dashboard on Kickstarter, it’s time to select the specific project that you want to delete. The project dashboard provides you with an organized view of all the projects associated with your Kickstarter account, making it easier to locate the project you wish to delete.
Follow these steps to select the project you want to delete:
- Scan through the list of projects displayed on the project dashboard. Each project is typically represented by a thumbnail image, accompanied by its title and funding status.
- Take your time to review the list until you find the project you want to delete. You can use the scroll bar or search function to navigate through the projects more efficiently.
- Once you have located the project, click on it to access the dedicated project page.
By clicking on the project, you will be redirected to a page that provides detailed information about the project, including the project description, updates, and backer comments.
It’s important to double-check that you have selected the correct project before proceeding with the deletion. Verify that the project you have chosen aligns with its title and description to avoid accidentally deleting another project.
Take your time to ensure the accurate selection of the project you want to delete. Review any associated details or updates to refresh your memory on the specific project’s context and status before proceeding with the next step.
Once you have selected the project and reviewed its information, you are ready to move on to the next step, which involves editing the project.
Step 4: Click on “Edit Project” Button
After selecting your desired project from the project dashboard, the next step in deleting a Kickstarter project is to click on the “Edit Project” button. This button allows you to access the project’s editing interface, where you can make changes to various aspects of the project.
Follow these steps to locate and click the “Edit Project” button:
- On the project page, you will find the “Edit Project” button typically located near the project’s title and description. Look for a button that has the text “Edit Project” or a similar variation.
- Click on the “Edit Project” button to proceed to the project’s editing interface.
By clicking the “Edit Project” button, you gain access to a range of options that allow you to modify different aspects of the project. These options may include changing the project’s description, updating the funding goal, editing rewards, or tweaking other project details.
It’s important to note that clicking the “Edit Project” button does not immediately delete the project. Instead, it grants you the ability to make changes to the project before proceeding with the deletion. This ensures that you have one final opportunity to review and modify the project before permanently removing it from Kickstarter.
Take your time to familiarize yourself with the project’s editing interface and explore the available options. If you have any last-minute changes or updates you wish to make to the project before deletion, this is the time to do so.
Once you are comfortable with the project’s editing interface and have made any necessary final adjustments, you are ready to progress to the next step in the deletion process, which involves scrolling down to the bottom of the edit page.
Step 5: Scroll Down to the Bottom of the Edit Page
After clicking on the “Edit Project” button, you will be redirected to the project’s edit page on Kickstarter. This page allows you to modify various aspects of the project before proceeding with the deletion. To initiate the deletion process, you must scroll down to the bottom of the edit page.
Follow these steps to reach the bottom of the edit page:
- Once on the edit page, review and make any necessary changes to the project details, such as the description, funding goal, or rewards.
- As you scroll down, you will reach the additional settings and options available for your project.
- Continue scrolling until you reach the bottom of the edit page.
Scrolling down to the bottom of the edit page is important because it is here that you will find the option to delete the project. It’s crucial to locate this option to proceed with the deletion process.
Take your time to review the entire edit page, ensuring that you have made all the necessary changes or updates to the project before moving forward with the deletion. Verify that all the information provided is accurate and up to date.
Once you have reached the bottom of the edit page and confirmed that you have made all the desired modifications, you are ready to progress to the next step: selecting the “Delete Project” option.
Scrolling down to the bottom of the edit page brings you closer to completing the deletion process. Ensure that you are prepared to delete the project as this action is permanent and cannot be reversed. Proceed with caution and confidence as you move on to the next step of deleting your Kickstarter project.
Step 6: Click on “Delete Project” Option
After scrolling down to the bottom of the edit page on Kickstarter, the next step in deleting a Kickstarter project is to locate and click on the “Delete Project” option. This option allows you to initiate the process of permanently removing your project from the Kickstarter platform.
Follow these steps to find and click the “Delete Project” option:
- Once you have reached the bottom of the edit page, carefully review the settings and options available in this section.
- Scan through the page and look for the section that contains additional project settings or actions.
- Within this section, you will find the “Delete Project” option. Click on this option to proceed with the deletion process.
Clicking on the “Delete Project” option is a significant step, as it signifies your intent to permanently remove the project from Kickstarter. Before making this final decision, double-check that you have chosen the correct project for deletion.
It’s important to note that once you click the “Delete Project” option, the action is irreversible. All associated information, updates, comments, and pledges related to the project will be permanently deleted. Backers and other stakeholders will no longer have access to the project page or any details associated with it.
Take the time to carefully consider your decision to delete the project. If you are certain that deleting the project is the right course of action, proceed confidently and click on the “Delete Project” option to move forward.
By clicking on the “Delete Project” option, you initiate the final stages of the deletion process. The next step involves confirming your decision to proceed with the deletion, which will be covered in the subsequent section.
Step 7: Confirm Deletion
After clicking on the “Delete Project” option, you will be prompted to confirm your decision to proceed with the deletion. This final step ensures that you are fully aware of the consequences and irreversibility of deleting your Kickstarter project.
Follow these steps to confirm the deletion of your Kickstarter project:
- A confirmation message or prompt will appear on the screen after clicking on the “Delete Project” option.
- Read the confirmation message carefully, as it provides important information about the deletion process and its consequences.
- Take the time to understand the implications of deleting the project, including the permanent removal of all associated information, updates, comments, and pledges.
- If you are certain about deleting the project, click on the confirmation button or link provided in the prompt to proceed with the deletion.
Confirming the deletion of your Kickstarter project is a critical step as it marks the point of no return. Once confirmed, all traces of your project will be permanently erased from the Kickstarter platform, and it cannot be recovered.
Before making the final confirmation, ensure that you have considered all factors carefully and have communicated with your backers or stakeholders about the project’s deletion, if necessary. Transparency and thorough communication can help maintain trust and understanding, even in a situation where a project needs to be deleted.
Take some time to reflect on your decision before confirming the deletion. If you are confident that deleting the project is the appropriate course of action, proceed by confirming your choice.
By confirming the deletion, you complete the process of removing your Kickstarter project. You have successfully followed all the necessary steps to delete the project, ensuring that it is no longer visible or accessible on the Kickstarter platform.
Remember to take note of any important information or data associated with the project before its deletion, as it will no longer be available once confirmed.
Conclusion
Deleting a Kickstarter project is a significant decision that requires careful consideration and understanding of the process. By following the step-by-step guide outlined in this article, you can confidently navigate through the deletion process and remove your project from the Kickstarter platform.
Before initiating the deletion, it is essential to familiarize yourself with Kickstarter’s guidelines and assess the viability of your project. Understanding the guidelines ensures compliance with the platform’s rules, while evaluating project viability helps determine if deleting the project is the best course of action.
Distinction should be made between cancelling and deleting a project. Cancelling a project happens prior to the funding period’s end and voids backers’ pledges. Deleting a project occurs after the funding period and removes all traces of the project from Kickstarter.
The step-by-step process involves logging in to your Kickstarter account, navigating to the project dashboard, selecting the project you wish to delete, clicking on the “Edit Project” button, scrolling down to the bottom of the edit page, clicking on the “Delete Project” option, and confirming the deletion.
Remember to communicate openly with your backers and stakeholders throughout the deletion process. Transparency is crucial in maintaining trust and managing expectations. Take your time and ensure that deleting the project is the right decision for your circumstances.
By following these steps, you can confidently and responsibly delete your Kickstarter project. Whether it’s due to a change in plans, unforeseen obstacles, or a project that did not gain sufficient traction, knowing how to delete a Kickstarter project empowers you to make informed decisions and properly manage your crowdfunding experience.
Ensure that you have backed up any important information or data related to the project before its deletion, as it will not be retrievable once the deletion is confirmed.
Remember, even if the deletion of one project may be disappointing, it opens the door to new opportunities, allows you to learn from the experience, and focus on future endeavors. Keep innovating and exploring new ways to bring your creative ideas to life.


