Introduction
Welcome to Gatehub: How To Transfer Ripple To Another Wallet. In this article, we will guide you through the process of transferring Ripple, the popular cryptocurrency, to another wallet on the Gatehub platform. Whether you are moving your Ripple to a hardware wallet for added security or sending it to an exchange for trading purposes, Gatehub provides a seamless and user-friendly interface to make this transfer possible.
Gatehub is a trusted financial platform that allows users to store, buy, and sell various cryptocurrencies, including Ripple (XRP). With its intuitive design and robust security measures, Gatehub has become a favored choice for cryptocurrency enthusiasts.
Transferring Ripple to another wallet may be necessary for a variety of reasons. Firstly, if you prefer to have full control over your Ripple holdings, you may want to move them to a hardware wallet. This provides an extra layer of security by keeping your XRP offline and out of reach of potential hackers. Secondly, if you wish to trade Ripple on another cryptocurrency exchange that is not available on Gatehub, you will need to transfer your XRP to that exchange’s wallet.
Now that we understand what Gatehub is and why you may need to transfer Ripple to another wallet, let’s dive into the step-by-step process of how to make this transfer. By following these instructions carefully, you’ll be able to move your Ripple holdings without any hassle.
What is Gatehub?
Gatehub is a popular cryptocurrency platform that allows users to securely store, buy, and sell various digital assets including Ripple (XRP). It serves as a digital wallet, providing a safe and convenient way for individuals to manage their cryptocurrency holdings.
One of the key features that sets Gatehub apart is its user-friendly interface. Even for those who are new to the world of cryptocurrencies, Gatehub makes it easy to navigate and understand the process of buying, selling, and transferring digital assets. The platform offers a simple and intuitive design, ensuring that users can easily access and manage their funds.
Security is a top priority for Gatehub, as they understand the importance of protecting customers’ digital assets. The platform utilizes advanced security measures such as two-factor authentication (2FA) and encrypted data storage to safeguard user accounts. This provides users with peace of mind, knowing that their cryptocurrencies are well-protected.
Gatehub also offers a wide range of trading options, allowing users to exchange their cryptocurrencies for other digital assets or even fiat currencies, such as US Dollars or Euros. The platform supports multiple currencies, which makes it convenient for users from different parts of the world to access and trade cryptocurrencies on Gatehub’s platform.
Furthermore, Gatehub provides users with a comprehensive transaction history and account overview, allowing them to keep track of their past activities and monitor their cryptocurrency balances. This level of transparency ensures that users have full control and visibility over their digital assets.
In addition to its features, Gatehub is known for its excellent customer support. The platform offers responsive customer service, readily available to assist users with any inquiries or issues they may encounter. This commitment to customer satisfaction contributes to the overall positive experience that Gatehub provides.
In summary, Gatehub is a reliable and secure platform that simplifies the process of managing, buying, and selling cryptocurrencies, including Ripple. Its user-friendly interface, robust security measures, wide range of trading options, and dedicated customer support make Gatehub a favored choice among cryptocurrency enthusiasts.
Why Transfer Ripple to Another Wallet?
There are several reasons why you might want to transfer your Ripple (XRP) to another wallet, such as a hardware wallet or a wallet on a different cryptocurrency exchange. Let’s explore some of the common motivations behind this decision.
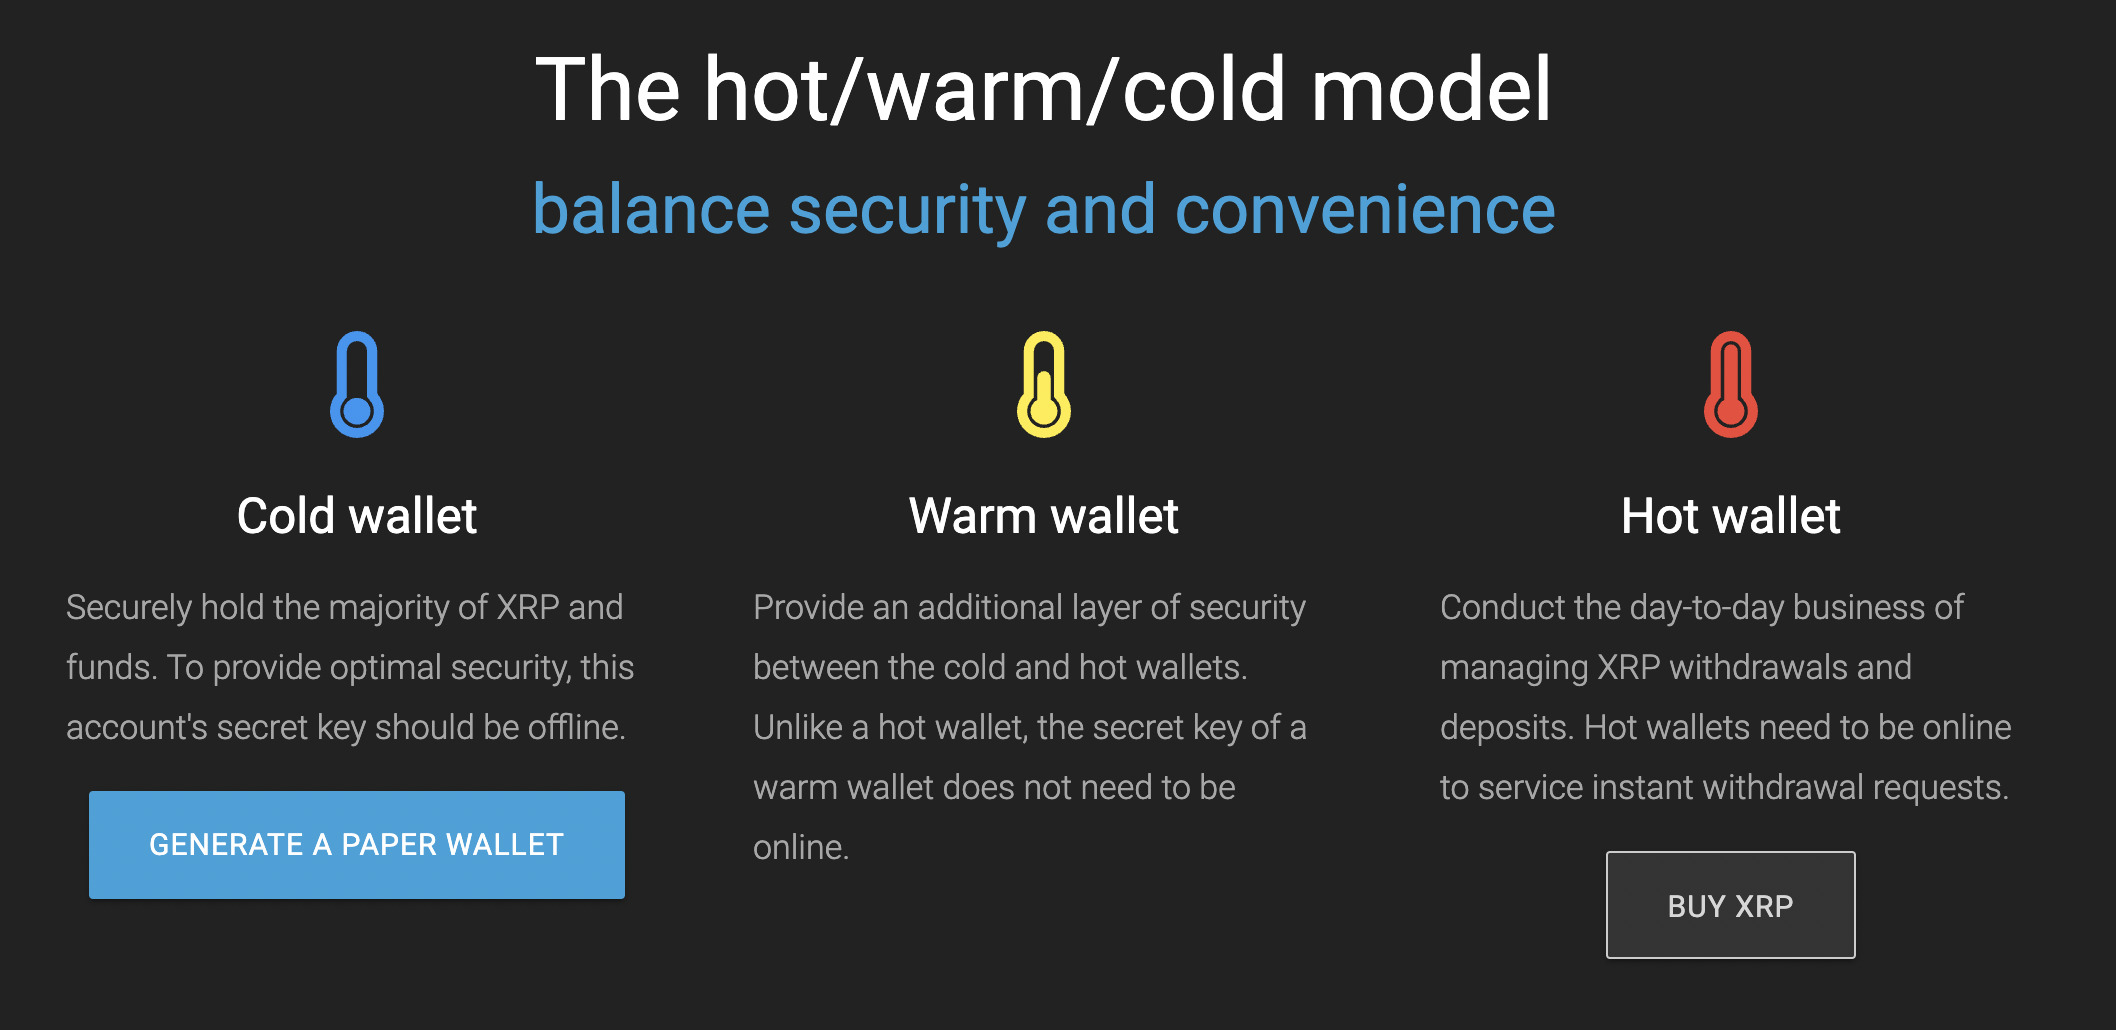
Enhanced Security: One of the primary reasons for transferring Ripple to another wallet is to enhance the security of your digital assets. While platforms like Gatehub have robust security measures in place, storing your cryptocurrencies on a hardware wallet adds an extra layer of protection. Hardware wallets are physical devices that store your private keys offline, preventing potential hacking attempts and keeping your XRP safe.
Diversification: If you’re an active cryptocurrency trader or investor, you may want to transfer your Ripple to a different wallet on another cryptocurrency exchange. This allows you to diversify your holdings and take advantage of trading opportunities on different platforms. By spreading your Ripple across multiple wallets and exchanges, you can reduce the risk of losing all your funds if one platform encounters issues.
Trading on Different Exchanges: Another reason to transfer Ripple to another wallet is to access different cryptocurrency exchanges. While Gatehub offers a wide range of trading options, there may be specific exchanges that provide additional features, better liquidity, or a broader selection of trading pairs. By moving your XRP to a wallet on a different exchange, you can take advantage of these unique offerings.
Participating in ICOs or Airdrops: Transferring your Ripple to another wallet may be necessary if you plan to participate in initial coin offerings (ICOs) or airdrops. ICOs are fundraising events in which new cryptocurrencies are offered to the public, and airdrops involve the distribution of free tokens to eligible holders of a particular cryptocurrency. To participate, you will usually need to hold your Ripple in a self-hosted wallet that supports the specific ICO or airdrop.
Peace of Mind: Lastly, some individuals prefer having full control over their cryptocurrency holdings. By transferring Ripple to a self-hosted wallet, you eliminate any reliance on third-party platforms and gain complete ownership of your XRP. This peace of mind can be particularly important for those who value decentralization and want to have direct control over their digital assets.
Regardless of your reason for transferring Ripple to another wallet, Gatehub provides a seamless and secure process to make this transfer. By following the steps outlined in this guide, you’ll be able to move your XRP holdings to the destination of your choice.
Step 1: Logging into Gatehub
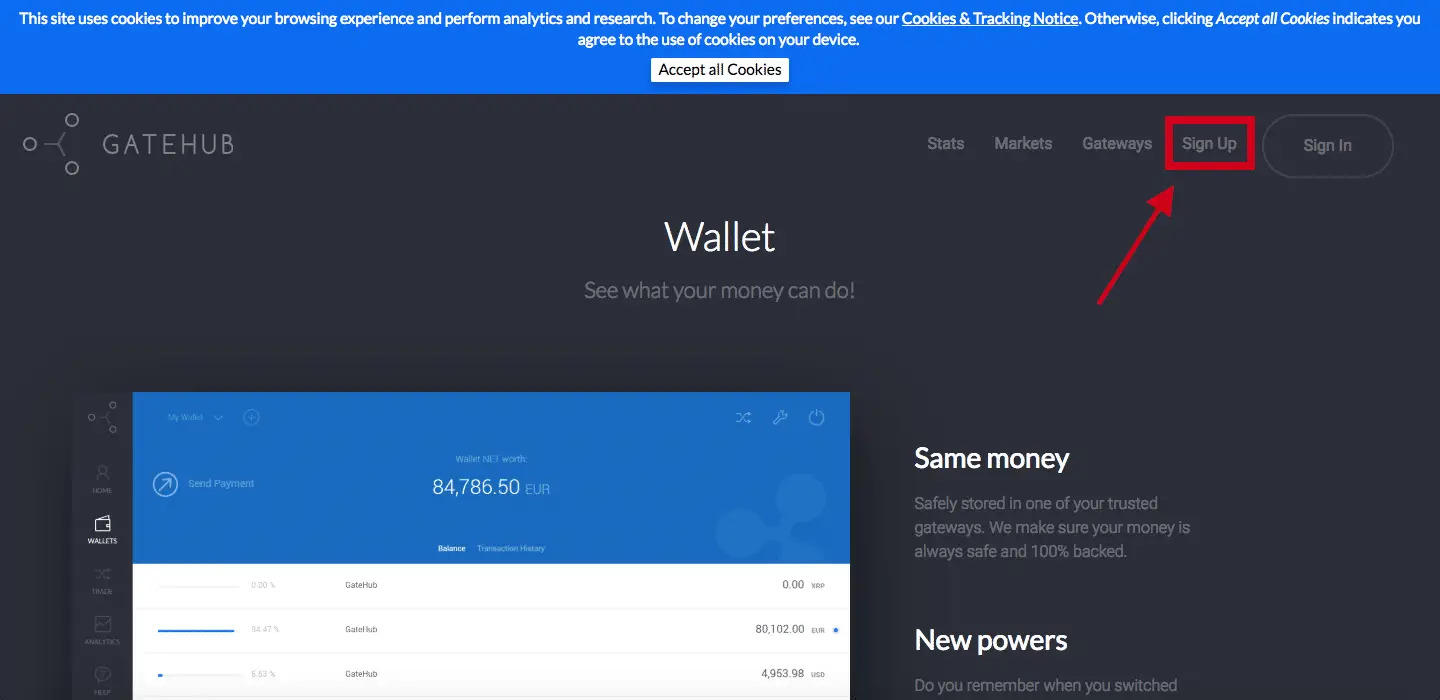
The first step in transferring your Ripple to another wallet on Gatehub is to log into your account. Here’s a step-by-step guide on how to do it:
- Open your preferred web browser and go to the Gatehub website.
- On the Gatehub homepage, you will find the “Login” button. Click on it to proceed.
- Enter your registered email address and password in the respective fields.
- If you have enabled two-factor authentication (2FA), you will be prompted to enter the code generated by your authentication app or sent to your mobile device.
- After entering the necessary login credentials, click on the “Login” button.
- If the provided information is correct, you will be successfully logged into your Gatehub account.
Ensure that you have entered your login details accurately to avoid any login issues. If you encounter any difficulties accessing your account, you can utilize Gatehub’s support services for assistance.
Once you have successfully logged in, you will have access to your Gatehub dashboard, where you can manage your Ripple and other cryptocurrency holdings.
In the next step, we will guide you on how to access your Ripple wallet within the Gatehub platform.
Step 2: Accessing Your Ripple Wallet
After logging into your Gatehub account, the next step in transferring your Ripple to another wallet is to access your Ripple wallet within the Gatehub platform. Follow these steps to access your Ripple wallet:
- Once you are logged in, you will be directed to your Gatehub dashboard.
- Look for the navigation menu on the left-hand side of the screen.
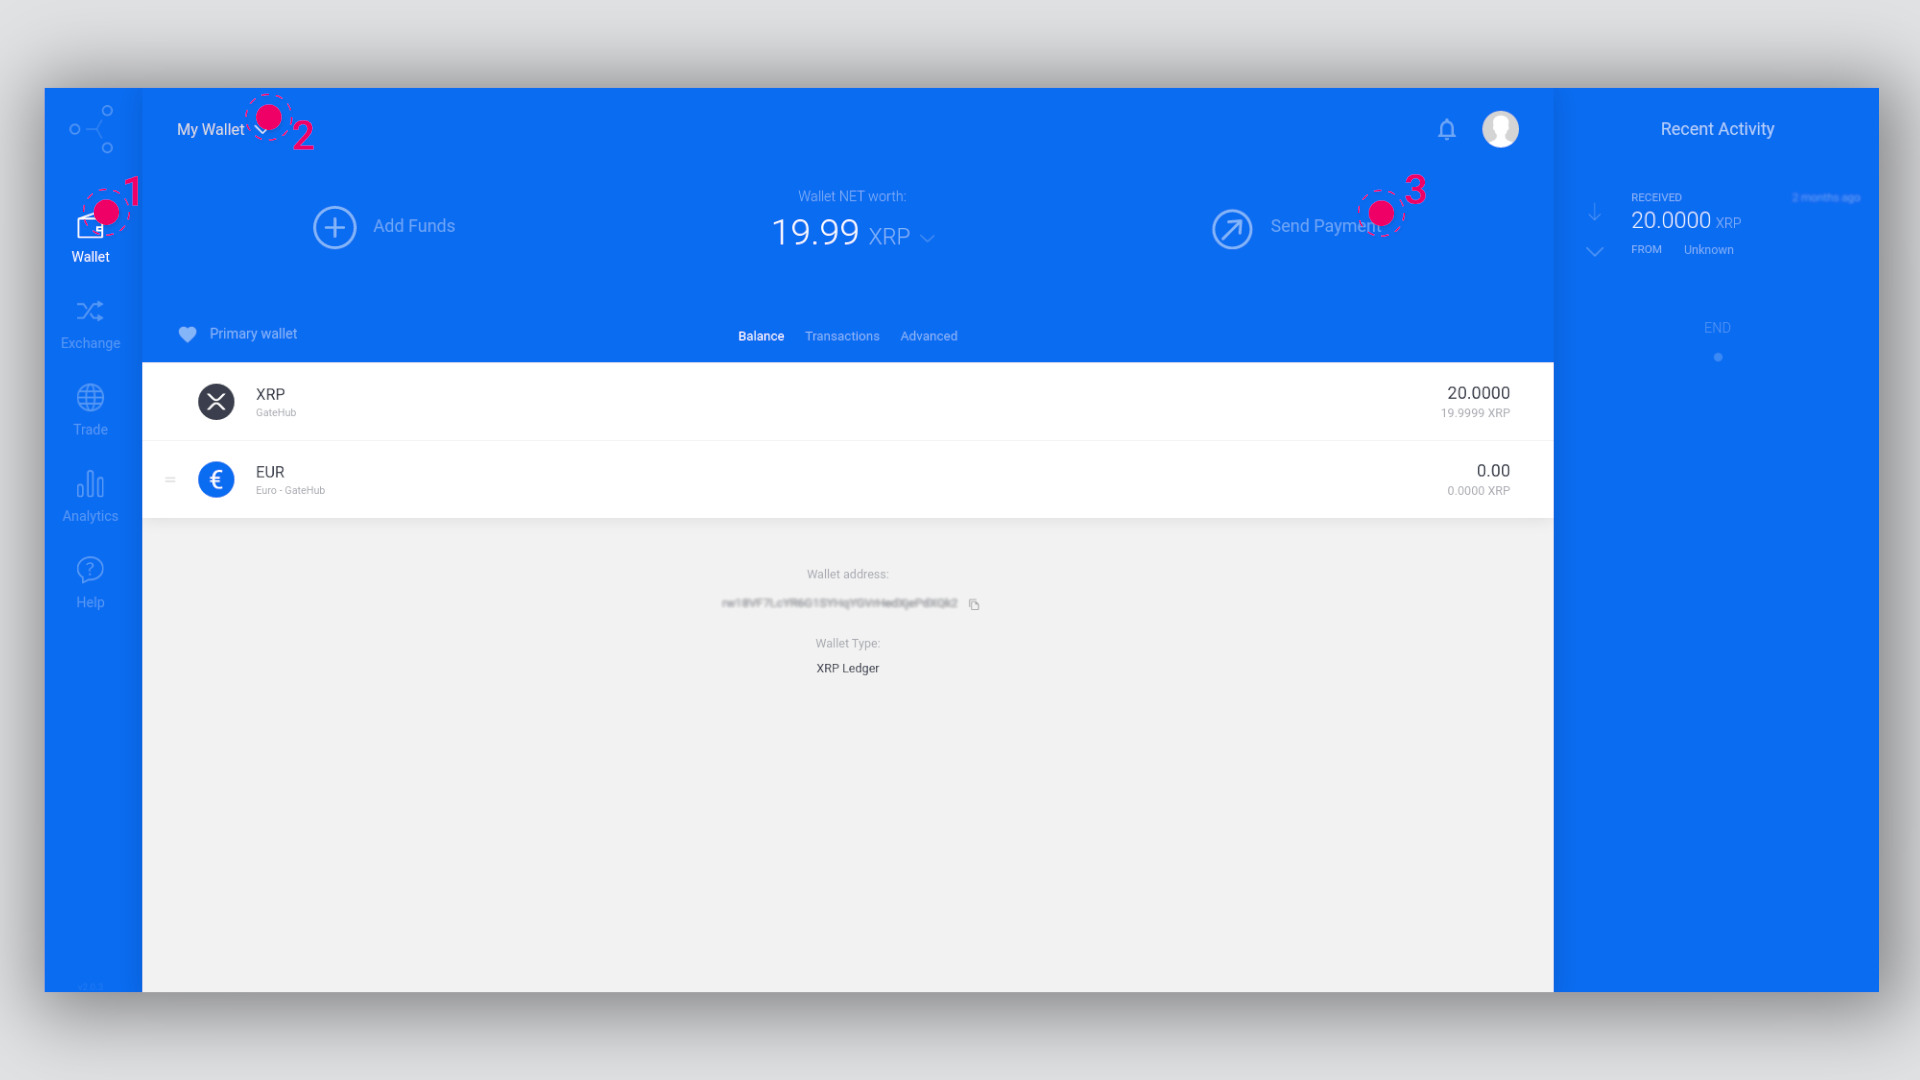
- In the navigation menu, find the “Wallet” option and click on it. This will open a dropdown menu with a list of wallets available on Gatehub.
- From the dropdown menu, locate and select the “Ripple” wallet. This will take you to the specific page for managing your Ripple holdings.
On the Ripple wallet page, you will be able to view essential information such as your Ripple balance, transaction history, and options for transferring your XRP.
It is crucial to double-check that you have selected the correct wallet before proceeding with the transfer. Verifying the wallet details will help ensure that your Ripple is transferred to the intended destination.
In the next step, we will guide you through the process of generating a new Ripple address to receive the transferred XRP.
Step 3: Generating a Ripple Address
Once you have accessed your Ripple wallet on the Gatehub platform, the next step in transferring your Ripple to another wallet is to generate a new Ripple address. This address will serve as the destination for your transferred XRP. Follow these steps to generate a new Ripple address:
- On the Ripple wallet page, look for the “Receive” or “Deposit” button. Click on it to initiate the process of generating a new address.
- A new window or pop-up will appear, displaying your generated Ripple address. This address consists of a combination of letters and numbers.
- Take note of your Ripple address or copy it to your clipboard. It is crucial to ensure the accuracy of the address, as any errors could result in the loss of your transferred XRP.
- It is recommended to double-check the address by comparing the first few and last few characters with the address displayed on your Ripple wallet page. This comparison will help confirm that the address is correct and has not been tampered with.
Generating a new Ripple address ensures that the transferred XRP will be directed to the correct destination within your Gatehub account. This address can be shared with the sender to initiate the transfer process.
Please be cautious when sharing your Ripple address and only provide it to trusted sources. Sharing your address with malicious entities may result in the loss of your XRP.
In the next step, we will guide you on how to verify the wallet address to ensure its accuracy and security.
Step 4: Verifying the Wallet Address
Verifying the wallet address is an essential step in the process of transferring your Ripple to another wallet. It helps ensure the accuracy and security of the destination address. Follow these steps to verify the wallet address:
- Compare the Ripple address generated in the previous step with the address displayed on your Gatehub Ripple wallet page.
- Check the first few and last few characters of both addresses to confirm that they match.
- Additionally, you can use various tools or websites that provide address verification services. These tools often allow you to enter the Ripple address and verify its correctness.
- If using a hardware wallet or another cryptocurrency exchange as the destination, ensure that the address format is compatible. Different wallets and exchanges may have specific address formats, so it is important to check for compatibility.
Verifying the wallet address is crucial to prevent any potential mistakes that could lead to the loss of your transferred XRP. Taking the time to ensure the accuracy of the address will give you peace of mind during the transfer process.
It is important to note that once the transfer is initiated and confirmed, it is usually irreversible. Therefore, it is crucial to verify the wallet address before proceeding to the next steps.
In the next step, we will guide you through the process of initiating the Ripple transfer on the Gatehub platform.
Step 5: Initiating the Ripple Transfer
After verifying the wallet address, you are now ready to initiate the transfer of your Ripple from your Gatehub wallet to another wallet. Follow these steps to start the transfer process:
- On the Ripple wallet page in your Gatehub account, look for the “Send” or “Transfer” button. Click on it to begin the transfer process.
- In the provided fields, enter the destination Ripple address to which you want to send your XRP. Make sure to double-check the accuracy of the address to avoid any mistakes.
- Enter the amount of Ripple (XRP) that you wish to transfer. You can choose to transfer the entire balance or specify a specific amount.
- Review the transaction details, including the transfer amount and destination address, to ensure their accuracy.
- Optionally, you may include a memo or message along with the transfer. Memos are typically required for specific exchanges or services, so make sure to check if a memo is necessary.
- Click on the “Confirm” or “Send” button to initiate the Ripple transfer.
Once the transfer is initiated, the Gatehub platform will process the transaction and broadcast it to the Ripple network. It may take some time for the transfer to be confirmed, depending on network congestion and other factors.
It is important to note that sending Ripple to another wallet typically incurs a small transaction fee. This fee is necessary to facilitate the processing of the transaction on the Ripple network.
In the next step, we will guide you through the process of confirming the Ripple transfer on the Gatehub platform.
Step 6: Confirming the Transfer
Once you have initiated the transfer of your Ripple from your Gatehub wallet to another wallet, the next step is to confirm the transaction details. Follow these steps to confirm the transfer:
- After initiating the transfer, you will be redirected to a confirmation page or prompted with a confirmation pop-up.
- Review the transaction details, including the destination Ripple address, transfer amount, and any memo or message associated with the transfer.
- Ensure that all the details are accurate and match your intended transfer.
- Verify that the transaction fee associated with the transfer is acceptable to you.
- If everything looks correct and you are ready to proceed, click on the “Confirm” or “Send” button to finalize the transfer.
Once you confirm the transfer, the transaction will be processed by the Gatehub platform and broadcasted to the Ripple network for validation. It may take some time for the transaction to be confirmed, depending on the network congestion and other factors.
During the confirmation process, it is important to be patient and avoid any unnecessary actions that may disrupt or interfere with the transfer. Interrupting the process may result in transaction failures or complications.
After the confirmation, you should receive a notification or confirmation message indicating that the transfer has been successfully initiated. You can also check your transaction history or account balance to monitor the progress of the transfer.
In the next step, we will guide you on how to check the status of the transferred Ripple.
Step 7: Checking the Transfer Status
After initiating the transfer of your Ripple from your Gatehub wallet to another wallet, it is important to check the status of the transfer to ensure its successful completion. Follow these steps to check the transfer status:
- Go to the transaction history section of your Gatehub account. This can usually be accessed from the dashboard or wallet page.
- Locate the specific Ripple transfer transaction in the transaction history.
- Check the status of the transfer, which is usually indicated as “Pending,” “Processing,” or “Complete.”
- If the transfer is marked as “Pending” or “Processing,” it means that the transfer is still in progress. It may take some time for the transfer to be confirmed on the Ripple network.
- If the transfer status shows as “Complete,” it means that the Ripple has been successfully transferred to the destination wallet.
- You can also use the transaction hash or ID provided in the transaction history to track the transfer on the Ripple network through blockchain explorers or other tracking tools.
- Keep in mind that the transfer confirmation time can vary depending on network congestion and other factors. If the transfer is taking longer than expected, it is recommended to wait for a reasonable amount of time before seeking assistance or taking further action.
By regularly checking the transfer status, you can stay updated on the progress of your Ripple transfer and ensure its successful completion. If there are any issues or concerns, you can reach out to Gatehub’s customer support for further assistance.
Congratulations! You have successfully completed the process of transferring your Ripple from your Gatehub wallet to another wallet. You can now enjoy the benefits of managing your XRP in the destination wallet of your choice.
Conclusion
In this guide on how to transfer Ripple to another wallet on Gatehub, we have covered the step-by-step process to help you successfully move your Ripple (XRP) holdings. Gatehub provides a user-friendly platform for managing and transferring cryptocurrencies, ensuring a seamless and secure experience.
We began by introducing Gatehub as a trusted cryptocurrency platform that offers features such as secure storage and convenient trading options. We then discussed the various reasons for transferring Ripple to another wallet, including enhanced security, diversification, accessing different exchanges, participating in ICOs or airdrops, and personal ownership preferences.
Next, we explored each step in detail, from logging into Gatehub and accessing your Ripple wallet, to generating a new Ripple address and verifying its accuracy. We also covered the crucial steps of initiating the Ripple transfer, confirming the transaction details, and checking the transfer status.
Throughout the process, it is important to double-check all details, such as wallet addresses and transaction amounts, to ensure accuracy and mitigate any potential risks. Additionally, being patient and allowing for adequate time for the transfer to be confirmed on the Ripple network is essential.
By following these steps carefully, you can successfully transfer your Ripple from your Gatehub wallet to another desired wallet. Always keep in mind the security measures, best practices, and any transaction fees associated with the transfer.
If you encounter any difficulties or have any questions during the transfer process, Gatehub’s dedicated customer support is available to assist you.
Transferring Ripple to another wallet provides you with added control, security, and flexibility over your digital assets. Whether you are moving your Ripple to a hardware wallet or to another exchange for trading purposes, Gatehub makes the process as straightforward as possible.
We hope this guide has been helpful in enabling you to successfully transfer your Ripple to another wallet on Gatehub. With your newly acquired knowledge, you can confidently navigate the world of cryptocurrency transfers and continue to explore the exciting possibilities that Ripple offers.