Introduction
Understanding the Challenges of Low Light Photography
Capturing stunning photographs in low light conditions can be a challenging yet rewarding endeavor for photographers. Whether you are documenting a dimly-lit indoor event, capturing the ambiance of a sunset, or exploring the magic of nighttime cityscapes, mastering the art of low light photography is essential for creating captivating images.
In this comprehensive guide, we will delve into the techniques and strategies that will enable you to harness the full potential of your DSLR camera in low light settings. From understanding the intricacies of low light photography to selecting the optimal camera settings and utilizing external lighting sources, this guide will equip you with the knowledge and skills to elevate your low light photography game.
Low light photography presents a unique set of challenges, including reduced visibility, potential for image noise, and the need for longer exposure times. However, with the right approach and a solid understanding of the fundamental principles, you can overcome these challenges and unlock the creative possibilities that low light environments offer.
Whether you are an aspiring photographer looking to expand your skill set or a seasoned professional aiming to refine your low light photography techniques, this guide will provide valuable insights and actionable tips to help you capture breathtaking images in challenging lighting conditions. So, grab your DSLR camera, and let's embark on this enlightening journey into the realm of low light photography.
Understanding Low Light Photography
Low light photography refers to the art of capturing images in environments with minimal available light. This genre of photography presents a myriad of creative opportunities and challenges, requiring photographers to adapt their techniques to achieve optimal results. Understanding the nuances of low light photography is crucial for harnessing the full potential of your DSLR camera in challenging lighting conditions.
When shooting in low light, photographers often encounter reduced visibility, leading to the need for longer exposure times and heightened sensitivity to light. This can result in potential image noise and a greater emphasis on stabilizing the camera to avoid blurry images. Additionally, the dynamic range of the scene may be more pronounced, requiring careful consideration of exposure settings to retain detail in both highlight and shadow areas.
One of the key elements in low light photography is mastering the balance between capturing sufficient light and maintaining image quality. This involves leveraging the capabilities of your DSLR camera to adjust settings such as aperture, shutter speed, and ISO to achieve the desired exposure while minimizing noise and preserving image sharpness.
Furthermore, understanding the behavior of light in low light environments is essential for making informed creative decisions. Whether you are working with ambient light, artificial lighting, or a combination of both, being attuned to the nuances of light and shadow will empower you to craft visually compelling compositions.
Moreover, low light photography offers a canvas for exploring the interplay of colors, contrasts, and textures in a unique and evocative manner. By embracing the inherent moodiness and drama of low light settings, photographers can convey compelling narratives and evoke powerful emotions through their imagery.
Ultimately, a deep understanding of low light photography empowers photographers to transcend the limitations of challenging lighting conditions and unleash their creativity. By honing the technical skills and artistic sensibilities necessary for capturing remarkable images in low light, photographers can expand their expressive capabilities and produce captivating visual stories that resonate with viewers.
Choosing the Right Camera Settings
When venturing into the realm of low light photography, selecting the appropriate camera settings is paramount to achieving exceptional results. Your DSLR camera offers a range of customizable settings that can be optimized to suit the specific challenges posed by low light environments. Understanding how to manipulate these settings effectively will empower you to capture stunning images even in the most challenging lighting conditions.
The three primary camera settings that play a crucial role in low light photography are aperture, shutter speed, and ISO. These settings directly impact the exposure, depth of field, and overall image quality, making them essential components of your photographic arsenal when shooting in low light.
Aperture: The aperture setting controls the size of the lens opening, dictating the amount of light that reaches the camera sensor. In low light scenarios, it is advisable to use a wider aperture (small f-number) to allow more light to enter the lens, thereby facilitating proper exposure. Additionally, a wider aperture can create a shallower depth of field, enabling you to isolate subjects and create compelling bokeh effects.
Shutter Speed: In low light conditions, longer shutter speeds are often necessary to capture sufficient light for a well-exposed image. However, prolonged exposure times can introduce the risk of camera shake, leading to blurry photos. To mitigate this, utilizing a tripod or other stabilizing methods is essential. Additionally, employing a remote shutter release or the camera’s self-timer can minimize vibrations caused by manually pressing the shutter button.
ISO: Increasing the ISO sensitivity allows the camera to capture more light in low light situations. However, higher ISO settings can also introduce digital noise, degrading image quality. It is crucial to strike a balance between achieving adequate exposure and minimizing noise by selecting the optimal ISO setting for the specific lighting conditions.
Furthermore, utilizing the camera’s metering modes, such as evaluative, spot, or center-weighted metering, can aid in obtaining accurate exposure readings in challenging lighting environments. Understanding how to interpret and adjust exposure compensation based on the metering mode selected is essential for fine-tuning the exposure to suit your creative vision.
By mastering the intricacies of these camera settings and their interplay in low light photography, you can exercise precise control over the exposure and visual aesthetics of your images, thereby elevating your photographic prowess in low light settings.
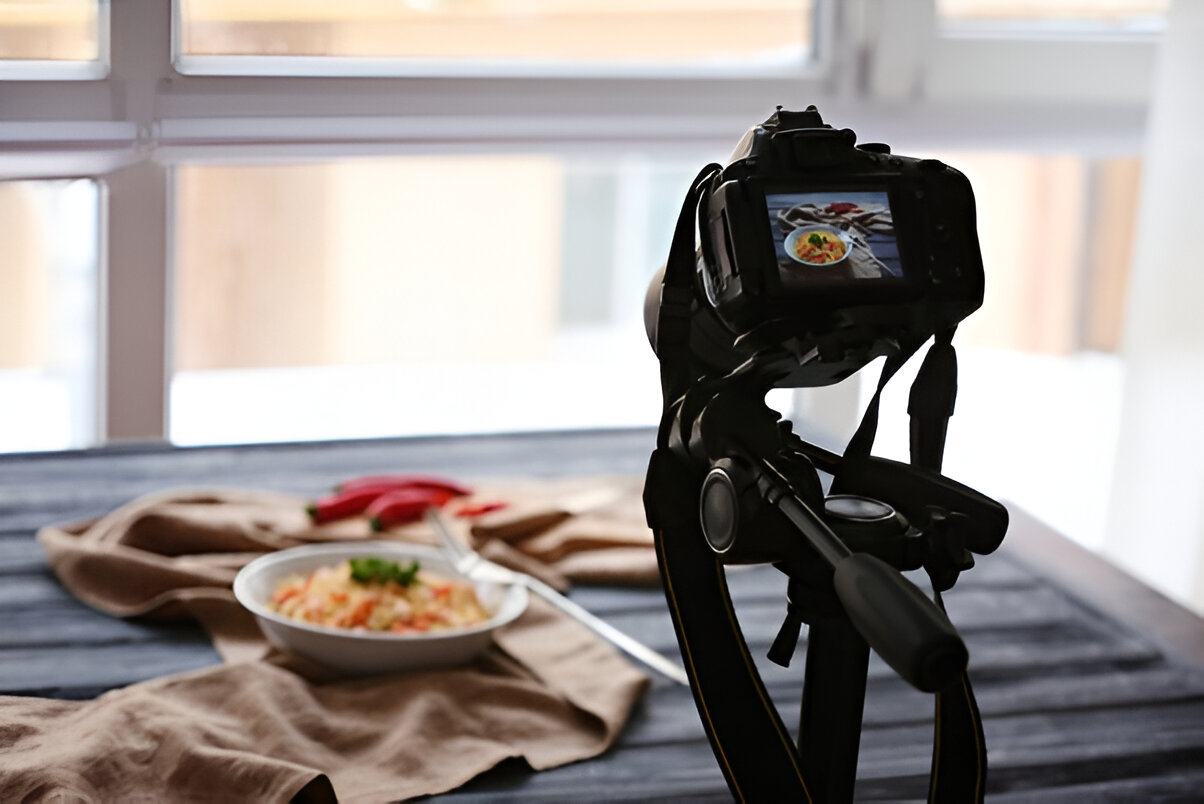
Using a Tripod for Stability
When engaging in low light photography, the significance of stability cannot be overstated. In conditions where longer exposure times are often necessary to capture sufficient light, the risk of camera shake leading to blurry images is heightened. To mitigate this challenge and ensure sharp, well-defined photographs, utilizing a tripod is indispensable.
A tripod serves as a steadfast support system for your camera, effectively minimizing the impact of hand movements and external vibrations, thereby enhancing the overall sharpness and clarity of your images. By providing a stable platform, a tripod enables photographers to utilize longer shutter speeds without compromising image quality, making it an essential tool for low light photography.
When selecting a tripod for low light photography, consider factors such as weight, height, stability, and portability. Opting for a sturdy yet lightweight tripod that can be easily transported to various shooting locations will enhance your flexibility and convenience during low light photo sessions.
Moreover, familiarize yourself with the different types of tripod heads, such as ball heads and pan-tilt heads, to determine the most suitable option for your specific shooting requirements. The versatility and precision offered by a well-chosen tripod head can significantly contribute to the ease and efficiency of composing and capturing images in low light conditions.
Furthermore, integrating additional accessories such as a remote shutter release or a cable release into your tripod setup can further minimize the potential for camera shake, particularly when working with longer exposure times. These accessories allow you to trigger the camera’s shutter without physically touching it, reducing the likelihood of introducing unwanted vibrations.
By incorporating a tripod into your low light photography workflow, you can elevate the technical quality of your images and expand your creative possibilities. The stability and precision afforded by a tripod empower photographers to explore longer exposure times, experiment with various compositions, and capture the nuanced beauty of low light environments with unparalleled clarity and detail.
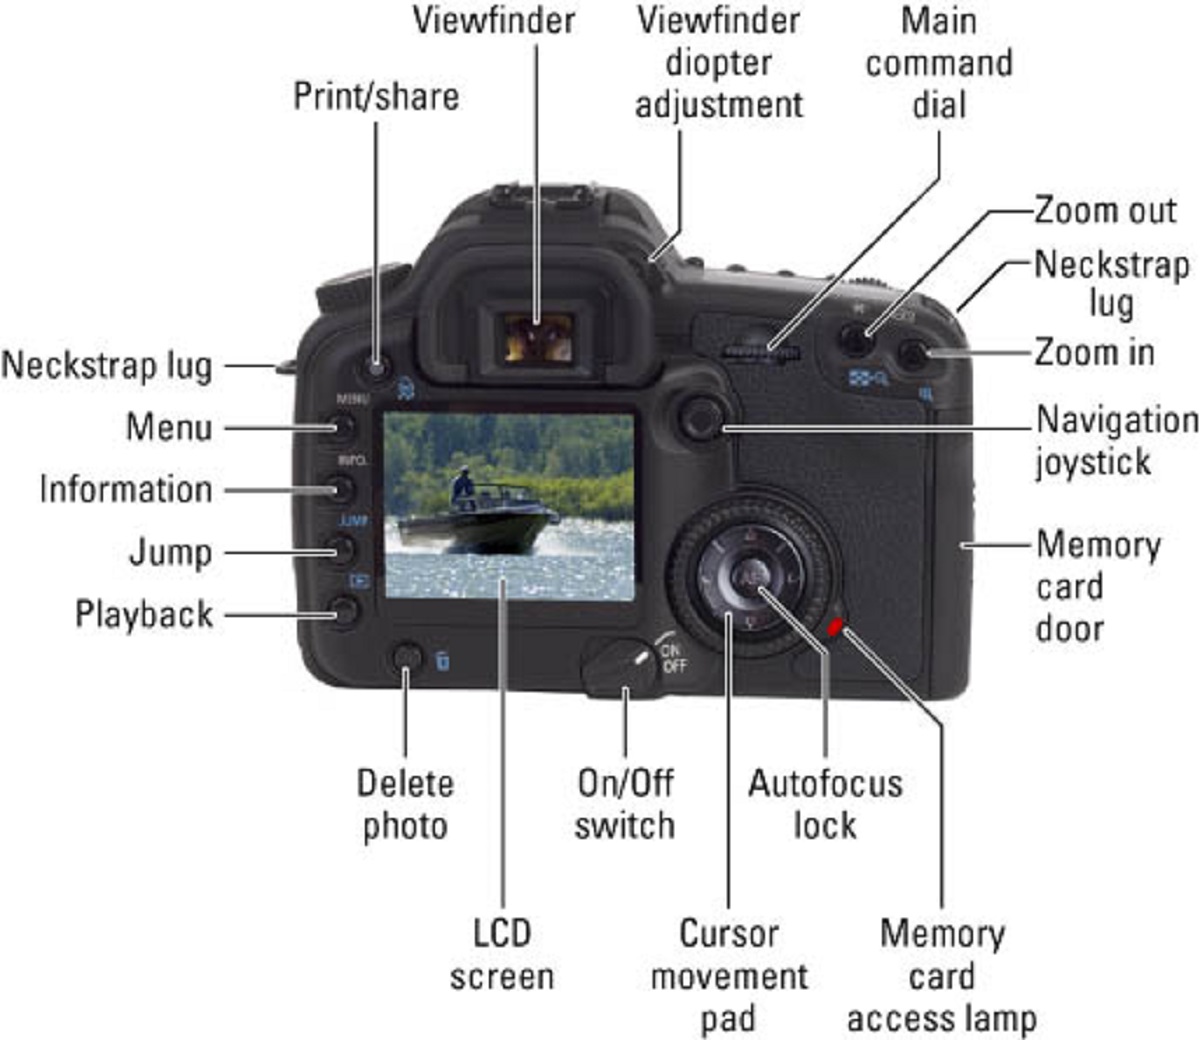
Utilizing the Camera’s Built-in Features
Modern DSLR cameras are equipped with a plethora of built-in features and functionalities designed to enhance the photographer’s ability to capture exceptional images, even in challenging low light conditions. Understanding and effectively utilizing these built-in features can significantly elevate the quality and creativity of your low light photography.
Image Stabilization: Many DSLR lenses and some camera bodies are equipped with image stabilization technology, which helps counteract the effects of camera shake when shooting at slower shutter speeds. Activating this feature can contribute to sharper images, especially when handheld shooting in low light.
Noise Reduction: Cameras often offer in-camera noise reduction settings tailored for low light photography. These settings aim to minimize the appearance of digital noise, a common occurrence when shooting at higher ISO settings in dimly lit environments. Exploring and experimenting with these noise reduction features can aid in preserving image quality while shooting in low light.
Low Light Autofocus Performance: Understanding the autofocus capabilities of your DSLR camera in low light is essential for achieving precise and accurate focus. Some cameras are equipped with advanced autofocus systems designed to perform effectively in low light conditions. Familiarizing yourself with the autofocus modes and settings specific to low light scenarios can enhance the speed and accuracy of your focusing, ensuring that your subjects are rendered crisply and clearly.
Custom White Balance: Low light environments often present unique color temperatures and lighting conditions. Leveraging the custom white balance settings of your camera allows you to calibrate the color rendition to accurately capture the ambient lighting, resulting in more natural and balanced color reproduction in your low light images.
Long Exposure Noise Reduction: Many DSLR cameras offer long exposure noise reduction settings, which are particularly beneficial when capturing long exposures in low light. Activating this feature can help mitigate the appearance of hot pixels and digital noise in images captured with extended exposure times, contributing to cleaner and more visually appealing results.
By familiarizing yourself with these and other built-in features of your DSLR camera, you can harness their potential to overcome the challenges of low light photography and enhance the technical and aesthetic aspects of your images. Effectively utilizing these features empowers you to capture compelling and visually striking photographs, even in the most demanding low light scenarios.
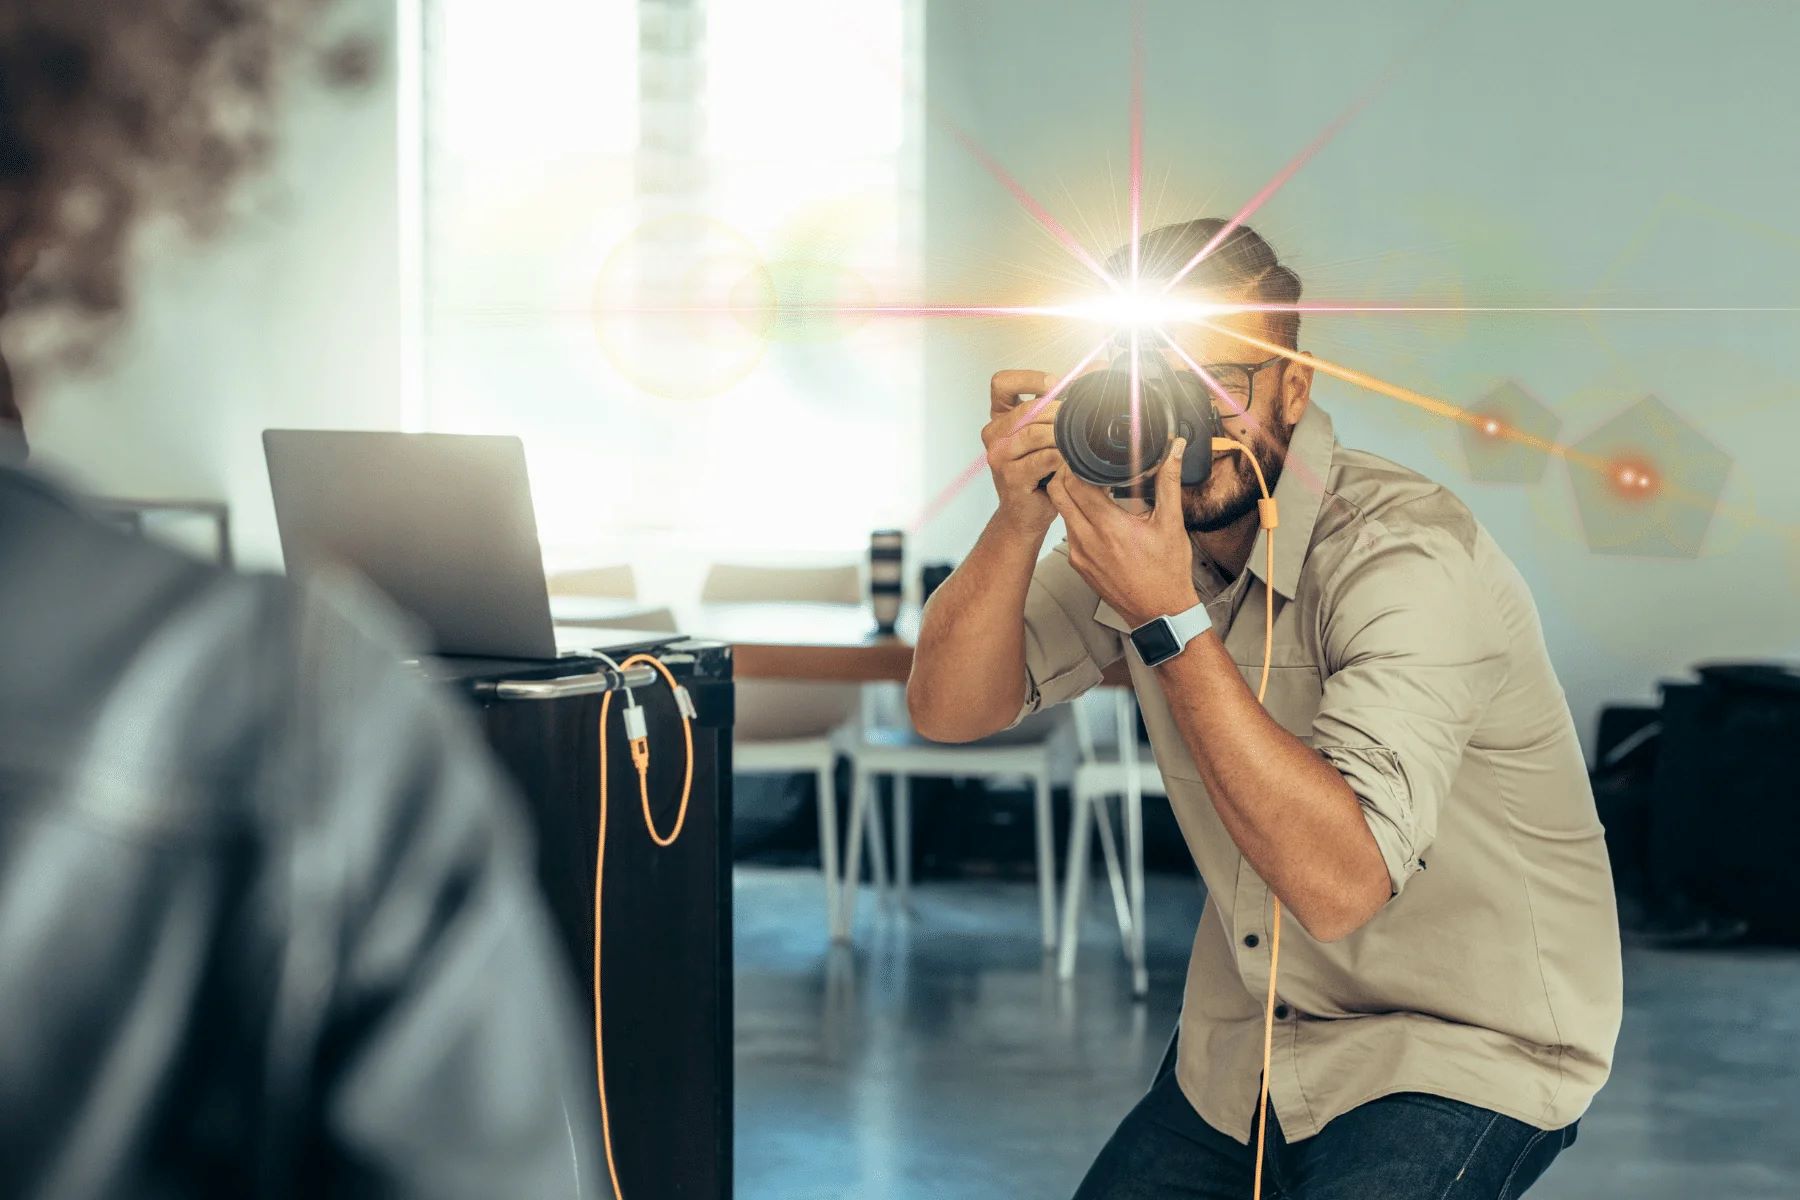
Using External Lighting Sources
While low light photography often involves working with minimal available light, incorporating external lighting sources can significantly expand your creative possibilities and enhance the visual impact of your images. Whether you are aiming to illuminate specific subjects or create dramatic lighting effects, leveraging external lighting sources can elevate the quality and artistic expression of your low light photography.
Off-Camera Flash: Utilizing off-camera flash units or speedlights allows you to introduce controlled bursts of artificial light into your low light compositions. This technique enables you to selectively illuminate subjects, sculpt the lighting to create depth and dimension, and overcome the challenges of inadequate ambient light.
Continuous Lighting: Continuous lighting sources, such as LED panels or portable studio lights, offer a versatile means of augmenting available light in low light environments. These sources can be manipulated to provide consistent illumination, making them well-suited for portrait photography, still life, and creative low light setups.
Light Modifiers: Employing light modifiers, such as softboxes, umbrellas, and reflectors, can refine and shape the quality of light from external sources. These accessories enable you to diffuse harsh light, create soft and flattering illumination, and manipulate the direction and intensity of the light to achieve the desired mood and visual impact in your low light images.
Light Painting: Embracing the technique of light painting involves using handheld light sources, such as flashlights or colored gels, to selectively illuminate and accentuate elements within a scene during long exposures. This approach allows for creative experimentation with light and movement, resulting in visually captivating and ethereal imagery.
Environmental Lighting: In certain low light scenarios, incorporating ambient sources of light, such as street lamps, neon signs, or natural moonlight, can contribute to the atmospheric and cinematic quality of your photographs. Embracing and integrating these existing light sources into your compositions can add depth, character, and a sense of narrative to your low light images.
By integrating external lighting sources into your low light photography toolkit, you can exercise greater control over the illumination and visual dynamics of your compositions. Whether you are seeking to enhance the clarity of your subjects, craft evocative lighting effects, or infuse your images with a distinct mood, the strategic use of external lighting sources can unleash the full creative potential of your low light photography endeavors.
Post-Processing Techniques for Low Light Photography
Post-processing plays a pivotal role in optimizing and refining low light photographs, allowing photographers to fine-tune exposure, reduce noise, and enhance the visual impact of their images. Leveraging post-processing software, such as Adobe Lightroom or Photoshop, enables photographers to overcome the inherent challenges of low light photography and elevate the quality of their captured images.
Exposure Adjustment: Fine-tuning the exposure settings during post-processing can help rectify underexposed or overexposed areas in low light images, restoring balance and detail to the photograph. Adjusting the exposure slider and utilizing graduated filters or adjustment brushes can selectively enhance the luminance and tonal range within the image, ensuring optimal exposure across the frame.
Noise Reduction: Low light photography often results in the presence of digital noise, particularly when higher ISO settings are employed to compensate for limited available light. Post-processing software offers dedicated noise reduction tools that effectively minimize the appearance of noise while preserving image detail, resulting in cleaner and more visually appealing low light images.
Contrast and Clarity Enhancement: Manipulating contrast and clarity settings can accentuate the visual impact of low light photographs, enhancing the definition of textures and details within the image. By selectively adjusting these parameters, photographers can imbue their low light images with heightened depth and visual intensity, elevating the overall aesthetic appeal of the photographs.
Color Correction and White Balance Adjustment: Post-processing affords photographers the ability to refine color rendition and correct white balance discrepancies inherent in low light photography. By fine-tuning color temperature, tint, and saturation, photographers can ensure accurate and natural color reproduction, effectively capturing the ambiance and nuances of the low light environment.
Sharpening and Detail Enhancement: Utilizing sharpening tools and detail enhancement techniques can refine the overall sharpness and clarity of low light images, ensuring that intricate details and textures are rendered with precision and definition. This post-processing step contributes to the overall visual impact and technical quality of the photographs, resulting in images that are crisp and visually compelling.
By integrating these post-processing techniques into their workflow, photographers can transcend the limitations of low light photography, refine the technical and aesthetic aspects of their images, and ultimately produce captivating and visually striking photographs that resonate with viewers.