Introduction
Welcome to the world of photography, where capturing the perfect shot often requires precision and timing. As a DSLR camera owner, you understand the value of remote connectivity in achieving stunning photographs without physically touching the camera. Whether you’re a professional photographer or an enthusiastic hobbyist, the ability to connect your DSLR camera to a remote opens up a realm of creative possibilities.
Imagine being able to capture breathtaking landscapes without disturbing the natural serenity, or effortlessly taking group photos without the need for a self-timer or the hassle of running back and forth to adjust the composition. With a reliable remote connection, you can elevate your photography game and explore innovative angles and perspectives.
In this guide, we will delve into the intricacies of connecting a DSLR camera to a remote, providing you with a comprehensive understanding of the process. From selecting the right remote for your specific camera model to the setup and testing phases, we’ll walk you through each step to ensure a seamless and successful remote connection.
By the end of this guide, you’ll be equipped with the knowledge and confidence to harness the power of remote connectivity, empowering you to unleash your creativity and capture awe-inspiring images with ease. Let’s embark on this journey to unlock the full potential of your DSLR camera and take your photography skills to new heights.
Choosing the Right Remote for Your DSLR Camera
When it comes to selecting a remote for your DSLR camera, it’s essential to consider the specific functionalities and compatibility with your camera model. Remote options range from simple wired remotes to advanced wireless systems, each offering unique features to cater to diverse photography needs.
First and foremost, identify the compatibility of the remote with your DSLR camera. Some cameras are compatible with a wide array of remotes, while others require specific models designed for seamless integration. Check the camera’s manual or manufacturer’s website to determine the recommended remotes for your particular model.
Next, consider the type of remote that best aligns with your shooting requirements. Wired remotes are straightforward and reliable, ideal for basic shutter release and long exposure shots. They are often budget-friendly and do not require additional setup. On the other hand, wireless remotes offer greater flexibility and convenience, allowing you to trigger the shutter from a distance without being tethered to the camera. Some advanced wireless remotes feature interval shooting and bulb mode capabilities, enabling you to explore creative long-exposure photography and time-lapse sequences.
If you frequently engage in portrait or group photography, investing in a remote with multi-functionality, such as the ability to control autofocus and capture images remotely, can significantly enhance your efficiency and workflow. Additionally, for landscape and astrophotography enthusiasts, intervalometers integrated into certain remotes enable precise control over exposure intervals, making them indispensable tools for capturing stunning time-lapse footage and star trails.
Consider the operational range of the remote, especially if you often work from a distance or in challenging environments. Some wireless remotes offer extended ranges, allowing you to trigger the shutter from considerable distances, making them ideal for wildlife photography and capturing candid moments without disturbing the subjects.
Ultimately, the right remote for your DSLR camera should align with your specific photography style and shooting preferences. By carefully evaluating the compatibility, features, and operational capabilities of various remotes, you can make an informed decision that enhances your photographic capabilities and unleashes your creative potential.
Setting Up Your DSLR Camera for Remote Connection
Before diving into the process of connecting your DSLR camera to a remote, it’s crucial to ensure that your camera is properly configured to facilitate seamless remote operation. The setup process may vary depending on your camera model and the type of remote you intend to use, so carefully follow these general guidelines to prepare your camera for remote connectivity.
1. Enable Remote Shutter Release: Access your camera’s menu and navigate to the “Remote Control” or “Shooting Mode” settings. Ensure that the remote shutter release option is activated. This step is essential for allowing the remote to trigger the camera’s shutter without physical contact, enabling hands-free operation and minimizing the risk of camera shake.
2. Check Battery Level: Verify that your camera’s battery is sufficiently charged to support extended remote shooting sessions, especially if you plan to utilize features such as interval shooting or time-lapse photography. A fully charged battery ensures uninterrupted remote operation and prevents potential disruptions during critical shooting moments.
3. Configure Remote Settings: If you are using an advanced wireless remote with additional functionalities such as interval shooting or bulb mode, familiarize yourself with the specific settings required to enable these features. Refer to the remote’s user manual for detailed instructions on configuring the settings to align with your desired shooting parameters.
4. Stabilize Your Camera: To maximize the effectiveness of remote operation, ensure that your camera is securely mounted on a stable surface or tripod. This minimizes the risk of unintended movement or vibration, particularly when capturing long exposure shots or time-lapse sequences. A stable setup is essential for achieving sharp and professional-quality images during remote shooting.
5. Test Remote Connectivity: Before proceeding with your actual photography session, perform a test to confirm that the remote is successfully communicating with your camera. Trigger the shutter using the remote and verify that the camera responds accordingly. This preliminary test allows you to address any connectivity issues or configuration errors before commencing your actual shooting endeavors.
By meticulously preparing your DSLR camera for remote connection, you lay the foundation for a seamless and productive remote shooting experience. These preliminary setup steps empower you to harness the full potential of remote operation, enabling you to focus on capturing compelling images while leveraging the convenience and flexibility offered by remote connectivity.
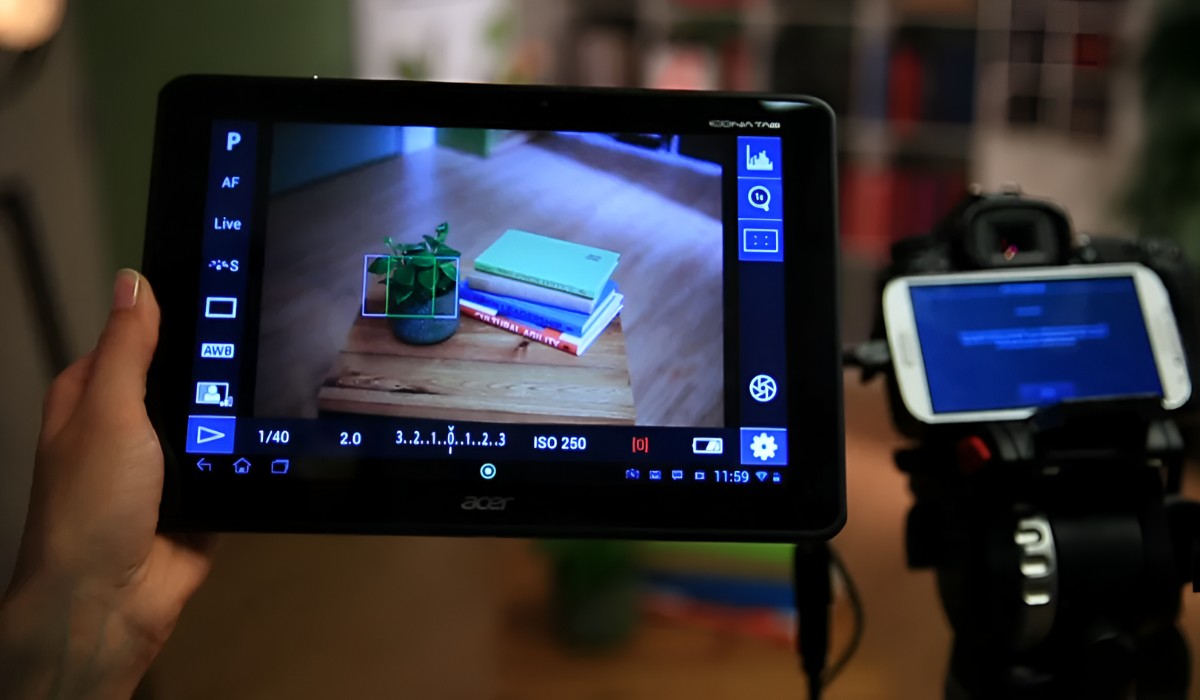
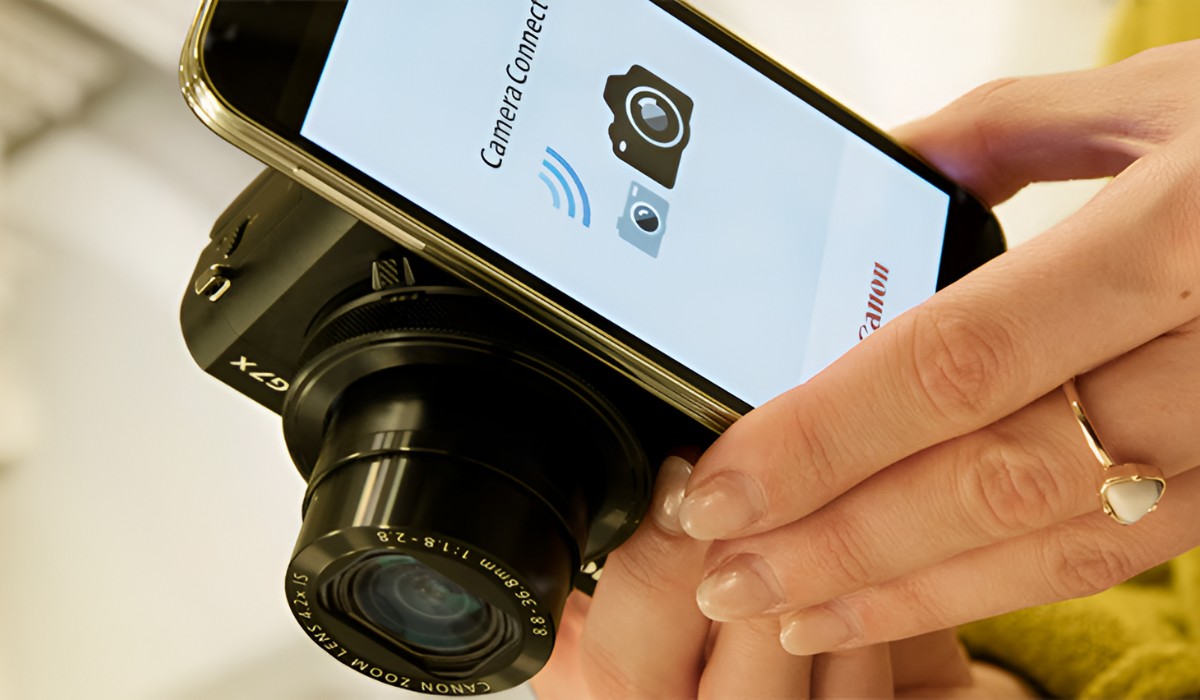
Connecting Your DSLR Camera to the Remote
Once you have prepared your DSLR camera for remote operation, the next step involves establishing a reliable connection between the camera and the remote. The process may differ based on the type of remote you are using, whether it’s a wired or wireless model. Follow these general guidelines to seamlessly connect your DSLR camera to the remote of your choice.
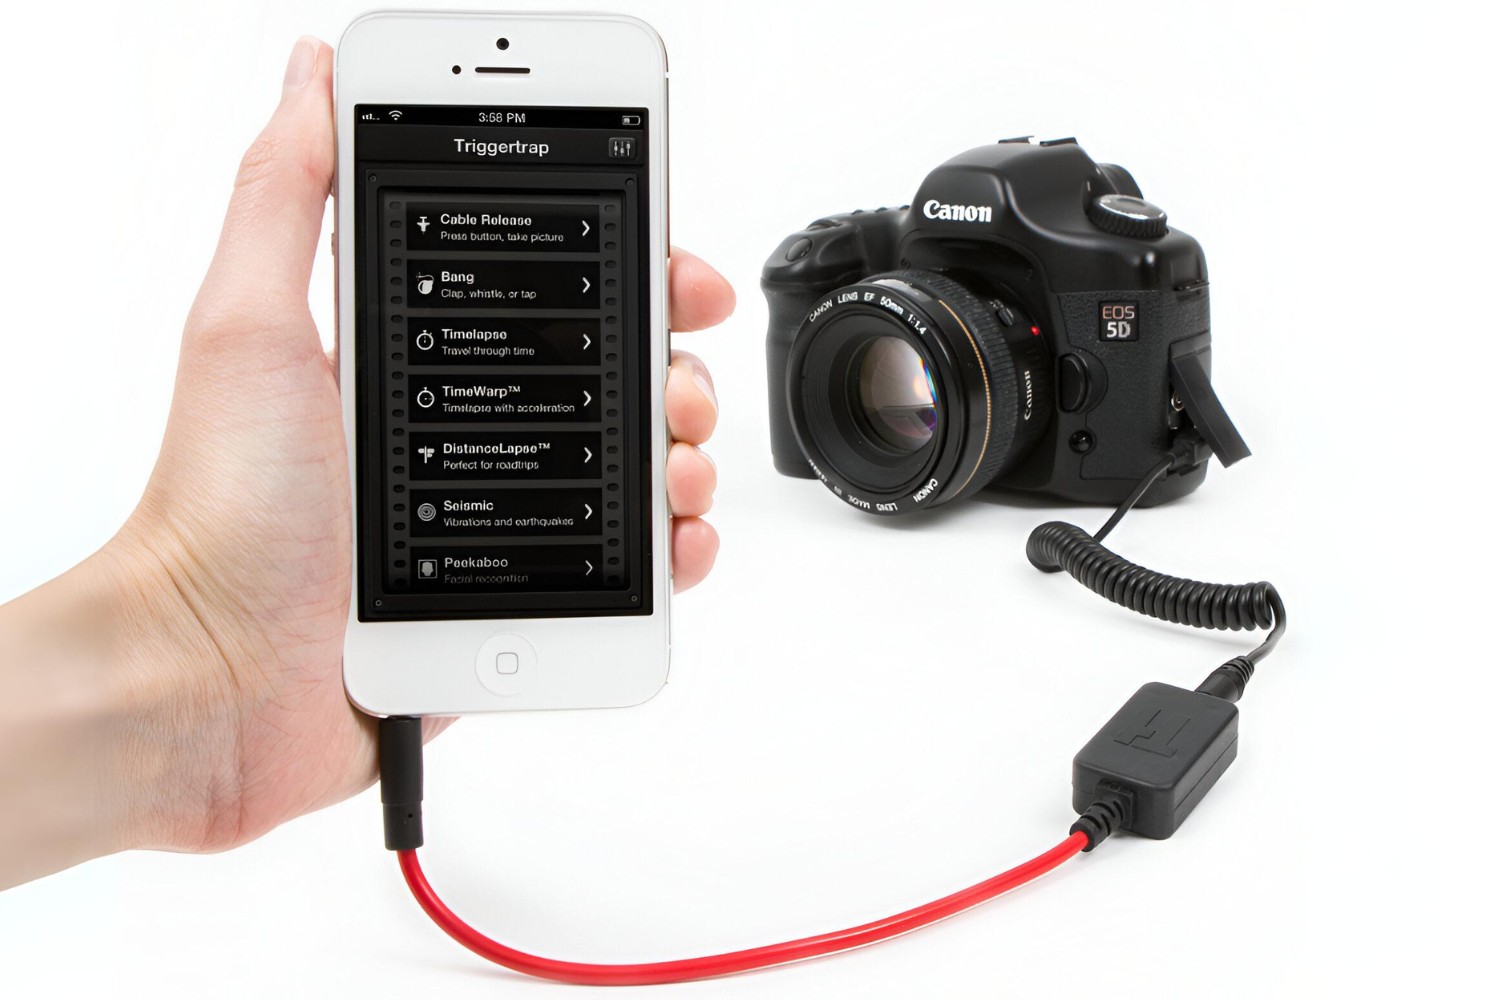
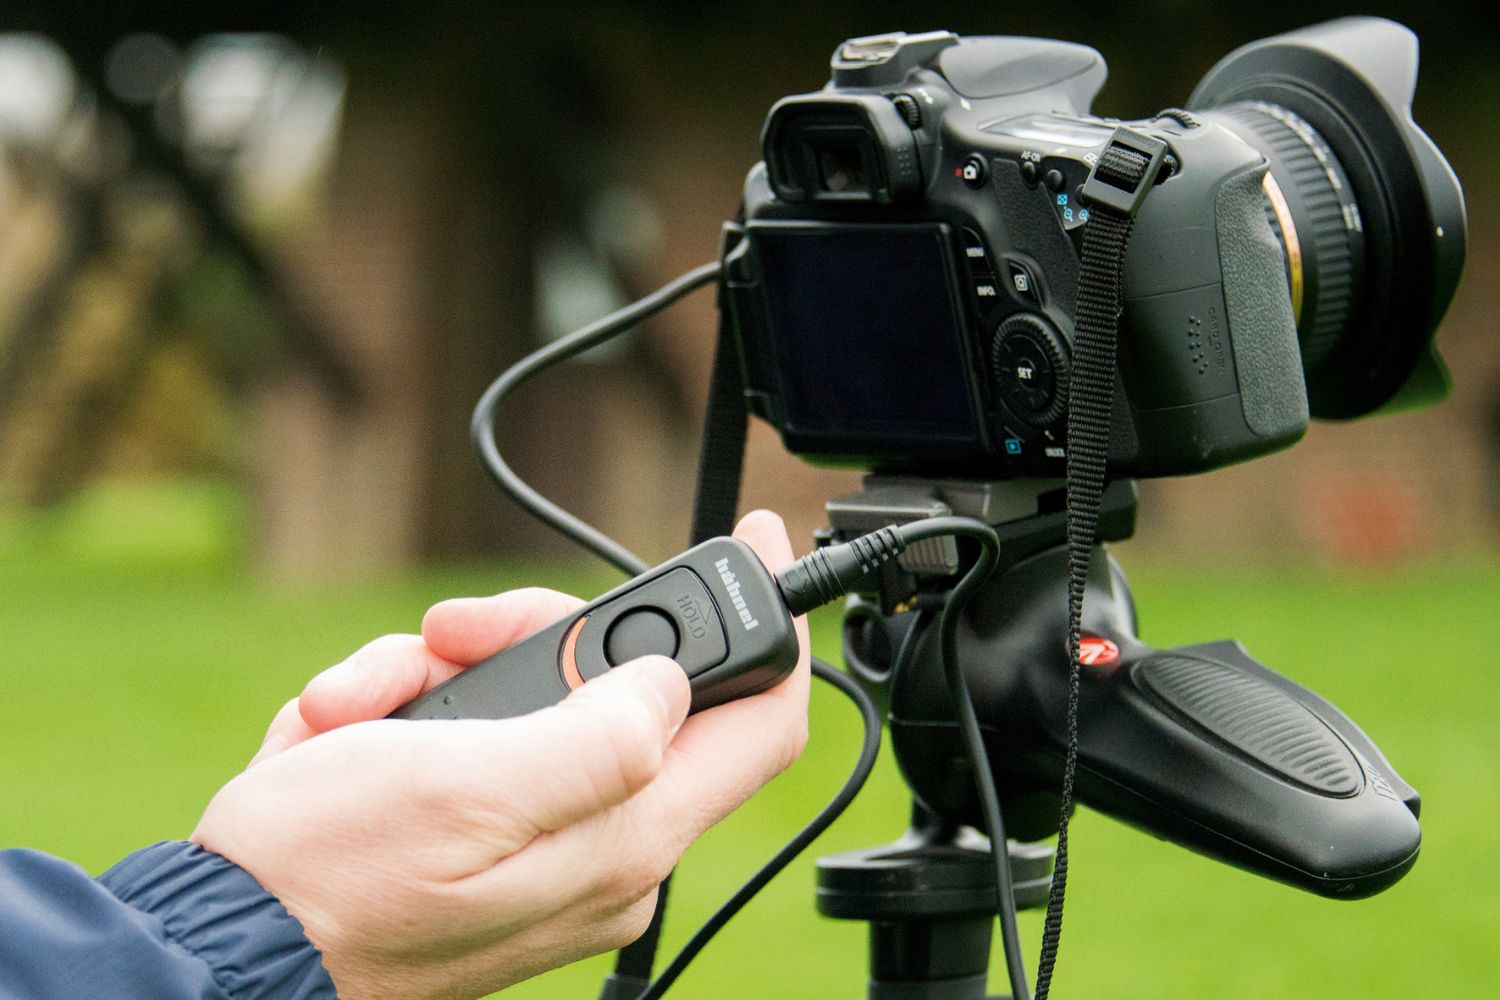
Wired Remote Connection: If you are using a wired remote, such as a cable release, the connection process is straightforward. Simply plug the remote’s cable into the designated port on your camera, typically located near the shutter button. Once connected, the camera should recognize the remote, allowing you to trigger the shutter remotely without the need for additional setup or configuration.
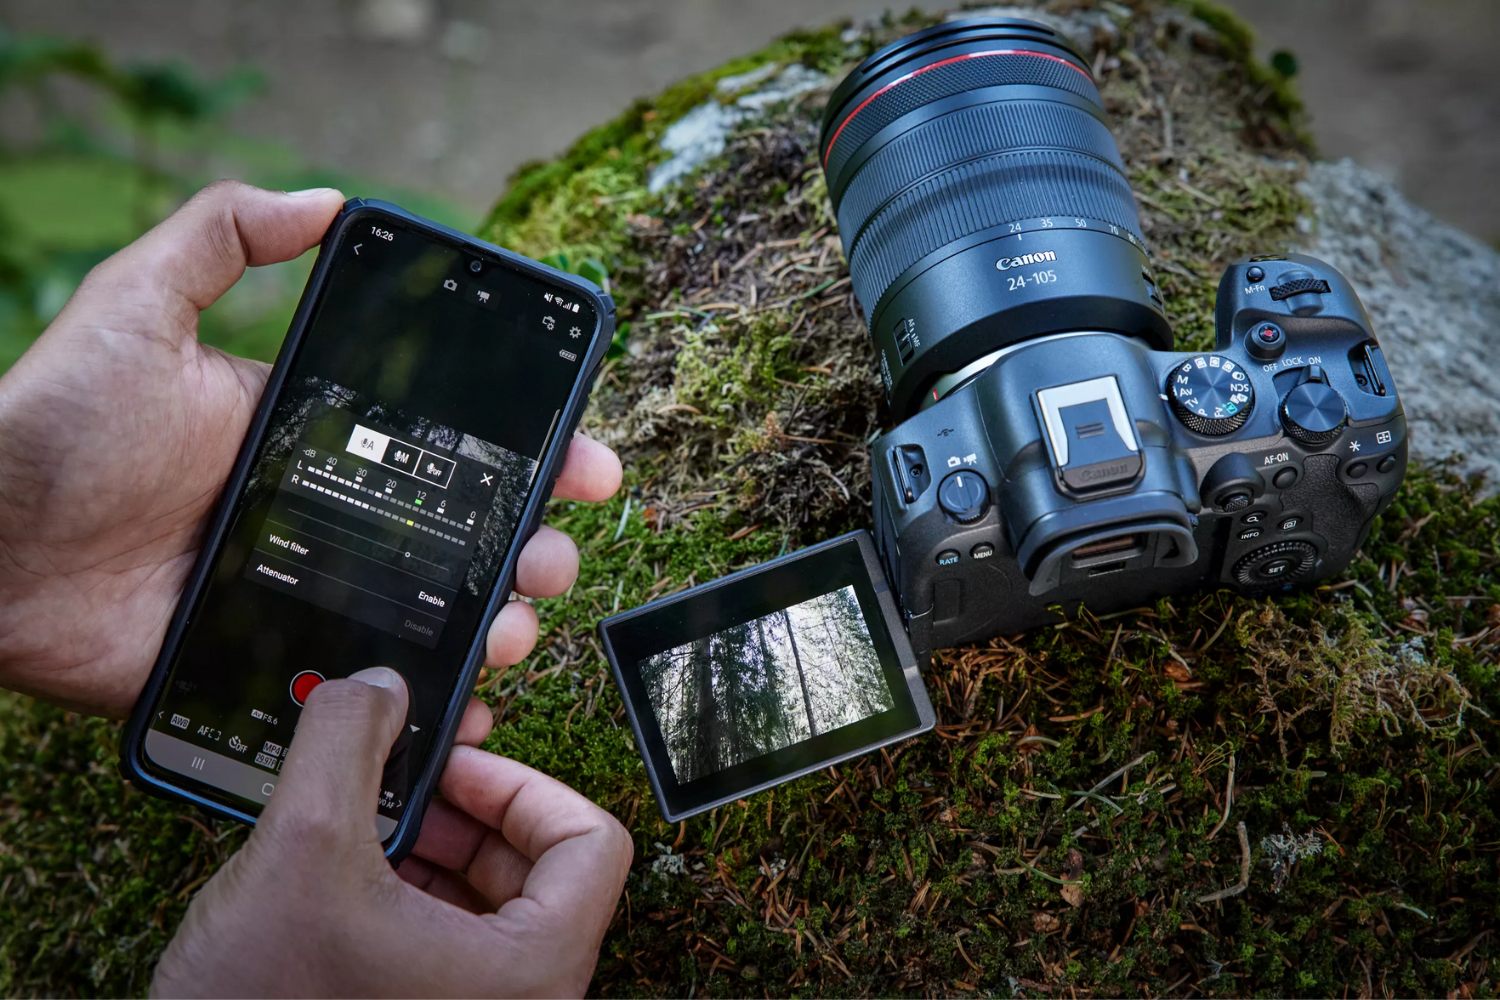
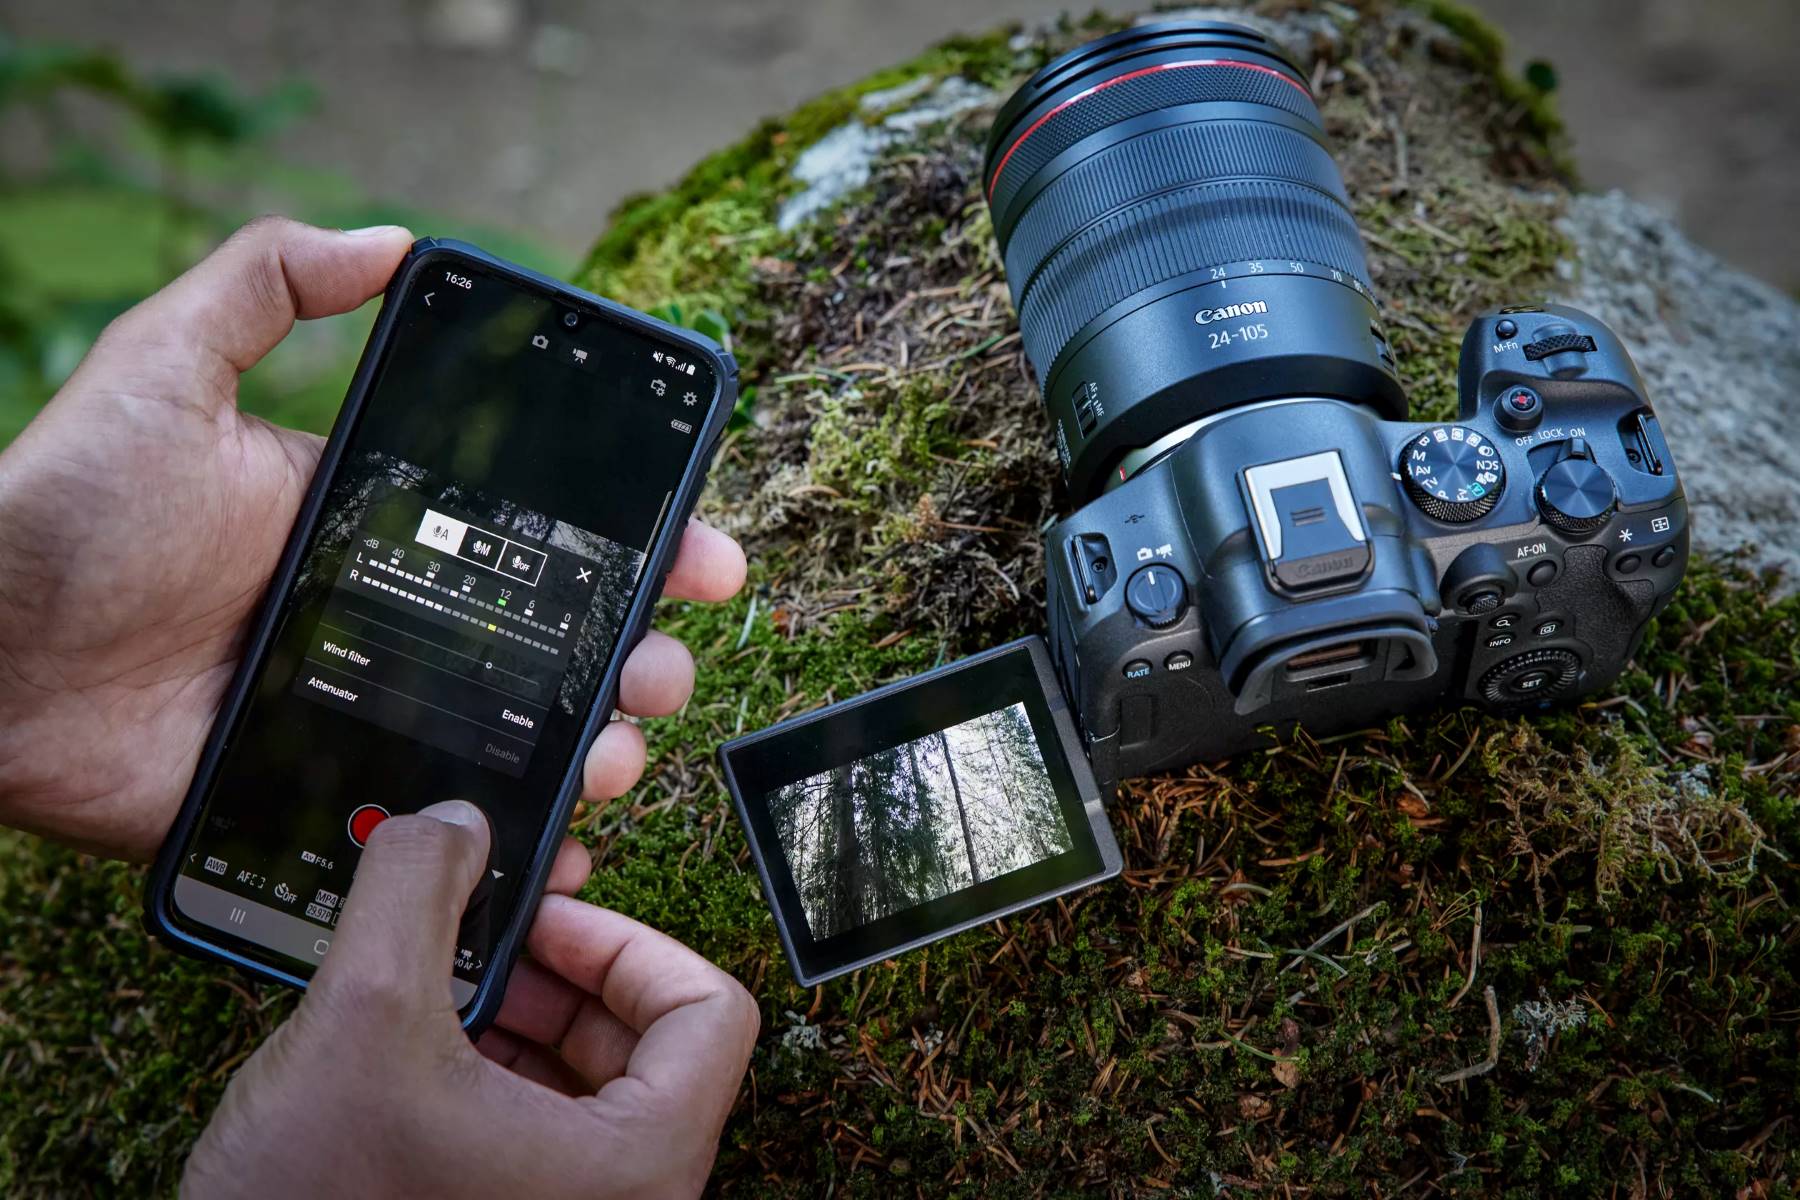
Wireless Remote Connection: When using a wireless remote, begin by turning on both the remote and the camera. Depending on the wireless technology utilized by the remote (e.g., infrared or radio frequency), ensure that the remote is within the specified operational range of the camera. Some wireless remotes require initial pairing or synchronization with the camera, as outlined in the remote’s user manual. Follow the prescribed steps to establish a secure and responsive connection between the remote and the camera.
Pairing and Configuration: For advanced wireless remotes with multifunction capabilities, such as intervalometers or bulb mode triggers, refer to the remote’s instructions for pairing and configuring these features. Depending on the remote’s design, you may need to access specific menus or settings on the camera to enable the desired functionalities, ensuring that the remote operates in tandem with your shooting preferences.
Verification of Connection: Once the remote is connected to the camera, perform a quick verification to confirm that the remote effectively triggers the camera’s shutter. Test the remote’s functionality by initiating a series of test shots or activating specific shooting modes, ensuring that the camera responds accurately to the remote’s commands. This verification step provides assurance that the remote connection is established and fully operational.
By successfully connecting your DSLR camera to the remote, you unlock a realm of creative possibilities and shooting flexibility. Whether you opt for a wired or wireless remote, the seamless establishment of the connection empowers you to capture images with precision and convenience, elevating your photography experience to new heights.
Testing the Remote Connection
After connecting your DSLR camera to the remote, it’s imperative to conduct thorough testing to ensure the reliability and responsiveness of the remote connection. Testing the remote connection not only validates the successful setup but also provides an opportunity to familiarize yourself with the remote’s functionalities and fine-tune its operation according to your specific shooting requirements.
Basic Functionality Test: Initiate the testing phase by performing basic functionality checks. Use the remote to trigger the camera’s shutter in single-shot mode, verifying that the remote effectively captures images without any delays or inconsistencies. This initial test allows you to confirm that the remote communication is seamless and that the camera responds promptly to the remote’s commands.
Interval Shooting and Time-Lapse Tests: If your remote features interval shooting or time-lapse capabilities, explore these functionalities during the testing phase. Set up the camera to capture a series of sequential shots at predetermined intervals, leveraging the remote’s intervalometer feature. This test enables you to assess the precision and reliability of the remote’s interval shooting functionality, ensuring that it aligns with your creative vision for time-lapse sequences and extended exposure projects.
Bulb Mode and Long Exposure Tests: For remotes equipped with bulb mode triggers, engage in long exposure tests to evaluate the remote’s ability to control extended exposures effectively. Utilize the remote to initiate bulb mode, capturing prolonged exposures while assessing the remote’s capacity to maintain consistent and accurate control over the camera’s shutter duration. This test is particularly crucial for astrophotography and low-light scenarios that demand precise long exposure management.
Operational Range and Environmental Tests: Assess the operational range of the remote by conducting tests at varying distances from the camera. Verify that the remote remains responsive and reliable within the specified range, allowing you to trigger the camera’s shutter from distances that align with your shooting preferences. Additionally, perform tests in different environmental conditions to gauge the remote’s performance in challenging settings, such as low-light environments or areas with potential interference.
By meticulously testing the remote connection, you gain confidence in the seamless operation and reliability of the remote, ensuring that it meets your expectations for diverse photography scenarios. This comprehensive testing phase not only validates the successful connection but also equips you with the assurance and proficiency to leverage the remote’s capabilities to their fullest potential.
Conclusion
Congratulations on mastering the art of connecting your DSLR camera to a remote! By navigating through the intricacies of selecting the right remote, preparing your camera for remote operation, establishing a seamless connection, and conducting comprehensive testing, you’ve unlocked a world of creative possibilities and elevated your photography experience.
With the ability to trigger your camera’s shutter remotely, you now possess the freedom to capture stunning images without physical contact, enabling you to explore unique perspectives, delve into time-lapse sequences, and delve into long exposure photography with unparalleled precision and convenience.
As you embark on your photographic endeavors with remote connectivity, remember to leverage the newfound flexibility and efficiency offered by the remote to unleash your creativity and expand your artistic horizons. Whether you’re capturing captivating landscapes, immortalizing candid moments, or delving into intricate long exposure projects, the seamless remote connection empowers you to focus on your vision while seamlessly orchestrating your camera’s operations from a distance.
Embrace the opportunities that remote connectivity presents, and continue to experiment with different shooting scenarios and creative techniques to fully harness the potential of your DSLR camera and remote combination. As you refine your proficiency in remote operation, you’ll discover new dimensions of photographic expression and redefine the boundaries of your visual storytelling.
Now equipped with the knowledge and expertise to connect your DSLR camera to a remote, you’re poised to embark on a captivating journey of photographic exploration and innovation. Embrace the convenience, precision, and creative liberation that remote connectivity affords, and let your passion for photography flourish in the boundless realm of remote-controlled imagery.