Introduction
Are you looking to upgrade your audio recording capabilities on your Samsung Note? Look no further than a USB microphone. A USB microphone is a versatile device that connects directly to your Samsung Note’s USB port, providing high-quality audio recording and capturing every nuance of your voice.
In this article, we will explore how to use a USB microphone with your Samsung Note, allowing you to enhance your podcasting, voiceovers, music recordings, or any other audio-related activities. Whether you are a professional content creator or just getting started with your audio journey, utilizing a USB microphone can greatly improve the quality of your recordings.
We will guide you through the process of connecting and configuring your USB microphone with your Samsung Note, ensuring that you achieve optimal performance and exceptional sound quality. Additionally, we’ll provide some helpful tips to make the most out of your USB microphone setup.
So, if you’re ready to take your audio recording capabilities to the next level, let’s dive into the world of USB microphones and unleash the full potential of your Samsung Note!
What is a USB Microphone?
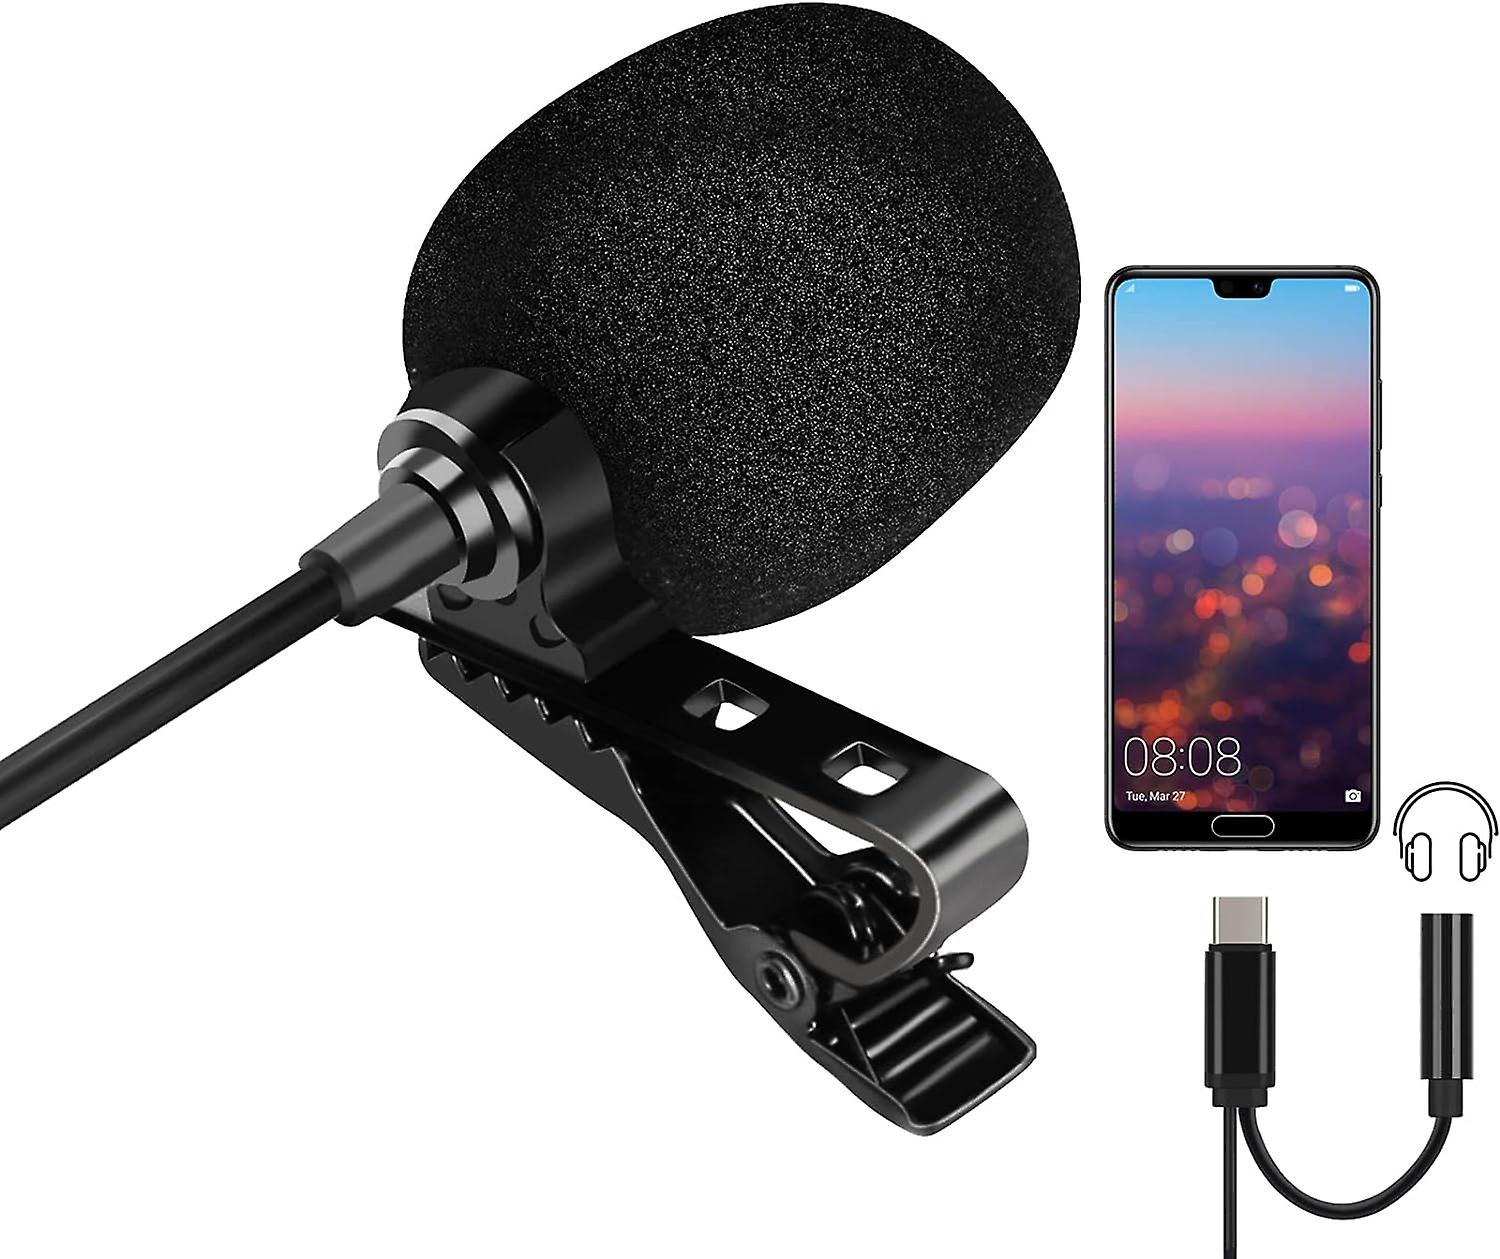
A USB microphone is a type of microphone that utilizes a USB connection to connect directly to your device, such as a computer or smartphone. Unlike traditional microphones that require an audio interface or mixer, a USB microphone simplifies the recording process by eliminating the need for additional equipment.
USB microphones are designed to capture high-quality audio with minimal setup and provide a convenient solution for various recording needs. They are popular among content creators, podcasters, musicians, and voiceover artists who want an easy-to-use and portable recording setup.
Most USB microphones feature a built-in analog-to-digital converter (ADC) that converts the incoming analog audio signal into a digital format. This allows the microphone to bypass the need for an external audio interface and directly transmit the digital audio data to your device through the USB connection.
USB microphones come in various shapes and sizes, including handheld microphones, condenser microphones, and dynamic microphones. Each type has its own unique characteristics and is suited for different recording applications.
Handheld USB microphones are compact and portable, making them ideal for on-the-go recording or live performances. They usually have built-in controls for adjusting volume and other settings directly on the microphone itself.
Condenser USB microphones are more sensitive and offer a wider frequency response, making them suitable for capturing vocals, instruments, and studio-quality recordings. They are commonly used in home studios and professional recording environments.
Dynamic USB microphones are more rugged and resistant to handling noise, making them well-suited for live performances, podcasts, and broadcasting.
Overall, USB microphones provide a convenient and affordable solution for high-quality audio recording. Whether you are a content creator, musician, or simply looking to improve the audio quality of your conference calls, a USB microphone is a versatile tool that can greatly enhance your audio recording experience.
Why Use a USB Microphone with Samsung Note?
Using a USB microphone with your Samsung Note offers several advantages and opens up a world of opportunities for audio recording and content creation. Here are some compelling reasons why you should consider using a USB microphone with your Samsung Note:
1. Enhanced Audio Quality: USB microphones are designed to provide superior audio quality compared to the built-in microphone on your Samsung Note. They capture a broader frequency range and offer improved clarity and detail, resulting in professional-grade recordings.
2. Versatility: Whether you’re recording podcasts, voiceovers, music, interviews, or lectures, a USB microphone offers the versatility to handle a variety of recording applications. You can achieve studio-quality sound directly from your Samsung Note, eliminating the need for additional equipment.
3. Convenience and Portability: USB microphones are compact and portable, making them ideal for mobile recording setups. You can easily connect your USB microphone to your Samsung Note and record high-quality audio wherever you go. Whether you’re in a studio, on location, or traveling, a USB microphone allows you to capture professional-grade audio with ease.
4. Plug-and-Play Setup: Connecting a USB microphone to your Samsung Note is as simple as plugging it into the USB port. There’s no need for complicated setups or additional drivers. Your Samsung Note recognizes the USB microphone instantly, allowing you to start recording right away.
5. Compatibility: USB microphones are compatible with a wide range of devices, including smartphones, tablets, and computers. This means that even if you upgrade your device in the future, you can continue using your USB microphone without any compatibility issues.
6. Control and Convenience: Many USB microphones come with built-in controls for adjusting volume, gain, and other settings directly on the microphone itself. This gives you more control over your recordings and eliminates the need to navigate through complex software or settings on your Samsung Note.
7. Professional-Quality Sound for Online Communication: Whether you’re participating in video conferences or recording voiceovers for videos, using a USB microphone ensures that your voice is clear and crisp. This enhances the overall quality of your communication and helps you make a strong impression.
Overall, using a USB microphone with your Samsung Note elevates your audio recording capabilities, allowing you to achieve professional-grade sound in various recording situations. It’s a versatile and convenient solution that enhances your creativity and ensures that your recordings stand out from the crowd.
Getting Started
Before you can start using a USB microphone with your Samsung Note, there are a few steps you need to follow to ensure a smooth setup and optimal performance. Let’s dive into the process of getting started:
Step 1: Check Compatibility: First, make sure that your Samsung Note is compatible with USB microphones. Most modern smartphones, including Samsung Note models, support USB audio, but it’s always a good idea to check the specifications or consult the manufacturer’s guidelines to ensure compatibility.
Step 2: Connect the USB Microphone: Once you’ve confirmed compatibility, it’s time to connect your USB microphone to your Samsung Note. Simply plug the USB end of the microphone into the USB port of your device. You should see a notification or confirmation that your Samsung Note has recognized the USB microphone.
Step 3: Configure Audio Settings: After connecting the USB microphone, you’ll need to configure the audio settings on your Samsung Note. Go to the settings menu and navigate to the sound or audio settings. Look for the audio input or microphone option and select the USB microphone as the default input device.
Step 4: Test the USB Microphone: To ensure everything is working correctly, it’s a good idea to test your USB microphone. Open a voice recording app or any other app that utilizes the microphone on your Samsung Note. Speak or make a sound into the USB microphone and check if the audio is being captured properly. Adjust the volume or gain settings if needed.
That’s it! You are now ready to start using your USB microphone with your Samsung Note. Whether you’re recording podcasts, voiceovers, or any other audio content, your USB microphone will deliver high-quality sound and enhance your recording experience.
Keep in mind that different USB microphones may have additional features or requirements, so it’s always a good idea to consult the user manual or manufacturer’s guidelines for specific instructions related to your USB microphone model.
Now that you’ve successfully set up your USB microphone with your Samsung Note, let’s explore some useful tips to optimize your recording experience and make the most out of your USB microphone setup.
Step 1: Check Compatibility
Before connecting a USB microphone to your Samsung Note, it’s crucial to ensure that your device is compatible. While most modern smartphones, including Samsung Note models, support USB audio, it’s always important to double-check the specifications or consult the manufacturer’s guidelines to verify compatibility.
To check the compatibility of your Samsung Note with a USB microphone, you can follow these steps:
1. Review the Device Specifications: Look for the USB audio support in the technical specifications of your Samsung Note model. Check if it explicitly mentions USB audio or mentions support for external microphones and accessories. This information can usually be found on the manufacturer’s website or in the user manual.
2. Research Online: Search online forums, user communities, and reputable tech websites to gather information from other users who have successfully used USB microphones with their Samsung Note devices. This can provide valuable insights and help you make an informed decision about compatibility.
3. Consult the Manufacturer: If you’re unsure about the compatibility, reach out to the manufacturer of your Samsung Note or the USB microphone itself. They should be able to confirm if the particular USB microphone model you are planning to use is compatible with your specific Samsung Note model.
It’s important to note that some USB microphones may have additional requirements, such as power or firmware updates. Therefore, it’s essential to thoroughly read the USB microphone’s user manual or consult the manufacturer’s guidelines to ensure compatibility and avoid any potential issues.
By checking the compatibility of your Samsung Note with a USB microphone, you can ensure a seamless integration and avoid any frustration or disappointment that may arise from an incompatible setup. Once you’ve confirmed compatibility, you can proceed to the next step of connecting the USB microphone to your Samsung Note and unlocking its full potential for high-quality audio recording.
Step 2: Connect the USB Microphone
Now that you have confirmed the compatibility of your Samsung Note with a USB microphone, it’s time to connect the microphone to your device. Connecting a USB microphone is a straightforward process that requires minimal effort. Here’s how to do it:
1. Locate the USB Port: Identify the USB port on your Samsung Note. Depending on the model, the USB port may be located at the bottom, side, or top of the device. It is usually a rectangular-shaped port that is used for charging and data transfer.
2. Insert the USB Connector: Take the USB cable that came with your microphone and insert the USB connector into the USB port of your Samsung Note. Make sure to insert it securely to establish a reliable connection.
3. Check for Recognition: Once you have connected the USB microphone, your Samsung Note should recognize it automatically. You may receive a notification on your device indicating that a USB device has been connected. Your Samsung Note may also prompt you to confirm the use of the connected USB microphone.
4. Choose the USB Microphone as Default Input: To ensure that your Samsung Note uses the USB microphone as the primary input device for audio recording, you need to set it as the default input. Go to your device’s settings menu and navigate to the sound or audio settings. Look for an option related to the microphone or audio input and select the USB microphone as the default input device.
5. Adjust Mic Settings (Optional): Some USB microphones may have additional settings or controls that you can adjust for optimal performance. These settings can include volume, gain, or microphone sensitivity. Consult the user manual of your USB microphone to learn more about the available settings and how to adjust them.
Once you’ve connected the USB microphone and configured the audio settings, you’re ready to start using it with your Samsung Note. Whether you’re recording podcasts, voiceovers, or any other type of audio content, your USB microphone will pick up high-quality sound and elevate your recordings to the next level.
Remember to check the user manual or manufacturer’s guidelines for your specific USB microphone model for any additional information or troubleshooting tips related to connecting and using the microphone with your Samsung Note.
Step 3: Configure Audio Settings
Once you have connected your USB microphone to your Samsung Note, it’s important to configure the audio settings to ensure optimal recording quality. By customizing the audio settings, you can fine-tune the microphone’s performance and achieve the best possible sound. Here’s how to configure the audio settings on your Samsung Note:
1. Access Sound Settings: Open the settings menu on your Samsung Note and locate the sound or audio settings. This may vary slightly depending on your device model or Android version.
2. Select Input Devices: Look for the option to choose the input device or microphone. It may be labeled as “Input device,” “Audio input,” or something similar. Tap on this option to access the available audio input devices.
3. Choose USB Microphone: In the input device menu, you should see the USB microphone listed as one of the available options. Select the USB microphone as the preferred input device for audio recording. This ensures that your Samsung Note will utilize the USB microphone instead of the device’s built-in microphone.
4. Adjust Volume or Gain: Some USB microphones have built-in controls for adjusting the volume or gain. If your USB microphone has these controls, you can fine-tune the input level to ensure that it matches your recording environment. Test different settings to find the optimal level that avoids distortion or clipping.
5. Enable Noise Reduction or Filters (Optional): Depending on your USB microphone model and the capabilities of your Samsung Note, you may have access to additional audio enhancement features. These can include noise reduction, echo cancellation, or filters for specific recording scenarios. Explore the settings or options in the sound menu to enable and adjust these features as desired.
6. Test the Audio: After configuring the audio settings, it’s recommended to test the USB microphone to ensure that it’s functioning properly. Open a voice recording app or any other app that uses the microphone on your Samsung Note. Speak or make a sound into the USB microphone and check if the audio is being captured clearly without any issues.
By following these steps and configuring the audio settings on your Samsung Note, you can optimize the performance of your USB microphone and ensure that you capture high-quality sound during your recordings. Don’t be afraid to experiment with different settings and make adjustments based on your specific recording needs and environment.
Remember to consult the user manual or manufacturer’s guidelines for your specific USB microphone model for any additional information or specific settings that may be available for customization.
Step 4: Test the USB Microphone
After connecting and configuring your USB microphone with your Samsung Note, it’s crucial to test it to ensure that everything is working as expected. Testing the USB microphone allows you to verify the audio quality, adjust settings if necessary, and ensure that your recordings will sound professional. Here’s how to test your USB microphone:
1. Open a Recording App: Launch a voice recording app or any other app that utilizes the microphone on your Samsung Note. There are several recording apps available on the Google Play Store, such as Voice Recorder, Smart Recorder, or Easy Voice Recorder. Choose the one that suits your needs and preferences.
2. Position the Microphone: Set up the USB microphone in a suitable position for recording. Whether you’re using a desktop stand, a boom arm, or holding the microphone in your hand, make sure it’s positioned correctly for capturing your voice or any other audio source.
3. Perform a Test Recording: Press the record button in the recording app and speak or make a sound into the USB microphone. Say a few sentences or perform a short sound check to test the audio quality and performance of the microphone. Listen back to the recording and assess the clarity, volume, and overall sound of the recording.
4. Adjust Settings if Needed: If the test recording doesn’t meet your expectations, you may need to make some adjustments. Try increasing or decreasing the microphone’s volume or gain settings using the controls on the microphone or the audio settings on your Samsung Note. Test different settings and listen to the recordings until you achieve the desired sound quality.
5. Monitor for Clipping or Distortion: During the test recording, pay attention to any signs of clipping or distortion. Clipping occurs when the audio signal exceeds the maximum level the microphone can handle, resulting in distorted and unpleasant sound. If you notice clipping, lower the volume or gain settings to avoid it and ensure a clean recording.
6. Test Different Recording Scenarios: To fully assess the capabilities of your USB microphone, consider testing it in different recording scenarios. Record in a quiet room, in a noisy environment, or experiment with different microphone distances to see how it captures your voice or other audio sources under varying conditions. This will allow you to understand the microphone’s strengths and limitations in different situations.
By performing a thorough test of your USB microphone, you can ensure that it’s functioning properly and delivering the desired sound quality. If any issues arise during the test, refer to your USB microphone’s user manual or contact the manufacturer for troubleshooting assistance.
Once you’re satisfied with the test recordings and confident in the performance of your USB microphone, you’re ready to embark on your audio recording journey with your Samsung Note, knowing that you have a reliable and high-quality tool at your disposal.
Tips for Using a USB Microphone with Samsung Note
Now that you have successfully set up and tested your USB microphone with your Samsung Note, here are some valuable tips to maximize your recording experience and get the most out of your USB microphone:
1. Choose the Right Recording Environment: Find a quiet and controlled environment for your recordings to minimize background noise and ensure optimal audio quality. Consider using acoustic treatments or moving to a room with better sound insulation if necessary.
2. Experiment with Microphone Placement: Depending on the desired sound and the audio source, try positioning the microphone at different distances and angles to achieve the best recording results. Experiment with placement to find the sweet spot for capturing your voice or instrument.
3. Use a Pop Filter or Windscreen: To reduce plosive sounds and minimize the impact of wind or breath noise, attach a pop filter or windscreen to your USB microphone. These accessories help to prevent unwanted bursts of air from distorting the audio.
4. Monitor your Audio Levels: Keep an eye on the input levels during recordings to ensure that your sound isn’t too quiet or distorted. Aim for a healthy signal level that avoids clipping while still capturing the full dynamics of your voice or instrument.
5. Consider External Power: Some USB microphones may benefit from external power sources, such as USB hubs with dedicated power or using a power bank. This can provide consistent power and potentially improve the microphone’s performance, especially in situations where the USB port on your Samsung Note may not provide sufficient power.
6. Utilize Editing Software: After recording, take advantage of audio editing software to fine-tune your recordings. You can trim unwanted sections, adjust levels, apply effects or filters, and enhance the overall sound quality of your recordings. There are various editing apps available for Android, such as Audacity, WavePad, or Adobe Audition.
7. Practice Proper Mic Technique: Familiarize yourself with proper microphone technique to ensure consistent and quality recordings. Maintain an appropriate distance from the microphone, speak or sing directly into it, and avoid unnecessary tapping or handling of the microphone during recordings.
8. Protect and Store Your USB Microphone: When not in use, store your USB microphone in a safe and protected place. Consider investing in a carrying case or pouch to prevent dust, damage, or accidental drops that can affect the microphone’s performance.
9. Stay Updated: Keep an eye on software updates for your USB microphone and your Samsung Note. Manufacturers often release firmware updates or software enhancements that can improve performance, address bugs, or introduce new features.
10. Experiment and Have Fun: Lastly, don’t be afraid to experiment and have fun with your USB microphone setup. Try different recording techniques, explore different genres, and allow your creative ideas to flow. The more you practice and experiment, the better you’ll become at using your USB microphone effectively.
By following these tips, you can elevate your audio recordings and make the most out of your USB microphone setup with your Samsung Note. Remember that practice and patience are key to mastering the art of recording and getting the best results from your USB microphone setup.
Conclusion
Using a USB microphone with your Samsung Note opens up a world of possibilities for high-quality audio recording and content creation. With the convenience, versatility, and improved audio quality that a USB microphone offers, you can take your podcasts, voiceovers, music recordings, and other audio projects to the next level.
In this article, we explored the steps to connect and configure a USB microphone with your Samsung Note. We discussed the importance of checking compatibility, connecting the USB microphone, configuring the audio settings, and testing the microphone to ensure optimal performance.
Additionally, we provided valuable tips to help you make the most out of your USB microphone with your Samsung Note. By choosing the right recording environment, experimenting with microphone placement, monitoring audio levels, and utilizing editing software, you can enhance the overall quality of your recordings.
Remember to practice proper microphone technique, protect and store your USB microphone properly, and stay updated with any software updates or enhancements that may be available for your specific USB microphone model and Samsung Note.
By following these guidelines and unleashing the power of a USB microphone with your Samsung Note, you can produce professional-grade audio content, captivate your audience, and achieve your desired recording goals.
So, what are you waiting for? Start exploring the world of USB microphones and unlock the full potential of your Samsung Note for exceptional audio recording experiences.


