Introduction
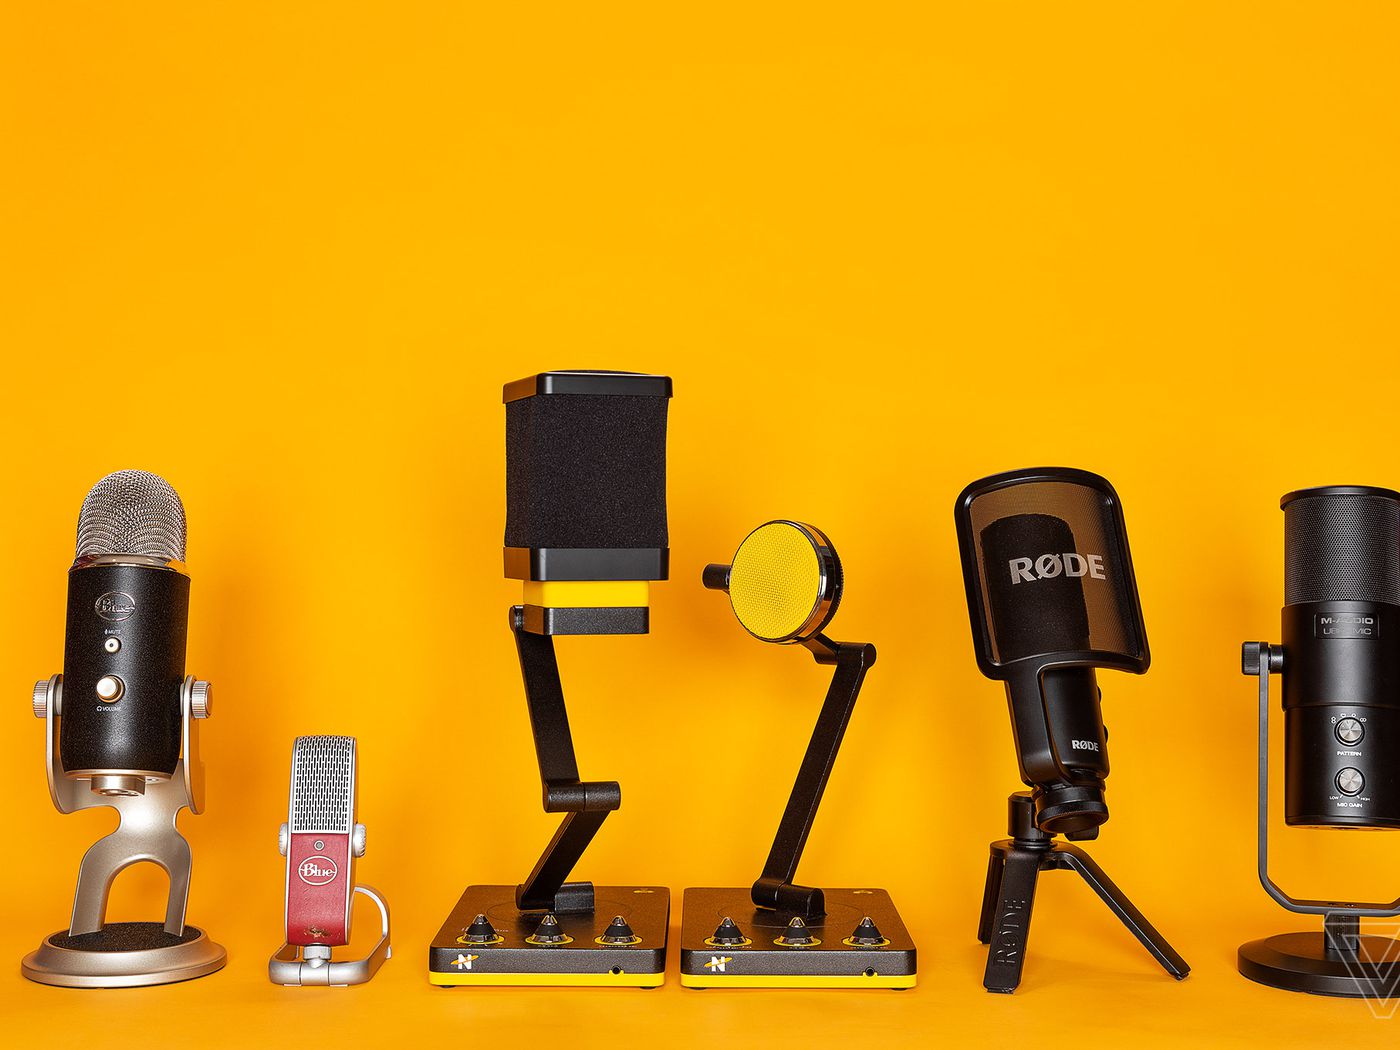
YouTube has become a powerful platform for content creators, where they can share their passions, talents, and expertise with a worldwide audience. One of the key elements in producing high-quality YouTube videos is having clear and professional audio. While the built-in microphone on your phone or computer may suffice for casual videos, using a USB microphone can greatly enhance the audio quality and take your content to the next level.
USB microphones are a popular choice among YouTubers due to their ease of use, affordability, and excellent sound reproduction. Whether you’re a vlogger, gamer, musician, or educator, having a USB microphone can significantly improve the clarity, depth, and professionalism of your videos.
In this article, we will guide you on how to use a USB microphone for YouTube, from choosing the right microphone to recording and editing your audio. We will provide you with valuable tips and techniques to help you get the best results and create engaging content that captivates your audience.
So, if you’re ready to take your YouTube videos to the next level and make your voice stand out, let’s dive into the world of USB microphones and discover how they can revolutionize your content creation!
Choosing the Right USB Microphone
When it comes to choosing a USB microphone for your YouTube videos, there are a few factors to consider. The right microphone will depend on your specific needs and preferences, as well as your budget. Here are some key points to keep in mind:
- Audio Quality: Look for a USB microphone that offers high-quality audio recording. Consider the frequency response range, sensitivity, and signal-to-noise ratio to ensure clear and crisp sound reproduction.
- Directionality: USB microphones come in various directional patterns, such as cardioid, omnidirectional, and bidirectional. Cardioid microphones are great for solo recordings, while omnidirectional and bidirectional options are ideal for interviews or group discussions.
- Connectivity and Compatibility: Ensure that the USB microphone you choose is compatible with your computer or device. Check if it requires any additional drivers or software installation.
- Features and Controls: Consider any additional features and controls that may enhance your recording experience. Some microphones have built-in headphone jacks, volume controls, mute buttons, and gain adjustments, allowing you to monitor and customize your audio settings.
- Budget: USB microphones are available at various price points, so it’s important to determine your budget beforehand. While more expensive options may offer advanced features and higher audio quality, there are also affordable microphones that deliver excellent performance.
Reading customer reviews and watching comparison videos can help you make an informed decision. Consider the specific needs of your YouTube channel and the type of content you create, whether it’s voiceovers, musical performances, podcasts, or live streaming. It’s essential to choose a USB microphone that suits your unique requirements and provides the best audio quality within your budget.
Now that you have a better understanding of what to look for in a USB microphone, let’s move on to setting up your microphone and preparing it for recording in the next section.
Setting Up Your USB Microphone
Setting up your USB microphone correctly is essential to ensure optimal performance and audio quality. Follow these steps to get your microphone up and running:
- Connect the microphone: Plug your USB microphone into an available USB port on your computer or device. Ensure a secure connection to avoid any audio interruptions or disconnections during recording.
- Install any necessary drivers or software: Some USB microphones may require specific drivers or software to function correctly. Check the manufacturer’s instructions or website for any necessary downloads and follow the installation process.
- Configure microphone settings: Access your computer’s audio settings and make sure the USB microphone is selected as the input device. Adjust the input volume to an appropriate level to avoid distortion or clipping.
- Test the microphone: Open a recording software or application and test your USB microphone by speaking or singing into it. Monitor the audio levels to ensure that the microphone is picking up sound correctly.
- Adjust microphone gain: If your USB microphone has a gain control feature, experiment with different settings to find the optimal level. Avoid setting the gain too high, as it can lead to distortion or background noise. Find the right balance that captures your voice or instrument clearly without any unwanted artifacts.
- Consider using a pop filter or windscreen: To minimize plosive sounds (such as “p” and “b” sounds) and reduce wind noise, use a pop filter or windscreen in front of your USB microphone. This accessory helps to improve the overall audio quality by reducing unwanted distortions.
Once you have completed these steps, your USB microphone should be properly set up and ready to record your voice or instruments for your YouTube videos. Take some time to familiarize yourself with the microphone’s settings and experiment with different techniques to find the best sound for your content.
In the next section, we’ll discuss how to adjust the microphone settings to optimize the audio quality further and ensure that your recordings are clear and professional.
Adjusting the Microphone Settings
Once you’ve set up your USB microphone, you may need to make some adjustments to optimize the audio quality and achieve the best results. The following tips will help you fine-tune your microphone settings:
- Volume levels: Check the input volume levels in your computer’s sound settings or recording software. Ensure that the volume is set at an appropriate level, neither too low nor too high. Adjusting the volume will prevent audio distortion or capturing weak, hard-to-hear recordings.
- Equalization (EQ): If your USB microphone has built-in EQ settings, experiment with them to find the best sound for your voice or instrument. Adjusting the EQ can help enhance specific frequencies, such as boosting the bass or adding clarity to the higher frequencies.
- Noise reduction: If you’re recording in a noisy environment, consider using noise reduction techniques or software. This will help minimize background noise and improve the clarity of your recordings. Some recording software may have built-in noise reduction features, or you can use standalone plugins for post-production processing.
- Monitoring: Use headphones or speakers to monitor your audio while recording. This allows you to hear any issues or unwanted noises in real-time and make adjustments accordingly. Monitoring is especially important when recording vocals to ensure a high-quality performance.
- Positioning: Experiment with the distance and angle of the microphone to achieve the desired sound. Move the microphone closer or farther away from your mouth or instrument until you find the sweet spot with optimal audio quality. Angling the microphone slightly can also help reduce plosive sounds and improve clarity.
Remember, every USB microphone is unique, and the settings that work well for one microphone may not be ideal for another. Take the time to explore and experiment with different settings to find the perfect balance that suits your voice and recording environment.
With the microphone settings adjusted to your liking, you’re now ready to start recording your voice for your YouTube videos. In the next section, we’ll discuss proper microphone positioning to further enhance your audio recordings.
Positioning the Microphone
Proper microphone positioning plays a crucial role in capturing clear and high-quality audio. By positioning your USB microphone correctly, you can optimize sound capture and reduce unwanted noises or distortions. Here are some tips to help you position your microphone effectively:
- Distance from the sound source: The ideal distance between your microphone and sound source may vary depending on the microphone and the sound you’re recording. As a general rule, position the microphone about 6-12 inches away from your mouth or instrument. However, don’t be afraid to experiment and adjust the distance to achieve the desired sound.
- Microphone angle: Angle the microphone slightly downwards towards your mouth or targeted sound source. This helps to capture the sound accurately and minimizes any unwanted background noise. Avoid speaking or singing directly into the top or sides of the microphone, as this can cause distortion or capture excessive breath sounds.
- Microphone placement: If you’re using a desk stand or a microphone arm, position the microphone at a height that aligns with your mouth or instrument. This allows for a more natural sound capture and reduces the chances of picking up unintended noises from the surrounding environment.
- Isolation and reflection: Pay attention to the placement of the microphone to minimize unwanted sounds and reflections. Avoid placing the microphone too close to walls or reflective surfaces, which can cause echoes or reverberations. If possible, utilize acoustic panels or blankets to create a more controlled recording environment.
- Wind noise prevention: If you’re recording outdoors or in a windy environment, consider using a windscreen or pop filter. These accessories help to reduce wind noise and plosive sounds caused by strong air movements, resulting in cleaner recordings.
Experimenting with microphone positioning is key to finding the optimal setup for your specific needs and the characteristics of your voice or instrument. Take the time to test different positions, listen to the recordings, and make adjustments as necessary. Remember, each microphone and recording environment may require slight variations in placement to achieve the best audio quality.
Now that your USB microphone is properly positioned, you’re ready to start recording your voice or instrument for your YouTube videos. In the next section, we’ll dive into the process of recording your audio and explore techniques to ensure a professional and captivating performance.
Recording Your Voice
Recording your voice with a USB microphone is an essential step in creating high-quality YouTube videos. Here are some tips to help you achieve the best results when recording your voice:
- Prepare your recording environment: Choose a quiet and controlled environment for recording to minimize background noise and distractions. Find a space with good acoustics and consider using acoustic treatment to reduce echo or reverberation.
- Warm-up your voice: Prior to recording, it’s beneficial to warm up your voice with breathing exercises, vocal stretches, and tongue twisters. This helps to improve vocal clarity, range, and control.
- Proper microphone technique: Position yourself in front of the microphone as directed during the setup process. Maintain a consistent distance and angle to ensure a consistent sound throughout your recording.
- Speak clearly and enunciate: Articulate your words clearly, enunciate consonants and vowels, and deliver your lines with passion and energy. This ensures that your audience can understand your message clearly and engages with your content.
- Control breathing and pacing: Pay attention to your breathing and avoid inhaling or exhaling directly into the microphone, as this can create unwanted noise. Additionally, maintain a steady pace when speaking to create a smooth and natural flow in your recordings.
- Monitor your audio levels: Keep an eye on the levels while recording. Aim for a balanced and consistent audio level, avoiding any clipping or distortion that may occur if the volume is too high.
- Take breaks and re-record when necessary: If you make a mistake or feel the need to redo a section, don’t hesitate to pause, take a breath, and start over. Recording in small sections allows you to maintain a high level of quality and coherence in your final audio.
- Experiment with vocal expression: Vary your vocal tone, pitch, and volume to add interest and emotion to your recordings. This helps to captivate your audience and convey your message more effectively.
It’s essential to listen back to your recordings and make any necessary adjustments or edits. Remove any unwanted background noise, coughs, or long pauses to create a polished and professional final product. Remember, practice makes perfect, so don’t be discouraged if it takes some time to reach the level of performance you desire.
With these tips in mind, you’re well on your way to recording high-quality voiceovers for your YouTube videos. In the next section, we’ll explore how to use multiple USB microphones for different scenarios or recording setups.
Recording With Multiple USB Microphones
If you’re looking to take your audio recordings to the next level or capture multiple sound sources simultaneously, using multiple USB microphones can be a great option. Whether you’re conducting interviews, recording a podcast with multiple hosts, or capturing various instruments, here are some tips for recording with multiple USB microphones:
- Choose the right microphones: Ensure that each USB microphone you select matches the sound source it will be capturing. Opt for microphones with different directional patterns to capture sounds from different angles and positions.
- Use a USB hub or compatible audio interface: Since most computers have a limited number of USB ports, a USB hub or audio interface with multiple USB inputs can provide the required connectivity for multiple microphones.
- Assign each microphone to a separate track: When recording with multiple USB microphones, it’s essential to assign each microphone to a separate track in your recording software. This allows you to have individual control over each microphone’s volume, EQ, and other adjustments during the editing process.
- Position the microphones strategically: Experiment with the placement of each microphone to ensure optimal sound capture. Consider the sound sources’ positioning, the microphone’s pickup pattern, and the desired balance between them.
- Synchronize the recordings: Make sure all the microphones are synchronized before recording. Start a countdown or clap your hands once to create a sharp audio spike that can be used to align the audio tracks during editing.
- Mixing the recordings: During the editing process, adjust the volume levels of each microphone to create a balanced mix. You may also need to apply EQ, compression, or other audio effects to enhance the overall sound quality.
- Monitor the recordings: Use headphones to monitor the recordings in real-time. This allows you to detect any issues or imbalances and make necessary adjustments on the spot.
Recording with multiple USB microphones brings a new level of depth and clarity to your audio recordings. It allows for greater control and versatility in capturing multiple voices or instruments simultaneously. However, it’s important to note that the performance of your computer and recording software must be capable of handling multiple audio tracks simultaneously.
With these tips in mind, you can confidently explore the world of recording with multiple USB microphones and create captivating and professional-sounding content for your YouTube videos.
In the next section, we’ll dive into the post-production phase and explore techniques for editing and enhancing your audio recordings.
Editing and Enhancing the Audio
Editing and enhancing the audio is a crucial step in the post-production process that can elevate the quality of your recordings. Whether you’re adjusting volume levels, removing background noise, or adding effects, here are some techniques for editing and enhancing your audio recordings:
- Trimming and cutting: Start by trimming any unwanted sections or long pauses in your recordings. Cut out any mistakes, awkward pauses, or irrelevant content to create a more concise and engaging final product.
- Adjusting volume levels: During the editing process, make sure the volume levels of your audio tracks are balanced and consistent. Raise or lower the volume as needed to ensure all voices and instruments are audible and well blended.
- Removing background noise: If you have recorded in a less-than-ideal environment, or if there is unwanted background noise present, you can use noise reduction tools or plugins to reduce or eliminate these distractions from your recordings.
- Applying EQ and compression: Enhance the overall sound quality of your recordings by using equalization (EQ) to adjust frequencies and compression to even out dynamic ranges. This can help bring clarity and balance to your audio, making it more pleasing to the listener’s ear.
- Adding effects: Experiment with adding effects such as reverb, delay, or chorus to enhance the depth or ambience of your recordings. However, use these effects sparingly and only when they enhance the overall listening experience.
- Layering multiple tracks: If you have recorded with multiple USB microphones or have multiple audio sources, layering the tracks together can create a richer and more dynamic sound. Ensure that each track is properly aligned and mixed for a cohesive final result.
- Equalizing individual tracks: If you have multiple voices or instruments recorded on separate tracks, you can use individual EQ adjustments to make each element stand out or blend harmoniously within the mix.
- Mastering the final mix: Before exporting your audio, consider mastering practices such as applying a gentle limiter or maximizing the overall volume to ensure the final audio is balanced and consistent across different playback systems.
It’s essential to approach audio editing with a critical ear and make decisions that enhance the listening experience while staying true to the original intention of the recordings. Take breaks during the editing process and listen to your work with fresh ears to ensure you achieve the desired result.
Once you’ve completed these editing and enhancement techniques, you’re ready to export your audio and integrate it into your YouTube videos. The combination of well-recorded audio and carefully edited sound can greatly enhance the overall quality of your content.
In the final section, we’ll provide some additional tips for using a USB microphone effectively to help you optimize your recordings.
Tips for Using a USB Microphone
To get the most out of your USB microphone and ensure professional-quality audio recordings, here are some additional tips to keep in mind:
- Use a pop filter: A pop filter helps reduce plosive sounds and excessive breath noise when recording vocals. It is a simple yet effective accessory that can greatly improve the clarity of your recordings.
- Practice proper microphone technique: Maintain a consistent distance and angle from the microphone, and speak or sing directly into it. This helps ensure optimal sound capture and minimizes unwanted noise or distortion.
- Invest in a microphone stand or shock mount: Using a microphone stand or shock mount helps stabilize the microphone and reduces handling noise and vibrations. This is particularly important if you’re recording while sitting or moving around.
- Consider room acoustics: If you’re recording in a room with poor acoustics, such as excessive echo or reverb, you can improve the sound quality by using soundproofing techniques or adding acoustic panels to minimize audio reflections.
- Monitor your audio levels: Keep an eye on the recording levels to avoid distortion or clipping. Adjust your microphone’s gain or input volume to ensure the audio signal is strong without overloading the microphone.
- Create a consistent recording environment: If possible, designate a specific area or room for your recordings. This allows you to set up consistent acoustic conditions and minimizes the need for adjustments each time you record.
- Invest in quality headphones: Using high-quality headphones allows you to monitor and fine-tune your recordings accurately. It helps you catch any issues or unwanted noise during the recording process.
- Experiment with post-processing: Don’t be afraid to explore post-processing techniques such as EQ, compression, and other effects to enhance your recordings during the editing phase. However, remember to use them subtly and with purpose.
- Regularly clean your microphone: Dust and debris can accumulate on your microphone over time, affecting its performance. Use a soft brush or cloth to clean the microphone’s exterior and grille regularly.
- Stay up to date: Check for firmware or software updates for your USB microphone regularly. These updates often bring performance improvements or new features that can enhance your recording experience.
By following these tips, you can maximize your USB microphone’s potential and produce professional-quality audio recordings for your YouTube videos. Remember that practice and experimentation are key to finding the best techniques and settings that work for you and your unique recording setup.
Now armed with these tips and techniques, you’re well-equipped to create exceptional audio content that enhances the overall quality and impact of your YouTube videos.
Conclusion
Using a USB microphone for your YouTube videos can make a significant difference in the audio quality and overall production value of your content. By following the steps outlined in this article, from choosing the right microphone to recording, editing, and enhancing your audio, you can create engaging and professional-sounding videos.
Remember to choose a USB microphone that best suits your needs and budget, considering factors such as audio quality, directionality, connectivity, and features. Proper positioning and adjustment of microphone settings are vital to capturing clear and high-quality audio. Whether you’re recording your voice or using multiple USB microphones for various sources, paying attention to technique and post-processing can elevate your recordings further.
Throughout the entire process, it’s essential to monitor your audio levels, experiment with different techniques, and continuously strive for improvement. Regularly updating your microphone’s firmware and keeping your recording environment clean and optimized will further enhance your audio recording experience.
With practice, patience, and attention to detail, you can harness the power of your USB microphone to create captivating and professional content that leaves a lasting impression on your YouTube audience.
So, go ahead and embark on your audio recording journey with confidence, and take your YouTube videos to new heights with the incredible sound quality that a USB microphone provides!