Introduction
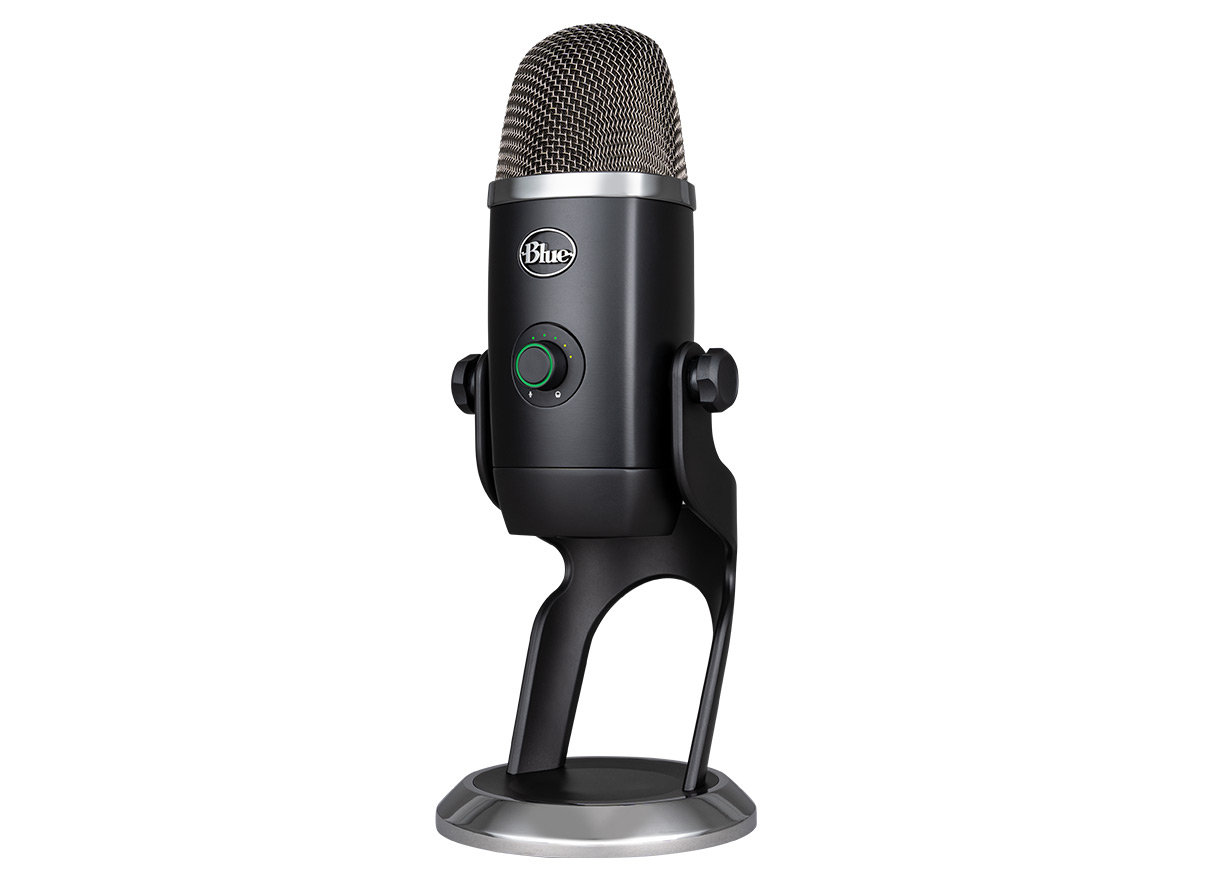
USB microphones have become increasingly popular for recording audio in various settings, such as podcasting, streaming, voiceovers, and video conferencing. They provide convenience and ease of use, allowing users to plug directly into their computer’s USB port and start recording. However, one common issue that users may encounter with USB microphones is power feedback.
Power feedback occurs when an electrical loop is formed between the USB microphone and the computer, resulting in a buzzing or humming noise in the audio recording. This issue can be frustrating and negatively impact the overall audio quality. Therefore, it is crucial to understand the causes of power feedback and how to stop it.
Throughout this article, we will delve into the common causes of power feedback in USB microphones and explore various solutions to eliminate this unwanted noise. By implementing these solutions, you can ensure clear and professional audio recordings without any annoying buzzing or humming sounds. So, let’s dive in.
Understanding Power Feedback in USB Microphones
Power feedback in USB microphones refers to the occurrence of unwanted noise, such as buzzing or humming, that is generated when the microphone’s electrical circuit becomes entangled with the computer’s power system. This interference can distort the audio signal and compromise the quality of the recording.
The phenomenon of power feedback is primarily caused by a ground loop, which occurs when there are multiple paths for electrical current to flow between the USB microphone and the computer. This can create a loop where the microphone’s signal is inadvertently picked up and amplified by the computer’s power system, resulting in the undesirable noise.
USB microphones are particularly prone to power feedback due to their direct connection to the computer’s USB port. Unlike analog microphones that require external interfaces or preamps, USB microphones draw power directly from the computer, increasing the likelihood of electrical interference.
Additionally, the grounding design of the computer can contribute to power feedback. If the computer’s grounding is not properly isolated, it can create a voltage difference between the USB microphone and other devices connected to the computer. This voltage difference can manifest as the buzzing or humming noise in the audio recordings.
It is important to note that power feedback in USB microphones can be exacerbated by other factors, such as electrical noise from nearby devices, electromagnetic interference, or outdated USB drivers. Understanding these contributing factors will help in implementing effective solutions to stop power feedback and improve the overall audio quality.
Common Causes of Power Feedback
Several factors can contribute to the occurrence of power feedback in USB microphones. Understanding these common causes is essential in troubleshooting and implementing effective solutions. Let’s explore them:
- Grounding Issues: Improper grounding or multiple grounding paths can create a ground loop, resulting in power feedback. This can happen when the USB microphone, computer, and other devices connected to the computer have different ground potentials. The voltage difference between these components can lead to unwanted noise in the audio recording.
- Electrical Interference: Electrical noise from nearby devices, such as power outlets, fluorescent lights, or other electronic equipment, can introduce interference into the USB microphone’s signal. This interference can be picked up and amplified, leading to buzzing or humming sounds in the recording.
- Electromagnetic Interference (EMI): External electromagnetic fields, such as those emitted by cell phones, radios, or Wi-Fi routers, can disrupt the USB microphone’s signal and contribute to power feedback. As USB microphones are typically sensitive to electromagnetic interference, it is crucial to minimize their exposure to such sources.
- Outdated or Incompatible USB Drivers: USB drivers play a crucial role in the proper functioning of USB microphones. Outdated or incompatible drivers can lead to compatibility issues, signal degradation, and even power feedback. It is recommended to regularly update the USB drivers to ensure optimal performance.
Identification of these common causes will help in taking targeted actions to eliminate power feedback in USB microphones. By addressing these underlying issues, users can improve the audio quality and achieve clean and professional recordings.
Solutions to Stop Power Feedback in USB Microphones
Dealing with power feedback in USB microphones requires implementing effective solutions that address the underlying causes. Here are some solutions to help you eliminate power feedback and improve the audio quality:
- Use a Ground Loop Isolator: A ground loop isolator is a device that breaks the ground loop and prevents electrical interference. It is connected in-line between the USB microphone and the computer. The isolator effectively blocks the unwanted noise caused by power feedback, resulting in cleaner audio recordings.
- Use a USB Isolator: Similar to a ground loop isolator, a USB isolator is a device that separates the USB microphone from the computer’s power system. It effectively removes the electrical connectivity between the two, eliminating the potential for power feedback. USB isolators also provide additional protection against electrical noise and interference.
- Check for Interference Sources: Identify and eliminate potential sources of electrical or electromagnetic interference. Move the USB microphone away from power outlets, fluorescent lights, and other electronic devices. Keeping a distance between the microphone and these sources can greatly reduce the chances of power feedback.
- Move Away from Electrical Sources: Ensure the USB microphone is not placed near power cables or other electrical sources. These can induce electrical noise and interfere with the microphone’s signal. By keeping a physical distance from such sources, you can minimize the risk of power feedback and achieve cleaner audio recordings.
- Use Shielded USB Cables: Shielded USB cables have an added layer of insulation that helps protect against electrical noise and interference. Replace the standard USB cable that came with the microphone with a shielded one to reduce the chances of power feedback.
- Update or Change USB Drivers: Check for any available updates for the USB drivers and install them. Outdated or incompatible drivers can cause signal degradation and power feedback. If updating the drivers doesn’t resolve the issue, consider reinstalling or changing the USB drivers to ensure compatibility and optimal performance.
- Adjust Microphone Gain Settings: Experiment with the microphone gain settings on your computer to find the optimal level. Sometimes, excessive gain can amplify background noise and contribute to power feedback. Adjust the gain to a suitable level that enhances the audio quality without introducing unwanted noise.
By implementing these solutions, you can effectively stop power feedback in USB microphones and achieve clean, high-quality audio recordings. Experiment with different solutions to find the combination that works best for your specific setup and environment.
Use a Ground Loop Isolator
One effective solution to stop power feedback in USB microphones is to use a ground loop isolator. This device acts as a barrier between the USB microphone and the computer’s power system, preventing the formation of a ground loop and the resulting interference.
A ground loop isolator is easily installed by connecting it in-line between the USB microphone and the computer. It effectively breaks the electrical loop and blocks any unwanted noise caused by power feedback. By isolating the microphone’s signal from the computer’s power system, the ground loop isolator ensures clean and interference-free audio recordings.
Ground loop isolators come in various forms, including small inline adapters and dedicated audio interfaces with built-in isolation capabilities. They typically feature audio connectors (such as RCA or 3.5mm) on both ends and are easy to connect without requiring any special technical knowledge.
When using a ground loop isolator, it is important to ensure that it is compatible with your USB microphone and computer system. Check the specifications and reviews before making a purchase to ensure the isolator meets your requirements and is known for its effectiveness in eliminating power feedback.
While a ground loop isolator is an effective solution, it is important to note that it might not solve all cases of power feedback. In some instances, there may be multiple sources of interference or other underlying issues contributing to the unwanted noise. Therefore, it’s recommended to explore other solutions in combination with a ground loop isolator to achieve the best possible results.
By using a ground loop isolator, you can effectively break the electrical loop and eliminate power feedback, resulting in improved audio quality for your USB microphone recordings. It provides a convenient and affordable solution for those seeking to resolve this common issue without making significant changes to their setup or investing in more complex equipment.
Use a USB Isolator
Another effective solution to prevent power feedback in USB microphones is to use a USB isolator. A USB isolator is a device that separates the USB microphone from the computer’s power system, eliminating the possibility of electrical interference and power feedback.
The USB isolator acts as a barrier between the USB microphone and the computer by breaking the electrical connection between the two. It achieves this by using optical or magnetic isolation techniques to transmit data signals while blocking the flow of electrical current.
To use a USB isolator, simply connect it in-line between the USB microphone and the computer. It creates a physical and electrical separation, preventing any potential ground loops and interference from affecting the audio signal. This separation ensures a clean and undistorted audio recording without any buzzing or humming sounds caused by power feedback.
USB isolators come in various form factors, from compact portable devices to larger interface units with additional features. They are generally easy to use and require no additional setup or configuration. It’s important to choose a USB isolator that is compatible with your USB microphone and computer system to ensure optimal performance.
Using a USB isolator provides a comprehensive solution to prevent power feedback in USB microphones. It not only isolates the audio signal but also offers protection against electrical noise and interference from other devices. This makes it an ideal choice for users who work in environments with high electromagnetic interference or have multiple electrical devices connected to their computer.
However, it is important to note that a USB isolator may not be necessary for all setups. If you have already addressed the grounding issues or eliminated potential sources of interference, you may not require a USB isolator. It’s essential to assess your specific situation and determine whether a USB isolator is the right solution for you.
By using a USB isolator, you can effectively isolate the USB microphone from the computer’s power system, preventing power feedback and ensuring clean audio recordings. It provides an additional layer of protection and peace of mind, ensuring that your recordings are free from unwanted noise and interference.
Check for Interference Sources
When dealing with power feedback in USB microphones, it is crucial to identify and address potential sources of interference. Electrical or electromagnetic interference can disrupt the audio signal and contribute to the unwanted buzzing or humming sounds. By checking for interference sources, you can take steps to minimize their impact and improve the overall audio quality.
Start by examining the environment in which you are recording. Look for nearby power outlets, fluorescent lights, or other electronic devices that could generate electrical noise or electromagnetic fields. These sources can introduce interference into the USB microphone’s signal, resulting in power feedback.
Once you have identified the potential interference sources, consider the following steps:
- Move the USB microphone away from power outlets: Power outlets can emit electrical noise, especially if they are outdated or poorly grounded. Keep your USB microphone as far away from power outlets as possible to minimize the risk of interference.
- Position the USB microphone away from fluorescent lights: Fluorescent lights can introduce electromagnetic interference that can affect the USB microphone’s signal. Ensure that the microphone is not positioned too close to these lights and consider using alternative lighting sources, such as LED lights, which generate less interference.
- Turn off or move electronic devices: Other electronic devices, such as radios, speakers, or Wi-Fi routers, can also produce electromagnetic interference. Turn off or move these devices away from the USB microphone to minimize their impact on the audio signal.
- Use magnetic shielding: In some cases, you may need to use magnetic shielding to protect the USB microphone from external electromagnetic interference. Magnetic shielding materials, such as mu-metal or ferrite beads, can help block or absorb electromagnetic fields that could interfere with the microphone’s signal.
By taking these steps to check for interference sources and minimize their impact, you can significantly reduce the likelihood of power feedback in USB microphones. It is important to note that eliminating all interference sources may not always be possible, especially in certain environments or setups. In such cases, combining other solutions, such as ground loop isolators or USB isolators, can provide additional protection against power feedback.
Remember to periodically reassess your recording environment and make necessary adjustments to maintain optimal audio quality. By staying vigilant and proactive in identifying and addressing interference sources, you can ensure clean and professional recordings with your USB microphone.
Move Away from Electrical Sources
When dealing with power feedback in USB microphones, one simple yet effective solution is to move the microphone away from electrical sources. Electrical devices and cables can emit electromagnetic fields and electrical noise, which can interfere with the USB microphone’s signal and result in unwanted buzzing or humming sounds.
Here are some steps you can take to move away from electrical sources:
- Keep distance from power cables: Power cables, especially unshielded ones, can radiate electrical noise that interferes with the USB microphone. Ensure your microphone is positioned a sufficient distance away from power cables to minimize the risk of interference.
- Avoid crossing cables: If possible, avoid crossing USB cables with power cables or other electrical cables. When cables cross each other, they can create electromagnetic interference that can affect the USB microphone’s signal. Keep cable routing organized and separate USB cables from power cables.
- Separate from electrical devices: Other electrical devices, such as monitors, speakers, or chargers, can generate electrical noise or electromagnetic fields that could interfere with the USB microphone. Keep your microphone physically separated from these devices to minimize interference. If necessary, rearrange your desk or recording setup to create more distance between the microphone and these devices.
- Consider using shielded cables: To further protect against electrical interference, you can use shielded USB cables. These cables have an additional layer of shielding that helps block out external interference sources. By using shielded cables, you can reduce the chances of electrical noise affecting the USB microphone’s signal.
It’s important to note that moving away from electrical sources may not always be possible in certain environments or setups. In such cases, it’s recommended to utilize other solutions like ground loop isolators or USB isolators to further protect the USB microphone from power feedback.
By implementing these steps and moving the USB microphone away from electrical sources, you can significantly reduce the risk of power feedback and improve the overall audio quality. Regularly monitor your recording environment and make adjustments as needed to maintain optimal performance and minimize unwanted interference.
Use Shielded USB Cables
One effective solution to prevent power feedback in USB microphones is to use shielded USB cables. Shielded cables have an additional layer of insulation that helps protect against electrical noise and interference, reducing the chances of power feedback and ensuring cleaner audio recordings.
The additional shielding in these cables acts as a barrier, preventing external electrical interference from reaching the USB microphone’s signal. This shielding can effectively block out electromagnetic interference from nearby electronic devices, power cables, or other sources of electrical noise in the recording environment.
When choosing a shielded USB cable, it’s important to ensure compatibility with your USB microphone and the necessary connectors (e.g., USB Type-A, USB Type-B, or USB-C). Look for cables specifically designed for audio use or those labeled as “shielded” or “EMI/RFI protected.”
Replacing the standard USB cable that came with your microphone with a shielded USB cable is a straightforward process. Simply unplug the existing cable and connect the shielded cable between the USB microphone and your computer or audio interface. The additional shielding will provide better protection against electrical interference, reducing the risk of power feedback.
In some cases, you may also need to consider the length of the cable. Longer USB cables can potentially introduce more interference and signal loss. Therefore, it’s advisable to use the shortest shielded USB cable that is practical for your setup, while still allowing for flexibility and ease of use.
Using shielded USB cables is a cost-effective solution that can significantly improve the audio quality of your USB microphone recordings. It provides an extra layer of protection against electrical interference, ensuring that your recordings are free from buzzing or humming noises caused by power feedback.
However, it’s important to note that while shielded USB cables can help reduce interference, they may not completely eliminate all instances of power feedback. It’s essential to combine this solution with other troubleshooting techniques, such as addressing grounding issues or using ground loop isolators, for a comprehensive approach to resolving power feedback in USB microphones.
By using shielded USB cables, you can enhance the overall performance of your USB microphone and achieve clean and professional audio recordings. Ensure that you select high-quality cables from trusted manufacturers to maximize the effectiveness of this solution.
Update or Change USB Drivers
Updating or changing the USB drivers for your USB microphone can be an effective solution to address power feedback issues. Outdated or incompatible USB drivers can cause signal degradation and even contribute to power feedback. By ensuring that your USB drivers are up to date and compatible with your operating system, you can optimize the performance of your USB microphone and reduce the risk of power feedback.
Here are the steps you can follow to update or change your USB drivers:
- Check for updates: Visit the manufacturer’s website of your USB microphone or the computer manufacturer’s support page. Look for any available driver updates specifically related to USB audio or your specific model of USB microphone.
- Download and install: If an update is available, download the latest version of the USB driver and follow the manufacturer’s instructions to install it. It’s recommended to close any recording or audio-related programs running in the background before installing the driver.
- Restart your computer: After installing the updated driver, restart your computer to ensure that the changes take effect. This will help refresh the system and ensure that the new driver is properly recognized.
- Test the USB microphone: Once your computer has restarted, test your USB microphone to see if the power feedback issue has been resolved. Record audio or engage in a voice check to determine whether the buzzing or humming sound has disappeared or been significantly reduced.
- Consider changing USB ports: If updating the USB drivers does not resolve the power feedback issue, try plugging your USB microphone into a different USB port on your computer. Sometimes, specific USB ports may have better compatibility or provide a more stable power supply, which can help eliminate power feedback.
- Try a different computer: If updating the USB drivers and changing USB ports does not address the power feedback problem, try connecting your USB microphone to a different computer. This will help determine if the issue is specific to your current computer setup or if it persists across different systems.
If updating or changing the USB drivers does not resolve the power feedback issue, it may be necessary to contact the manufacturer’s support for further assistance. They can provide guidance and troubleshoot the problem, or recommend any specific settings or updates that are specific to your USB microphone model.
By ensuring that your USB drivers are up to date and compatible, you can maximize the performance of your USB microphone and minimize the risk of power feedback. Regularly checking for updates and keeping your drivers current is good practice to ensure optimal functionality and audio quality.
Adjust Microphone Gain Settings
Another solution to consider when experiencing power feedback in USB microphones is to adjust the microphone gain settings. The gain setting determines the sensitivity of the microphone, and improper settings can amplify background noise and contribute to power feedback.
Here are the steps to adjust the microphone gain settings:
- Access your computer’s audio settings: Open the sound settings on your computer. This can typically be done by right-clicking on the speaker icon in the taskbar and selecting “Open Sound Settings” or something similar.
- Navigate to the microphone settings: Once in the sound settings, locate the microphone settings. This may be under the “Recording” tab or a similar section, depending on your operating system.
- Adjust the microphone gain: Look for the microphone gain or volume slider. Experiment with different gain levels to find the optimal setting. Lower the gain if you hear excessive background noise or buzzing sounds. Increase it if your recordings sound too faint or have poor signal levels.
- Test and fine-tune: After adjusting the gain, test your USB microphone by recording audio or engaging in a voice check. Listen to the playback or use audio monitoring to check for any remaining power feedback. Fine-tune the gain settings as needed until you achieve clean and clear audio recordings without any unwanted noise.
It’s important to strike a balance with the gain settings. Setting it too high can amplify background noise, including any electrical interference that may cause power feedback. Conversely, setting it too low may result in recordings that are too soft and require excessive post-processing to bring up the volume.
Additionally, consider using a pop filter or windscreen when adjusting gain settings. These accessories can help reduce plosive sounds and wind noise, which can often be accentuated by higher gain levels.
By properly adjusting the microphone gain settings, you can achieve optimal audio quality and minimize the risk of power feedback. Take the time to experiment with different gain levels and regularly monitor your recordings to ensure that the gain is appropriately set for your recording environment and desired audio quality.
If adjusting the gain settings does not completely eliminate power feedback, it may be necessary to combine this solution with other techniques mentioned earlier, such as using ground loop isolators or moving away from electrical sources.
Remember that different USB microphones and recording setups may have unique gain settings, so it’s essential to fine-tune your settings accordingly. Regularly revisit and make adjustments as needed based on your specific recording environment and requirements.
Conclusion
Power feedback in USB microphones can be a frustrating issue that compromises the audio quality of your recordings. However, by understanding the causes and implementing the right solutions, you can effectively stop power feedback and achieve clean and professional audio recordings.
Throughout this article, we explored various solutions to prevent power feedback in USB microphones. We discussed the importance of using ground loop isolators and USB isolators to break the electrical loops and isolate the microphone’s signal from the computer’s power system. We also emphasized the significance of checking for interference sources, moving away from electrical sources, using shielded USB cables, and adjusting microphone gain settings.
It’s important to remember that power feedback can be caused by a combination of factors. Therefore, it may be necessary to employ multiple solutions simultaneously, especially in complex recording environments. By implementing these solutions and tailoring them to your specific setup and requirements, you can significantly minimize or eliminate power feedback and produce high-quality audio recordings.
Regularly reassessing your recording environment, staying vigilant for potential sources of interference, and keeping your equipment and drivers up to date are key practices to maintain optimal performance and audio quality in the long term.
In summary, dealing with power feedback in USB microphones requires a combination of troubleshooting techniques. Take the time to experiment with different solutions, test your audio recordings, and make adjustments as needed until you achieve the desired results.
By implementing the solutions discussed in this article, you can overcome power feedback challenges, ensuring that your USB microphone delivers clear, pristine audio recordings for your podcasts, streaming, voiceovers, and other audio projects.