Introduction
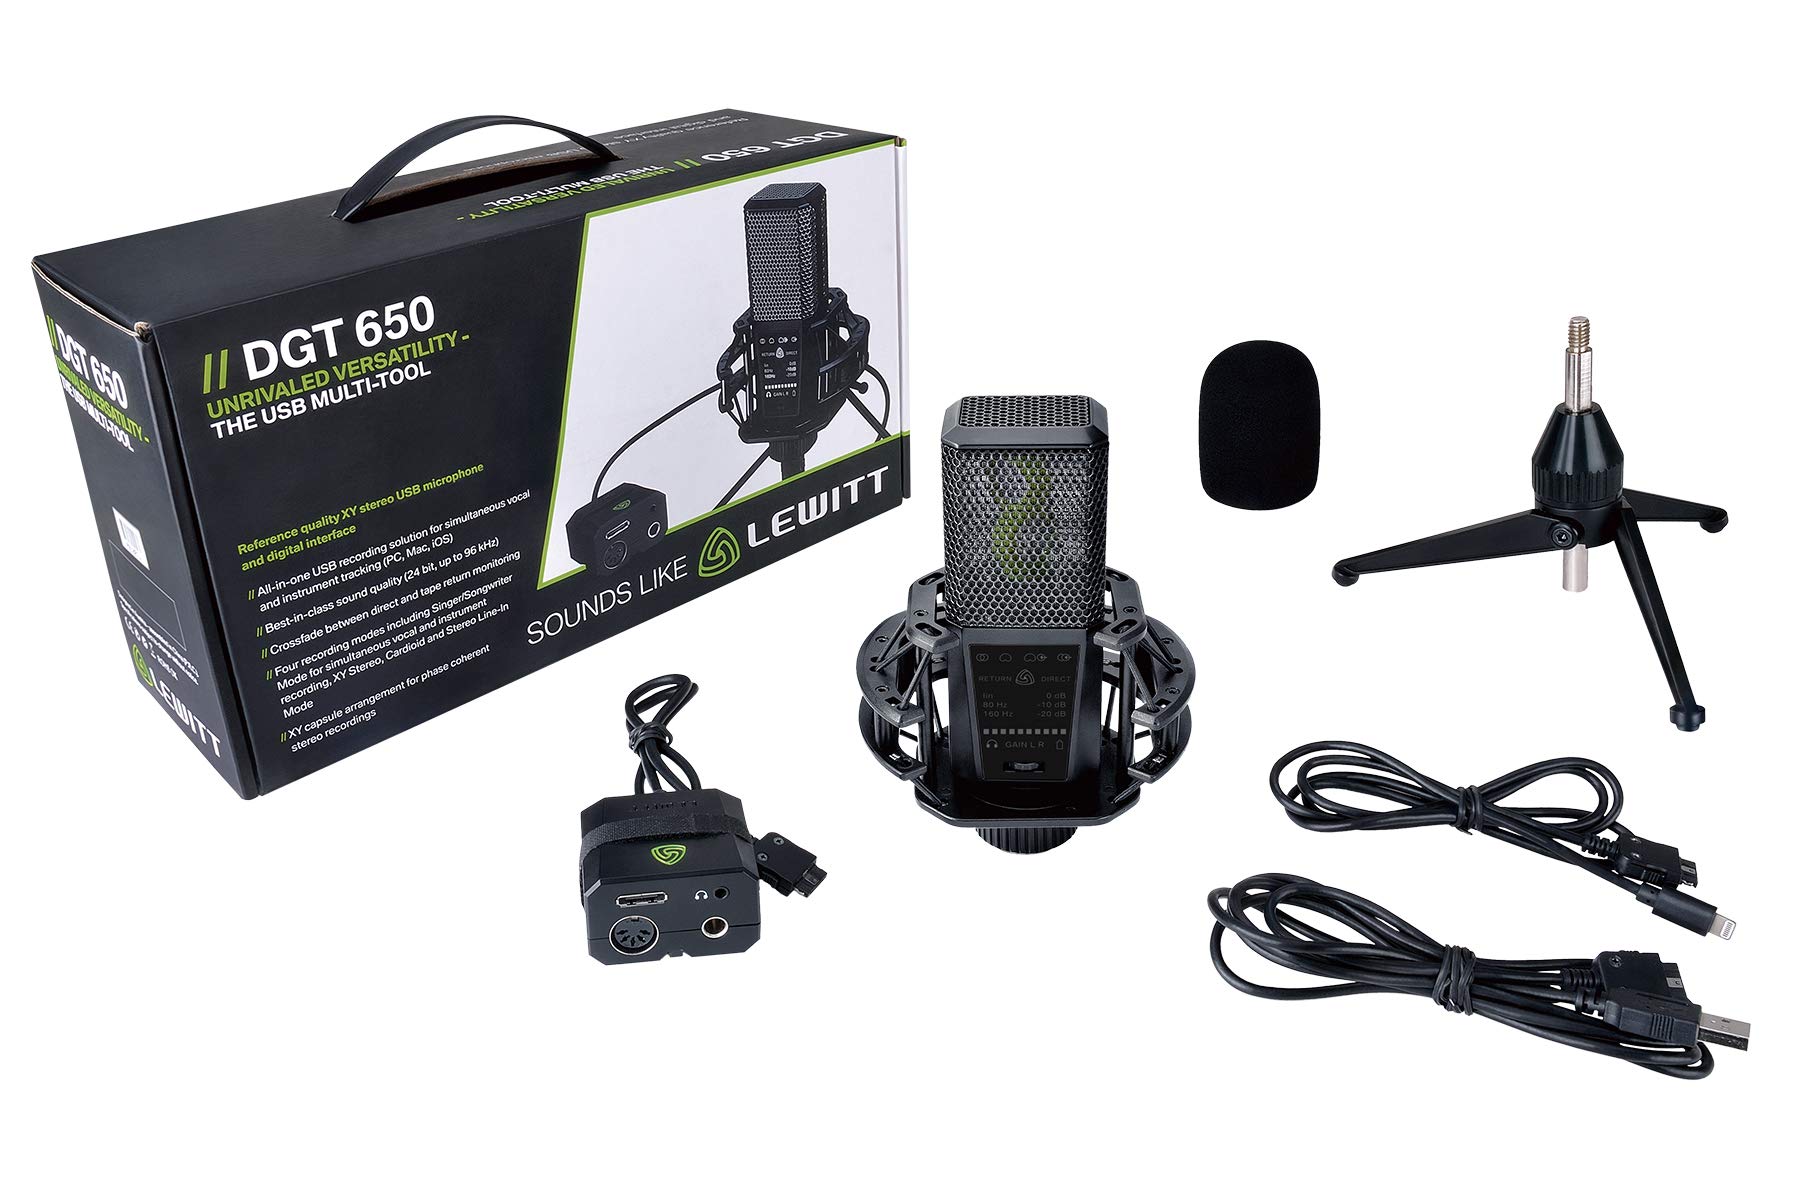
Welcome to the world of professional audio recording! The Lewitt DGT 650 USB microphone is an excellent choice for anyone looking to elevate their sound quality. Whether you’re a podcaster, musician, voice-over artist, or simply someone who wants to enhance their audio communication, this microphone provides exceptional performance and versatility.
In this guide, we’ll walk you through the process of connecting your Lewitt DGT 650 USB microphone to your computer. We’ll cover everything from ensuring compatibility to troubleshooting common issues. By the end, you’ll have a crystal-clear understanding of how to make the most of this powerful microphone.
Before we begin, it’s important to note that the Lewitt DGT 650 USB microphone is compatible with both PC and Mac systems. This means that regardless of your preferred operating system, you can take advantage of its incredible features and capabilities.
Now, let’s dive into the step-by-step process of connecting the Lewitt DGT 650 USB microphone to your computer and unleashing its full potential!
Step 1: Ensure Compatibility and Gather Necessary Equipment
Before you begin setting up your Lewitt DGT 650 USB microphone, it’s essential to ensure that your computer meets the necessary requirements for compatibility. The microphone is compatible with both PC and Mac systems, but it’s important to check if your operating system is supported.
First, verify that your computer meets the minimum system requirements. The Lewitt DGT 650 USB microphone requires a computer with at least 1GB of RAM and a USB 2.0 or higher port. Make sure your computer meets these specifications to ensure optimal performance.
Next, gather all the necessary equipment for the setup process. Along with your Lewitt DGT 650 USB microphone, you will need a USB cable that is compatible with the microphone and your computer. Ensure that you have a high-quality USB cable that will provide a stable connection for seamless audio recording.
In addition to the microphone and USB cable, you may also want to consider using a microphone stand or boom arm. These accessories can provide stability and flexibility during recording sessions, allowing you to position the microphone at the optimal distance and angle for capturing the best possible sound.
Finally, it’s a good idea to have headphones on hand for monitoring your audio. While the Lewitt DGT 650 USB microphone features a built-in headphone output, having a dedicated pair of headphones will give you a more accurate representation of your recording and allow you to make precise adjustments during the setup process.
With all the necessary equipment gathered, you’re ready to move on to the next step: connecting the microphone to your computer.
Step 2: Connect the Microphone to the Computer
Now that you have gathered all the necessary equipment, it’s time to connect your Lewitt DGT 650 USB microphone to your computer. Follow these steps to establish a seamless connection:
- Locate the USB port on your computer. This is where you will plug in the USB cable.
- Take one end of the USB cable and insert it into the USB port on your computer. Ensure that the connection is secure.
- Take the other end of the USB cable and connect it to the USB port on the bottom of the Lewitt DGT 650 USB microphone. The USB port is located on the side of the microphone and is labeled with the USB symbol.
- Once the USB cable is securely connected to both the microphone and the computer, you’re ready to power on the microphone. Locate the power button on the front of the microphone and press it to turn on the device.
- Upon powering on the microphone, your computer will recognize the device and may prompt you with a notification.
That’s it! You have successfully connected your Lewitt DGT 650 USB microphone to your computer. The next step is to adjust the microphone settings on your computer to ensure optimal audio recording.
Note: If your computer does not recognize the microphone, double-check the cable connections and try connecting to a different USB port. If the issue persists, consult the user manual or reach out to the Lewitt customer support team for assistance.
Step 3: Adjust Microphone Settings on Your Computer
Now that your Lewitt DGT 650 USB microphone is connected to your computer, it’s time to adjust the microphone settings to ensure optimal audio recording. Follow these steps to configure the microphone settings:
- Go to the system settings on your computer. On Windows, you can access this by clicking on the Start menu and selecting “Settings.” On Mac, go to the Apple menu and choose “System Preferences.”
- Within the system settings, locate and select the “Sound” or “Audio” option. This will bring up the audio settings menu.
- Under the input or recording tab, you should see the Lewitt DGT 650 USB microphone listed as an available input device. Select the microphone to set it as the default input device.
- Adjust the microphone volume or gain settings to your desired level. Start with a moderate setting and make adjustments as needed during your recording sessions.
- Explore additional settings such as sample rate and bit depth. The recommended settings for most recording purposes are a sample rate of 44.1kHz and a bit depth of 16 bits.
- If your computer offers advanced settings such as EQ (equalizer) or filters, you can experiment with these to further refine the sound quality. However, it’s important to keep in mind that the Lewitt DGT 650 USB microphone already delivers exceptional audio quality without the need for extensive adjustments.
Once you have made the necessary adjustments to the microphone settings, it’s a good idea to test the microphone to ensure it is working properly.
Note: The exact steps for adjusting microphone settings may vary depending on your operating system and version. If you encounter any difficulties or require further assistance, consult the operating system’s documentation or contact the Lewitt customer support team for guidance.
Step 4: Test the Microphone
After adjusting the microphone settings on your computer, it’s important to test the Lewitt DGT 650 USB microphone to ensure that it is functioning correctly. Follow these steps to perform a microphone test:
- Open your preferred audio recording software on your computer. This could be a dedicated digital audio workstation (DAW) or a simple voice recording application.
- Create a new audio recording session or open an existing one.
- Select the Lewitt DGT 650 USB microphone as the input device for the recording session.
- Click on the record button and speak into the microphone at a comfortable distance. You should see the audio levels on the recording software’s interface moving in response to your voice.
- Perform a short test recording and listen back to it. Pay attention to the clarity and quality of the audio. If you notice any issues or inconsistencies, go back to the microphone settings and adjust them accordingly.
- Continue testing the microphone by experimenting with different recording scenarios. This could include speaking at different volumes, testing with background noise, or even singing if you’re a musician. The goal is to ensure that the microphone captures your sound accurately in various situations.
By testing the microphone in different scenarios, you can become familiar with its capabilities and make any necessary adjustments to achieve the desired sound. It’s also a great opportunity to fine-tune your microphone technique and explore different recording techniques.
If you encounter any issues during the microphone test or if the audio quality doesn’t meet your expectations, refer to the troubleshooting section in the next step for common solutions.
Now that you have successfully tested the Lewitt DGT 650 USB microphone and confirmed its functionality, you’re well on your way to creating professional-grade audio recordings!
Step 5: Troubleshooting Common Issues
While the Lewitt DGT 650 USB microphone is designed to provide excellent performance, you may encounter some common issues during the setup or recording process. Here are a few troubleshooting tips to help you address these issues:
- No sound or low volume: If you’re not hearing any sound or experiencing low volume levels, check the microphone volume settings on your computer. Ensure that the volume is turned up and adjust it accordingly. You can also check the physical volume control on the microphone itself.
- Interference or noise: If you’re hearing unwanted noise or interference, try using the microphone with a different USB cable or connecting it to a different USB port on your computer. Sometimes, a faulty cable or a noisy USB port can cause interference.
- Driver issues: Occasionally, driver issues may arise. Make sure that you have the latest drivers installed for your operating system. Visit the manufacturer’s website to download and install any available driver updates for the Lewitt DGT 650 USB microphone.
- Compatibility problems: If you’re experiencing compatibility issues with your computer, ensure that your operating system meets the minimum requirements specified by the manufacturer. Additionally, check for any updates or patches for your operating system that may address compatibility issues.
- Physical damage or connectivity issues: Inspect the USB cable and the microphone itself for any signs of physical damage. Ensure that the USB cable is securely connected to both the microphone and the computer. If you suspect any connectivity issues, try using a different USB cable or contacting the manufacturer for further assistance.
If you have tried these troubleshooting tips and are still experiencing issues with your Lewitt DGT 650 USB microphone, it is recommended to refer to the user manual or reach out to the manufacturer’s customer support for further assistance. They will be able to provide detailed guidance based on your specific situation.
Remember, troubleshooting common issues is part of the journey of using any complex audio equipment, and with persistence and thorough troubleshooting, you can resolve most issues and continue enjoying the exceptional performance of your Lewitt DGT 650 USB microphone.
Conclusion
Congratulations! You have successfully connected and set up your Lewitt DGT 650 USB microphone with your computer. By following the steps outlined in this guide, you have ensured compatibility, connected the microphone, adjusted the settings, tested its functionality, and gained troubleshooting knowledge for common issues.
The Lewitt DGT 650 USB microphone is a powerful tool that can elevate the quality of your audio recordings, whether you’re a podcaster, musician, voice-over artist, or anyone seeking professional-grade sound. Its versatility, ease of use, and exceptional performance make it a popular choice among audio enthusiasts.
Remember to keep experimenting with the microphone to discover your optimal recording techniques and settings. Fine-tune the microphone positioning, explore different recording environments, and embrace the creative possibilities of your newfound tool.
If you encounter any difficulties or have specific questions about your Lewitt DGT 650 USB microphone, don’t hesitate to consult the user manual or reach out to the manufacturer’s customer support team. They are there to assist you in making the most of your microphone and ensuring a smooth recording experience.
Start exploring the endless possibilities that the Lewitt DGT 650 USB microphone offers and let your creativity flow. With this versatile microphone at your disposal, you’re well-equipped to create professional-quality audio recordings that captivate your audience.
Happy recording!