Introduction
Playing an electric guitar is not just about strumming the strings; it’s about the intricate details that make the music come alive. One crucial aspect of maintaining an electric guitar is dressing the frets. This process involves filing and polishing the frets to ensure a smooth and precise playing experience. Whether you are a seasoned guitarist or a beginner, understanding how to dress the frets on an electric guitar is essential for maintaining the instrument's playability and longevity.
Dressing the frets not only enhances the guitar’s performance but also improves the overall aesthetics. The smooth, gleaming frets not only make playing effortless but also add to the visual appeal of the instrument. By mastering the art of fret dressing, you can elevate your playing experience and ensure that your electric guitar remains in top condition for years to come.
In this guide, we will walk you through the step-by-step process of dressing the frets on an electric guitar. From the tools and materials needed to the final touches, you will learn the techniques required to achieve professional results. Whether you prefer the warm tones of blues or the high-energy riffs of rock, dressing the frets will undoubtedly enhance your playing and keep your electric guitar in prime condition. So, let’s dive in and discover the art of dressing frets to unlock the full potential of your electric guitar.
Tools and Materials Needed
Before embarking on the fret dressing journey, it’s essential to gather the necessary tools and materials. Here’s what you’ll need:
- Fret File: A specialized file designed for fret work, featuring a safe edge to protect the fingerboard.
- Masking Tape: Used to protect the fingerboard from accidental scratches during the filing process.
- Steel Wool or Abrasive Pads: For polishing the frets to a smooth, gleaming finish.
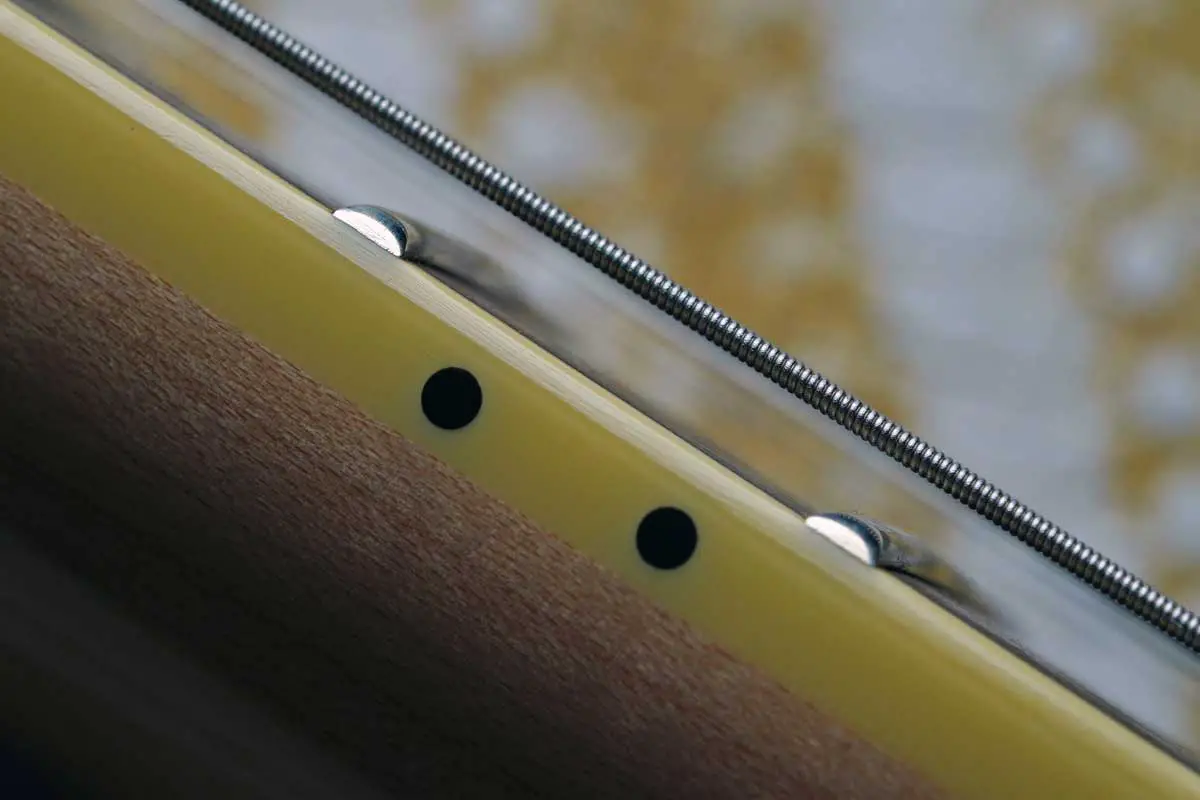
- Fret Rocker: A precision tool to detect uneven frets by rocking it across three frets at a time.
- Fret Crowning File: Used to reshape and round the frets after filing.
- Microfiber Cloth: For wiping down the frets and fingerboard after polishing.
- Mask: To protect yourself from inhaling metal dust during the filing and polishing process.
- String Winder: Useful for removing and restringing the guitar efficiently after fret dressing.
- Calipers: For measuring the fret height to ensure uniformity across the fingerboard.
- Leveling Beam: Used to ensure the frets are level across the fingerboard.
These tools and materials are essential for a successful fret dressing process, ensuring that you can achieve professional results while maintaining the integrity of your electric guitar. With the right equipment at your disposal, you’ll be well-prepared to tackle the task of dressing the frets with confidence and precision.
Preparation
Before diving into the fret dressing process, it’s crucial to prepare the guitar and the workspace to ensure a smooth and efficient workflow. Here are the essential steps for preparation:
1. Detune the Guitar: Start by loosening the strings to reduce tension on the neck, making it easier to work on the frets without risking damage to the instrument.
2. Clean the Fingerboard: Use a soft, lint-free cloth to remove any dirt, grime, or residue from the fingerboard. This step ensures that the frets are exposed and ready for the dressing process.
3. Mask the Fingerboard: Apply masking tape along the edges of the fingerboard to protect it from accidental scratches or nicks during the filing and polishing stages. This precaution helps maintain the pristine condition of the fingerboard.
4. Inspect the Frets: Use a fret rocker to check for any unevenness or protruding frets. This step is crucial for identifying areas that require filing and ensures a consistent playing surface across the entire fingerboard.
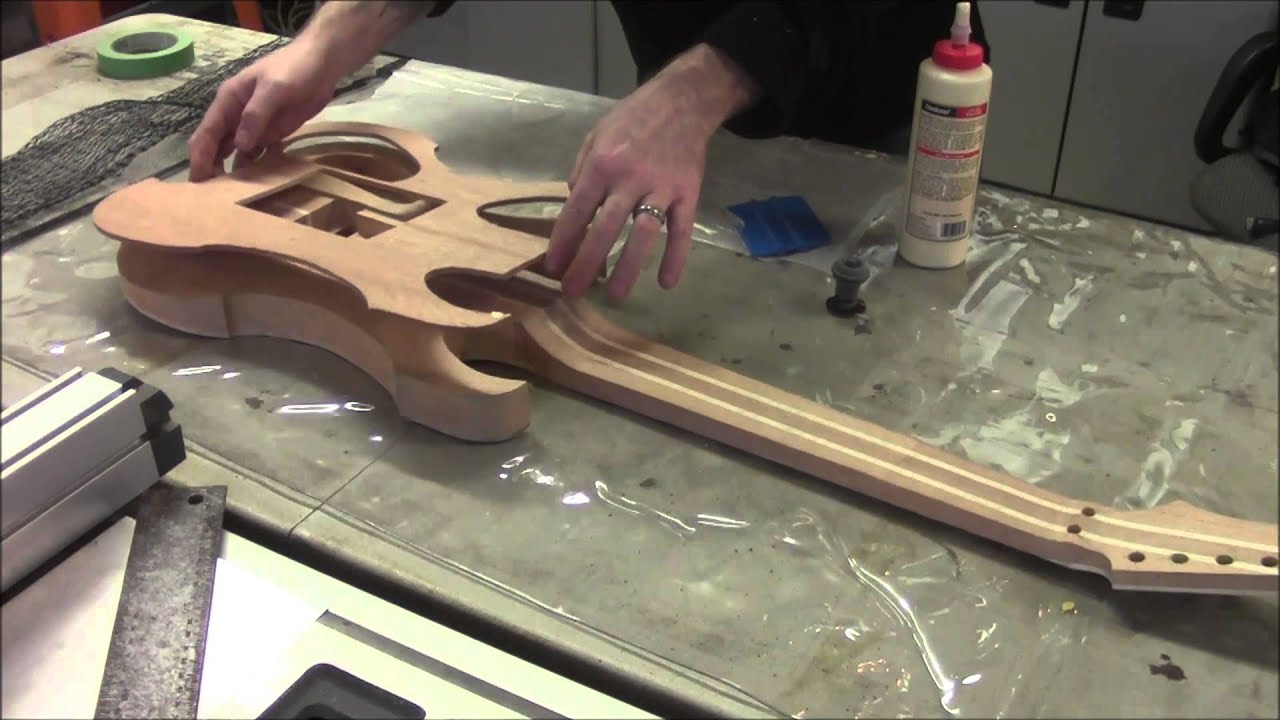
5. Secure the Guitar: Place the guitar in a stable, well-lit workspace, ideally using a neck support or a specialized guitar maintenance station to keep the instrument steady during the fret dressing process.
6. Wear Protective Gear: Put on a mask to prevent inhaling metal dust during the filing and polishing stages. Additionally, consider using protective eyewear to shield your eyes from any debris that may dislodge during the process.
By following these preparatory steps, you set the stage for a successful fret dressing session. Taking the time to prepare the guitar and the workspace ensures that the fret dressing process can be carried out with precision and care, ultimately leading to a beautifully dressed set of frets and an enhanced playing experience.
Filing the Frets
Once the preparation is complete, it’s time to move on to the crucial step of filing the frets. This process involves reshaping and leveling the frets to ensure a uniform playing surface. Here’s a detailed guide on how to file the frets:
1. Secure the Guitar: Place the guitar in a stable position, ensuring that it is well-supported and won’t shift during the filing process. This stability is crucial for maintaining precision and avoiding accidental damage to the instrument.
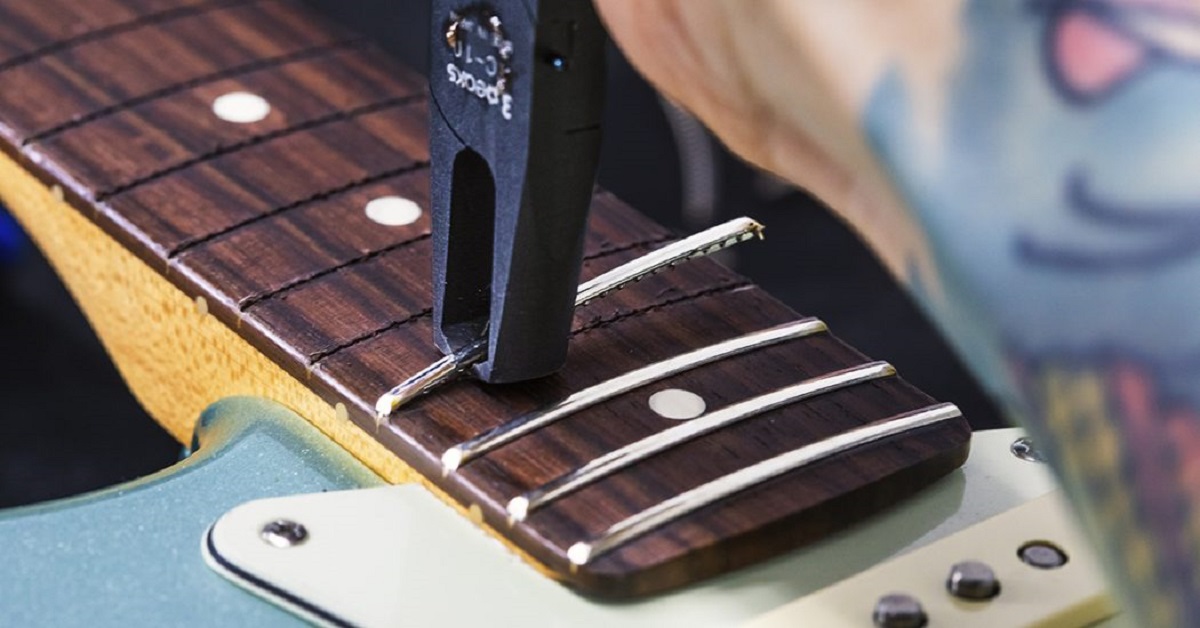
2. Use the Fret File: Begin by carefully filing each fret, working in a consistent motion along the length of the fret. Ensure that the file is angled to match the curvature of the fret, maintaining its original shape and profile.
3. Check for Evenness: Periodically use a fret rocker to verify that the frets are level and free of any high or low spots. This step is essential for achieving a uniform playing surface across the entire fingerboard.
4. Recheck and Refine: After filing, recheck the frets with the fret rocker and address any areas that require further attention. Consistent and meticulous filing is key to achieving a smooth and level fret surface.
5. Remove Excess Material: Once the frets are filed to the desired level, carefully remove any excess material and debris using a microfiber cloth. This step prepares the frets for the subsequent polishing stage.
6. Remove the Masking Tape: Gently peel off the masking tape from the fingerboard, ensuring that no residue is left behind. This reveals the freshly filed frets and allows for the next phase of the dressing process.
By following these steps, you can effectively file the frets on your electric guitar, ensuring that they are level, smooth, and ready for the final polishing stage. Filing the frets with precision and care is essential for achieving optimal playability and maintaining the overall integrity of the instrument.
Polishing the Frets
After filing the frets to achieve a level and uniform playing surface, the next crucial step is polishing the frets to a smooth and gleaming finish. This process not only enhances the visual appeal of the frets but also ensures a friction-free playing experience. Here’s how to polish the frets effectively:
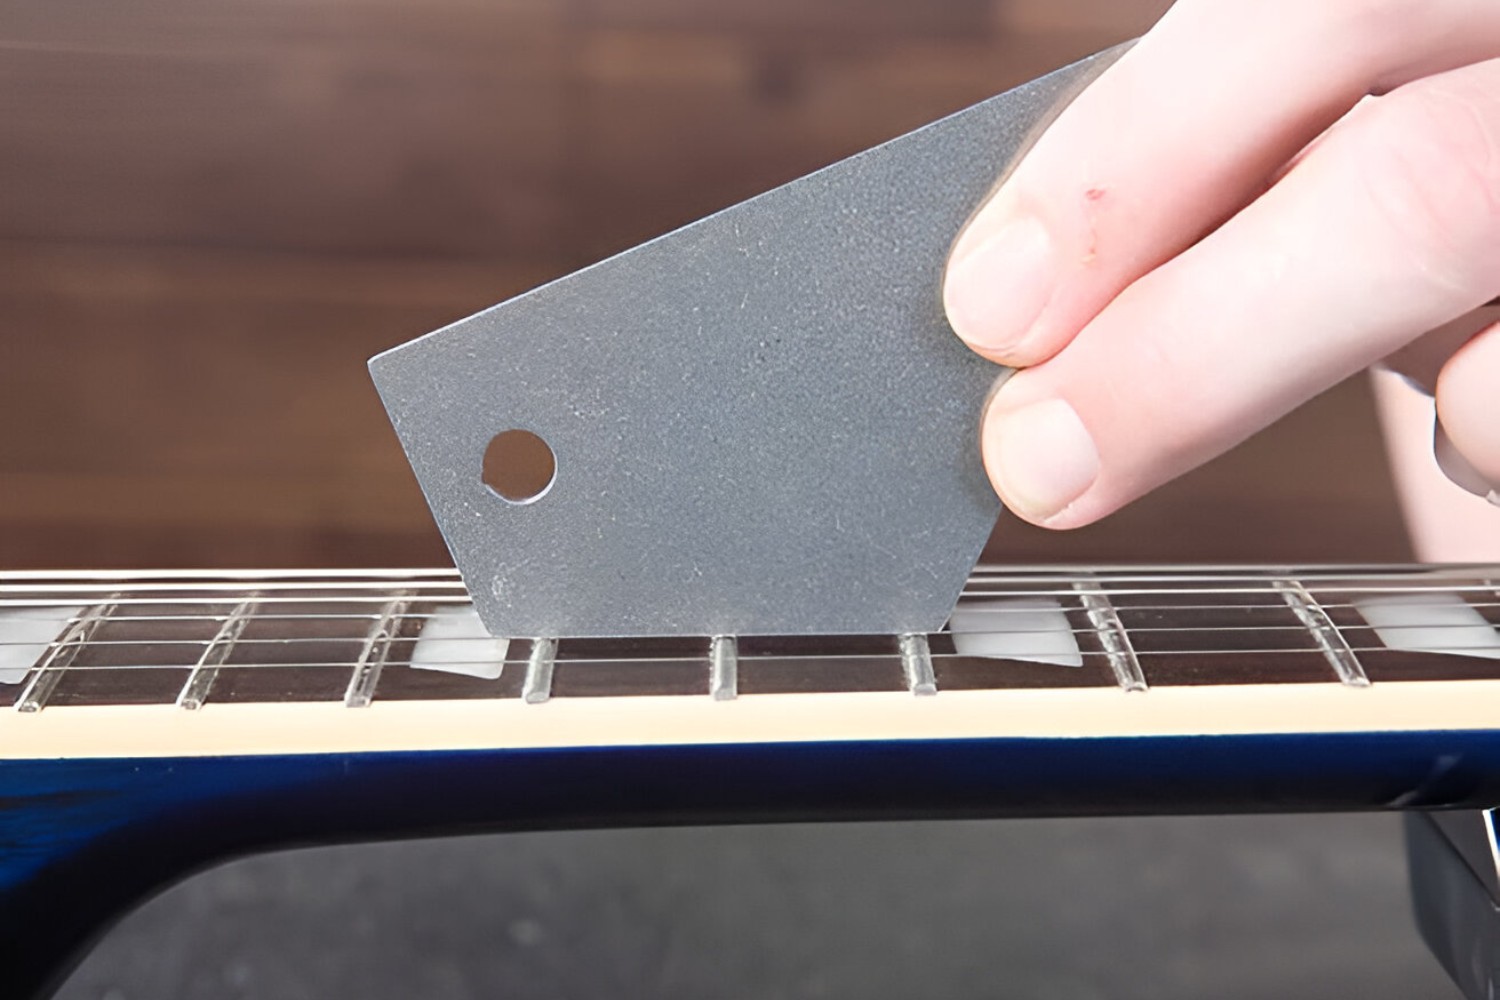
1. Prepare the Polishing Material: Use steel wool or abrasive pads to gently buff the frets, removing any roughness or dullness left behind after filing. Ensure that the polishing material is fine enough to achieve a lustrous finish without scratching the frets.
2. Work in Sections: Divide the fingerboard into manageable sections and focus on polishing one fret at a time. This approach allows for thorough and precise polishing without overlooking any areas.
3. Apply Even Pressure: When polishing each fret, apply even pressure and use smooth, consistent motions to buff the metal. This technique helps achieve a uniform shine across all the frets.
4. Clean and Inspect: After polishing a section of frets, use a microfiber cloth to wipe away any polishing residue and inspect the frets for a smooth, reflective finish. Address any areas that require further polishing to ensure a consistent gleam.
5. Protect the Fingerboard: While polishing the frets, take care to avoid inadvertently scratching or damaging the fingerboard. Maintaining a steady hand and being mindful of the surrounding areas is essential for a successful polishing process.
6. Wipe Down the Fingerboard: Once all the frets are polished to perfection, use a clean microfiber cloth to wipe down the entire fingerboard, removing any residual polishing material and ensuring a pristine finish.
By following these steps, you can achieve beautifully polished frets that not only enhance the aesthetics of your electric guitar but also contribute to a seamless playing experience. The gleaming frets serve as a testament to your meticulous care for the instrument and elevate its overall visual appeal.
Final Touches
As the fret dressing process nears completion, it’s time to focus on the final touches that will ensure the optimal performance and visual appeal of the electric guitar. Here are the essential steps to wrap up the fret dressing journey:
1. Inspect and Test: After filing and polishing the frets, carefully inspect the entire fingerboard to ensure that the frets are level, smooth, and free of any imperfections. Test the playability of the guitar to gauge the impact of the fret dressing process on the overall performance.
2. Reinstall the Strings: With the frets dressed and polished, restring the guitar with fresh strings, taking care to secure them properly and tune the instrument to the desired pitch. The new strings complement the revitalized frets, resulting in a harmonious and responsive playing experience.
3. Adjust the Action and Intonation: Fine-tune the action and intonation of the guitar to ensure that the fret dressing process has not affected the instrument’s setup. Make any necessary adjustments to achieve optimal playability and tonal balance.
4. Clean and Condition the Fingerboard: Use a specialized fingerboard cleaner and conditioner to nourish and protect the fingerboard, maintaining its luster and preserving the wood. This step adds a final touch of care and attention to the instrument.
5. Play and Enjoy: Once the final touches are complete, take the time to play the guitar and revel in the enhanced playability and visual appeal. The dressed and polished frets contribute to a smooth, responsive playing experience, allowing you to fully appreciate the results of your meticulous fret dressing efforts.
6. Regular Maintenance: To preserve the effects of fret dressing, incorporate regular maintenance into your guitar care routine. Keep the fingerboard clean, monitor the frets for wear, and address any issues promptly to maintain the optimal condition of the instrument.
By attending to these final touches, you can ensure that the fret dressing process culminates in a rejuvenated and well-maintained electric guitar. The combination of precision fret work, attentive setup adjustments, and ongoing maintenance sets the stage for a rewarding and enduring playing experience.