Introduction
So, you've got your hands on a drum machine, and now you're eager to unleash its rhythmic prowess to the world. But before you can make the ground shake and the walls tremble with those infectious beats, you need to ensure that your drum machine's sound is properly amplified. Whether you're a solo performer, a DJ, or a band member, the right amplifier and setup can make all the difference in how your drum machine sounds to your audience.
Amplifying a drum machine involves more than just cranking up the volume. It's about finding the right amplifier, making the necessary connections, adjusting levels and EQ settings, and perhaps even adding some effects to enhance the sound. In this guide, we'll walk you through the essential steps to amplify your drum machine effectively, ensuring that the beats and rhythms it produces are delivered with maximum impact.
From selecting the appropriate amplifier to fine-tuning the sound with effects, this article will equip you with the knowledge and techniques to amplify your drum machine like a pro. So, let's dive in and explore the world of drum machine amplification, where the pulse of the beat meets the power of sound reinforcement.
Choosing the Right Amplifier
When it comes to amplifying your drum machine, selecting the right amplifier is crucial for achieving the desired sound quality and volume. The amplifier you choose should complement the sonic characteristics of your drum machine while providing sufficient power to fill the performance space with rich, well-defined sound. Here are some key factors to consider when choosing an amplifier for your drum machine:
- Power Rating: The power rating of an amplifier is a critical consideration. Ensure that the amplifier can deliver enough power to effectively amplify the drum machine’s sound without distortion, especially in live performance settings.
- Input Options: Look for an amplifier with multiple input options, such as line-level inputs and possibly XLR inputs for balanced connections. This versatility allows you to connect the drum machine seamlessly and integrate it into your existing setup.
- Tonal Characteristics: Consider the tonal characteristics of the amplifier. Some amplifiers are known for their warmth and coloration, which can add a unique sonic character to the drum machine’s sound. Others may offer a more neutral and transparent amplification, faithfully reproducing the source signal.
- Portability and Size: Depending on your intended use, portability and size may be important factors. For gigging musicians, a compact and lightweight amplifier can be advantageous, while studio setups may accommodate larger, more feature-rich amplifiers.
- Built-in Effects: Some amplifiers come with built-in effects such as reverb, delay, or modulation. While not essential, these effects can add depth and dimension to the drum machine’s sound, simplifying your setup and expanding your sonic palette.
Ultimately, the goal is to find an amplifier that complements the sonic characteristics of your drum machine, provides the necessary power and flexibility, and aligns with your performance or recording requirements. Whether you opt for a solid-state amp, a tube amp, or a digital modeling amp, the right amplifier will serve as the sonic conduit that elevates your drum machine’s beats to new heights.
Connecting the Drum Machine to the Amplifier
Once you’ve chosen the perfect amplifier for your drum machine, the next step is to establish a seamless connection between the two. Properly connecting the drum machine to the amplifier ensures that the sound is faithfully transmitted and amplified without any signal loss or interference. Here’s a step-by-step guide to connecting your drum machine to the amplifier:
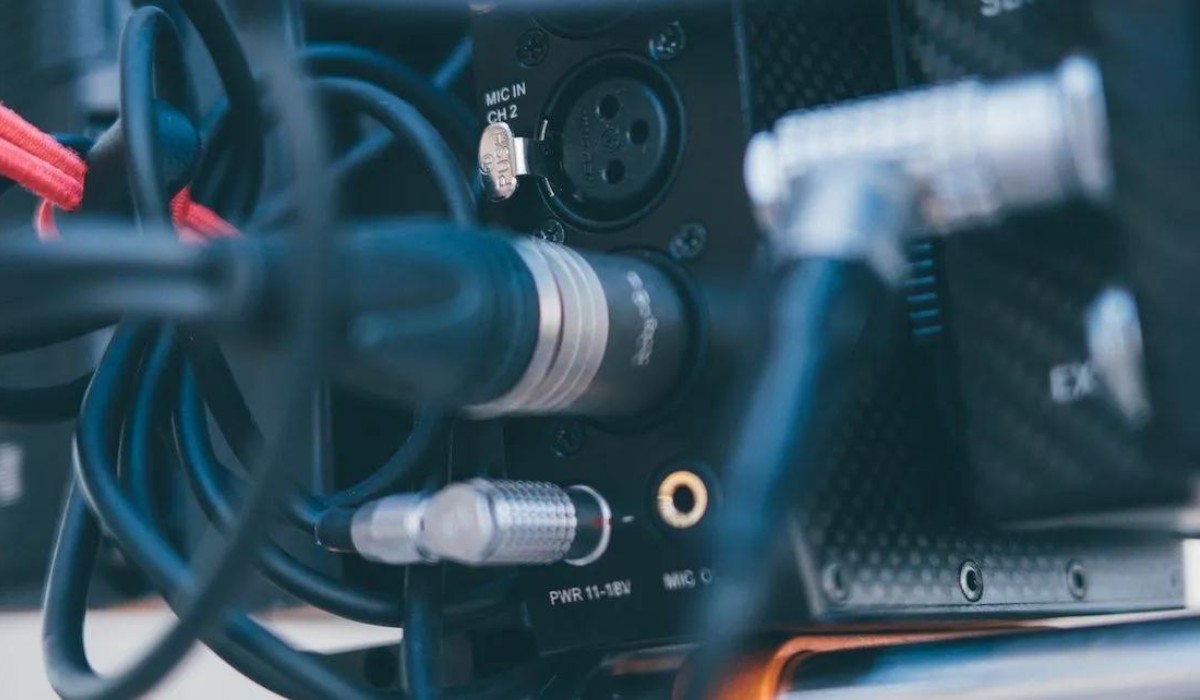
- Check the Outputs: Begin by identifying the output options on your drum machine. Most drum machines feature standard 1/4-inch line outputs, although some models may also offer XLR or RCA outputs. Understanding the available output connections will guide your choice of cables and adapters for the connection.
- Select the Cables: Depending on the output options of your drum machine and the input options of the amplifier, choose the appropriate cables. For 1/4-inch outputs, standard instrument cables are suitable. If your drum machine offers XLR outputs, use balanced XLR cables for noise-free transmission.
- Establish the Connection: With the selected cables in hand, connect the output of the drum machine to the input of the amplifier. Ensure a secure connection to prevent accidental disconnection during performances or recording sessions.
- Test the Signal: Before finalizing the setup, it’s advisable to test the signal flow from the drum machine to the amplifier. Play a pattern or sequence on the drum machine and monitor the amplifier’s input levels to confirm that the signal is being received and amplified properly.
- Grounding and Power Considerations: In live performance scenarios, pay attention to grounding and power considerations to avoid ground loops and electrical interference. Using quality power conditioners and ensuring proper grounding can contribute to a noise-free and reliable connection.
By following these steps, you can establish a robust and reliable connection between your drum machine and amplifier, ensuring that the beats and rhythms produced by the drum machine are faithfully amplified and projected with clarity and impact. A secure and well-maintained connection minimizes the risk of signal loss, distortion, or unwanted noise, allowing you to focus on delivering an electrifying performance or capturing pristine recordings.
Setting the Levels and EQ
Once your drum machine is connected to the amplifier, the next crucial step is to set the levels and EQ to optimize the sound output. Properly adjusting the levels and EQ ensures that the drum machine’s sonic characteristics are faithfully represented and tailored to suit the performance space or recording environment. Here’s a guide to effectively setting the levels and EQ for your amplified drum machine:
- Gain Staging: Begin by setting the input gain or volume on the amplifier to an appropriate level. Avoid overdriving the input, as this can result in distortion. Aim for a healthy signal level that allows for dynamic range without clipping.
- Balance the Levels: If your drum machine features individual outputs for different sounds (kick, snare, hi-hats, etc.), consider balancing the levels of each sound source to achieve a well-rounded and cohesive mix. Adjust the individual output levels on the drum machine to achieve a balanced sound before it reaches the amplifier.
- EQ Considerations: Use the amplifier’s EQ controls to shape the tonal characteristics of the drum machine’s sound. Depending on the amplifier, you may have access to basic tone controls such as bass, midrange, and treble adjustments. Experiment with these controls to tailor the sound to your preference and the acoustics of the performance space.
- Room Acoustics: Consider the acoustics of the venue or recording space when setting the EQ. If the space is particularly resonant or lacks certain frequencies, adjust the amplifier’s EQ to compensate for these acoustic characteristics and ensure a more balanced and natural sound.
- Feedback Management: In live performance settings, pay attention to the potential for feedback. Carefully adjust the EQ to minimize the risk of feedback while maintaining a desirable tonal balance. Notch out any frequencies that tend to cause feedback issues without compromising the overall sound quality.
By carefully setting the levels and EQ for your amplified drum machine, you can sculpt its sound to suit your artistic vision and the sonic demands of the performance or recording environment. Whether you aim for a punchy, aggressive sound or a more balanced and nuanced sonic palette, the levels and EQ settings play a pivotal role in achieving the desired sonic impact.
Using Effects with the Drum Machine
Adding effects to your drum machine’s sound can elevate its sonic character and introduce creative possibilities that enhance your performances or recordings. Whether you aim to infuse depth with reverbs, add rhythmic complexity with delays, or explore sonic textures with modulation effects, integrating effects with your drum machine can unlock a world of sonic expression. Here’s a comprehensive look at using effects to enhance the sound of your drum machine:
- Reverb and Ambience: Incorporating reverb can lend a sense of space and depth to the drum machine’s sounds, creating an immersive sonic environment. Experiment with different reverb types and settings to tailor the ambience to suit the mood and style of your music.
- Delay and Echo: Delays can introduce rhythmic complexity and movement to the drum machine’s patterns. From subtle echoes to cascading rhythmic repeats, the use of delay effects can add a captivating dimension to the beats and rhythms produced by the drum machine.
- Modulation Effects: Modulation effects such as chorus, flanger, and phaser can introduce swirling textures and dynamic tonal shifts to the drum machine’s sounds. These effects can be particularly effective in creating evolving and atmospheric rhythmic elements.
- Dynamic Processing: Consider employing dynamic processing effects such as compression or transient shaping to refine the impact and punch of the drum machine’s sounds. These effects can help control the dynamics and ensure that the beats sit well in the mix, whether in a live performance or a studio recording.
- Integration with Sequencers and Controllers: Explore the integration of effects with sequencers and controllers to introduce real-time manipulation and modulation of the drum machine’s sounds. This interactive approach can add a performative element to your music and allow for spontaneous sonic exploration.
By judiciously incorporating effects with your drum machine, you can expand its sonic palette and imbue your music with expressive nuances and sonic richness. Whether you opt for subtle enhancements or bold sonic transformations, the strategic use of effects can accentuate the rhythmic core of your music and captivate your audience with engaging sonic landscapes.
Tips for Getting the Best Sound
Amplifying a drum machine to achieve the best possible sound involves a combination of technical know-how and creative finesse. Here are some valuable tips to help you optimize the sound of your amplified drum machine:
- Acquaint Yourself with the Drum Machine: Take the time to explore the sonic capabilities and features of your drum machine. Understanding its sound generation, sequencing options, and sound shaping parameters will empower you to maximize its potential when amplified.
- Experiment with Placement and Acoustics: When using the drum machine in live settings, consider the placement of the amplifier and the drum machine to optimize sound projection and minimize unwanted reflections or phase issues. In studio environments, experiment with mic placements and room acoustics to capture the best sound.
- Utilize Sound Checks and Rehearsals: Prior to performances, sound checks and rehearsals provide opportunities to fine-tune the amplified sound of the drum machine. Use this time to address any tonal adjustments, level balancing, and effects integration for optimal sonic impact.
- Explore Layering and Sound Design: Experiment with layering drum machine sounds to create complex and textured rhythms. Utilize sound design techniques within the drum machine to sculpt unique and captivating sonic landscapes that translate effectively when amplified.
- Consider Audience and Venue: Tailor the amplified sound of the drum machine to suit the audience and the venue. Adapt the tonal characteristics, effects usage, and sound dynamics to create an immersive sonic experience that resonates with the listeners in a live setting.
- Collaborate with Sound Engineers: In professional settings, collaborating with sound engineers can yield valuable insights into optimizing the amplified sound of the drum machine. Leverage their expertise in sound reinforcement and signal processing to enhance the sonic fidelity of your performances.
By incorporating these tips into your approach to amplifying a drum machine, you can elevate its sonic impact and ensure that the beats and rhythms it produces are delivered with clarity, power, and artistic finesse. Whether in live performances, studio recordings, or creative explorations, the quest for the best sound is a dynamic and rewarding journey that enhances the musical experience for both the performer and the audience.