Introduction
Welcome to the guide on fixing the internal button of the CAD GXL2200 Cardioid Condenser Microphone. This microphone is renowned for its exceptional audio quality and is a popular choice among musicians, podcasters, and content creators. However, like any electronic device, it may encounter issues over time, and one common problem is the malfunctioning of the internal button.
Whether you’re a professional recording artist or an enthusiastic hobbyist, dealing with a faulty internal button can be frustrating. Fortunately, with the right tools and a systematic approach, you can resolve this issue without having to replace the entire microphone.
In this comprehensive guide, we will delve into the step-by-step process of fixing the internal button of the CAD GXL2200 Cardioid Condenser Microphone. By following these instructions, you can regain full functionality of your microphone and continue producing high-quality audio recordings.
Let’s embark on this journey to troubleshoot and repair the internal button of the CAD GXL2200, ensuring that you can make the most of this exceptional piece of audio equipment.
Overview of CAD GXL2200 Cardioid Condenser Microphone
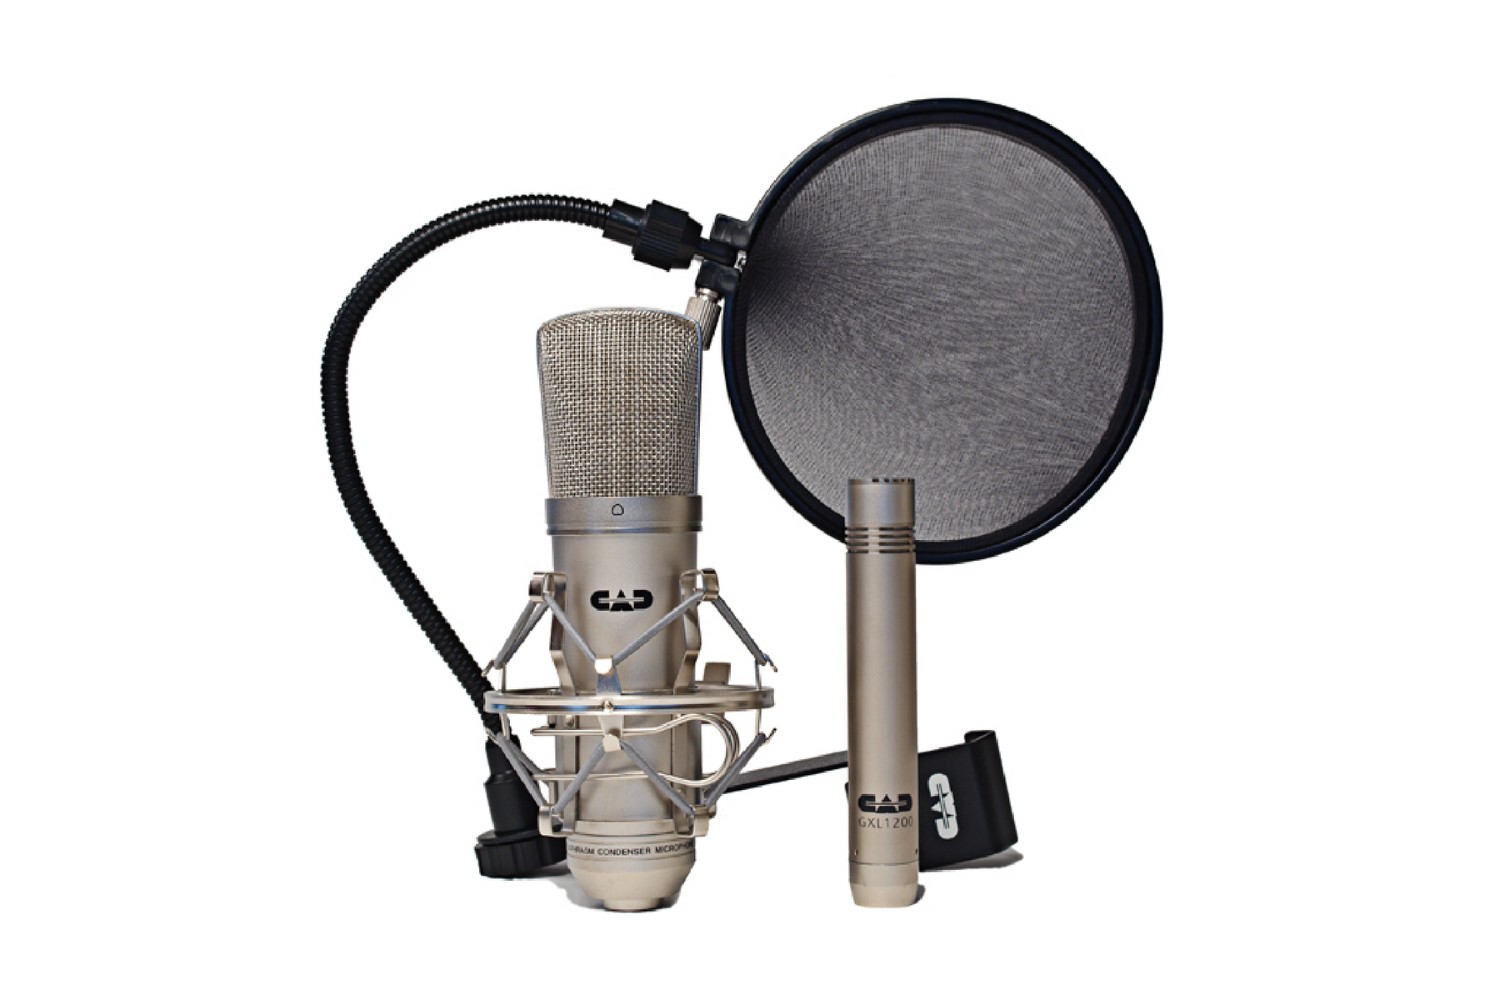
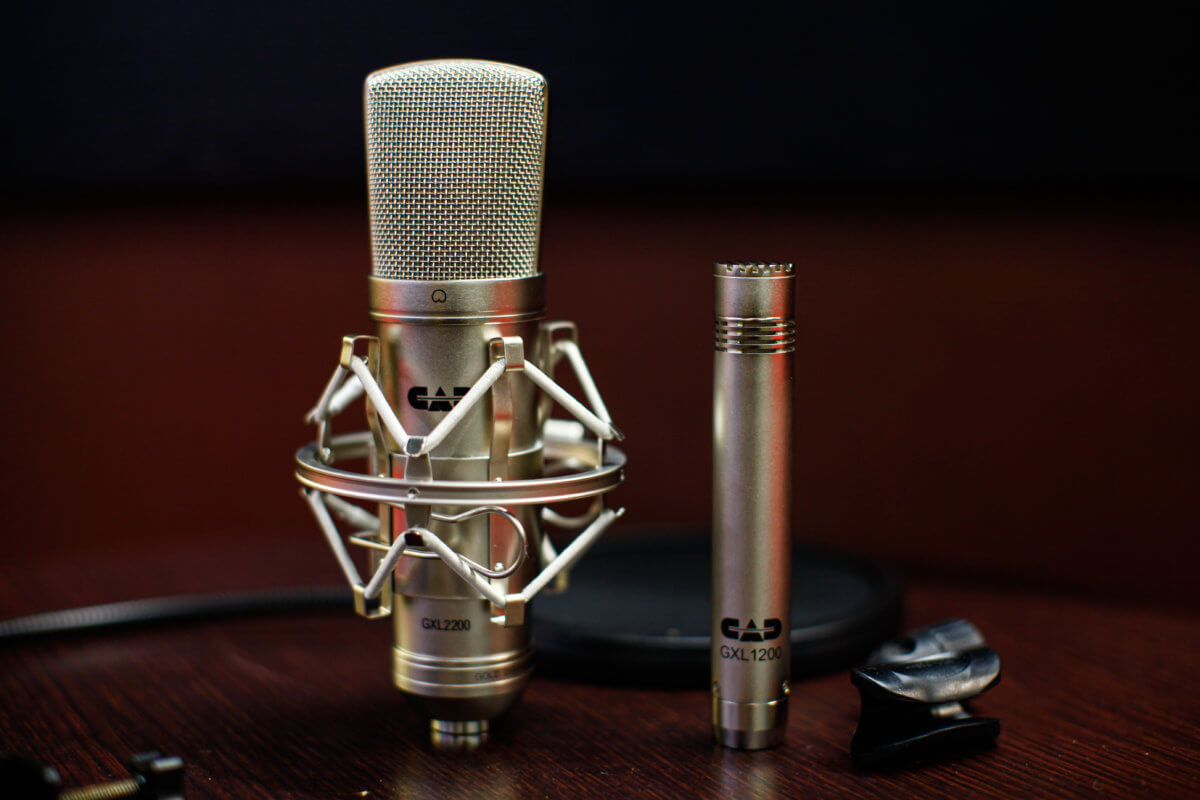
The CAD GXL2200 is a versatile and reliable cardioid condenser microphone that has garnered widespread acclaim for its exceptional performance and affordability. Designed to deliver professional-grade audio capture, this microphone is a popular choice for studio recordings, live performances, podcasting, and various other audio applications.
With its cardioid polar pattern, the GXL2200 excels in capturing sound sources directly in front of the microphone while effectively minimizing background noise and feedback. This makes it an ideal option for vocal recordings and instrument miking, providing clear and focused audio reproduction.
Equipped with a large 1-inch gold-sputtered diaphragm, the GXL2200 delivers a wide frequency response and high sensitivity, ensuring that it captures the nuances and subtleties of the sound source with remarkable clarity. Whether you’re recording vocals, acoustic instruments, or percussion, this microphone is capable of delivering rich and detailed audio.
Furthermore, the GXL2200 features a solid-state preamp and transformerless design, contributing to its low noise floor and transparent sound quality. Its sturdy construction and robust build make it a reliable companion for both studio and stage use, with the ability to withstand the demands of professional audio production.
Overall, the CAD GXL2200 Cardioid Condenser Microphone embodies a perfect balance of performance, durability, and affordability, making it a go-to choice for audio enthusiasts and professionals alike. Its versatile capabilities and consistent output quality have solidified its position as a trusted tool for capturing pristine audio recordings across various applications.
Common Issues with Internal Button
While the CAD GXL2200 Cardioid Condenser Microphone is renowned for its reliability, users may encounter common issues related to the internal button over time. One prevalent problem is the unresponsiveness or erratic behavior of the internal button, which can impede the microphone’s functionality and user experience.
When the internal button malfunctions, users may experience difficulties in engaging features such as pad switches, low-cut filters, or polar pattern selection, depending on the microphone’s configuration. This can significantly impact the versatility and control that the microphone offers, leading to frustration during recording sessions or live performances.
Another issue associated with the internal button is physical damage or wear, which can manifest as a loose or wobbly button mechanism. This can compromise the tactile feedback and reliability of the button, making it challenging for users to make precise adjustments or selections during operation.
In some cases, the internal button may become stuck or unresponsive due to debris accumulation or internal contact issues. This can result in the button getting jammed or failing to register user input, hindering the seamless operation of the microphone’s features.
It is important to address these issues promptly to ensure that the CAD GXL2200 microphone continues to deliver consistent performance and remains a dependable tool for audio capture. By identifying and resolving common internal button issues, users can restore the microphone’s functionality and maximize its potential across various recording and sound reinforcement applications.
Tools and Materials Needed
Before embarking on the process of fixing the internal button of the CAD GXL2200 Cardioid Condenser Microphone, it is essential to gather the necessary tools and materials to facilitate a smooth and effective repair. Here’s a comprehensive list of the items you will need:
- Small Screwdriver Set: A precision screwdriver set with various head types will be indispensable for disassembling the microphone and accessing the internal components.
- Tweezers: Fine-point tweezers will aid in handling small components and delicate parts within the microphone housing.
- Cotton Swabs and Isopropyl Alcohol: These will be useful for cleaning the internal button mechanism and removing any debris or residue that may be affecting its functionality.
- Lubricant (Optional): A small amount of specialized lubricant may be required to ensure smooth operation of the internal button after cleaning and reassembly.
- Replacement Button (If Necessary): Depending on the nature of the internal button issue, you may need to acquire a replacement button or switch to address physical damage or irreparable malfunctions.
- Work Surface and Lighting: A clean and well-lit workspace will provide the ideal environment for disassembling and working on the microphone, allowing for better visibility and organization of components.
- Patience and Care: While not tangible items, exercising patience and meticulous care throughout the repair process is crucial for ensuring that the microphone is reassembled correctly and functions optimally.
By having these tools and materials at your disposal, you can approach the repair process with confidence and precision, addressing the internal button issues of the CAD GXL2200 microphone effectively and restoring its full functionality.
Steps to Fix the Internal Button
Repairing the internal button of the CAD GXL2200 Cardioid Condenser Microphone requires a systematic approach and careful handling of its internal components. Follow these step-by-step instructions to address common issues with the internal button:
- Prepare the Workspace: Find a clean, well-lit area to work on the microphone. Lay down a soft cloth or a padded surface to prevent any damage to the microphone during disassembly.
- Unscrew the Housing: Use the appropriate screwdriver from your set to carefully remove the screws securing the microphone’s housing. Keep the screws organized for reassembly.
- Access the Internal Button: Gently lift the housing to reveal the internal components. Locate the internal button mechanism, which may be situated near the microphone’s control circuitry.
- Inspect and Clean the Button: Assess the condition of the internal button for any visible debris, dust, or damage. Use cotton swabs moistened with isopropyl alcohol to clean the button and its surrounding area, ensuring that it moves freely and without obstruction.
- Lubricate the Button (If Necessary): If the button exhibits stiffness or resistance during operation, apply a small amount of specialized lubricant to the button mechanism to facilitate smooth movement. Exercise caution to avoid over-lubrication.
- Check for Loose Connections: Inspect the wiring and connections associated with the internal button. Ensure that all connections are secure and free from damage, reseating any loose connections if necessary.
- Reassemble the Microphone: Carefully place the housing back onto the microphone, aligning the components and securing the screws in their respective positions. Exercise caution to avoid overtightening the screws.
- Test the Button Functionality: Once the microphone is reassembled, test the internal button to verify that it operates smoothly and effectively engages the microphone’s features. Ensure that all functions associated with the button are responsive and reliable.
Following these steps diligently will enable you to address internal button issues and restore the full functionality of the CAD GXL2200 microphone, allowing you to continue capturing pristine audio with confidence and precision.
Testing the Microphone
After completing the repair process for the internal button of the CAD GXL2200 Cardioid Condenser Microphone, it is crucial to conduct thorough testing to ensure that the microphone functions as intended and that the internal button operates seamlessly. Here are the essential steps for testing the microphone:
- Audio Input Verification: Connect the microphone to a suitable audio interface or recording device, ensuring that all connections are secure and the input levels are appropriately set.
- Vocal and Instrumental Testing: Perform vocal and instrumental recordings using the microphone, assessing the audio quality, clarity, and sensitivity. Pay attention to the microphone’s ability to capture a wide frequency range and subtle nuances in the sound source.
- Engage Microphone Features: Test the functionality of the internal button by engaging any available features such as pad switches, low-cut filters, or polar pattern selection. Verify that the button operates smoothly and reliably activates the intended functions.
- Dynamic Range Assessment: Evaluate the microphone’s dynamic range by recording both soft and loud sound sources, ensuring that it captures the full spectrum of audio levels without distortion or excessive noise.
- Background Noise and Feedback Check: Assess the microphone’s ability to reject background noise and minimize feedback, particularly in a live sound reinforcement environment. Verify that the microphone maintains a focused pickup pattern and exhibits minimal sensitivity to off-axis sound sources.
- Comparison to Reference Recordings: Compare the recordings obtained with the repaired microphone to reference recordings made prior to the repair. Look for improvements in overall audio quality and the functionality of the internal button’s features.
By conducting comprehensive testing, you can ascertain that the CAD GXL2200 microphone has been successfully repaired, and its internal button functions optimally. This ensures that the microphone continues to deliver exceptional audio performance across various recording and sound reinforcement applications, providing reliable and consistent results for your audio projects.
Conclusion
Repairing the internal button of the CAD GXL2200 Cardioid Condenser Microphone is a rewarding endeavor that empowers users to restore the full functionality of this exceptional audio capture device. By addressing common issues such as unresponsiveness, physical damage, or debris accumulation within the internal button mechanism, users can ensure that the microphone continues to deliver pristine audio recordings with precision and reliability.
Throughout this guide, we have explored the systematic process of fixing the internal button, from preparing the workspace and accessing the internal components to cleaning, lubricating (if necessary), and reassembling the microphone. By following the outlined steps diligently and utilizing the necessary tools and materials, users can effectively troubleshoot and resolve internal button issues, revitalizing the microphone’s performance.
Furthermore, the comprehensive testing phase allows users to validate the success of the repair, ensuring that the microphone operates seamlessly and exhibits improved functionality of its internal button features. Through vocal and instrumental testing, dynamic range assessment, and comparison to reference recordings, users can confirm the restored audio quality and the reliable operation of the internal button.
Ultimately, the repair process not only resolves immediate issues with the internal button but also enhances the overall user experience, reaffirming the CAD GXL2200 microphone as a dependable tool for professional and creative audio endeavors. By investing time and care in repairing the internal button, users can prolong the lifespan of the microphone and continue to benefit from its exceptional performance across a diverse range of recording and sound reinforcement applications.
With a renewed sense of confidence in the microphone’s functionality, users can embark on their audio projects with the assurance that the CAD GXL2200 Cardioid Condenser Microphone remains a steadfast companion, consistently delivering exceptional audio capture and contributing to the realization of their creative vision.