Introduction
Changing the band on your Fitbit Versa 2 can breathe new life into your wearable device, allowing you to personalize its appearance and tailor it to your unique style. Whether you're looking to switch to a more comfortable band for daily wear, a sleek metal band for a formal occasion, or a vibrant, colorful band to express your personality, the process is simple and can be completed in just a few easy steps. In this guide, we'll walk you through the process of swapping out the band on your Fitbit Versa 2, providing you with the knowledge and confidence to make the change seamlessly.
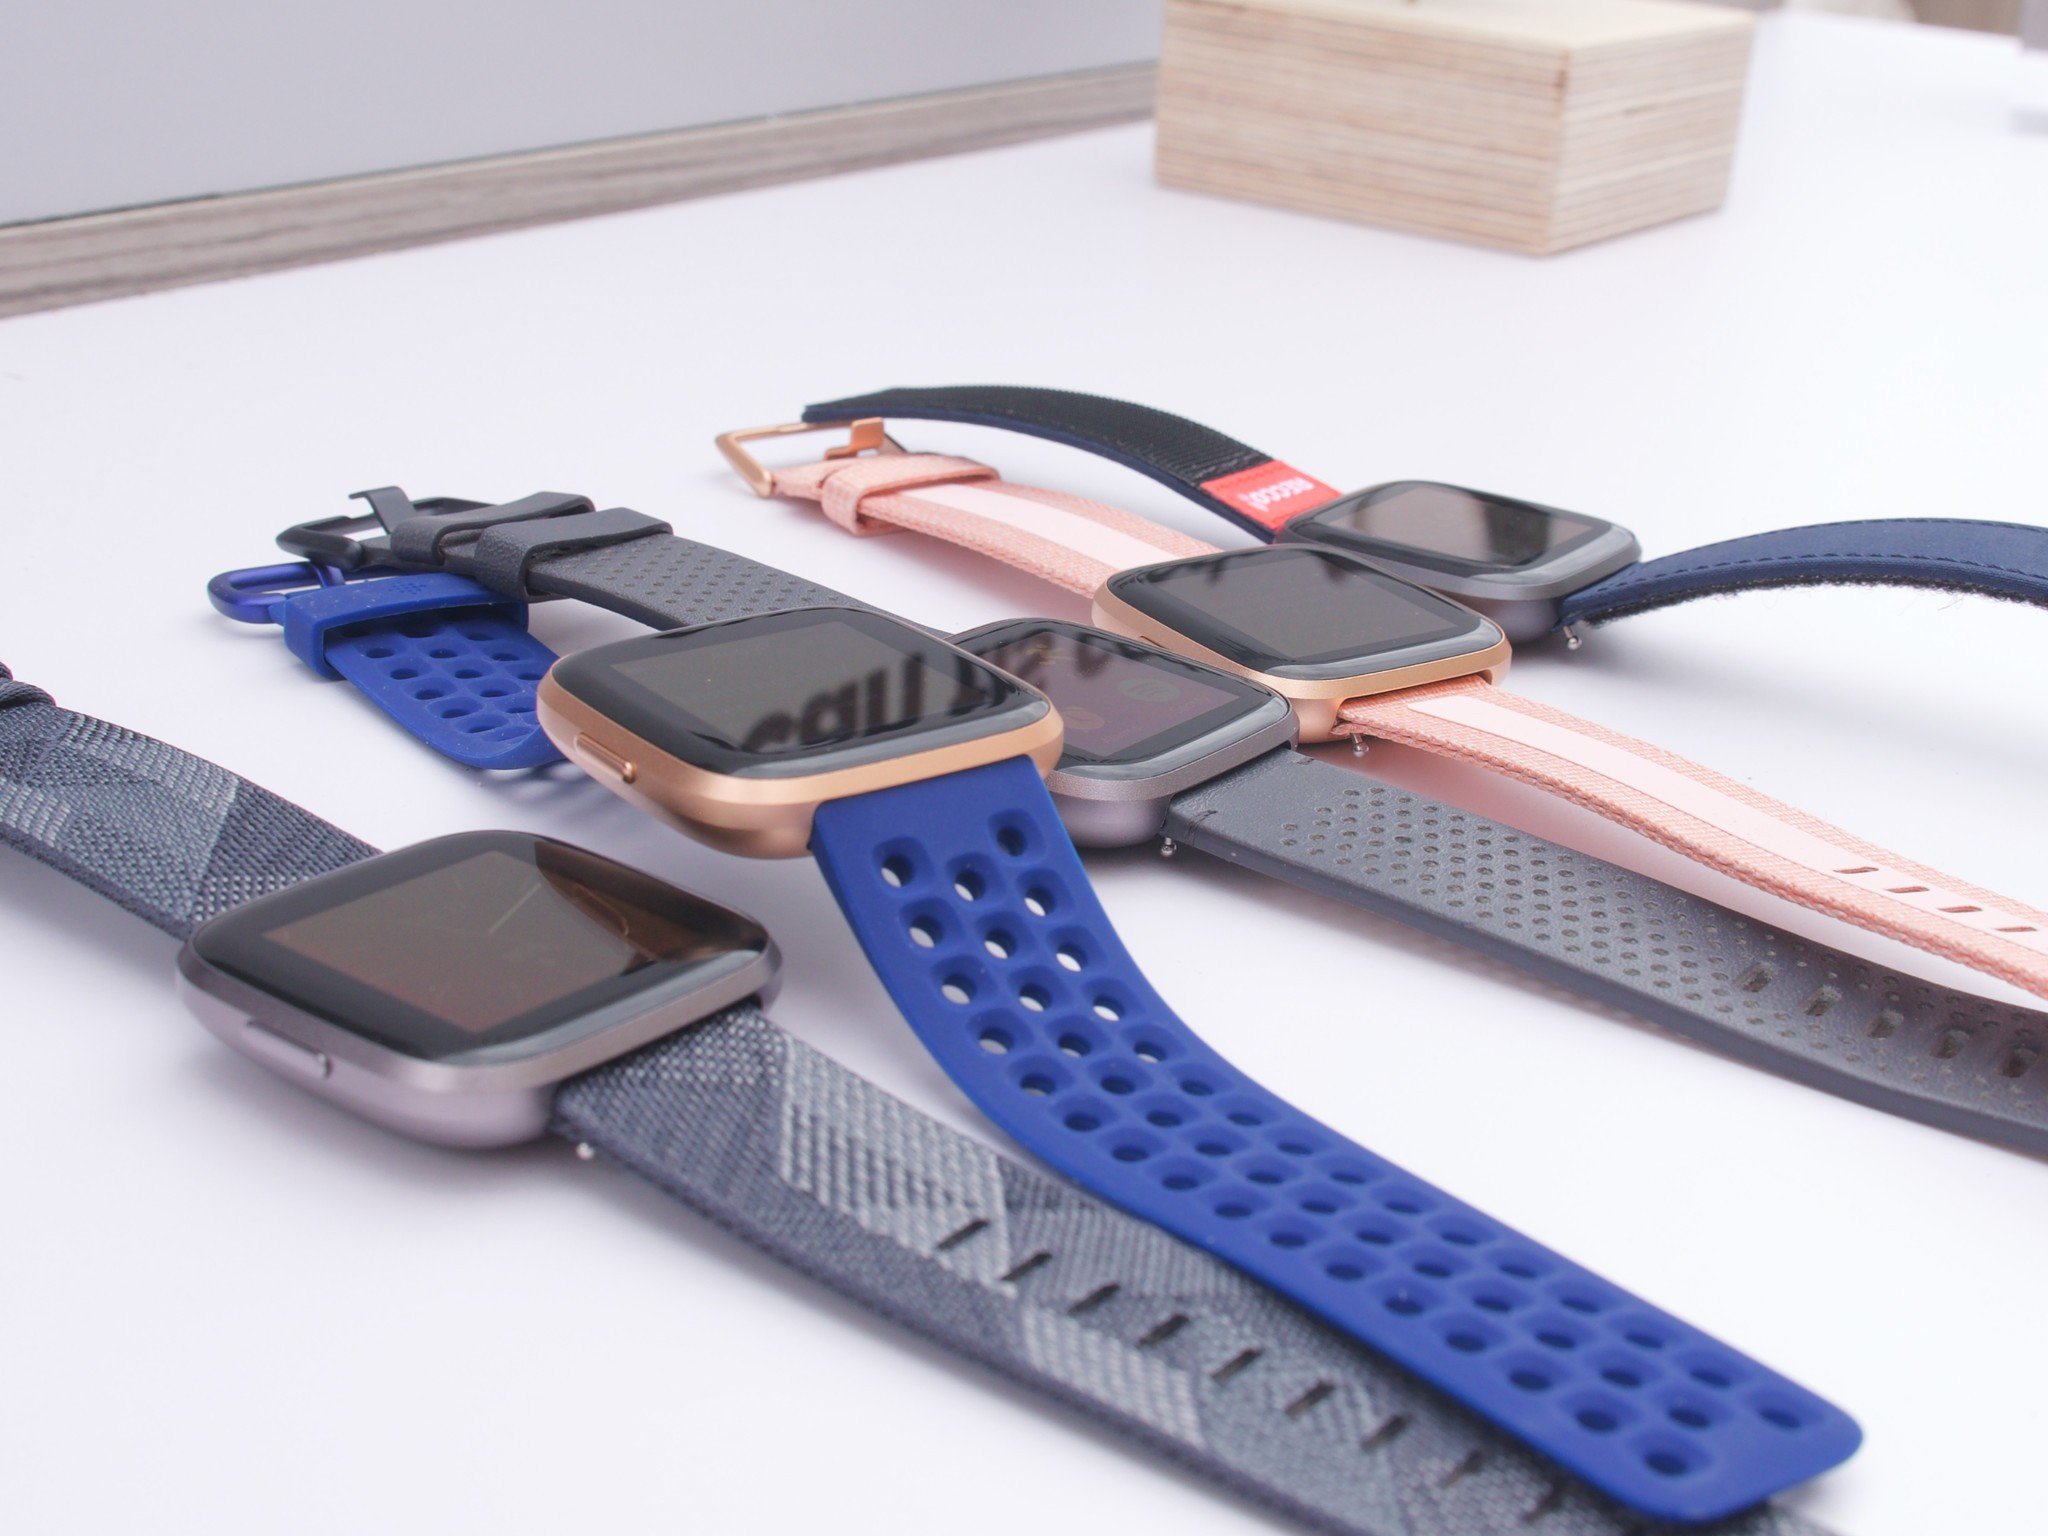
The ability to change the band on the Fitbit Versa 2 offers a level of versatility that complements its functionality. With a variety of band options available, including silicone, leather, metal, and woven bands, you can easily transform the look and feel of your device to suit your mood, outfit, or activity. Whether you're heading to the gym, a formal event, or a casual outing, having the flexibility to switch bands allows you to seamlessly integrate your Fitbit Versa 2 into any setting.
Moreover, the process of changing the band is not only practical but also an opportunity for personal expression. It enables you to showcase your individual style and preferences, turning your wearable device into a fashion statement that reflects your personality. By following the steps outlined in this guide, you'll be able to effortlessly customize your Fitbit Versa 2 to match your unique aesthetic, making it an extension of your personal identity.
In the following sections, we'll provide a detailed walkthrough of the band-changing process, from gathering the necessary tools to adjusting the fit and adding personalized accessories. By the end of this guide, you'll have the knowledge and confidence to switch out the band on your Fitbit Versa 2 with ease, allowing you to unlock the full potential of your wearable device. Let's dive in and explore the exciting possibilities of customizing your Fitbit Versa 2 to suit your individual style.
Step 1: Gather the Necessary Tools
Before embarking on the journey of changing the band on your Fitbit Versa 2, it's essential to gather the necessary tools to ensure a smooth and efficient process. Having the right tools at your disposal will not only simplify the band-changing procedure but also minimize the risk of damaging your device. Here's a comprehensive list of the essential tools you'll need:
-
Replacement Band: The first and most crucial item you'll need is the replacement band for your Fitbit Versa 2. Whether you opt for a silicone, leather, metal, or woven band, ensure that it is compatible with the Fitbit Versa 2 model. Additionally, choose a band that aligns with your style preferences and intended use, as this will be the focal point of your customization.
-
Spring Bar Tool or Quick Release Pins: Depending on the type of band you're using, you'll require a spring bar tool or quick release pins to facilitate the removal and attachment of the band. These tools allow for easy manipulation of the spring bars, which secure the band to the watch case. If your replacement band utilizes quick release pins, ensure that the tool is designed specifically for this purpose.
-
Clean Cloth or Microfiber Towel: It's important to have a clean cloth or microfiber towel on hand to wipe down the device and remove any dust, dirt, or residue that may have accumulated around the band attachment points. This simple step helps maintain the cleanliness of your Fitbit Versa 2 and ensures a pristine surface for attaching the new band.
-
Workspace: Creating a dedicated workspace with ample lighting and a flat surface is essential for performing the band-changing process. A well-lit area provides visibility, allowing you to work with precision, while a flat surface offers stability for handling the device and tools.
By gathering these essential tools, you'll be fully equipped to embark on the band-changing journey with confidence and preparedness. With these items at your disposal, you can proceed to the next step of removing the current band from your Fitbit Versa 2, setting the stage for a seamless transition to your new, customized band.
Step 2: Remove the Current Band
Removing the current band from your Fitbit Versa 2 is a straightforward process that requires precision and care to avoid any damage to the device. By following these steps, you can safely detach the existing band, preparing the Versa 2 for the installation of a new, personalized band.
-
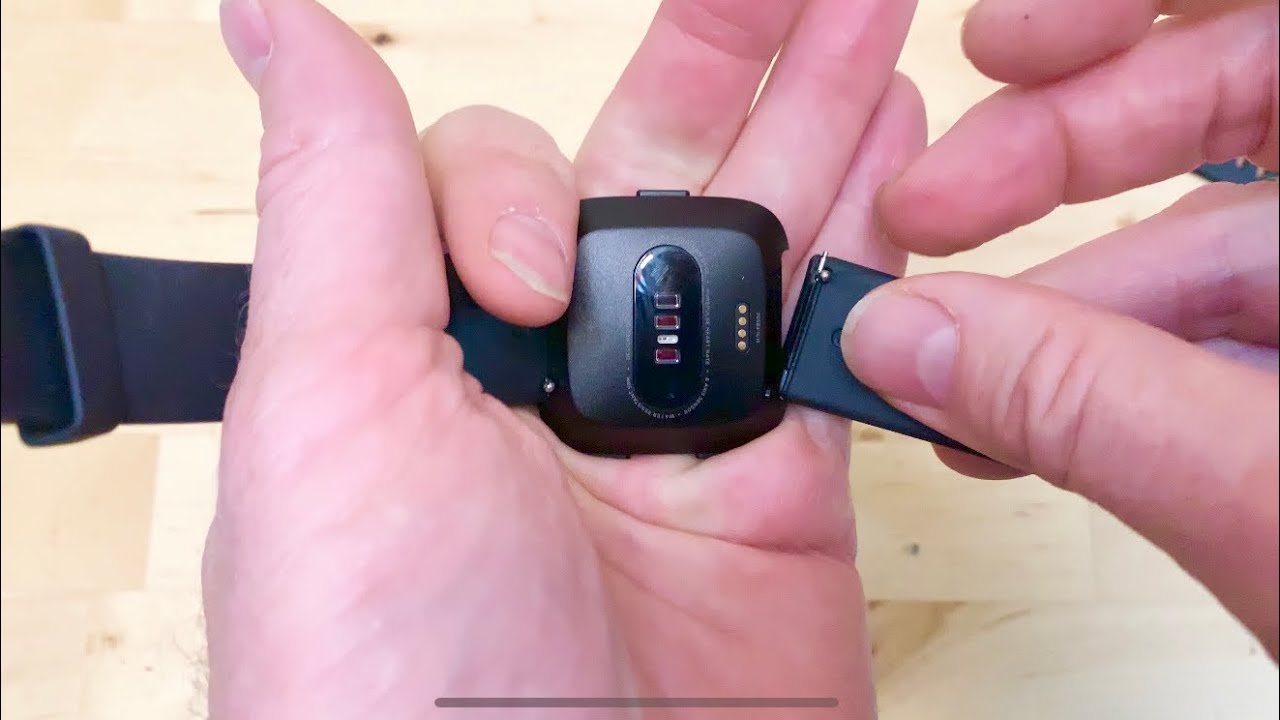
Locate the Quick Release Pins or Spring Bars: Depending on the type of band your Fitbit Versa 2 is equipped with, you'll need to identify the quick release pins or spring bars that secure the band to the watch case. These pins or bars are typically located on both ends of the device, where the band meets the watch face.
-
Use the Spring Bar Tool or Quick Release Mechanism: If your Versa 2 utilizes spring bars, carefully insert the spring bar tool into the small openings on the band attachment points. Gently press down on the tool to compress the spring bar, allowing you to release it from the watch case. For bands equipped with quick release pins, simply locate the release buttons on the underside of the band and simultaneously press them to disengage the pins from the watch case.
-
Detach the Current Band: Once the spring bars or quick release pins have been disengaged, carefully slide the current band away from the watch case, ensuring a smooth and controlled removal. Take care not to force the band off, as this may cause damage to the attachment points or the band itself.
-
Clean the Attachment Points: With the current band removed, take a moment to inspect the attachment points on the watch case. Use a clean cloth or microfiber towel to gently wipe down the attachment areas, removing any debris or residue that may have accumulated. This step ensures that the attachment points are clean and ready to receive the new band.
By following these steps, you can effectively remove the current band from your Fitbit Versa 2, setting the stage for the seamless attachment of a new band. With the old band safely detached, you're now ready to proceed to the next step of attaching your chosen replacement band to the Versa 2, allowing you to infuse your personal style into this versatile wearable device.
Step 3: Attach the New Band
With the old band successfully removed, it's time to embark on the exciting process of attaching your new band to the Fitbit Versa 2. This step allows you to infuse your personal style and preferences into the device, transforming its appearance to align with your unique aesthetic. By following these detailed steps, you can seamlessly install the new band, ensuring a secure and stylish fit for your Fitbit Versa 2.
-
Align the New Band: Begin by aligning the replacement band with the attachment points on the watch case. Ensure that the band is oriented correctly, with the designated ends positioned to align with the attachment areas. This initial alignment sets the stage for a smooth and precise installation.
-
Engage the Attachment Mechanism: If your new band utilizes quick release pins, simply align the pins with the attachment points and gently press down until they audibly click into place. This secure clicking sound indicates that the pins have successfully engaged with the watch case, providing a reliable connection. For bands equipped with spring bars, carefully position the ends of the band onto the attachment points, aligning the spring bar notches with the corresponding openings on the watch case.
-
Secure the Band: Once the band is aligned and the attachment mechanisms are engaged, perform a gentle tug on the band to ensure that it is securely fastened to the watch case. This step verifies that the band is properly attached and eliminates the risk of accidental detachment during wear.
-
Verify Fit and Comfort: With the new band in place, assess the fit and comfort to ensure that it meets your expectations. The band should sit snugly against your wrist without causing discomfort or constriction. Take a moment to adjust the fit if necessary, ensuring that the band is tailored to your comfort preferences.
-
Inspect the Attachment: After attaching the new band, visually inspect the attachment points to confirm that the band is securely fastened to the watch case. Check for any gaps or misalignments that may indicate an incomplete attachment, and make any necessary adjustments to achieve a seamless connection.
By following these steps, you can effectively attach your new band to the Fitbit Versa 2, elevating its visual appeal and personalizing it to align with your individual style. With the band securely in place, you're now ready to proceed to the next step of adjusting the fit to ensure optimal comfort and functionality.
Step 4: Adjust the Fit
Ensuring that the Fitbit Versa 2 sits comfortably on your wrist is essential for a seamless and enjoyable wearable experience. After attaching the new band, it's important to focus on adjusting the fit to achieve optimal comfort and functionality. By customizing the fit to your preferences, you can maximize the wearability of your Fitbit Versa 2, allowing you to seamlessly integrate it into your daily activities.
Comfort and Flexibility
The Fitbit Versa 2 offers versatility in terms of fit adjustment, catering to a wide range of wrist sizes and individual preferences. Whether you prefer a snug fit during workouts or a slightly looser fit for all-day wear, the adjustable nature of the band allows you to tailor the fit to your comfort level. By ensuring a comfortable fit, you can wear your Versa 2 with ease, allowing it to accompany you through various activities without causing discomfort or irritation.
Band Sizing and Customization
Depending on the type of replacement band you've chosen, such as a silicone, leather, metal, or woven band, you may have the option to customize the sizing to achieve the perfect fit. For bands with traditional buckle closures, adjusting the fit is as simple as securing the buckle at the appropriate notch to achieve a comfortable and secure fit. Similarly, metal bands with adjustable links provide the flexibility to fine-tune the sizing, ensuring a tailored fit that complements your wrist size.
Wrist Positioning and Wearability
Once the band is attached and the fit is adjusted, take a moment to assess the positioning of the Fitbit Versa 2 on your wrist. The device should sit comfortably and securely, with the screen positioned optimally for visibility and interaction. Additionally, ensure that the band is neither too tight nor too loose, striking a balance that allows for unrestricted movement while maintaining a secure hold on your wrist. This careful consideration of wrist positioning enhances the overall wearability of the Fitbit Versa 2, ensuring that it seamlessly integrates into your daily routine.
Personalized Fit for Every Activity
The ability to adjust the fit of your Fitbit Versa 2 enables you to personalize its wearability for various activities. Whether you're engaging in rigorous workouts, embarking on outdoor adventures, or simply navigating through your daily tasks, having the flexibility to customize the fit ensures that your Versa 2 remains comfortable and secure in any scenario. This personalized fit enhances the practicality and functionality of the device, allowing you to harness its full potential across a spectrum of activities and environments.
By focusing on adjusting the fit of your Fitbit Versa 2, you can elevate its comfort and functionality, ensuring that it seamlessly integrates into your lifestyle. With the fit tailored to your preferences, you can confidently wear your Versa 2 throughout the day, harnessing its features and capabilities without compromise. This personalized approach to fit adjustment further enhances the appeal of the Fitbit Versa 2 as a versatile and indispensable wearable device.
Step 5: Personalize with Accessories
Personalizing your Fitbit Versa 2 goes beyond just changing the band; it extends to incorporating accessories that complement your style and enhance the functionality of the device. By accessorizing your Versa 2, you can elevate its visual appeal, add practical features, and make a statement that aligns with your individual preferences.
Watch Faces
One of the most impactful ways to personalize your Fitbit Versa 2 is by selecting custom watch faces that resonate with your style and interests. Whether you prefer minimalist designs, vibrant colors, or intricate complications, the wide array of available watch faces allows you to curate a visual experience that reflects your personality. From digital displays to analog-inspired designs, the versatility of watch faces enables you to tailor the look of your Versa 2 to suit various occasions and moods.
Screen Protectors
Protecting the screen of your Fitbit Versa 2 is essential for preserving its pristine appearance and safeguarding it against daily wear and tear. Applying a high-quality screen protector not only shields the display from scratches and smudges but also adds a layer of durability without compromising touchscreen functionality. With the option to choose from clear, matte, or tempered glass protectors, you can seamlessly integrate this accessory into your Versa 2, ensuring long-lasting clarity and protection.
Charging Stands and Docks
Streamlining the charging process for your Fitbit Versa 2 can be achieved through the use of dedicated charging stands and docks. These accessories offer a convenient and stylish solution for keeping your Versa 2 charged and ready for use. Whether you opt for a sleek, minimalist charging stand or a compact travel dock, integrating this accessory into your routine ensures that your Versa 2 remains powered up and accessible at all times.
Protective Cases
For those seeking additional protection for their Fitbit Versa 2, specialized cases provide a practical solution. These slim, form-fitting cases offer impact resistance and safeguard the edges and surfaces of the device against accidental bumps and dings. With options available in various colors and materials, you can customize the level of protection while adding a touch of personalization to your Versa 2.
Interchangeable Bezels
Adding a touch of sophistication to your Fitbit Versa 2 is made possible through interchangeable bezels. These sleek, metal accents encircle the watch face, elevating its aesthetic appeal and allowing for seamless coordination with different bands and outfits. By selecting bezels in metallic finishes or unique designs, you can effortlessly enhance the visual impact of your Versa 2, creating a cohesive and refined look that aligns with your style.
By incorporating these accessories into your Fitbit Versa 2 customization journey, you can elevate its visual appeal, enhance its functionality, and infuse your personal style into every aspect of the device. The combination of custom watch faces, protective accessories, and practical enhancements allows you to create a tailored experience that reflects your individuality, making your Fitbit Versa 2 an extension of your personal style and preferences.
Conclusion
In conclusion, the process of changing the band on your Fitbit Versa 2 presents an exciting opportunity to infuse your personal style into this versatile wearable device. By following the steps outlined in this guide, you've gained the knowledge and confidence to seamlessly transition from the default band to a customized option that resonates with your aesthetic preferences and lifestyle.
The ability to switch bands on the Fitbit Versa 2 not only offers practical benefits but also serves as a means of personal expression. Whether you opt for a silicone band for active pursuits, a leather band for a touch of elegance, or a metal band for a sleek and refined look, the versatility of band options allows you to tailor your Versa 2 to any occasion.
Furthermore, the process of changing the band is just the beginning of personalizing your Fitbit Versa 2. By exploring additional accessories such as custom watch faces, screen protectors, charging stands, protective cases, and interchangeable bezels, you can elevate the visual appeal, functionality, and durability of your device while reflecting your unique style and preferences.
Ultimately, the Fitbit Versa 2 becomes more than just a wearable device—it becomes an extension of your personality and a reflection of your individuality. With the ability to seamlessly integrate your Versa 2 into various aspects of your life, from fitness activities to formal events and everyday routines, the personalized customization enhances its significance as a versatile and indispensable companion.
As you embark on your journey with the customized band and accessories, remember that the process of personalization is ongoing. You have the freedom to adapt your Fitbit Versa 2 to suit evolving style trends, seasonal changes, and new experiences, ensuring that it remains a dynamic and integral part of your lifestyle.
In essence, the process of changing the band on your Fitbit Versa 2 is not just a practical endeavor; it's an opportunity for self-expression and personalization, allowing you to make a statement that is uniquely yours. With each customization, you further solidify the bond between yourself and your Versa 2, creating a wearable experience that is as distinctive and individual as you are.