Introduction
Welcome to the world of wireless convenience and immersive sound with Sony's Wireless Noise Cancelling Headphones. These cutting-edge headphones offer a seamless listening experience, allowing you to sync them with your computer for an enhanced audio experience. Whether you're streaming music, watching movies, or video conferencing, the Sony Wireless Noise Cancelling Headphones deliver top-notch sound quality while eliminating external distractions.
In this guide, we'll walk you through the simple process of syncing your Sony Wireless Noise Cancelling Headphones to your computer via Bluetooth. By following these easy steps, you'll be able to enjoy the freedom of wireless audio and the superior noise-cancelling capabilities of your Sony headphones while working, relaxing, or simply indulging in your favorite entertainment.
Stay tuned as we delve into the straightforward process of connecting your Sony Wireless Noise Cancelling Headphones to your computer, enabling you to experience the power of premium audio technology at your fingertips. Let's get started on this seamless journey to elevate your audio experience to new heights.
Step 1: Turn on the headphones
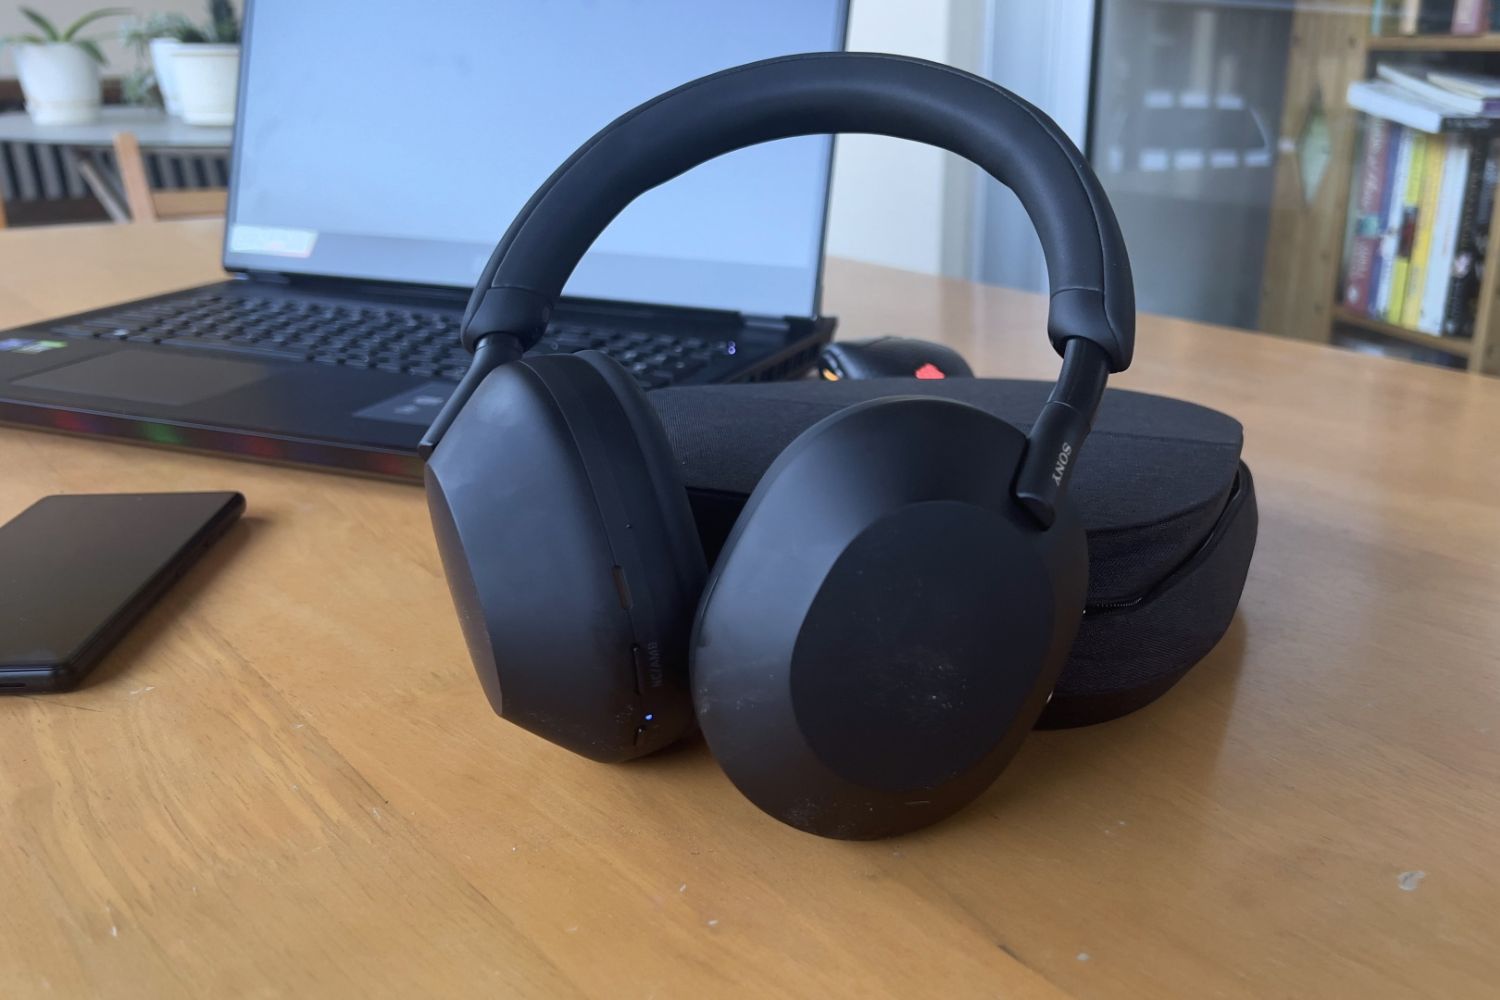
The first step in syncing your Sony Wireless Noise Cancelling Headphones to your computer is to ensure that the headphones are powered on. To do this, locate the power button on your headphones. This button is typically situated on one of the ear cups and may have a distinctive power symbol or indicator light.
Once you've located the power button, press and hold it for a few seconds until you see or hear a power-on indicator. Depending on the model of your Sony headphones, you may observe a light blinking, an audible power-on sound, or a visual indication such as an LED light turning on. This signifies that the headphones are now active and ready to be paired with your computer.
By turning on your Sony Wireless Noise Cancelling Headphones, you initiate the process of establishing a wireless connection with your computer, setting the stage for a seamless and immersive audio experience. With the headphones powered on, you're now ready to proceed to the next step of putting them in pairing mode to initiate the Bluetooth connectivity process.
Step 2: Put the headphones in pairing mode
After turning on your Sony Wireless Noise Cancelling Headphones, the next crucial step is to put them in pairing mode. Pairing mode allows your headphones to be discoverable by your computer’s Bluetooth settings, enabling the two devices to establish a secure and stable wireless connection.
To activate pairing mode, refer to the specific instructions provided in your Sony headphone’s user manual or follow these general steps. On most Sony Wireless Noise Cancelling Headphones, entering pairing mode involves pressing and holding a designated button or combination of buttons for a few seconds. This action typically triggers a visual or audible indication, such as a blinking light or a voice prompt, signaling that the headphones are now ready to be paired with a new device.
During the pairing process, it’s essential to ensure that your headphones are sufficiently charged to maintain a stable connection. Keep an eye on the battery level indicator to prevent any interruptions during the pairing procedure. Once your Sony Wireless Noise Cancelling Headphones are in pairing mode, they are primed to establish a seamless connection with your computer, paving the way for an uninterrupted audio experience.
By putting your headphones in pairing mode, you initiate the crucial step of enabling them to be discovered by your computer’s Bluetooth settings, setting the stage for a hassle-free connection process. With the headphones now in pairing mode, you’re ready to proceed to the next step of opening the Bluetooth settings on your computer to initiate the pairing process.
Step 3: Open Bluetooth settings on your computer
With your Sony Wireless Noise Cancelling Headphones in pairing mode, the next step is to navigate to the Bluetooth settings on your computer. Whether you’re using a Windows PC, Mac, or a laptop running a different operating system, the process of accessing Bluetooth settings remains fairly consistent across platforms.
Begin by locating the Bluetooth icon or accessing the Bluetooth settings through the system preferences or control panel on your computer. On a Windows PC, you can typically find the Bluetooth icon in the system tray or by searching for “Bluetooth” in the system settings. On a Mac, the Bluetooth settings can be accessed through the Apple menu or by searching for “Bluetooth” in System Preferences.
Once you’ve located the Bluetooth settings, ensure that the Bluetooth feature is enabled on your computer. This step is crucial as it allows your computer to actively scan for and connect to nearby Bluetooth devices, including your Sony Wireless Noise Cancelling Headphones. If Bluetooth is not already enabled, simply toggle the switch or click the option to turn it on.
As you access the Bluetooth settings on your computer, keep an eye out for any available devices or a “search for devices” option. This is where your computer will scan for nearby Bluetooth-enabled devices, including your headphones. Once your computer’s Bluetooth settings are open and actively searching for devices, you’re prepared to initiate the pairing process and connect your Sony Wireless Noise Cancelling Headphones to your computer.
By accessing the Bluetooth settings on your computer, you set the stage for establishing a seamless wireless connection between your Sony headphones and your computer. With the Bluetooth settings now open and ready to detect nearby devices, you’re poised to proceed to the next step of connecting your headphones to your computer and testing the wireless connection.
Step 4: Connect to the headphones
With the Bluetooth settings open on your computer and your Sony Wireless Noise Cancelling Headphones in pairing mode, you’re now ready to establish the wireless connection between the two devices. In the Bluetooth settings on your computer, look for the option to “Add a device,” “Scan for devices,” or a similar prompt that initiates the search for nearby Bluetooth-enabled devices.
Upon initiating the search, your computer will begin scanning for available Bluetooth devices, including your Sony headphones. As the scanning process progresses, your headphones should appear in the list of available devices on your computer’s Bluetooth settings. Once your Sony Wireless Noise Cancelling Headphones are detected, select them from the list to begin the pairing process.
Depending on your computer’s operating system, you may be prompted to enter a pairing code or confirm the connection. Follow the on-screen instructions to complete the pairing process, ensuring that the connection is secure and established successfully. Once the pairing is confirmed, your computer will recognize your Sony Wireless Noise Cancelling Headphones as a connected audio device.
After successfully connecting your headphones to your computer, you may have the option to set them as the default audio output device. This allows all audio from your computer to be routed through your Sony headphones, delivering a seamless and immersive listening experience. Check your computer’s sound settings to configure the audio output preferences according to your preferences.
By connecting your Sony Wireless Noise Cancelling Headphones to your computer, you’ve successfully established a wireless audio connection, enabling you to enjoy high-quality sound without the constraints of traditional wired connections. With the headphones now connected to your computer, you’re ready to proceed to the final step of testing the wireless connection and ensuring that the audio is seamlessly transmitted to your Sony headphones.
Step 5: Test the connection
After successfully connecting your Sony Wireless Noise Cancelling Headphones to your computer, it’s essential to test the wireless connection to ensure that the audio is seamlessly transmitted to your headphones. Begin by playing a sample audio or video file on your computer to verify that the sound is being transmitted to and played through your Sony headphones.
Listen for the audio output from your headphones, ensuring that the sound is clear, immersive, and free from any disruptions. Pay attention to the noise-cancelling feature, which should effectively minimize external distractions, allowing you to enjoy an uninterrupted audio experience. Additionally, check the volume controls on your headphones to ensure that you can adjust the audio levels according to your preference.
If the audio is not playing through your Sony Wireless Noise Cancelling Headphones, revisit the Bluetooth settings on your computer to confirm that the headphones are selected as the default audio output device. Additionally, ensure that the headphones are within the optimal range of your computer to maintain a stable wireless connection.
As you test the connection, consider exploring various audio sources, such as music, videos, or online content, to gauge the performance of your Sony headphones across different media. This allows you to experience the full spectrum of audio capabilities offered by your headphones, ensuring that they deliver exceptional sound quality across diverse content types.
By testing the connection between your computer and your Sony Wireless Noise Cancelling Headphones, you verify that the wireless audio transmission is functioning seamlessly, allowing you to revel in a captivating audio experience without the constraints of wired connections. With the connection successfully tested and the sound quality confirmed, you can now immerse yourself in a world of premium audio, courtesy of your Sony headphones.
Conclusion
Congratulations! You’ve successfully completed the seamless process of syncing your Sony Wireless Noise Cancelling Headphones to your computer, unlocking a world of wireless audio convenience and premium sound quality. By following the straightforward steps outlined in this guide, you’ve harnessed the power of Bluetooth connectivity to establish a robust wireless connection between your Sony headphones and your computer.
With your Sony Wireless Noise Cancelling Headphones now connected to your computer, you can indulge in a captivating audio experience, whether you’re streaming music, watching movies, engaging in video calls, or immersing yourself in your favorite content. The advanced noise-cancelling capabilities of your Sony headphones ensure that you can enjoy uninterrupted audio, free from external distractions, allowing you to focus on the immersive sound delivered by these cutting-edge headphones.
As you embrace the wireless freedom and superior sound performance of your Sony headphones, remember to explore the various audio settings and customization options available on your computer to tailor the audio experience to your preferences. Whether it’s adjusting the audio output levels, fine-tuning the equalizer settings, or configuring the sound preferences for different applications, you have the flexibility to personalize your audio experience according to your unique preferences.
By syncing your Sony Wireless Noise Cancelling Headphones to your computer, you’ve unlocked a world of audio excellence, seamlessly integrating cutting-edge technology into your daily audio endeavors. Whether you’re working, relaxing, or indulging in entertainment, the wireless connectivity and exceptional sound quality offered by your Sony headphones elevate your audio experience to new heights.
Now that you’ve mastered the art of syncing your Sony Wireless Noise Cancelling Headphones to your computer, you’re poised to embark on a journey of unparalleled audio immersion, powered by the seamless wireless connectivity and premium sound performance of your Sony headphones.


