Introduction
So, you've just purchased the HyperX Cloud Gaming Headset and you're eager to dive into the immersive world of gaming with crystal-clear audio. However, before you embark on your gaming adventures, you need to ensure that the microphone on your headset is properly connected and ready to capture your voice with precision. Whether you're gearing up for intense multiplayer battles or planning to engage in lively conversations with your fellow gamers, having a functional microphone is crucial for seamless communication.
In this guide, we'll walk you through the simple process of plugging in the microphone on your HyperX Cloud Gaming Headset. You'll learn how to locate the microphone port, insert the microphone plug, and make any necessary adjustments to ensure optimal performance. By following these steps, you'll be well-equipped to communicate clearly and effectively with your gaming companions, enhancing your overall gaming experience.
Let's dive into the step-by-step instructions to ensure that your HyperX Cloud Gaming Headset microphone is set up and ready to capture your voice with precision.
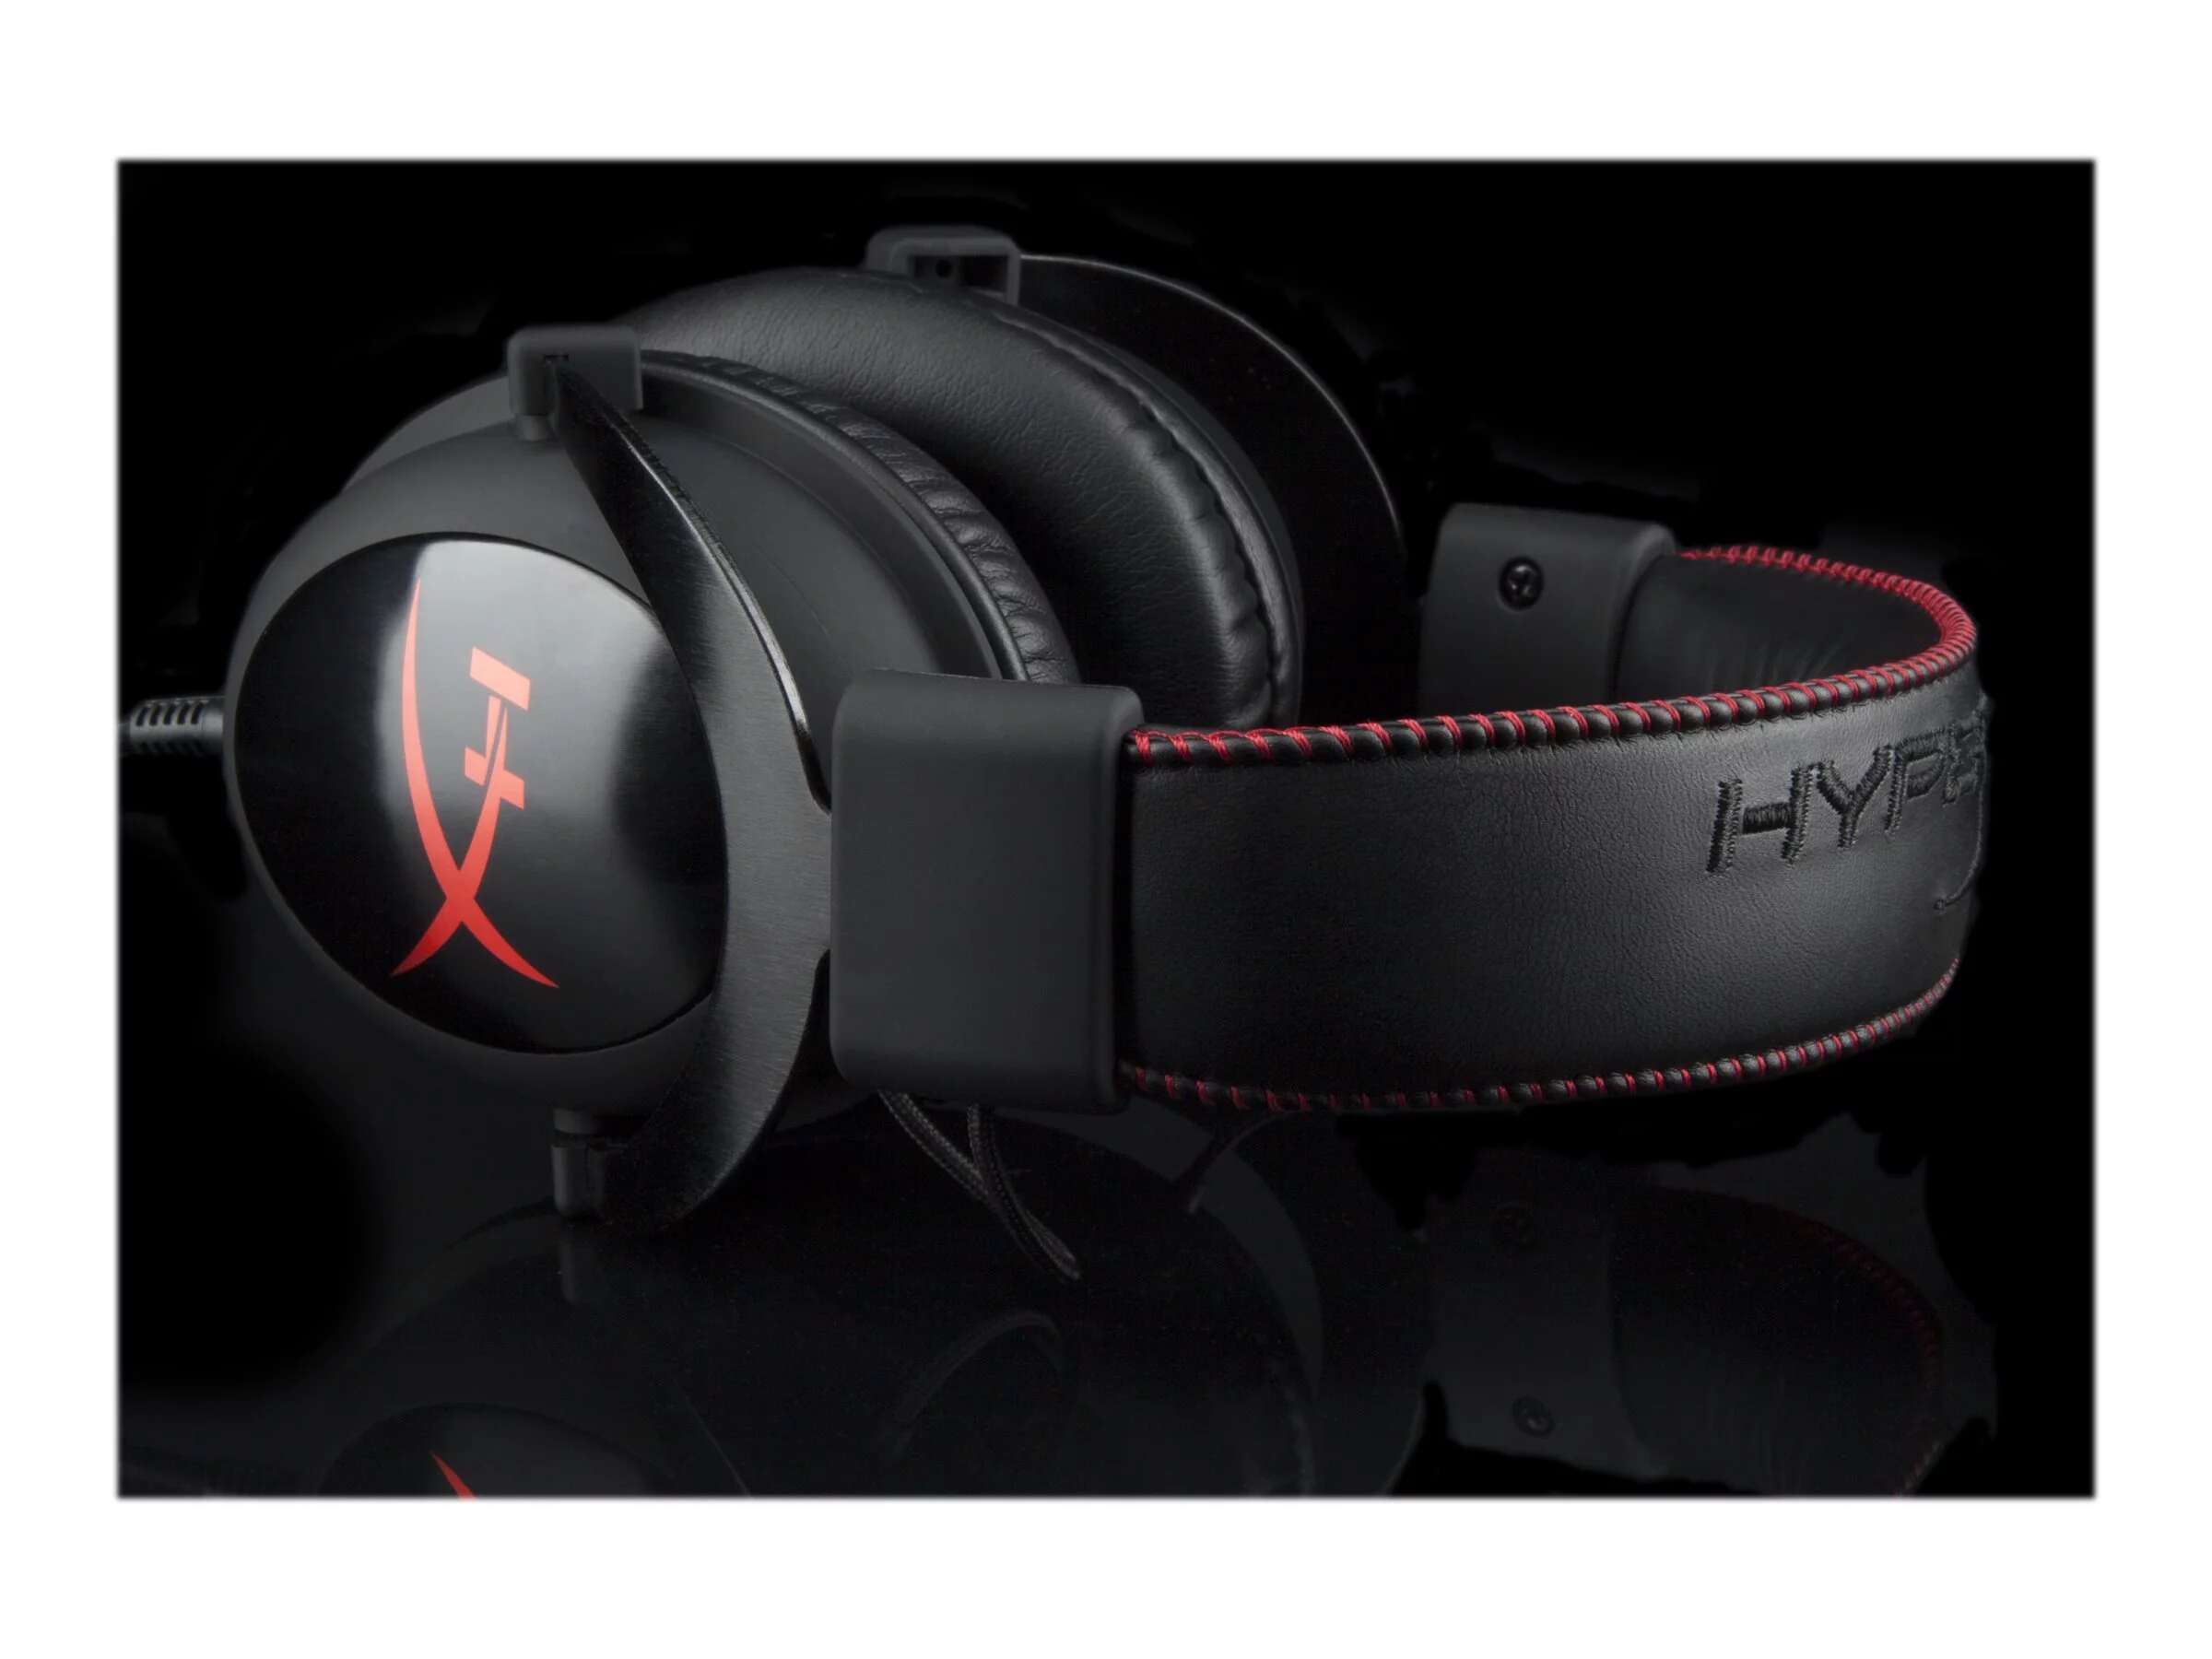
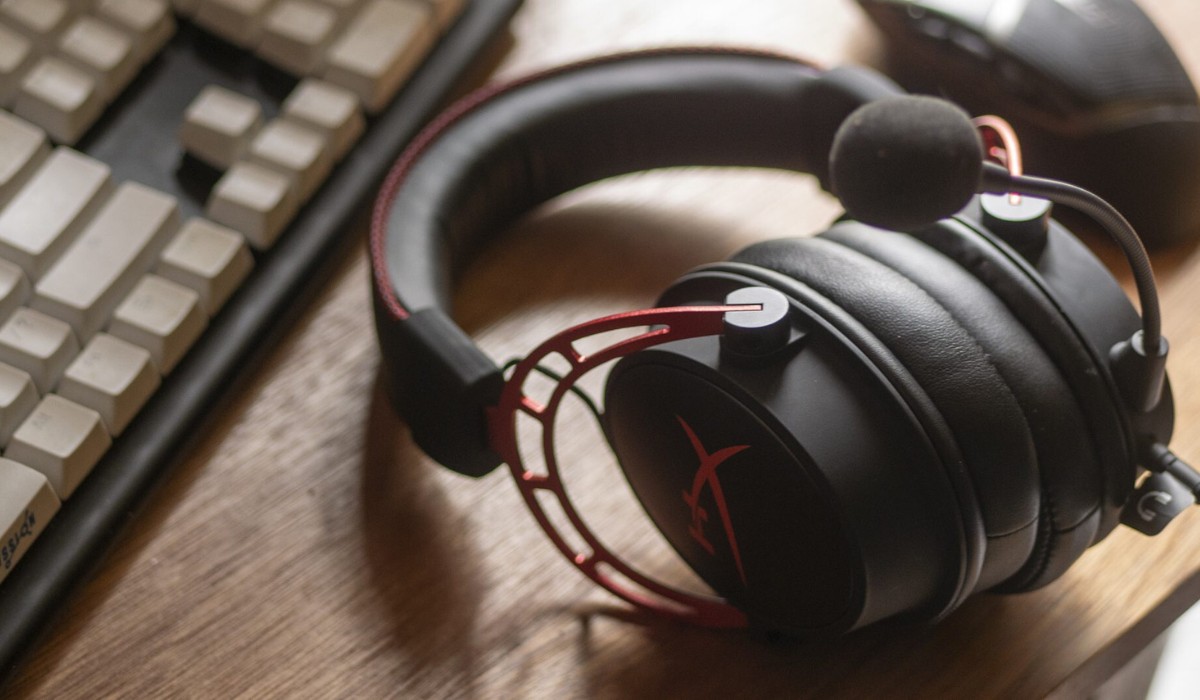
Step 1: Locate the microphone port on the HyperX Cloud Gaming Headset
Before you can begin using the microphone on your HyperX Cloud Gaming Headset, you need to locate the microphone port. This port is specifically designed to receive the microphone plug and enable the headset to capture your voice during gaming sessions or online conversations. To find the microphone port, follow these simple steps:
- Inspect the headset’s exterior: Begin by examining the exterior of the headset, paying close attention to the area where the microphone is attached. The microphone port is typically located near the ear cup where the microphone is connected. It may appear as a small opening or slot designed to accommodate the microphone plug.
- Refer to the user manual: If you’re having trouble locating the microphone port, consult the user manual that came with your HyperX Cloud Gaming Headset. The manual often includes detailed illustrations or descriptions that can help you identify the precise location of the microphone port.
- Check for labeled indicators: Some gaming headsets feature labeled indicators to differentiate between the microphone port and other ports, such as the audio input or output ports. Look for any symbols or labels that indicate the presence of the microphone port.
By following these steps, you’ll successfully pinpoint the microphone port on your HyperX Cloud Gaming Headset, setting the stage for the next crucial step in the process: inserting the microphone plug.
Step 2: Insert the microphone plug into the port
Now that you’ve located the microphone port on your HyperX Cloud Gaming Headset, it’s time to proceed with the next step: inserting the microphone plug into the port. This simple yet essential process ensures that the microphone is securely connected to the headset, allowing it to capture your voice accurately during gaming sessions or online communication. Follow these steps to insert the microphone plug:
- Align the microphone plug: Take a moment to inspect the microphone plug, ensuring that it is properly aligned for insertion into the microphone port. The plug should align with the port to facilitate a smooth and secure connection.
- Gently insert the plug: With the microphone plug properly aligned, gently insert it into the microphone port on the headset. Apply gentle pressure to ensure that the plug fits snugly into the port without forcing it or causing any damage to the components.
- Verify the connection: Once the plug is inserted, verify the connection by gently tugging on the microphone plug. If it is securely inserted, it should remain in place without coming loose. This quick check ensures that the microphone is properly connected and ready for use.
By following these steps, you’ll successfully insert the microphone plug into the port, establishing a reliable connection that allows the headset to capture your voice with clarity and precision. With the microphone securely in place, you’re one step closer to enjoying seamless communication during your gaming experiences.
Step 3: Adjust the microphone position
After successfully inserting the microphone plug into the port, it’s essential to ensure that the microphone is positioned optimally for effective voice capture. Proper positioning not only enhances the clarity of your voice but also minimizes background noise, contributing to a more immersive and seamless communication experience. Follow these steps to adjust the microphone position on your HyperX Cloud Gaming Headset:
- Position the microphone near your mouth: Adjust the microphone so that it is positioned near your mouth, approximately an inch or two away. This optimal distance ensures that your voice is captured clearly without the need to raise your voice, promoting comfortable communication during gaming sessions.
- Angle the microphone for optimal capture: Tilt the microphone to an angle that aligns with the natural position of your mouth when speaking. This adjustment helps the microphone capture your voice more effectively while minimizing ambient noise and distractions.
- Test the microphone position: Speak into the microphone and listen for the clarity of your voice. If necessary, make minor adjustments to the position to achieve the best possible voice capture. Ensuring that the microphone is positioned optimally is key to enhancing the overall communication experience.
By following these steps, you’ll effectively adjust the microphone position on your HyperX Cloud Gaming Headset, setting the stage for clear and precise voice capture during your gaming adventures and online interactions. With the microphone positioned optimally, you’re ready to put it to the test in the next step.
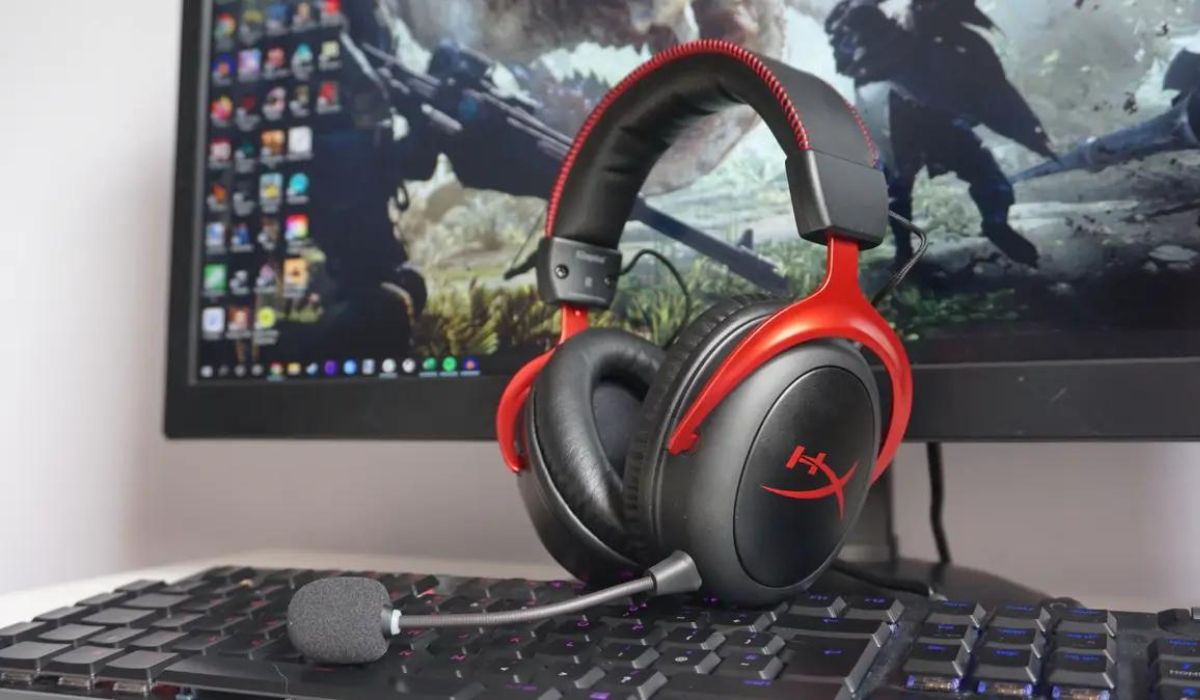
Step 4: Test the microphone
With the microphone plugged in and positioned optimally, it’s time to ensure that it’s functioning as intended. Testing the microphone allows you to verify the clarity and quality of voice capture, ensuring that you’re ready to engage in seamless communication during your gaming experiences. Follow these steps to test the microphone on your HyperX Cloud Gaming Headset:
- Access the microphone settings: Depending on your gaming platform or device, navigate to the microphone settings to access the input levels and configure any necessary adjustments. This step ensures that the microphone is recognized and ready for testing.
- Speak into the microphone: Utter a few words or sentences into the microphone to test its functionality. Listen for the clarity of your voice and ensure that it is being captured without distortion or interference.
- Adjust input levels if necessary: If you encounter any issues with the microphone’s input levels, make minor adjustments using the settings on your gaming platform or device. This step allows you to fine-tune the microphone settings for optimal performance.
- Engage in a test conversation: If possible, engage in a test conversation with a friend or fellow gamer to verify the microphone’s performance in a real-time communication scenario. This step provides valuable feedback on the microphone’s clarity and effectiveness.
By following these steps, you’ll effectively test the microphone on your HyperX Cloud Gaming Headset, ensuring that it’s ready to capture your voice with precision and clarity. With a successfully tested microphone, you’re well-prepared to engage in immersive gaming experiences and seamless online communication with your peers.
Conclusion
Congratulations! By following the step-by-step guide, you’ve successfully learned how to plug in the microphone on your HyperX Cloud Gaming Headset. From locating the microphone port to adjusting the microphone position and testing its functionality, you’ve taken the necessary steps to ensure that your headset is equipped to capture your voice with precision during gaming sessions and online interactions.
With the microphone securely connected and optimally positioned, you’re poised to enjoy seamless communication with your gaming companions, enhancing your overall gaming experience. Whether you’re coordinating strategies in multiplayer battles, engaging in team-based gameplay, or simply conversing with friends while gaming, a functional microphone is essential for effective communication.
As you embark on your gaming adventures, remember the importance of periodically checking the microphone’s performance and making any necessary adjustments to maintain optimal voice capture. Additionally, familiarize yourself with the microphone settings on your gaming platform or device to fine-tune the input levels and ensure a clear and balanced audio experience.
By mastering the process of plugging in the microphone on your HyperX Cloud Gaming Headset, you’ve empowered yourself to engage in immersive and dynamic gaming experiences while staying connected with your fellow gamers. Your clear and precise voice communication will undoubtedly contribute to a more cohesive and enjoyable gaming environment, enriching your gaming endeavors and fostering lasting connections within the gaming community.