Introduction
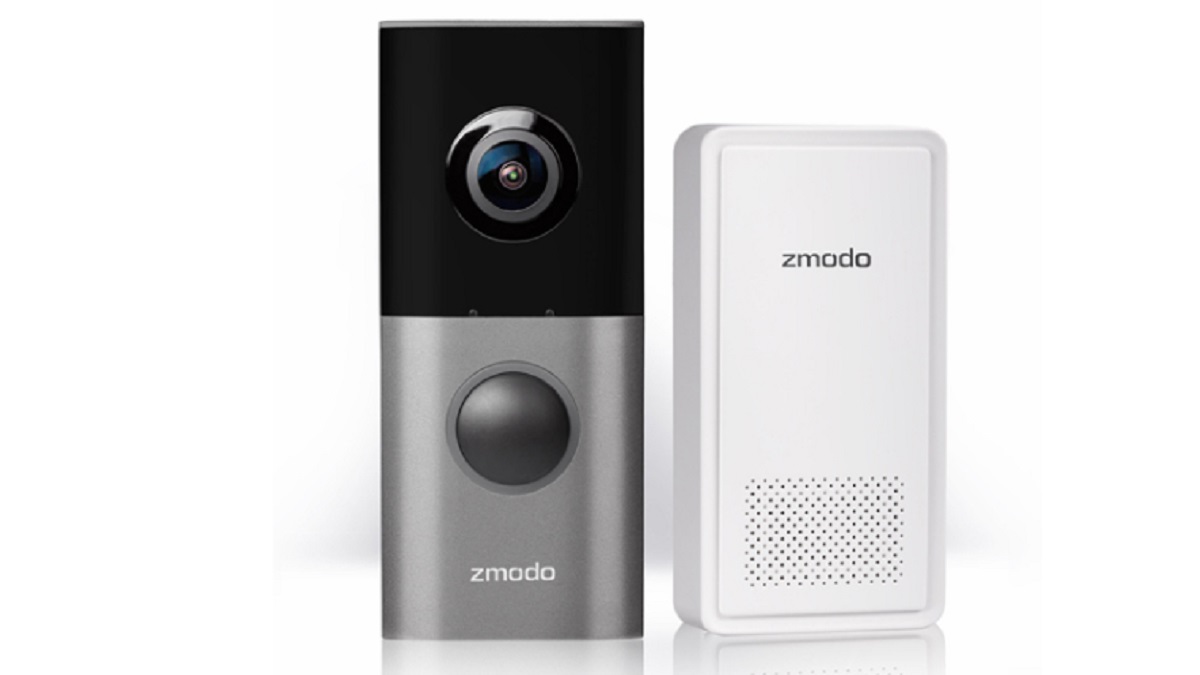
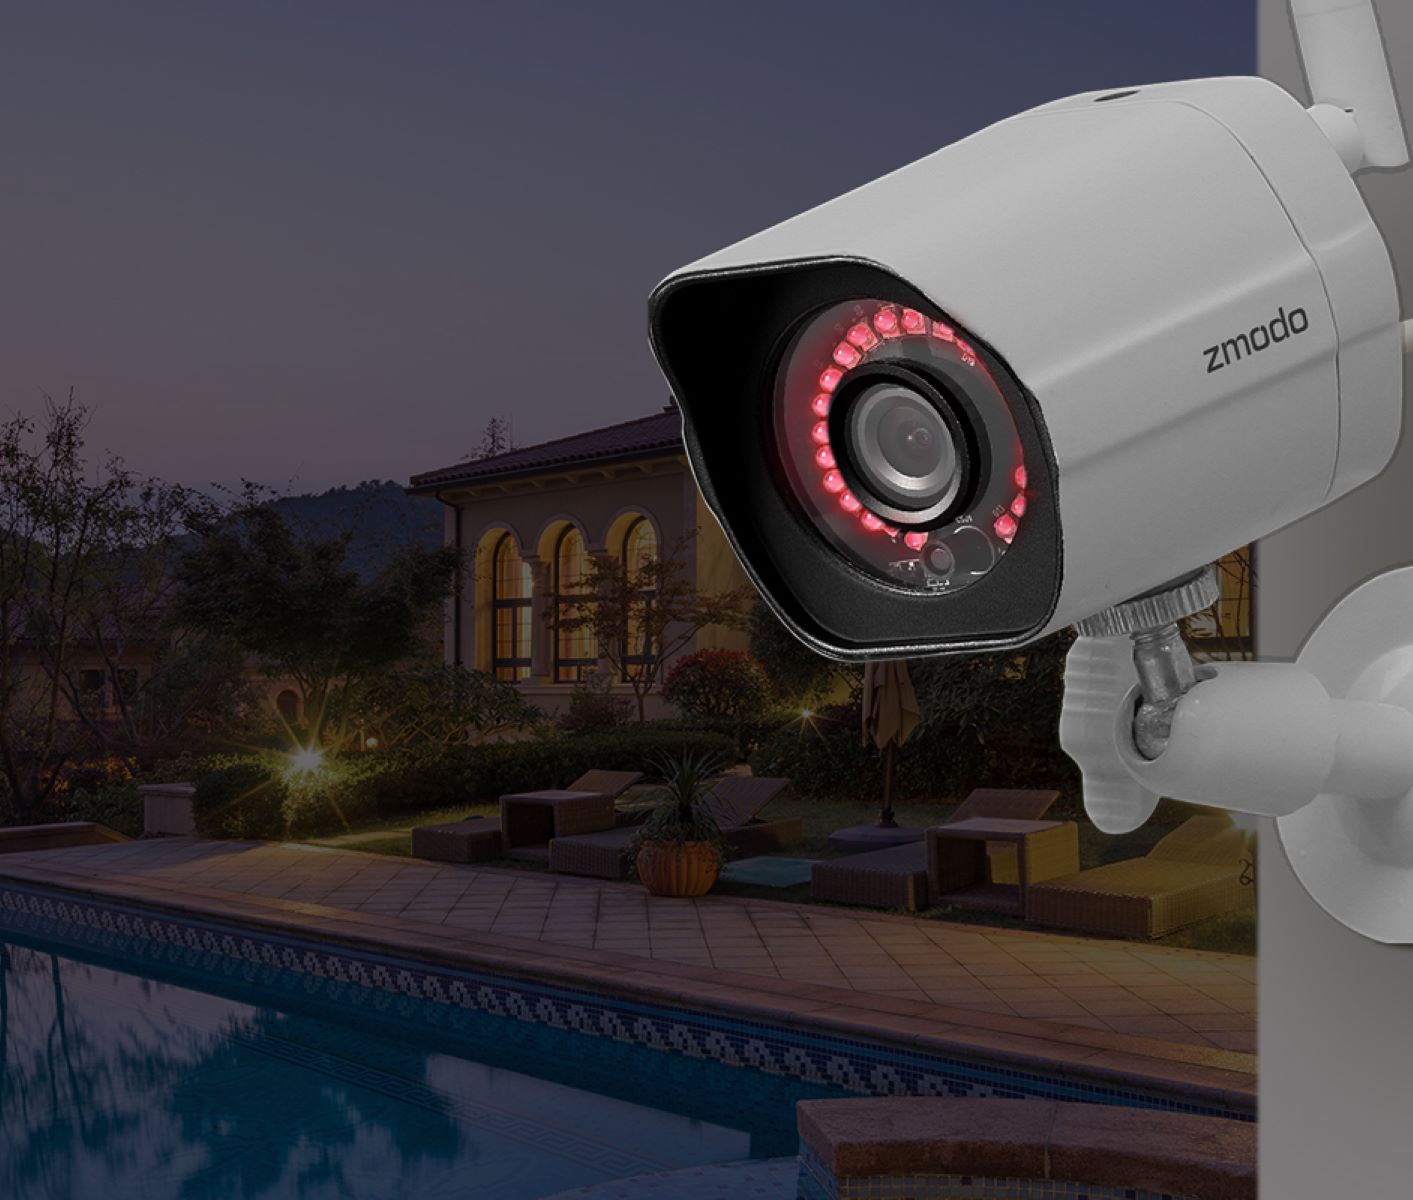
Welcome to our guide on how to connect the Zmodo Video Doorbell! The Zmodo Video Doorbell is a cutting-edge smart device that allows you to monitor and interact with visitors at your front door from anywhere using your smartphone. With its sleek design and advanced features, the Zmodo Video Doorbell provides an added layer of security and convenience for your home.
In this article, we will walk you through the step-by-step process of unboxing, setting up, and connecting the Zmodo Video Doorbell to your existing wiring. We will also guide you through downloading and configuring the Zmodo app on your smartphone, so you can access and control your doorbell’s features. So, let’s get started!
Before we dive into the installation process, it’s important to note that the Zmodo Video Doorbell requires an existing doorbell system with a wired connection. If you don’t have an existing doorbell or wiring, you may need to consult with a professional electrician for assistance.
Additionally, make sure you have the necessary tools and materials on hand before starting the installation. These may include a screwdriver, wire strippers, electrical tape, and possibly a voltage tester. Always prioritize safety when working with electricity, and if you have any doubts or concerns, consult a professional.
Now that you’re prepared, let’s proceed to step one: unboxing and inspecting the Zmodo Video Doorbell!
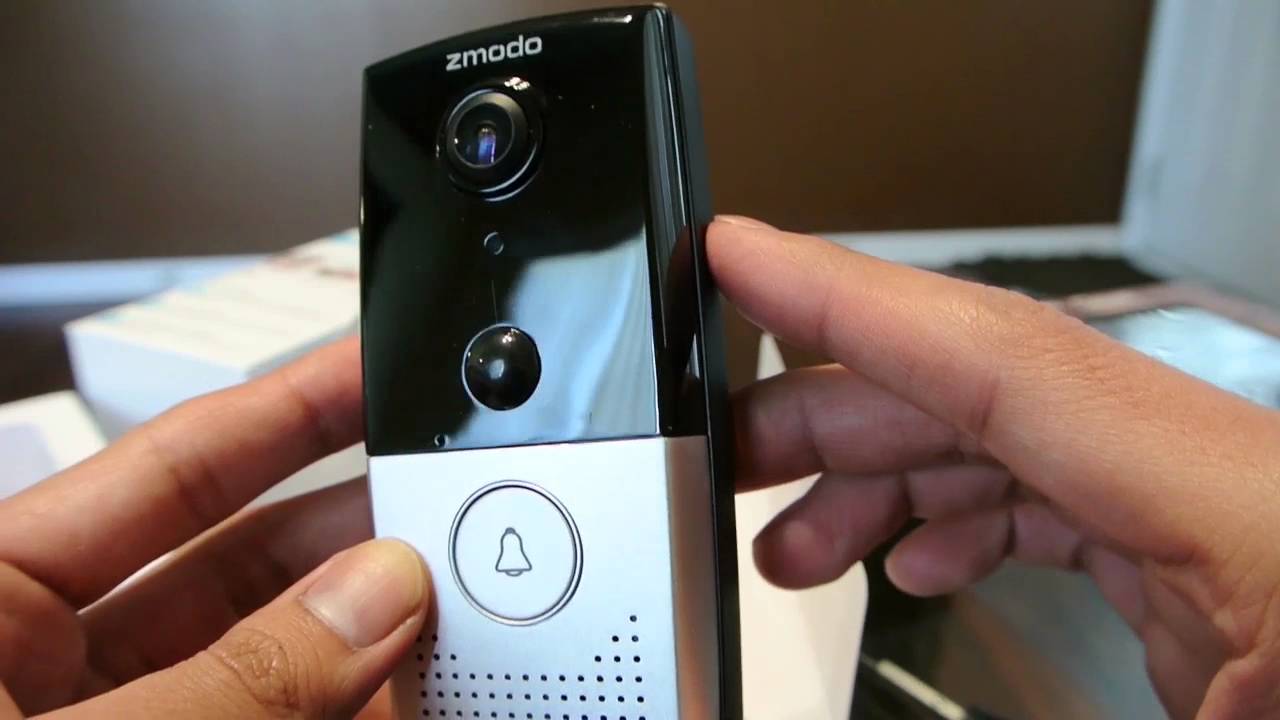
Step 1: Unboxing and Inspecting the Zmodo Video Doorbell
Now that you’re ready to install your Zmodo Video Doorbell, the first step is to unbox and inspect the device to ensure everything is in order. Follow these simple instructions to get started:
- Find a clean, well-lit area to unbox your Zmodo Video Doorbell. Remove the packaging and take out all the components, including the doorbell unit, mounting bracket, screws, and user manual.
- Inspect the doorbell unit for any visible signs of damage. Check for cracks or dents on the body of the doorbell, as well as any loose or broken parts. If you notice any issues, contact Zmodo customer support for assistance.
- Next, examine the mounting bracket. Make sure it is free from any defects and that all necessary screws are included. This bracket will be used to secure the doorbell unit to your wall or door frame, so it’s important to ensure it is in good condition.
- Take a look at the screws provided. Verify that they are the correct size and in good condition. If any screws are missing or damaged, you may need to purchase replacements from a local hardware store.
- Refer to the user manual included in the package for further instructions and information. Familiarize yourself with the different parts of the Zmodo Video Doorbell and get a basic understanding of how it works. This will come in handy during the installation process.
By carefully unboxing and inspecting your Zmodo Video Doorbell, you can ensure that you have all the necessary components and that they are in good working condition. This will help facilitate a smooth installation process in the next steps. Now that you have inspected the device, it’s time to move on to step two: preparing for installation.
Step 2: Preparing for Installation
Before you start installing your Zmodo Video Doorbell, it’s important to make a few preparations to ensure a successful and hassle-free installation process. Follow these steps to get ready:
- Determine the ideal location for your Zmodo Video Doorbell. Look for a spot near your front door that provides a good view of the entrance and has a strong Wi-Fi signal. Take into consideration any wiring or existing doorbell chimes that may need to be connected.
- Ensure that your Wi-Fi network is working properly and has a stable internet connection. This will enable you to connect your Zmodo Video Doorbell to the app and access its features remotely.
- Check the voltage of your existing doorbell system. The Zmodo Video Doorbell requires a voltage range of 16-24VAC. If your existing system does not meet this requirement, you may need to upgrade your transformer or seek professional assistance.
- Clean the area where you will be installing the doorbell. Remove any dust, dirt, or debris that may interfere with the mounting process.
- Prepare the necessary tools and materials. This may include a screwdriver, wire strippers, electrical tape, and a voltage tester. Having these items ready will save you time during the installation process.
By taking the time to prepare properly, you can ensure a smooth installation process for your Zmodo Video Doorbell. Once you have completed these preparations, you’re ready to move on to step three: connecting the doorbell to your existing wiring.
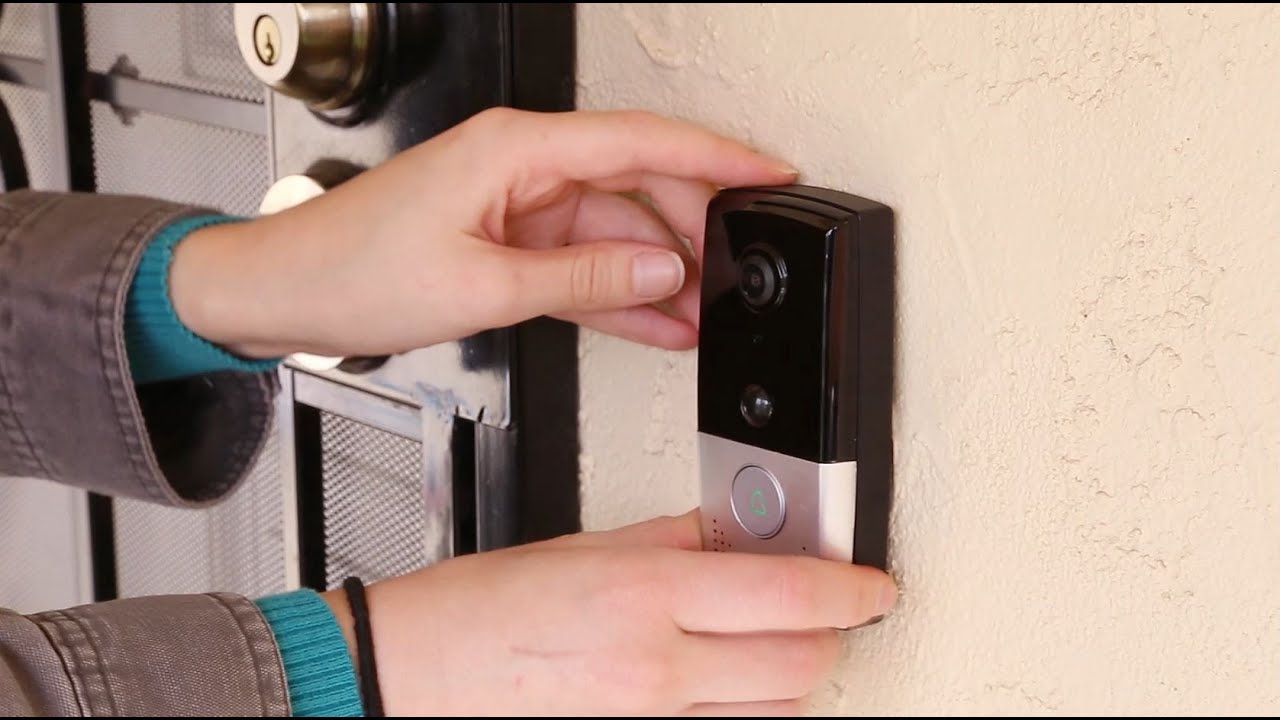
Step 3: Connecting the Doorbell to Existing Wiring
Now that you’ve prepared for installation, it’s time to connect the Zmodo Video Doorbell to your existing wiring. Follow these steps to ensure a successful connection:
- Turn off the power to your doorbell system from the breaker or fuse box. This will help prevent any accidents during the wiring process.
- Remove your existing doorbell button and disconnect the wires from the back. Take note of the wire colors and their corresponding terminals (usually labeled “Front” and “Transformer”).
- Remove the mounting bracket from the Zmodo Video Doorbell. This will expose the wiring terminals on the back of the device.
- Using wire strippers, strip the ends of the wires that were previously connected to your old doorbell button. Make sure to strip off enough insulation to expose the bare wire.
- Connect the bare ends of the wires to the corresponding terminals on the Zmodo Video Doorbell. Insert the wires firmly into the terminals and tighten the screws to secure them in place.
- Once the wiring is connected, attach the Zmodo Video Doorbell to the mounting bracket. Make sure it is securely fastened and level.
After completing these steps, you can turn the power back on from the breaker or fuse box. Your Zmodo Video Doorbell should now be connected to your existing wiring and ready for the next steps of the installation process.
It’s important to note that if you’re unsure about any of the wiring steps or don’t feel comfortable handling electrical connections, it’s always best to seek the assistance of a qualified electrician. Safety should be the top priority throughout the installation process.
Now that your doorbell is connected to the existing wiring, it’s time to move on to step four: downloading and installing the Zmodo app.
Step 4: Downloading and Installing the Zmodo App
With the Zmodo Video Doorbell successfully connected to your existing wiring, it’s time to download and install the Zmodo app on your smartphone. Follow these steps to get started:
- Open the app store on your smartphone. The Zmodo app is available for both iOS and Android devices.
- Search for “Zmodo” in the app store’s search bar. Look for the official Zmodo app, which should have the Zmodo logo.
- Select the Zmodo app from the search results and tap on “Install” or “Get” to begin the download and installation process.
- Once the app is downloaded and installed, open it on your smartphone.
- Create a new account or sign in if you already have one. You will need an active email address to create an account.
- Follow the on-screen instructions to complete the setup process. This may include granting necessary permissions, such as access to your camera and microphone.
- Once the setup process is complete, you will be taken to the dashboard of the Zmodo app.
Congratulations! You have successfully downloaded and installed the Zmodo app on your smartphone. This app will serve as the control center for your Zmodo Video Doorbell, allowing you to access and customize its features.
It’s important to note that you will need to connect your Zmodo Video Doorbell to your Wi-Fi network through the app. Follow the on-screen instructions within the app to complete this process.
Now that the Zmodo app is installed and set up on your smartphone, you’re ready to move on to step five: configuring the Zmodo Video Doorbell in the app.
Step 5: Configuring the Zmodo Video Doorbell in the App
Now that you have successfully installed the Zmodo app on your smartphone, it’s time to configure the Zmodo Video Doorbell within the app. Follow these steps to ensure proper configuration:
- Open the Zmodo app on your smartphone and log in to your account if you haven’t already done so.
- Once you’re logged in, navigate to the devices section of the app. You should see an option to add a new device.
- Select “Add a device” and choose “Zmodo Video Doorbell” from the list of available devices.
- The app will prompt you to scan the QR code located on the back of your Zmodo Video Doorbell. Use your smartphone’s camera to scan the code.
- After scanning the QR code, the app will start the pairing process. Follow the on-screen instructions to complete the pairing between your Zmodo Video Doorbell and the app.
- During the pairing process, you will be prompted to connect your Zmodo Video Doorbell to your Wi-Fi network. Make sure to select the correct network and enter the Wi-Fi password when prompted.
- Once the pairing and Wi-Fi connection process is complete, you should see a confirmation message in the app indicating that your Zmodo Video Doorbell is successfully configured.
With the Zmodo Video Doorbell successfully configured in the Zmodo app, you can now start exploring the various features and settings available. These may include adjusting motion detection sensitivity, setting up push notifications for incoming visitors, and enabling two-way audio communication.
Take some time to familiarize yourself with the app interface and customize the settings according to your preferences. This will ensure that you get the most out of your Zmodo Video Doorbell and enjoy a seamless experience.
Now that your Zmodo Video Doorbell is properly configured in the app, you’re ready to move on to step six: testing the doorbell and adjusting settings.
Step 6: Testing the Doorbell and Adjusting Settings
With your Zmodo Video Doorbell configured in the Zmodo app, it’s important to test the doorbell and adjust any settings to ensure optimal performance. Follow these steps to test and adjust your doorbell:
- Open the Zmodo app on your smartphone and navigate to the live view of your Zmodo Video Doorbell.
- Press the doorbell button or use the app to simulate a visitor ringing the doorbell. This will allow you to test the doorbell’s functionality and check if you receive the push notifications on your smartphone.
- Verify that the two-way audio feature is working properly by speaking through your smartphone and listening for the sound coming from the Zmodo Video Doorbell.
- Adjust the motion detection settings in the app to your desired sensitivity level. This will help in reducing false alerts or ensuring that no activities are missed near your front door.
- Explore additional settings available in the app, such as configuring recording options, scheduling, and customizing chime tones.
- If necessary, troubleshoot any connectivity issues by checking the Wi-Fi signal strength or contacting Zmodo customer support for assistance.
By testing the Zmodo Video Doorbell and adjusting the settings, you can ensure that the device is functioning properly and tailored to your specific preferences. This will provide you with peace of mind and the confidence that your doorbell is ready to keep your home secure.
Remember to periodically check for firmware updates within the Zmodo app to keep your Zmodo Video Doorbell up to date with the latest features and improvements.
Congratulations! You have successfully tested and adjusted your Zmodo Video Doorbell. You are now ready to step into a new level of security and convenience afforded by this smart device.
Now that you are familiar with the testing and adjustment process, the installation of your Zmodo Video Doorbell is complete. Enjoy the benefits of enhanced home security and the convenience of remote access via the Zmodo app!
Conclusion
Congratulations! You have successfully completed the installation and setup of your Zmodo Video Doorbell. By following the step-by-step instructions outlined in this guide, you have connected the doorbell to your existing wiring, downloaded the Zmodo app, and configured the doorbell within the app. You have also tested the doorbell’s functionality and adjusted settings to ensure optimal performance.
The Zmodo Video Doorbell provides an added layer of security and convenience for your home. With its sleek design and advanced features, you can now monitor and interact with visitors at your front door from anywhere using your smartphone. The two-way audio communication allows you to have conversations with visitors in real-time, even when you are not at home.
Make sure to take advantage of the various settings available in the Zmodo app, such as motion detection sensitivity and custom chime tones, to customize your doorbell’s behavior according to your preferences. Remember to regularly check for firmware updates within the app to keep your Zmodo Video Doorbell up to date with the latest features and improvements.
If you encounter any issues or have further questions, don’t hesitate to reach out to Zmodo’s customer support for assistance. They will be happy to help you troubleshoot any problems and ensure that you have the best experience with your Zmodo Video Doorbell.
Now that your Zmodo Video Doorbell installation is complete, enjoy the convenience, security, and peace of mind that it brings to your home. Whether you’re at home or away, you can now answer the door and monitor your front entrance with ease. Embrace the power of smart technology and make your home safer and smarter with the Zmodo Video Doorbell!