Introduction
The Samsung Galaxy Note 9 is a remarkable device that seamlessly integrates cutting-edge technology with sleek design. One of its essential components is the SIM card, which enables users to connect with their network providers and access a wide array of mobile services. However, there are instances when users need to safely extract the SIM card from their Note 9, whether to switch to a new device, replace the SIM card, or troubleshoot connectivity issues.
In this comprehensive guide, we will delve into the step-by-step process of safely extracting the SIM card from the Samsung Galaxy Note 9. By following these instructions, users can navigate this procedure with ease and ensure that their device remains unharmed throughout the process. From powering off the device to reinserting the SIM tray, each step is meticulously outlined to provide a seamless experience for Note 9 owners.
Whether you are a seasoned smartphone user or a newcomer to the world of mobile devices, this guide is designed to equip you with the knowledge and confidence to handle the extraction of the SIM card from your Note 9 effectively. By understanding the intricacies of this process, you can safeguard your device from potential damage and ensure a smooth transition when handling the SIM card.
Now, let's embark on this journey to uncover the essential steps for safely extracting the SIM card from the Samsung Galaxy Note 9. With a clear understanding of each step, you can navigate this process with confidence and precision, ultimately ensuring the integrity of your device and the seamless extraction of the SIM card.
Step 1: Power off the Note 9
Before embarking on the process of extracting the SIM card from your Samsung Galaxy Note 9, it is crucial to power off the device. This fundamental step ensures that the device is in a safe and dormant state, minimizing the risk of any damage during the SIM card extraction process.
To power off your Note 9, simply press and hold the power button located on the right side of the device. Upon doing so, a menu will appear on the screen, prompting you to power off the device. Slide the on-screen prompt to power off the Note 9 completely.
By powering off the device, you are effectively mitigating the risk of any electrical surges or disruptions while handling the SIM card. This proactive approach sets the stage for a smooth and secure SIM card extraction process, safeguarding both the device and the SIM card from potential harm.
Once the Note 9 is powered off, it is recommended to wait for a few moments to ensure that the device has completely shut down. This brief pause allows the internal components to settle, further reducing the likelihood of any unforeseen complications during the SIM card extraction.
With the Note 9 now powered off, you have successfully completed the first step towards safely extracting the SIM card from your device. This deliberate approach sets the foundation for a seamless SIM card extraction process, prioritizing the safety and integrity of both the device and the SIM card.
As we proceed to the subsequent steps, it is essential to maintain this cautious and methodical approach, ensuring that each phase of the SIM card extraction process is executed with precision and care. With the Note 9 powered off, we are now ready to progress to the next step in this comprehensive guide, bringing us closer to successfully extracting the SIM card from the Samsung Galaxy Note 9.
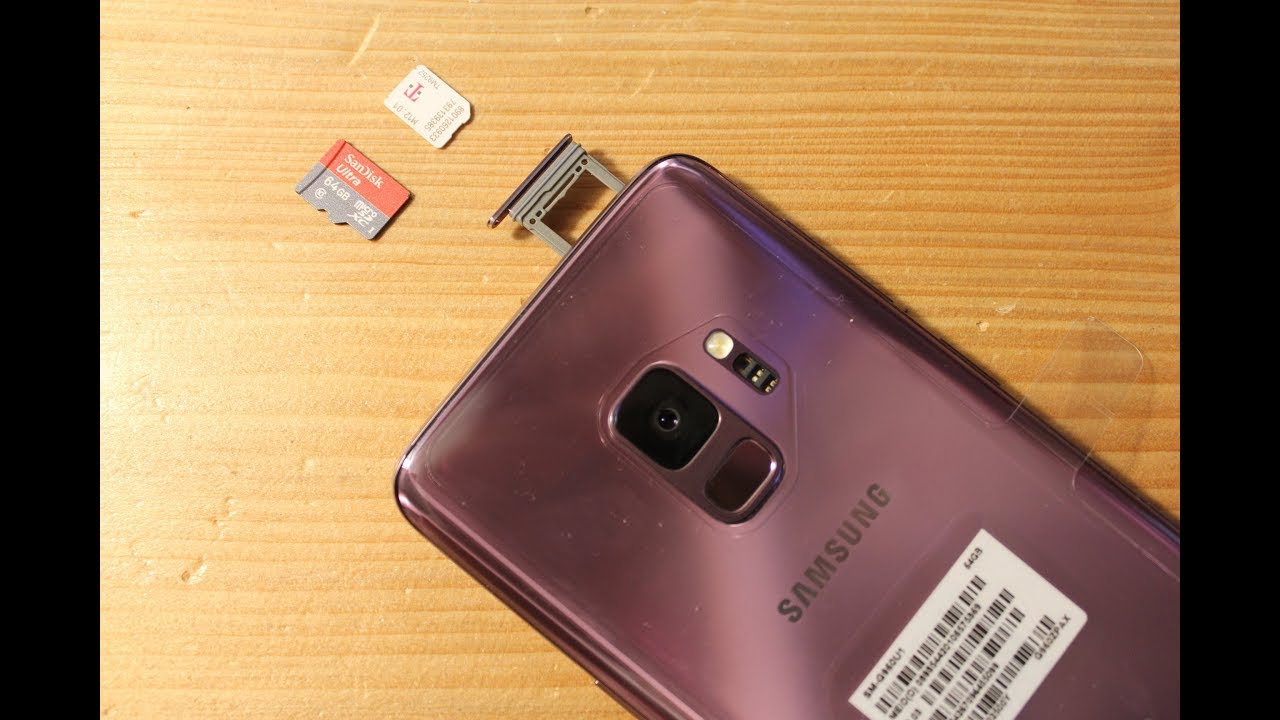
Step 2: Locate the SIM tray
Upon successfully powering off your Samsung Galaxy Note 9, the next crucial step in the process of safely extracting the SIM card is to locate the SIM tray. The SIM tray houses the SIM card and is designed to facilitate its insertion and removal from the device. To locate the SIM tray on your Note 9, follow these detailed instructions:
-
Position of the SIM Tray: The SIM tray is typically located on the top edge of the Note 9. It is important to note that the exact position may vary slightly depending on the device's orientation. Look for a small pinhole or slot on the top edge of the device, which indicates the presence of the SIM tray.
-
Identifying the SIM Tray Slot: Once you have located the pinhole or slot, use your fingertips to feel for the presence of the SIM tray within the slot. The SIM tray is designed to be flush with the device's exterior, ensuring a seamless and integrated design. Gently run your fingers along the top edge of the device to pinpoint the precise location of the SIM tray.
-
Orientation of the SIM Tray: As you locate the SIM tray, take note of its orientation within the slot. The SIM tray is positioned to accommodate the insertion and removal of the SIM card with precision. Familiarizing yourself with the orientation of the SIM tray sets the stage for a smooth and controlled extraction of the SIM card from your Note 9.
-
Utilize Adequate Lighting: In some instances, especially under low-light conditions, it may be beneficial to utilize adequate lighting to clearly identify the SIM tray. Natural or artificial light can aid in pinpointing the exact location of the SIM tray, ensuring that the extraction process is carried out with accuracy and confidence.
By meticulously following these instructions, you can effectively locate the SIM tray on your Samsung Galaxy Note 9, setting the stage for the subsequent steps in the SIM card extraction process. With the SIM tray now identified, you are poised to progress to the next phase of this comprehensive guide, bringing you closer to safely extracting the SIM card from your Note 9.
Step 3: Use the SIM eject tool
Once you have successfully located the SIM tray on your Samsung Galaxy Note 9, the next pivotal step in the process of safely extracting the SIM card is to utilize the SIM eject tool. This specialized tool is designed to facilitate the seamless removal of the SIM card from the device, ensuring precision and minimizing the risk of damage to both the SIM card and the Note 9.
To effectively use the SIM eject tool, follow these detailed instructions:
-
Retrieve the SIM Eject Tool: The SIM eject tool is typically included in the original packaging of your Samsung Galaxy Note 9. It is a small, metallic tool with a narrow, pointed end specifically designed for accessing the SIM tray. If the original SIM eject tool is unavailable, a suitable alternative, such as a paperclip or a similarly slender and sturdy object, can be used as a substitute.
-
Insert the SIM Eject Tool: With the SIM eject tool in hand, align the pointed end of the tool with the pinhole or slot located near the SIM tray on the top edge of your Note 9. Gently apply pressure to insert the tool into the pinhole, ensuring that it fits securely within the designated slot. The precise fit of the SIM eject tool is crucial for initiating the release mechanism of the SIM tray.
-
Apply Controlled Pressure: Once the SIM eject tool is securely inserted into the pinhole, exert controlled pressure in a straight, perpendicular motion. The goal is to activate the internal mechanism that releases the SIM tray from its locked position within the device. Avoid applying excessive force, as this may lead to damage or misalignment of the SIM tray.
-
Engage the Release Mechanism: As you apply pressure with the SIM eject tool, you will feel a subtle resistance followed by the release of the SIM tray. Continue to apply gentle pressure until the SIM tray is partially ejected from the device. At this stage, refrain from fully removing the SIM tray, as the next step involves delicately extracting the SIM card from the tray itself.
By following these precise instructions, you can effectively utilize the SIM eject tool to initiate the release of the SIM tray from your Samsung Galaxy Note 9. This deliberate and methodical approach sets the stage for the subsequent step in the SIM card extraction process, bringing you closer to safely removing the SIM card from your Note 9.
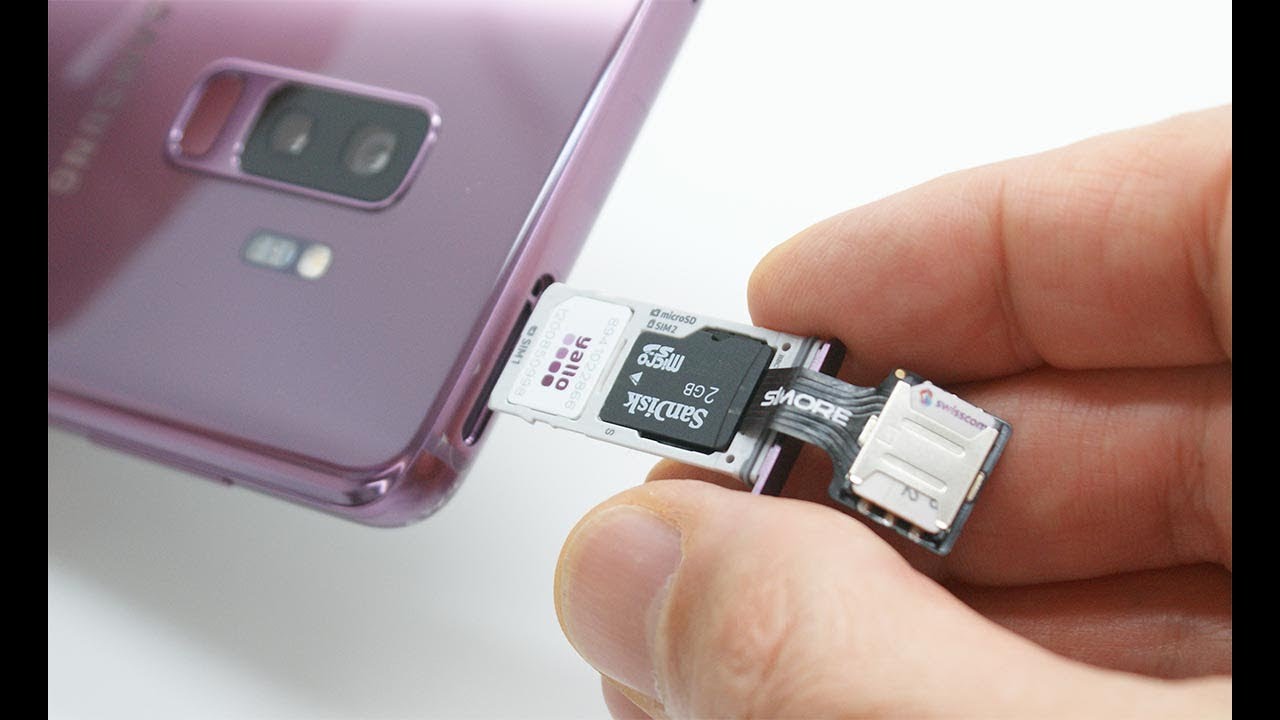
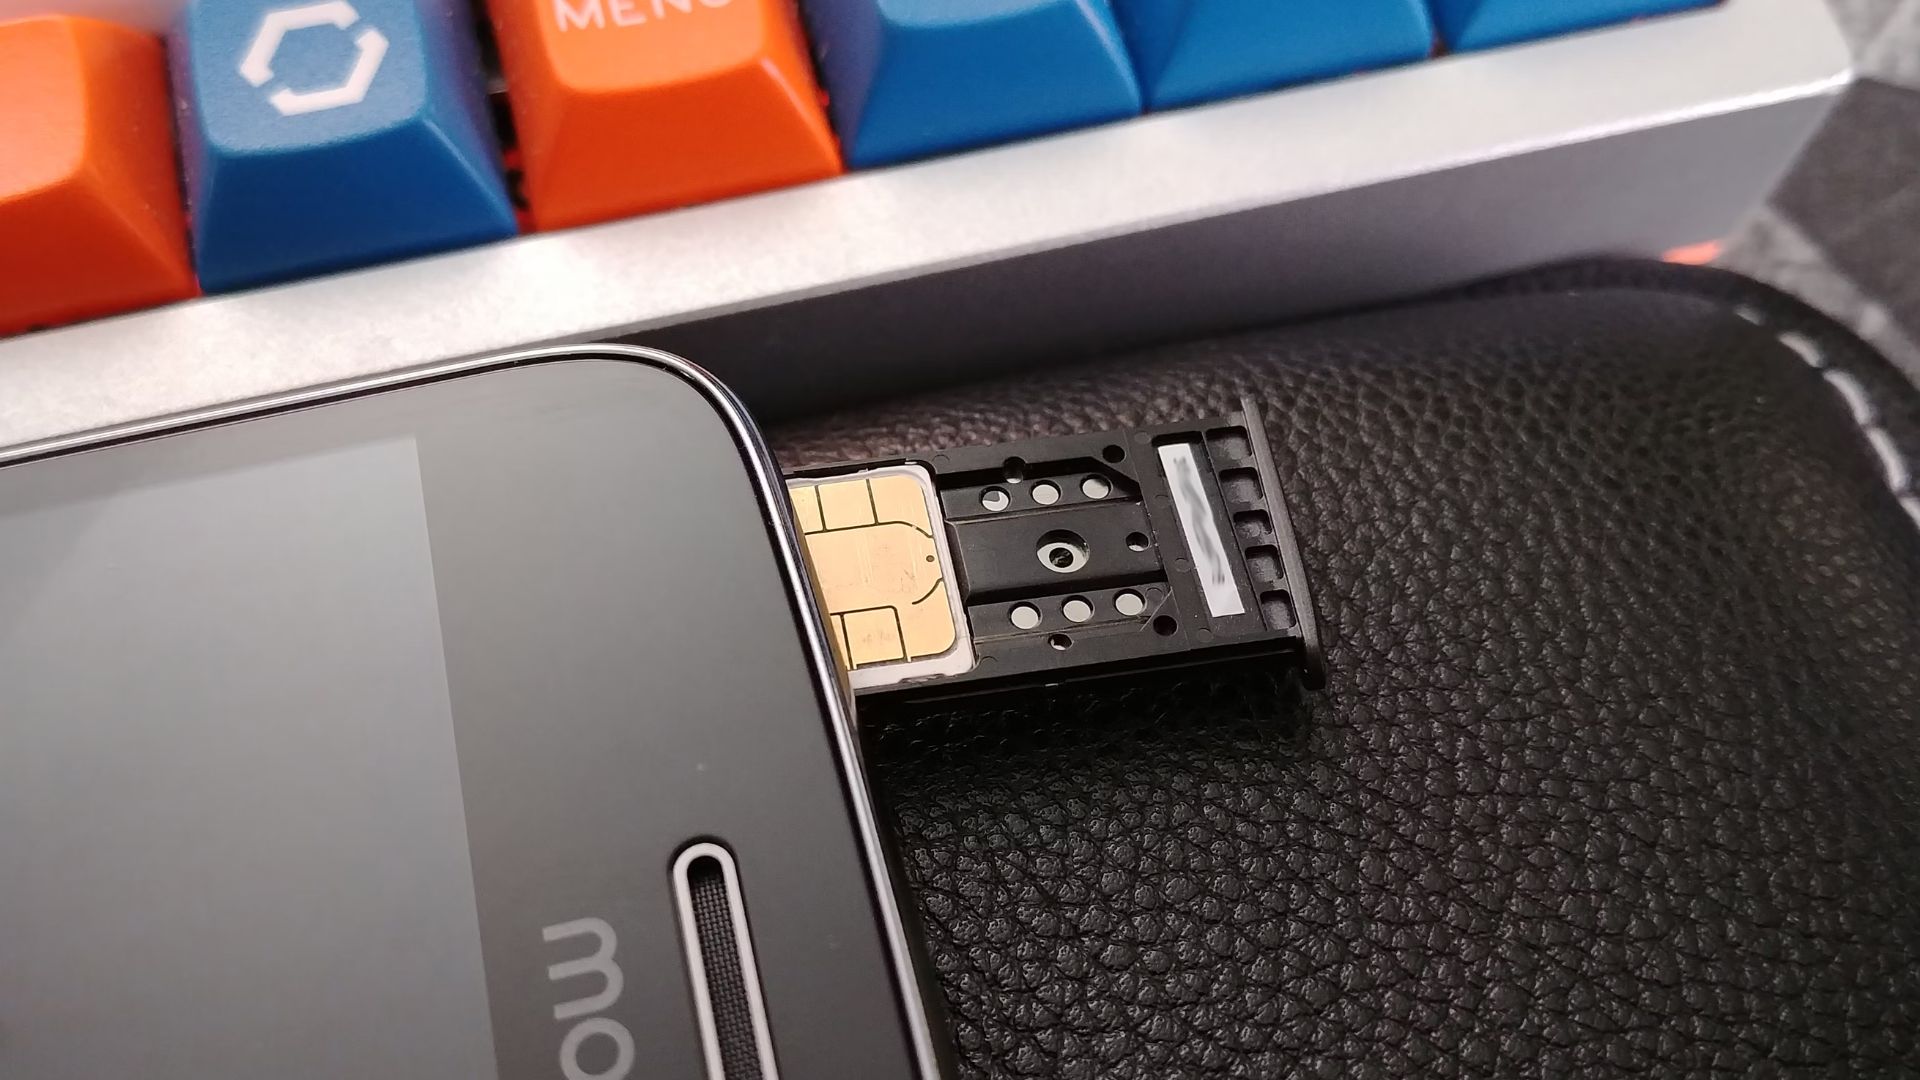
Step 4: Gently remove the SIM card
With the SIM tray partially ejected from your Samsung Galaxy Note 9, the next critical step in the SIM card extraction process is to delicately remove the SIM card from the tray. This phase demands precision and caution to ensure that the SIM card is extracted smoothly without causing any damage to the card or the device. Follow these detailed instructions to effectively and gently remove the SIM card from the SIM tray:
-
Inspect the SIM Card: Before proceeding with the removal, take a moment to inspect the SIM card within the partially ejected tray. Ensure that the SIM card is positioned securely within the tray and that there are no visible signs of damage or misalignment. This visual inspection allows you to identify any potential issues that may require careful handling during the extraction process.
-
Use Fingertips: With the SIM tray partially ejected, gently grasp the exposed edge of the SIM card with your fingertips. Exercise caution to avoid applying excessive pressure or bending the SIM card during this process. The goal is to securely hold the SIM card while preparing to lift it from the tray with steady and controlled movements.
-
Lift the SIM Card: Applying minimal pressure, carefully lift the SIM card from the tray in a straight, upward motion. It is essential to maintain a steady and even grip on the SIM card to prevent any bending or warping of the card. The SIM card should smoothly detach from the tray, facilitated by its designed placement within the tray.
-
Inspect for Damage: Once the SIM card is removed from the tray, take a moment to inspect it for any signs of damage or irregularities. Check the metallic contacts on the SIM card for cleanliness and ensure that there are no visible scratches or deformities. This thorough inspection allows you to ascertain the condition of the SIM card before reinserting it or transferring it to another device.
-
Securely Store the SIM Card: If the SIM card is not immediately reinserted into another device, it is crucial to store it in a safe and secure location. Utilize the original packaging or a designated SIM card holder to prevent the card from being exposed to potential damage or misplacement. This proactive measure ensures that the SIM card remains intact and ready for future use.
By meticulously following these instructions, you can effectively and gently remove the SIM card from the SIM tray of your Samsung Galaxy Note 9. This deliberate approach prioritizes the integrity of the SIM card and ensures a seamless extraction process, setting the stage for the subsequent step in this comprehensive guide. With the SIM card now safely removed, you are poised to progress to the final phase of the SIM card extraction process, bringing you closer to successfully managing the extraction of the SIM card from your Note 9.
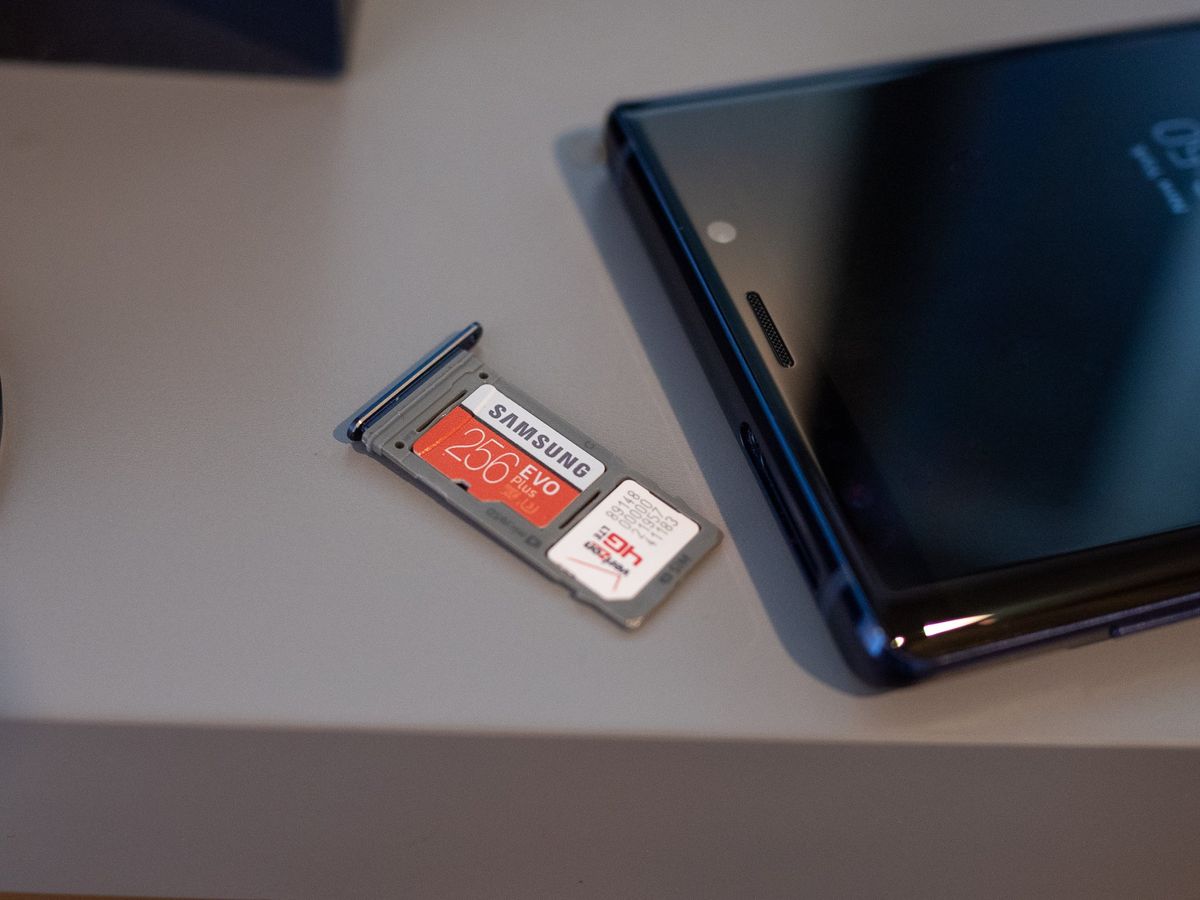
Step 5: Reinsert the SIM tray
With the SIM card safely extracted from your Samsung Galaxy Note 9, the final step in this comprehensive guide is to reinsert the SIM tray back into the device. This crucial phase ensures that the SIM tray is securely positioned within the Note 9, preparing the device for future use and connectivity. Follow these detailed instructions to effectively reinsert the SIM tray into your Note 9:
-
Align the SIM Tray: Begin by carefully aligning the SIM tray with the designated slot on the top edge of your Note 9. The orientation of the SIM tray is designed to facilitate a seamless fit within the device, ensuring that it sits flush with the exterior of the device.
-
Position the SIM Tray: With precision and caution, gently insert the SIM tray back into the slot, ensuring that it glides smoothly into place. It is essential to avoid applying excessive force or misaligning the SIM tray during this process, as it may lead to difficulties in securing the tray within the device.
-
Verify Secure Placement: Once the SIM tray is inserted, take a moment to verify that it is securely positioned within the device. A subtle click or resistance may indicate that the SIM tray has been correctly reinserted and is ready for regular use.
-
Power on the Note 9: With the SIM tray securely reinserted, proceed to power on your Samsung Galaxy Note 9. Press and hold the power button to initiate the device, allowing it to boot up and establish connectivity with the reinserted SIM card.
-
Confirm Connectivity: Upon powering on the Note 9, ensure that the device successfully recognizes the reinserted SIM card and establishes connectivity with the network. Verify that the device displays the network signal and enables access to mobile services, indicating a successful reinsertion of the SIM tray.
By meticulously following these instructions, you can effectively reinsert the SIM tray into your Samsung Galaxy Note 9, ensuring that the device is prepared for seamless connectivity and mobile functionality. This deliberate approach prioritizes the secure placement of the SIM tray within the device, ultimately concluding the SIM card extraction process with precision and care. With the SIM tray successfully reinserted, your Note 9 is now ready to resume its essential role as a reliable and connected mobile device.
Conclusion
In conclusion, the Samsung Galaxy Note 9 presents users with a seamless and secure process for extracting the SIM card from the device. By following the comprehensive guide outlined in this article, users can confidently navigate each step of the extraction process with precision and care, ensuring the safety and integrity of both the device and the SIM card.
The deliberate approach of powering off the Note 9 sets the foundation for a secure extraction process, mitigating the risk of any electrical surges or disruptions. This initial step prioritizes the safety of the device and creates a conducive environment for the subsequent phases of the SIM card extraction.
Locating the SIM tray and utilizing the SIM eject tool are pivotal steps that demand attention to detail and a methodical approach. By carefully identifying the SIM tray and employing the specialized SIM eject tool, users can initiate the release of the SIM tray with precision, setting the stage for the delicate removal of the SIM card.
The process of gently removing the SIM card from the tray underscores the importance of cautious and controlled movements. By inspecting the SIM card, lifting it from the tray with steady movements, and securely storing it, users can ensure that the SIM card remains intact and ready for future use.
The final step of reinserting the SIM tray into the Note 9 encapsulates the meticulous and secure approach advocated throughout this guide. By aligning, positioning, and verifying the secure placement of the SIM tray, users can conclude the extraction process with confidence, ultimately preparing the device for seamless connectivity and functionality.
Through each phase of the SIM card extraction process, the Samsung Galaxy Note 9 prioritizes the safety and ease of its users, underscoring its commitment to delivering a user-friendly and reliable mobile experience. By adhering to the detailed instructions outlined in this guide, users can effectively and safely extract the SIM card from their Note 9, ensuring a seamless transition and the preservation of both the device and the SIM card.
As users navigate the extraction process, it is essential to approach each step with patience and attentiveness, ultimately safeguarding the integrity of the device and the SIM card. By empowering users with the knowledge and confidence to handle the extraction process, the Samsung Galaxy Note 9 reinforces its position as a leading mobile device that prioritizes user convenience and device security.