Introduction
The iPhone XR is a remarkable piece of technology, offering a seamless user experience and a plethora of features. One of the essential components of the iPhone XR is the SIM card, which allows users to connect to their mobile network and enjoy the full range of communication and data services. Whether you're looking to switch to a new SIM card or troubleshoot network connectivity issues, knowing how to remove the SIM card from your iPhone XR is a valuable skill.
In this comprehensive guide, we will walk you through the process of removing the SIM card from your iPhone XR in a step-by-step manner. By following these instructions, you will be able to safely and efficiently remove the SIM card without causing any damage to your device. Whether you're a seasoned iPhone user or a newcomer to the world of mobile devices, this guide will equip you with the knowledge and confidence to handle the task with ease.
So, without further ado, let's dive into the process of removing the SIM card from your iPhone XR and empower you to take full control of your device's connectivity.
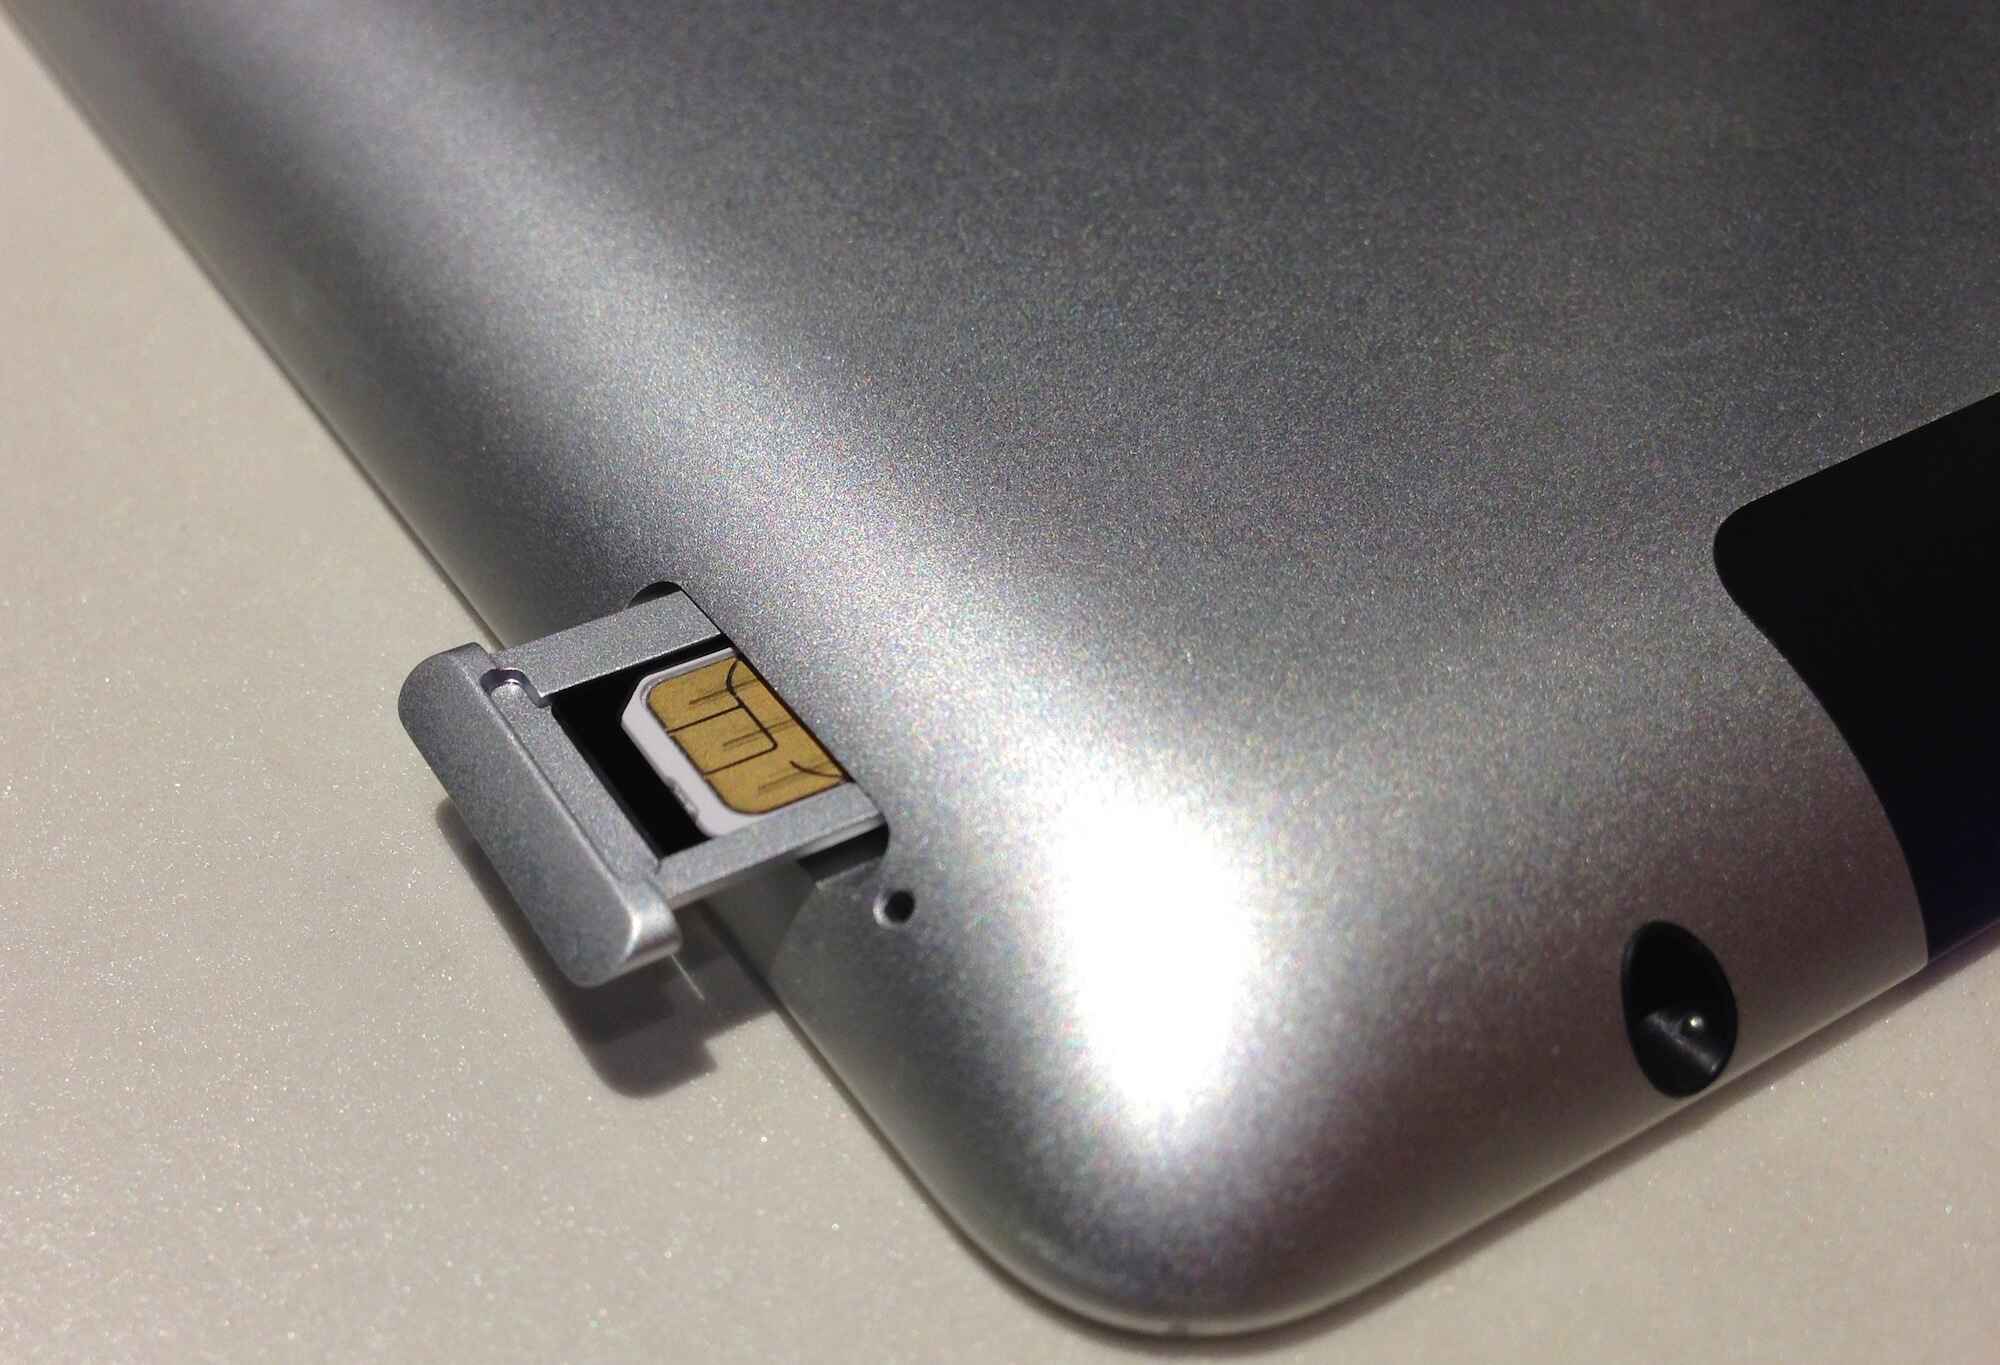
Step 1: Locate the SIM card tray
Locating the SIM card tray on your iPhone XR is the initial step in the process of removing the SIM card. The SIM card tray is a small, discreet component of the iPhone XR, designed to securely house the SIM card while ensuring easy access for removal or replacement.
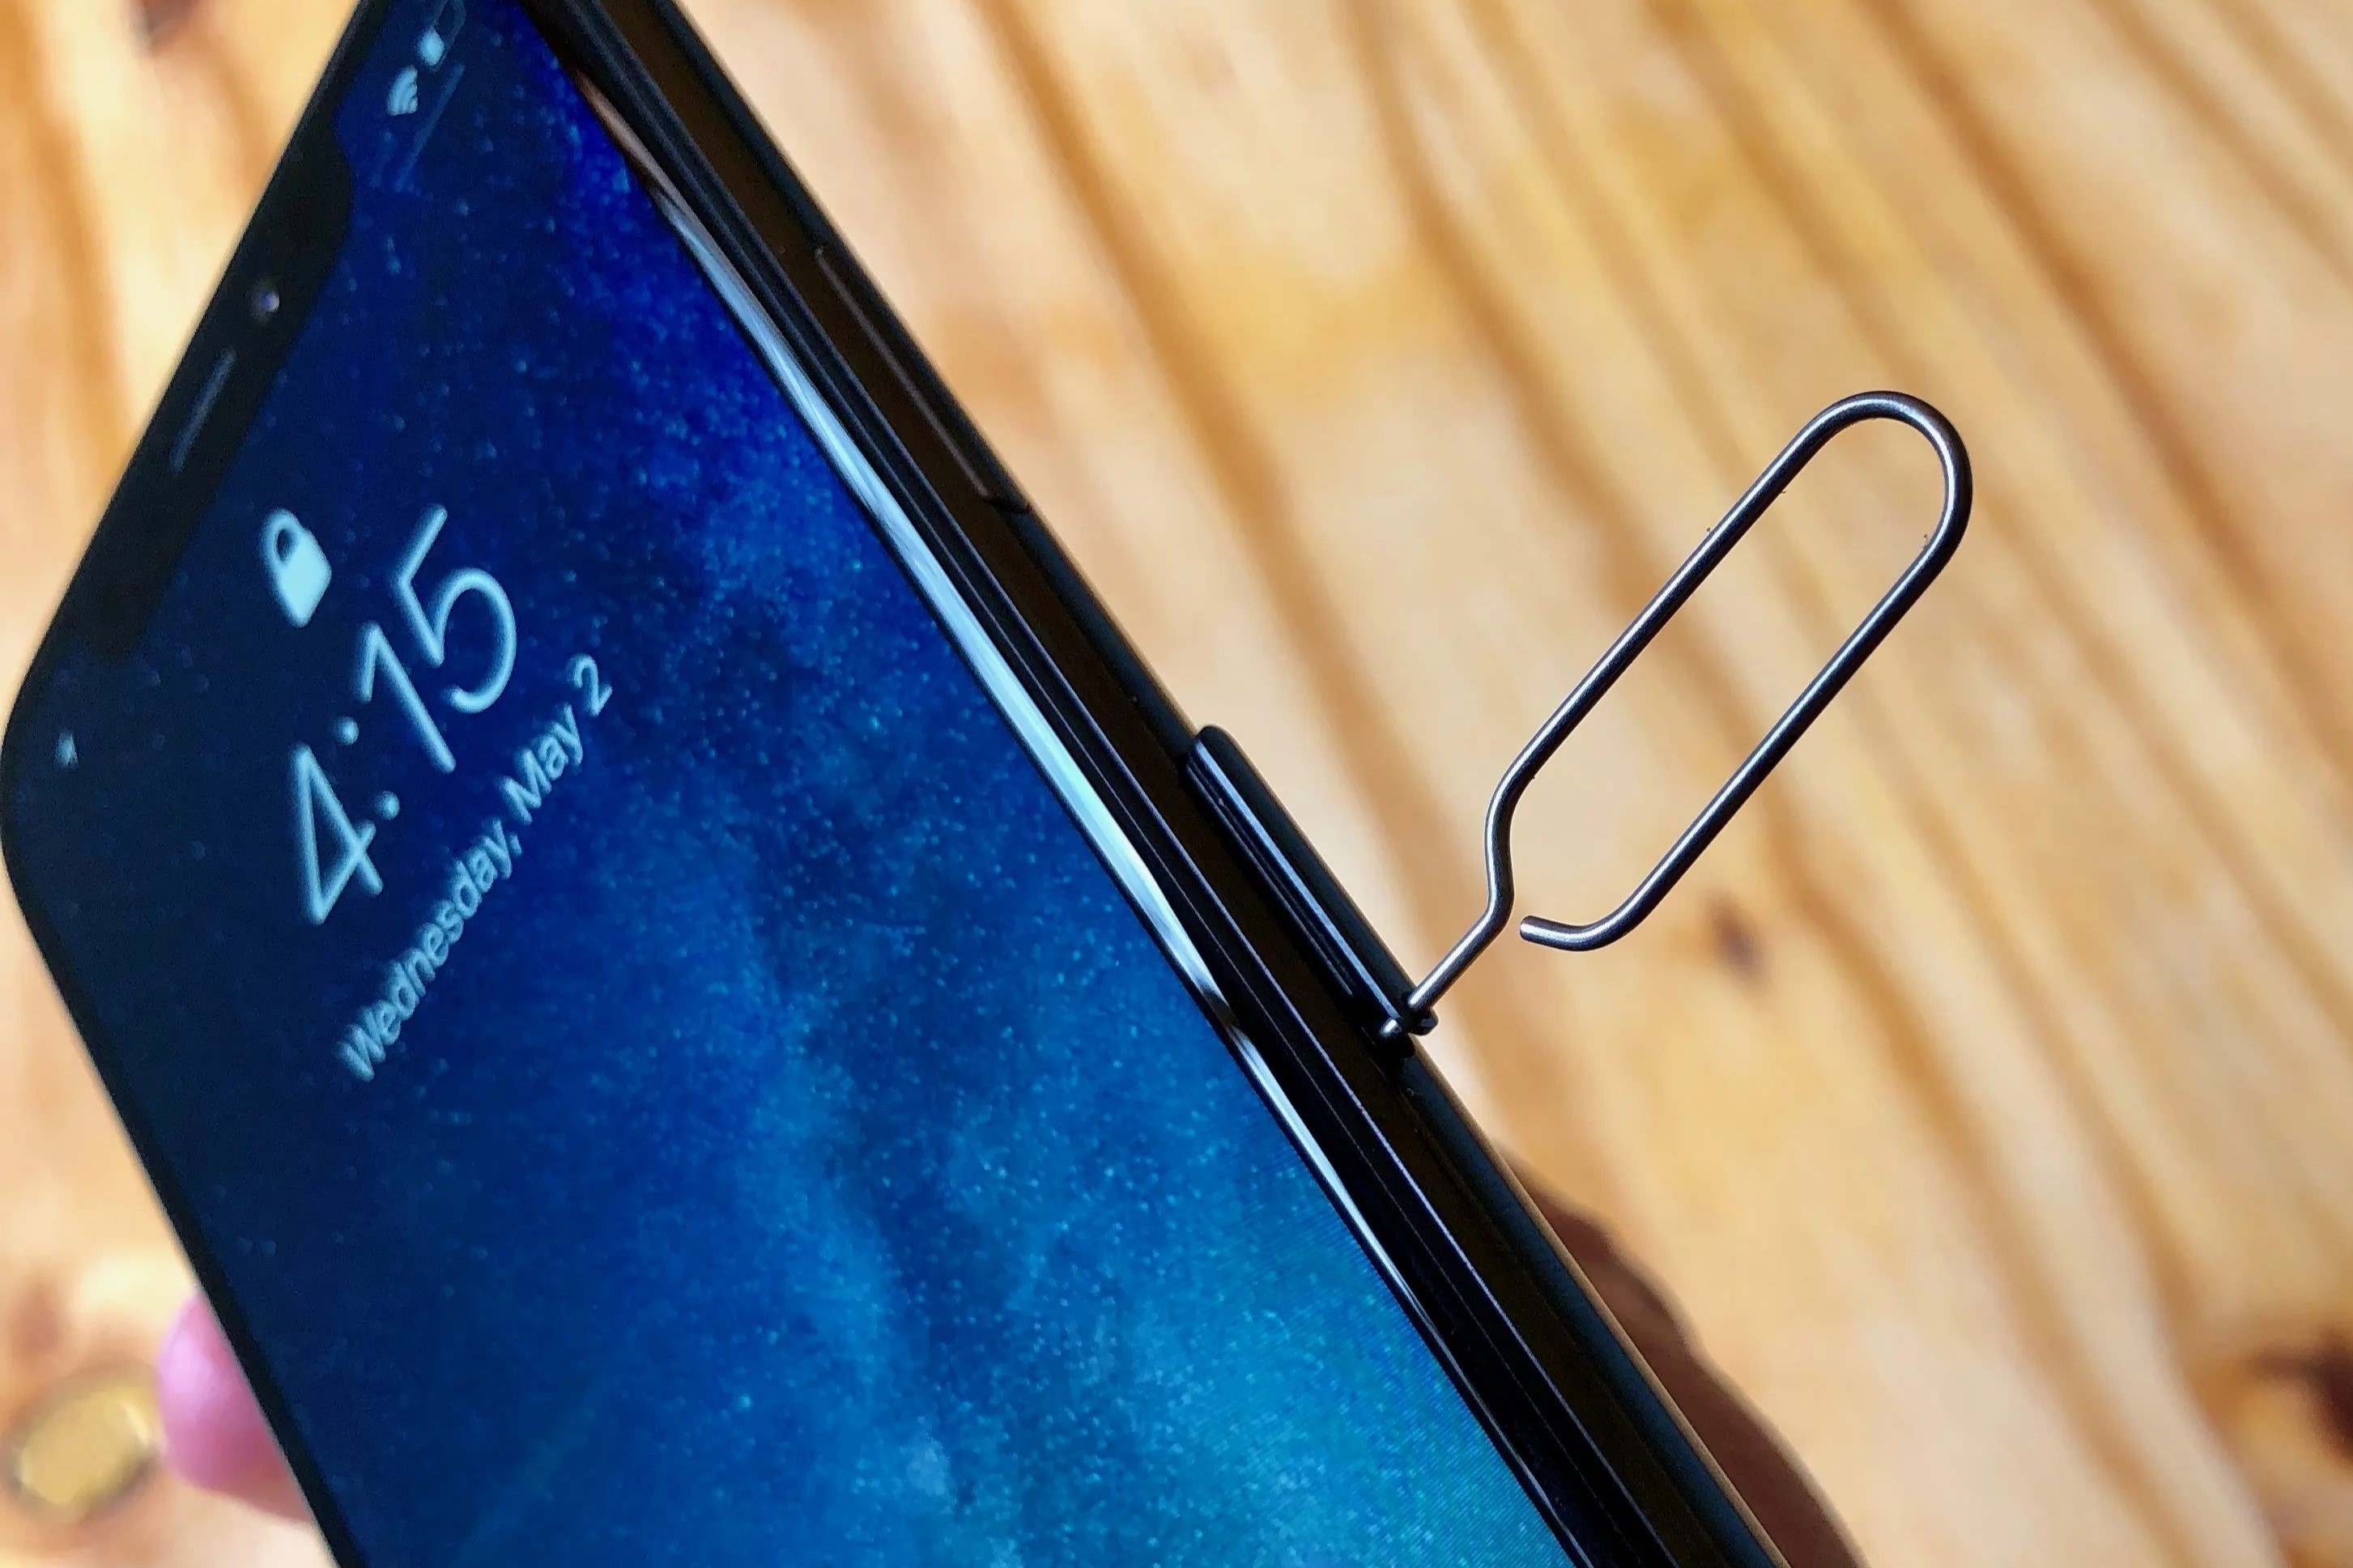
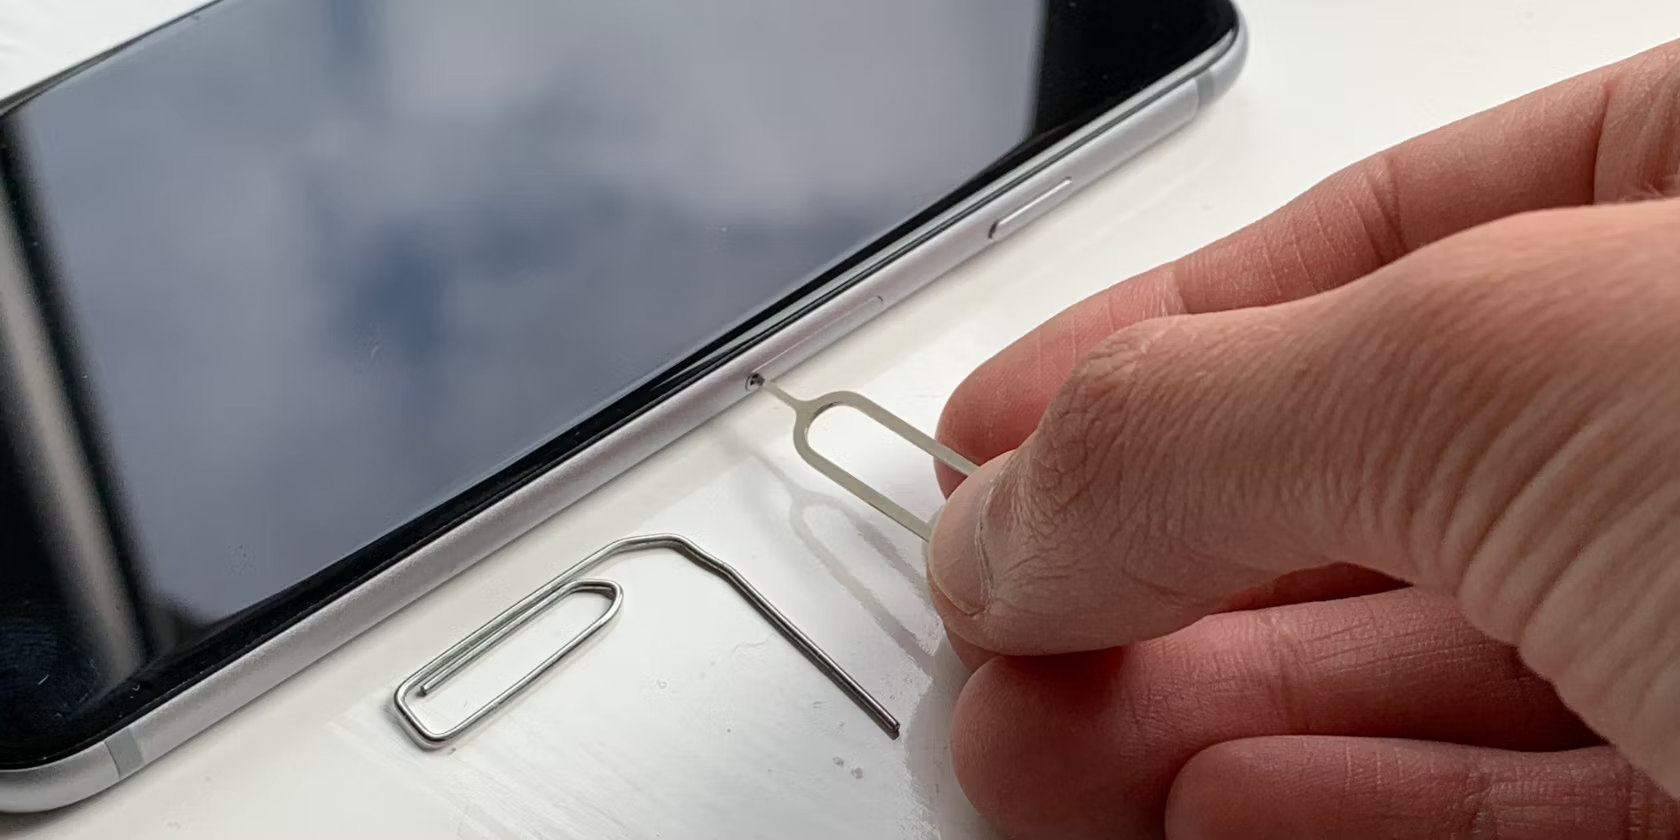
To locate the SIM card tray, you will need to position your iPhone XR in a well-lit environment, allowing for clear visibility and ease of access. The SIM card tray is typically located on the right-hand side of the device, adjacent to the device's volume buttons. You will notice a small pinhole or indentation on the side of the device, which indicates the presence of the SIM card tray.
Once you have identified the location of the SIM card tray, use the SIM eject tool that was provided with your iPhone XR. If the original SIM eject tool is unavailable, a paperclip can be gently straightened and used as an alternative. Insert the SIM eject tool into the pinhole on the side of the device, applying slight pressure to initiate the ejection of the SIM card tray.
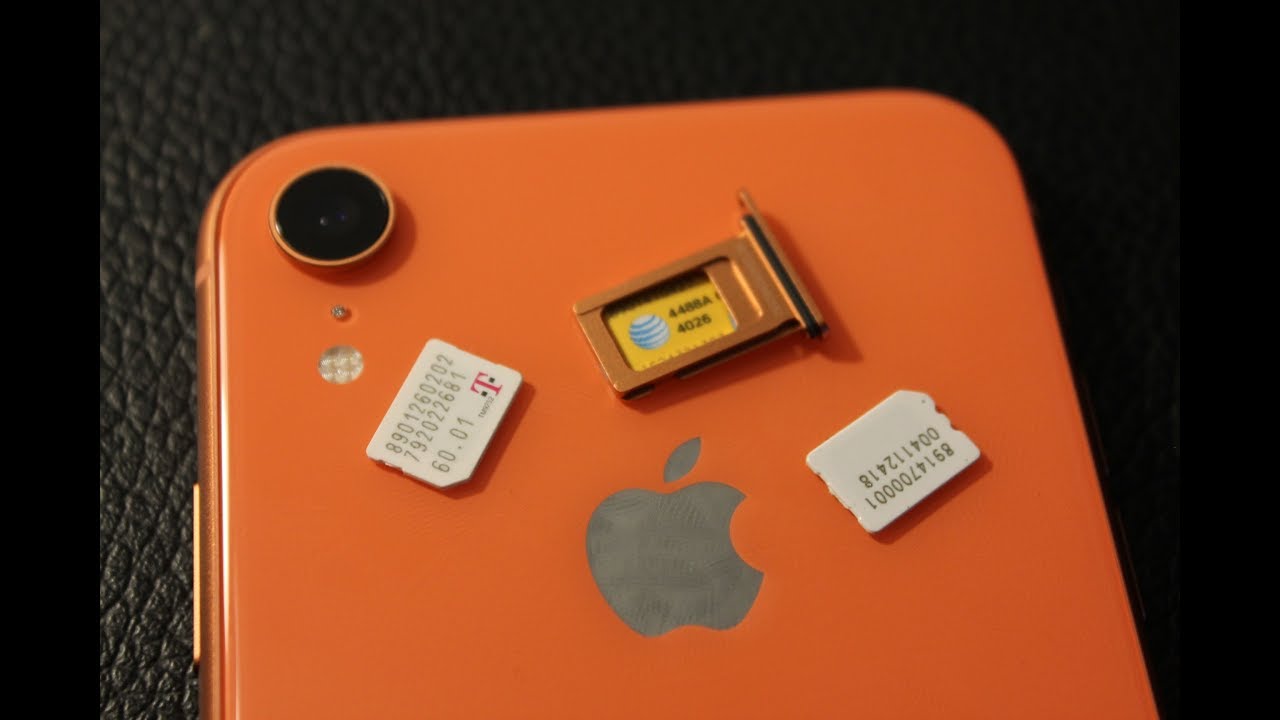
As the SIM card tray begins to emerge from the device, exercise caution to prevent any damage to the tray or the device itself. Gently grasp the edge of the SIM card tray and carefully slide it out of the device, ensuring a smooth and controlled extraction. The SIM card tray will contain the SIM card, which is securely positioned within the tray.
By successfully locating the SIM card tray on your iPhone XR, you have completed the first step towards removing the SIM card from your device. This foundational step sets the stage for the subsequent actions involved in the SIM card removal process, ultimately enabling you to manage your device's connectivity with confidence and precision.
With the SIM card tray in hand, you are now prepared to proceed to the next step in the process of removing the SIM card from your iPhone XR. This step will involve the careful ejection of the SIM card tray and the subsequent removal of the SIM card from its housing, paving the way for seamless management of your device's connectivity features.
Step 2: Eject the SIM card tray
Ejecting the SIM card tray from your iPhone XR is a crucial step in the process of removing the SIM card. With the SIM card tray in hand, you are now ready to proceed with the gentle ejection of the tray from your device, allowing for safe access to the SIM card housed within it.
To eject the SIM card tray, hold the tray firmly and continue to use the SIM eject tool or the straightened paperclip. Insert the tool into the pinhole on the side of the SIM card tray, ensuring that it fits snugly into the opening. Apply steady pressure to the tool, exerting a gentle force to prompt the release of the SIM card tray from the device.
As you exert pressure on the tool, you will feel a slight resistance as the SIM card tray begins to disengage from the device. Maintain a steady hand and continue to apply even pressure until the tray is fully ejected from the iPhone XR. Exercise caution to prevent any abrupt movements that could potentially damage the tray or the device.
Once the SIM card tray is fully ejected, carefully remove it from the device, taking care to handle it with precision and delicacy. The SIM card tray will contain the SIM card, securely positioned within its designated slot. Ensure that the SIM card tray is placed on a stable surface to prevent accidental displacement of the SIM card.
By successfully ejecting the SIM card tray from your iPhone XR, you have completed a significant phase of the SIM card removal process. This step sets the stage for the subsequent action of removing the SIM card from the tray, a pivotal maneuver that will enable you to manage your device's connectivity with confidence and proficiency.
With the SIM card tray now in your possession, you are poised to advance to the next step in the process of removing the SIM card from your iPhone XR. This next step will involve the careful removal of the SIM card from the tray, a task that demands precision and attentiveness to ensure the safe handling of the SIM card and the seamless management of your device's connectivity.
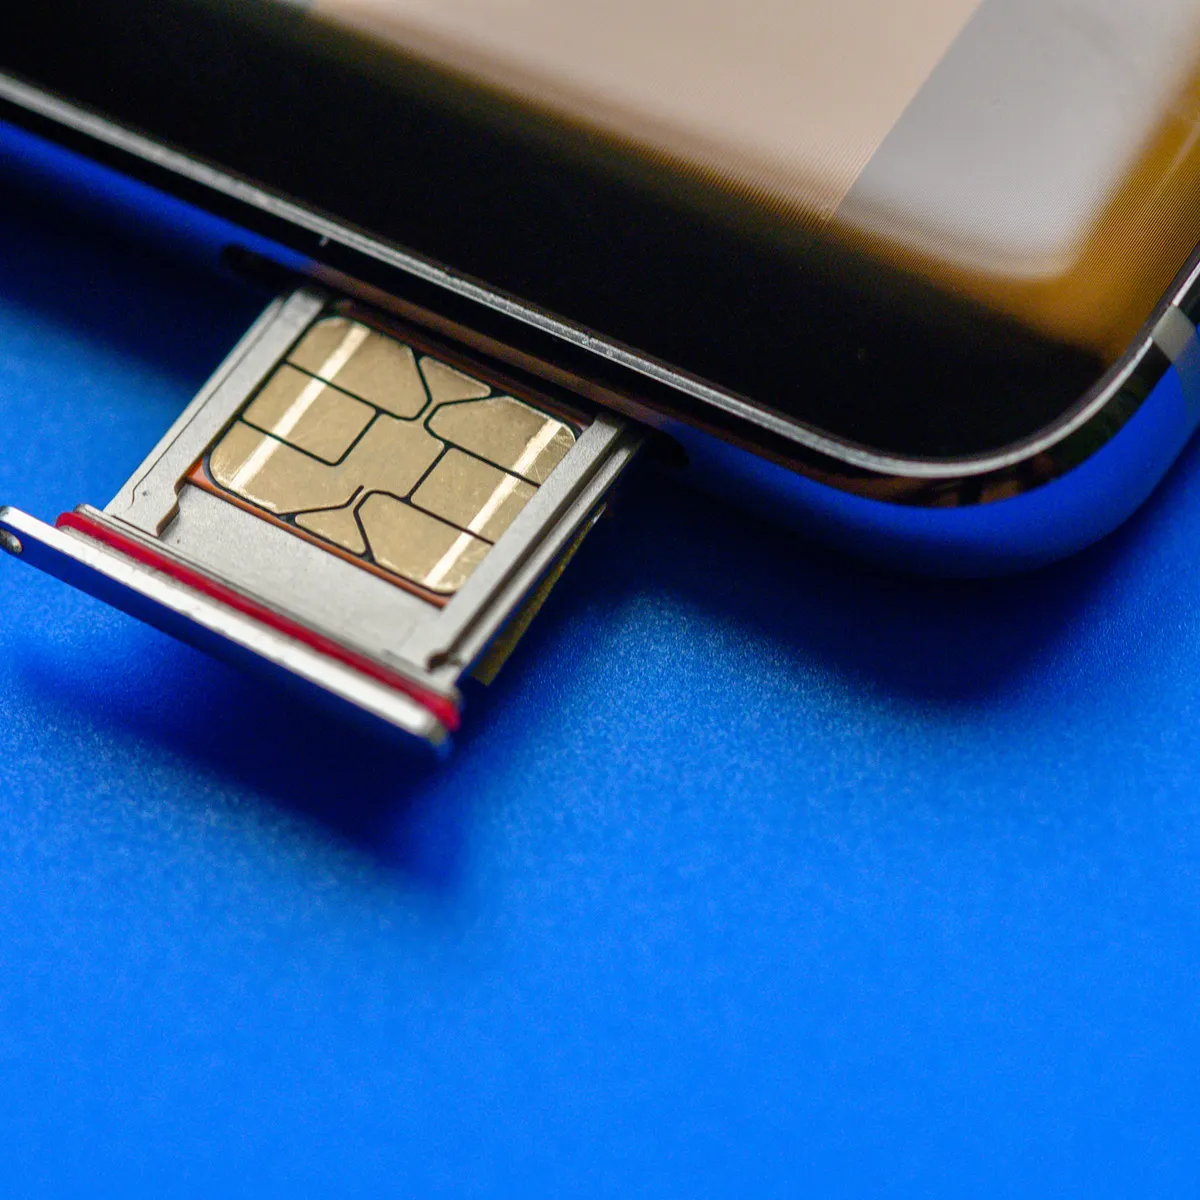
Step 3: Remove the SIM card
With the SIM card tray in hand, the next critical step in the process of removing the SIM card from your iPhone XR is the meticulous removal of the SIM card itself. The SIM card, a small yet indispensable component of your device, is securely positioned within the SIM card tray and requires careful handling to ensure its safe extraction.
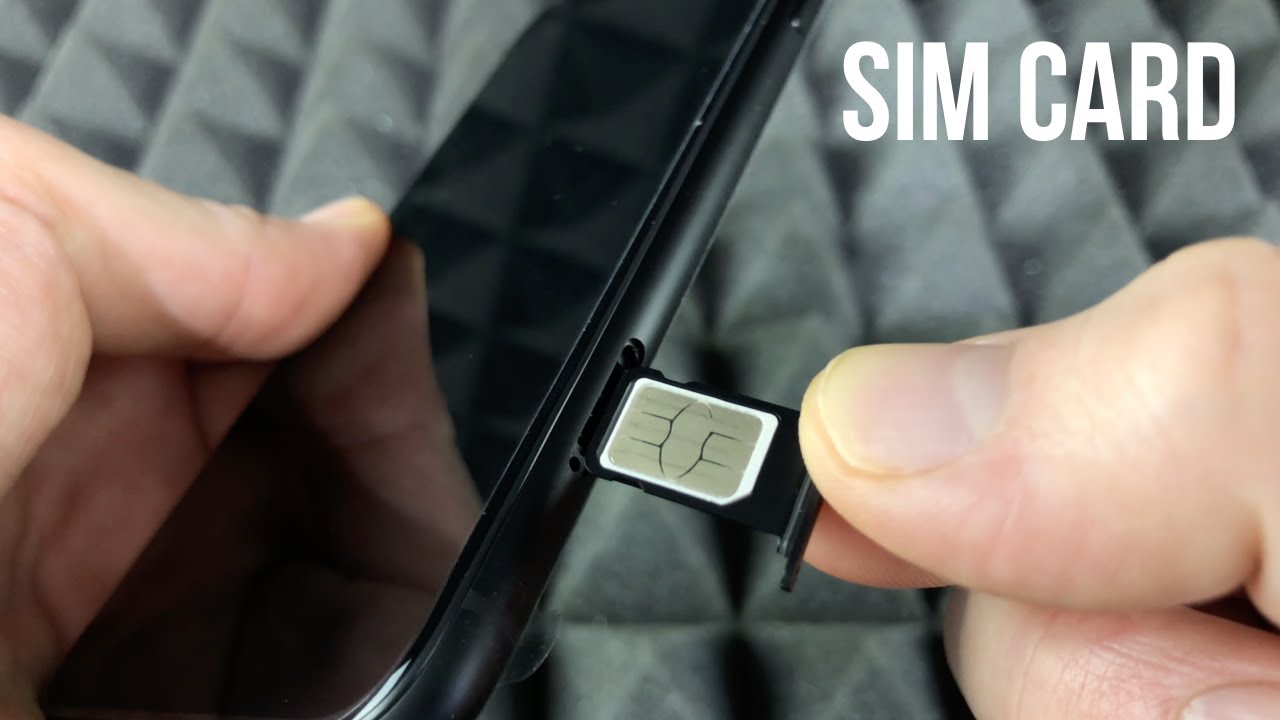
To remove the SIM card, gently examine the SIM card tray to locate the designated slot that houses the SIM card. The SIM card is typically positioned within a small, rectangular frame, nestled securely within the tray. Take a moment to inspect the orientation of the SIM card, noting the position of the gold contacts and the notched corner, which align with corresponding features within the tray.
With a delicate touch, carefully maneuver the SIM card within its slot, ensuring a controlled and precise approach to avoid any unnecessary force or pressure. Using your fingertips, gently push the SIM card out of its housing, employing a smooth and steady motion to guide it out of the tray. Exercise caution to prevent any bending or damage to the SIM card during this process.
As the SIM card begins to emerge from the tray, maintain a firm yet gentle grip to secure it in place. Once the SIM card is fully removed from the tray, place it on a stable surface, taking care to avoid any contact with dust, moisture, or other potential contaminants. The safe handling of the SIM card is essential to preserve its functionality and integrity.
By successfully removing the SIM card from the tray, you have accomplished a pivotal phase in the process of managing your device's connectivity. This deliberate and precise maneuver sets the stage for the subsequent action of reinserting the SIM card tray into your iPhone XR, thereby ensuring the seamless restoration of connectivity features.
With the SIM card now removed from the tray, you are ready to proceed to the final step in the process of removing the SIM card from your iPhone XR. This concluding step will involve the careful reinsertion of the SIM card tray into your device, marking the successful completion of the SIM card removal process and empowering you to manage your device's connectivity with confidence and proficiency.
Step 4: Re-insert the SIM card tray
With the SIM card safely removed from the tray, the final step in the process of removing the SIM card from your iPhone XR is the careful reinsertion of the SIM card tray into your device. This pivotal step marks the seamless restoration of connectivity features, ensuring that your iPhone XR is ready to re-establish its connection to the mobile network.
To re-insert the SIM card tray, position the tray in alignment with the designated slot on the side of your iPhone XR. Take a moment to ensure that the tray is oriented correctly, with the SIM card securely positioned within it. Carefully maneuver the tray into the slot, exercising precision and attentiveness to guide it into place without applying excessive force.
As the SIM card tray approaches the slot, maintain a steady hand and a gentle touch to facilitate its smooth insertion. Ensure that the tray fits snugly into the slot, aligning with the contours of the device to achieve a seamless integration. Once the tray is fully inserted, you will feel a subtle click, indicating that it is securely positioned within the device.
With the SIM card tray successfully re-inserted into your iPhone XR, the process of removing the SIM card is now complete. Take a moment to verify that the tray is securely in place, with no protrusions or misalignments that could compromise the device's integrity. Once you have confirmed the secure placement of the tray, you are ready to power on your iPhone XR and restore its connectivity features.
By following this comprehensive guide, you have gained the knowledge and confidence to remove and re-insert the SIM card from your iPhone XR with precision and proficiency. Whether you are switching to a new SIM card or troubleshooting network connectivity issues, mastering this process empowers you to take full control of your device's connectivity and ensures a seamless user experience.
With the SIM card securely re-inserted into your iPhone XR, you are now equipped to enjoy uninterrupted access to mobile communication and data services, allowing you to stay connected and engaged with the world around you.
This marks the successful completion of the SIM card removal process, and you are now prepared to seamlessly manage your device's connectivity features with confidence and proficiency.
Conclusion
In conclusion, the process of removing the SIM card from your iPhone XR is a fundamental skill that empowers you to manage your device's connectivity with confidence and precision. By following the step-by-step guide outlined in this comprehensive article, you have gained valuable insights into the meticulous process of removing and re-inserting the SIM card, ensuring that you can seamlessly navigate the intricacies of your iPhone XR's connectivity features.
Mastering the art of removing the SIM card from your iPhone XR not only equips you to switch to a new SIM card but also enables you to troubleshoot network connectivity issues with ease. The ability to confidently handle the SIM card tray and the SIM card itself demonstrates your proficiency in managing essential components of your device, fostering a deeper understanding of its functionality and capabilities.
As you embark on your journey with the iPhone XR, the knowledge and expertise you have acquired through this guide serve as a cornerstone for optimizing your device's connectivity. Whether you are a seasoned iPhone user or a newcomer to the world of mobile devices, the ability to remove and re-insert the SIM card empowers you to take full control of your device's connectivity, ensuring a seamless and uninterrupted user experience.
Furthermore, the process of removing the SIM card from your iPhone XR fosters a deeper connection with your device, allowing you to appreciate the intricate design and engineering that underpin its functionality. The delicate maneuvers involved in handling the SIM card tray and the SIM card itself highlight the precision and attention to detail that define the iPhone XR as a marvel of modern technology.
By seamlessly navigating the process of removing and re-inserting the SIM card, you have unlocked the full potential of your iPhone XR, enabling it to seamlessly connect to the mobile network and deliver a myriad of communication and data services. Your newfound expertise positions you as a proficient navigator of your device's connectivity, ensuring that you can harness its capabilities to stay connected and engaged with the world around you.
In essence, the process of removing the SIM card from your iPhone XR transcends a mere technical task; it symbolizes your ability to wield control over your device's connectivity and harness its full potential. As you continue to explore the myriad features of the iPhone XR, the knowledge and confidence you have gained through this guide will serve as a steadfast companion, empowering you to unlock new horizons and embrace the boundless possibilities that await within the palm of your hand.