Introduction
The iPhone 11 is a powerful and versatile mobile device that offers a wide range of features and functionalities. One essential aspect of owning an iPhone 11 is the ability to use a SIM card to connect to a mobile network and access voice, text, and data services. However, there may come a time when you need to remove the SIM card from your iPhone 11, whether it's for replacing the SIM card, troubleshooting network issues, or preparing the device for resale or transfer.
In this comprehensive guide, you will learn the step-by-step process for removing the SIM card from your iPhone 11. Whether you're a first-time iPhone user or a seasoned tech enthusiast, this guide will provide you with clear and easy-to-follow instructions, ensuring that you can successfully remove the SIM card without any hassle.
By following the instructions outlined in this guide, you will gain the confidence and knowledge needed to handle the SIM card removal process with ease. Additionally, understanding how to remove the SIM card from your iPhone 11 will empower you to take full control of your device and make necessary adjustments whenever the need arises.
Now, let's dive into the detailed steps for removing the SIM card from your iPhone 11, ensuring that you can complete the process smoothly and efficiently. Whether you're preparing to upgrade to a new device, troubleshoot network connectivity issues, or simply exploring the inner workings of your iPhone 11, this guide will equip you with the essential knowledge to handle the SIM card removal process like a pro.
Step 1: Gather Necessary Tools
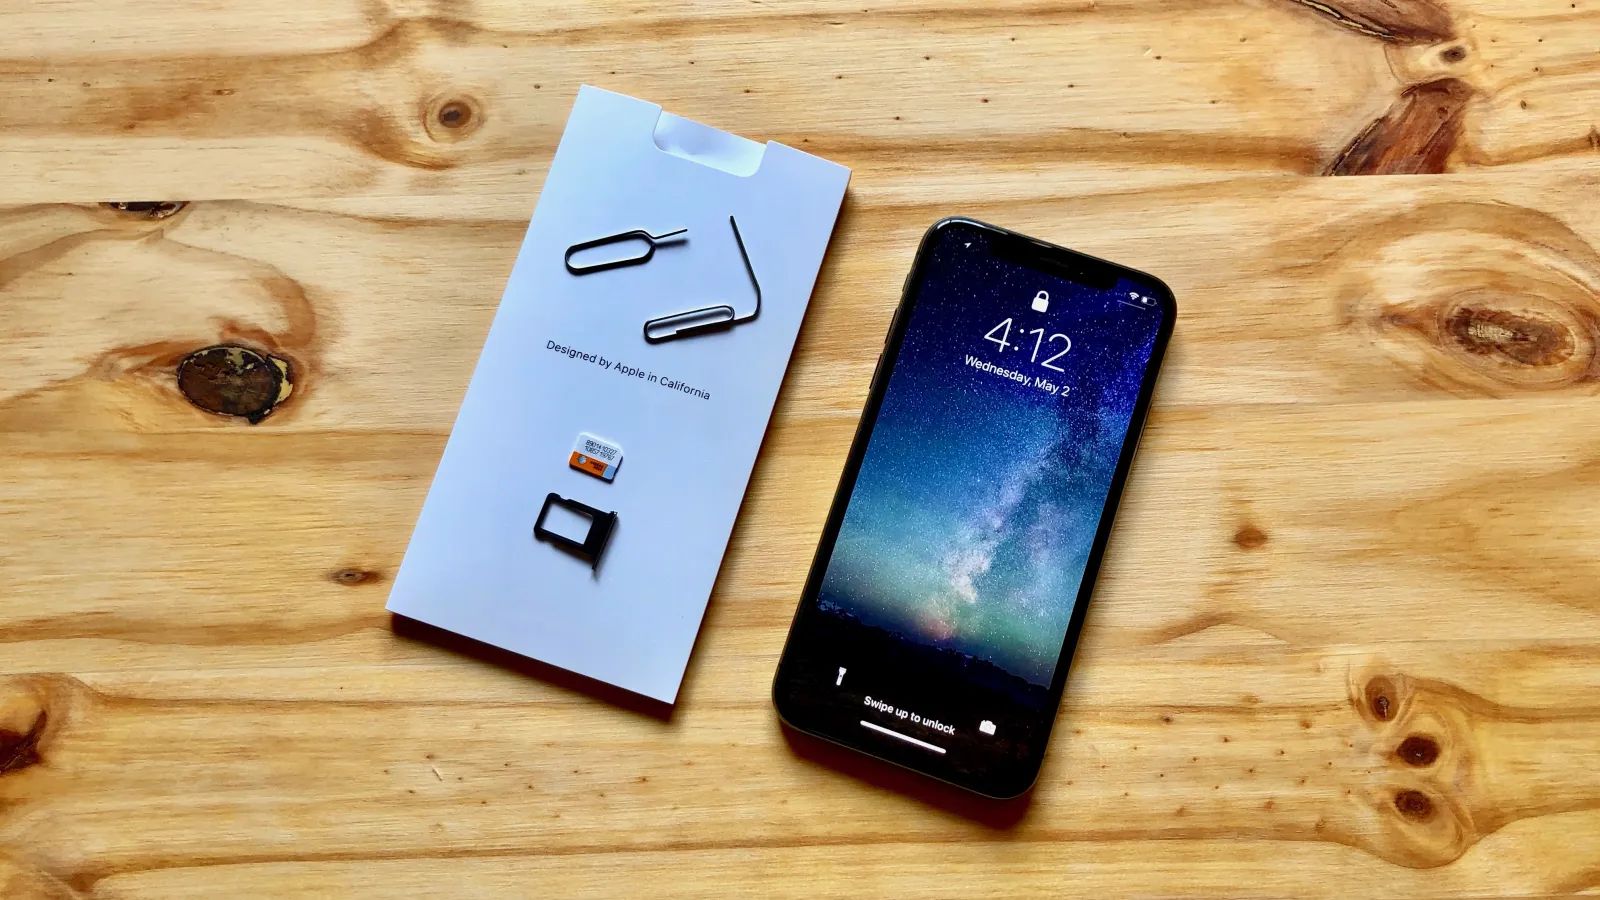
Before you begin the process of removing the SIM card from your iPhone 11, it's essential to gather the necessary tools to ensure a smooth and successful removal. The primary tool you will need is the SIM card ejector tool, which is typically included in the original packaging of your iPhone 11. This small, metal tool is designed specifically for ejecting the SIM card tray from the device, allowing you to access and remove the SIM card effortlessly.
If you can't locate the original SIM card ejector tool, don't worry. You can use a suitable alternative, such as a paperclip or a thin, straightened-out paperclip, to achieve the same result. However, using the designated SIM card ejector tool is recommended, as it is designed to fit perfectly into the SIM card tray's ejection pinhole, ensuring a secure and precise removal process.
Additionally, it's advisable to work on a clean and well-lit surface to prevent misplacing any small components during the SIM card removal process. A well-lit environment will allow you to clearly see the SIM card tray and the SIM card ejector tool, minimizing the chances of any mishaps during the removal process.
By ensuring that you have the necessary tools and a suitable working environment, you set the stage for a successful SIM card removal experience. Gathering the essential tools and preparing a conducive workspace will enable you to approach the SIM card removal process with confidence and precision, ensuring that you can complete each step of the removal process seamlessly.
With the necessary tools at your disposal and a clear understanding of the importance of preparation, you are now ready to move on to the next step of the SIM card removal process. As you proceed to the following steps, remember that thorough preparation is key to a successful SIM card removal experience with your iPhone 11.
Step 2: Locate the SIM Card Tray
Locating the SIM card tray is the crucial first step in the process of removing the SIM card from your iPhone 11. The SIM card tray houses the SIM card and is designed to be easily accessible, allowing for straightforward removal and insertion of the SIM card. To locate the SIM card tray on your iPhone 11, follow these simple steps:
-
Identify the SIM Card Tray Slot: The SIM card tray slot is typically located on the right-hand side of your iPhone 11. It is important to note that the exact placement of the SIM card tray may vary depending on the specific model of the iPhone 11. However, the general location remains consistent, ensuring ease of access for users.
-
Inspect the Right-Hand Side of the Device: Take a close look at the right-hand side of your iPhone 11, where you will find the SIM card tray slot. The slot is designed to accommodate the SIM card tray, which can be easily ejected using the SIM card ejector tool.
-
Identify the Small Pinhole: Next, locate the small pinhole adjacent to the SIM card tray slot. This pinhole is where you will insert the SIM card ejector tool to initiate the ejection of the SIM card tray. The presence of this pinhole signifies the designated access point for removing the SIM card tray from your iPhone 11.
-
Ensure Proper Lighting and Visibility: It is essential to ensure that you are working in a well-lit environment to clearly identify the SIM card tray slot and the accompanying pinhole. Adequate lighting will allow you to navigate the removal process with precision and accuracy, minimizing the risk of any mishaps during the SIM card removal process.
By carefully locating the SIM card tray on your iPhone 11 and familiarizing yourself with its specific location and features, you are now prepared to proceed to the next step of the SIM card removal process. This initial step sets the stage for a seamless and successful SIM card removal experience, ensuring that you can confidently navigate the subsequent steps with ease and precision.
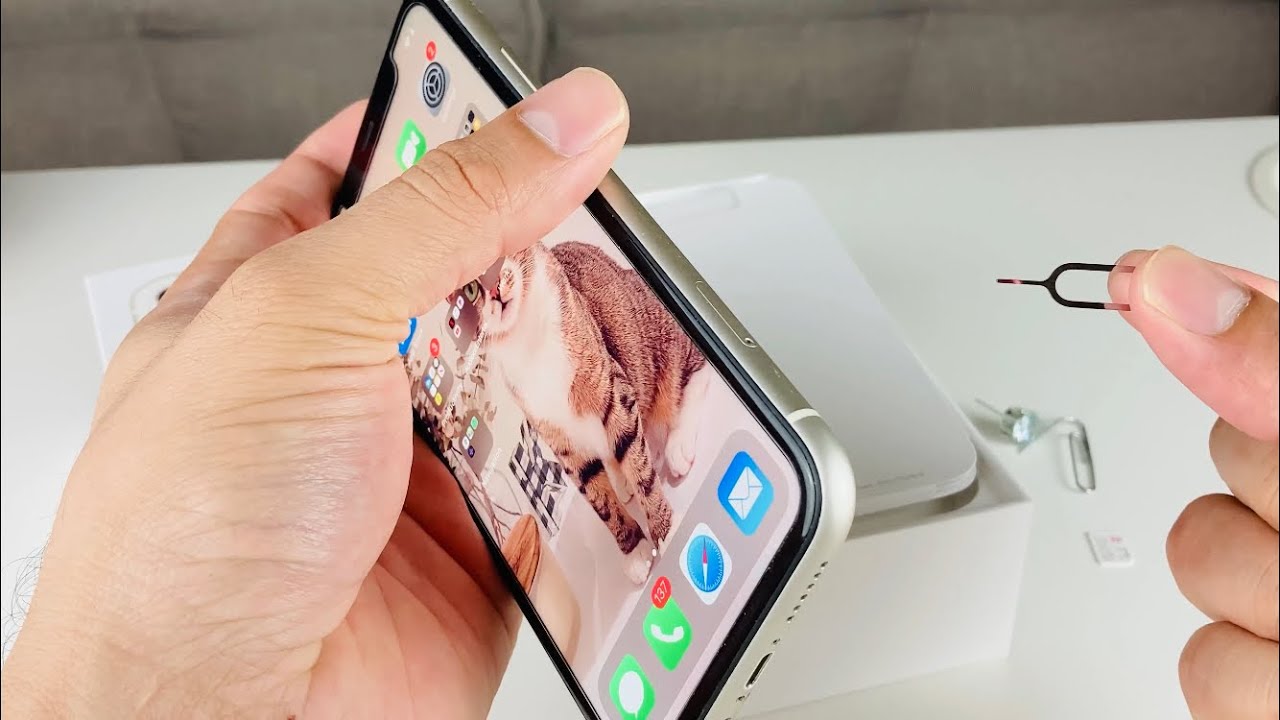
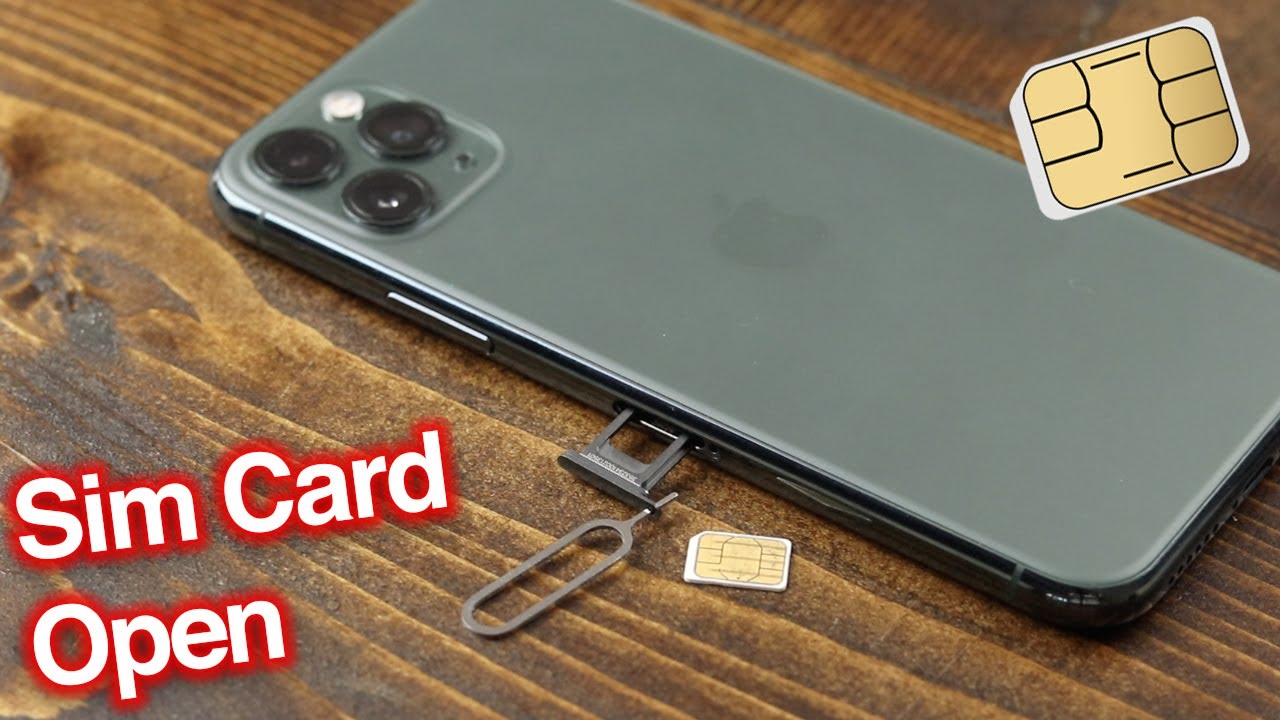
Step 3: Insert the SIM Card Ejector Tool
With the SIM card tray located, the next crucial step in the process of removing the SIM card from your iPhone 11 is to insert the SIM card ejector tool into the designated pinhole. This step initiates the ejection of the SIM card tray, allowing you to access and remove the SIM card effortlessly. Here's a detailed guide on how to insert the SIM card ejector tool with precision and ease:
-
Positioning the iPhone 11: Before proceeding, ensure that your iPhone 11 is placed on a stable surface with the right-hand side facing upwards. This positioning allows for optimal access to the SIM card tray slot and the accompanying pinhole.
-
Retrieve the SIM Card Ejector Tool: Take the SIM card ejector tool, either the original one provided with your iPhone 11 or a suitable alternative, and hold it firmly between your thumb and index finger. The pointed end of the tool is designed to fit securely into the pinhole, facilitating the ejection process.
-
Aligning the Tool with the Pinhole: Gently align the pointed end of the SIM card ejector tool with the small pinhole located adjacent to the SIM card tray slot. Ensure that the tool is positioned perpendicular to the device, allowing for a straight and precise insertion into the pinhole.
-
Applying Gentle Pressure: With the tool aligned and positioned correctly, exert gentle and consistent pressure to insert the tool into the pinhole. The tool should slide smoothly into the pinhole, initiating the ejection mechanism within the iPhone 11.
-
Feeling the Ejection: As you insert the SIM card ejector tool, you may feel a slight resistance followed by the release of the SIM card tray. This tactile feedback indicates that the ejection process has been activated, allowing the SIM card tray to protrude from the device slightly.
By following these detailed steps, you can confidently insert the SIM card ejector tool into the pinhole of your iPhone 11, initiating the ejection of the SIM card tray with precision and ease. This crucial step sets the stage for the subsequent removal of the SIM card, ensuring a seamless and successful SIM card removal experience.
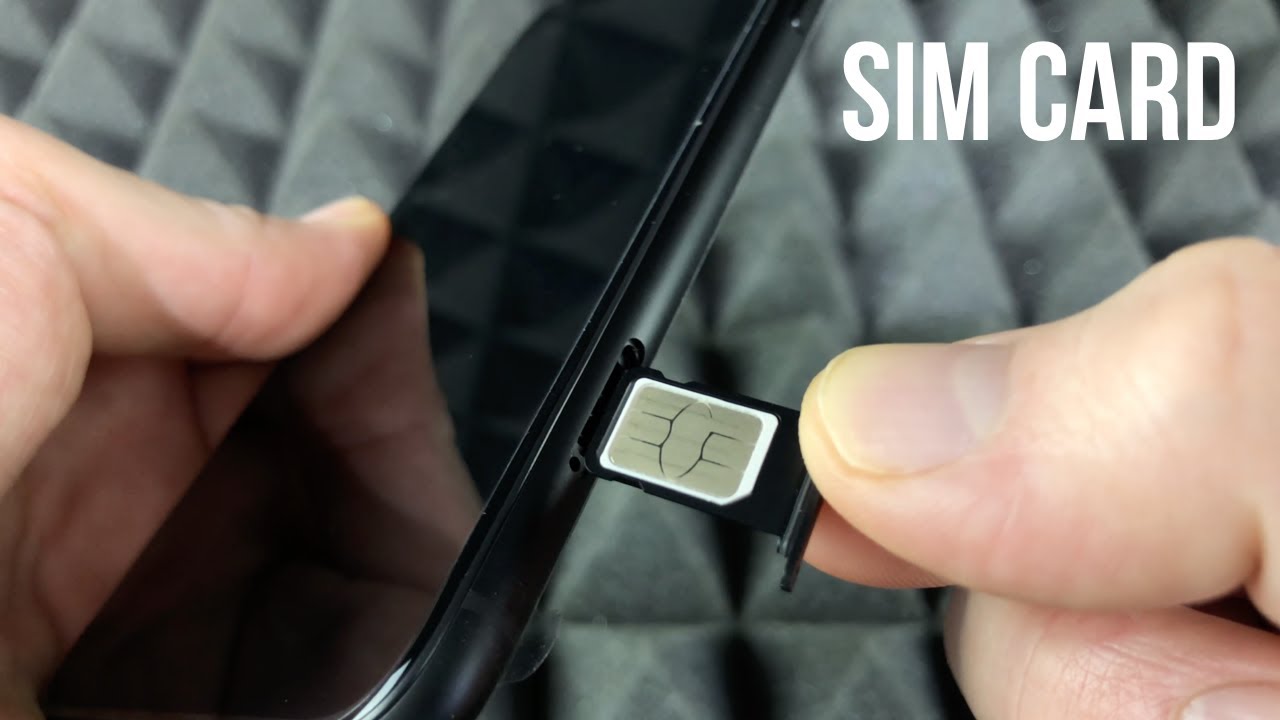
Step 4: Remove the SIM Card Tray
With the SIM card tray partially ejected from your iPhone 11, the next step is to carefully remove the tray from the device. This process requires precision and gentle handling to ensure that the SIM card and the tray remain undamaged. Follow these detailed steps to remove the SIM card tray with ease and confidence:
-
Grasp the SIM Card Tray: Using your thumb and index finger, gently grasp the exposed edge of the SIM card tray that protrudes from the device. Ensure a firm yet gentle grip to prevent any sudden movements that may dislodge the SIM card from its position within the tray.
-
Withdraw the SIM Card Tray: Slowly and steadily withdraw the SIM card tray from the iPhone 11, ensuring that you maintain a steady grip on the tray throughout the process. As you pull the tray out, you will reveal the SIM card housed within it, securely positioned in its designated slot.
-
Inspect the SIM Card: Once the SIM card tray is fully removed from the device, take a moment to inspect the SIM card. Ensure that it is seated securely within the tray and that no visible damage or debris is present on the SIM card or the tray.
-
Handle the SIM Card with Care: If you intend to reinsert the same SIM card into your iPhone 11 or transfer it to another device, handle the SIM card with utmost care. Avoid touching the metallic contacts on the SIM card, as any residue or oil from your fingers may affect its functionality.
-
Set the Tray Aside: After removing the SIM card tray and inspecting the SIM card, set the tray aside in a safe and stable location. This ensures that the tray remains free from any potential damage or misplacement while you proceed with the next steps.
By following these meticulous steps, you can effectively remove the SIM card tray from your iPhone 11, allowing for the safe extraction of the SIM card. This careful approach ensures that both the SIM card and the tray remain intact, enabling you to proceed with the subsequent steps of the SIM card removal process seamlessly.
Now that you have successfully removed the SIM card tray and extracted the SIM card from your iPhone 11, you are ready to proceed to the next step of reinserting the SIM card tray back into the device. This critical step marks a significant milestone in the SIM card removal process, empowering you to navigate the subsequent steps with confidence and precision.
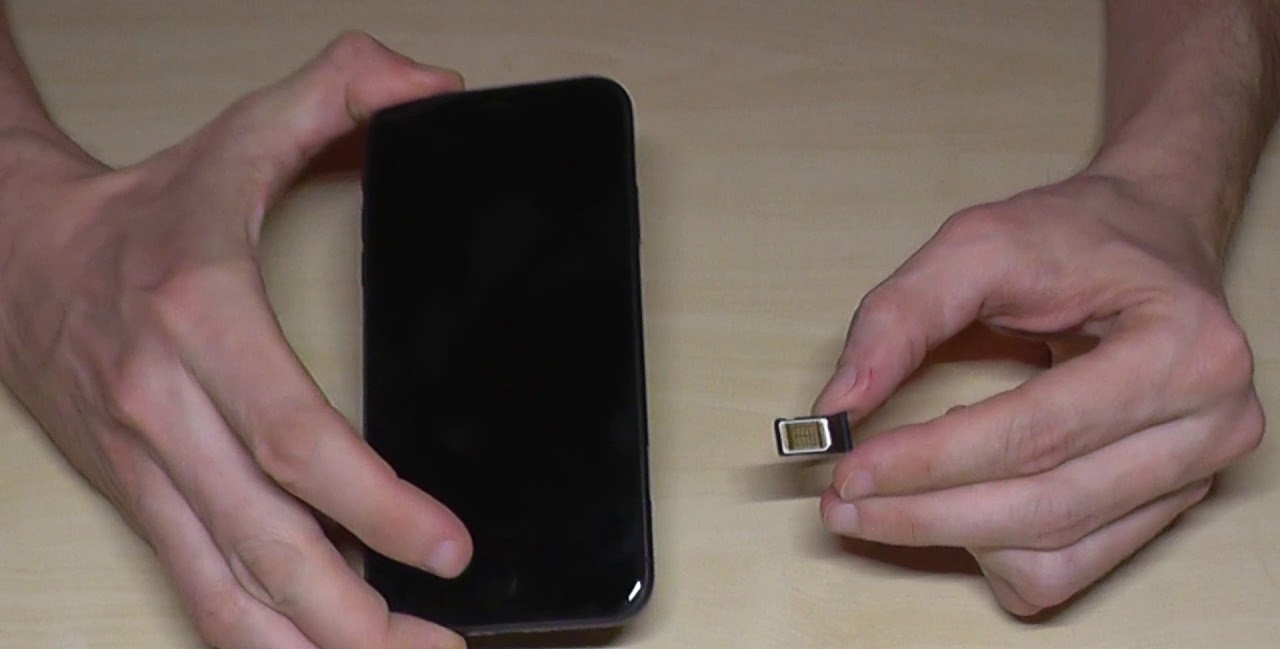
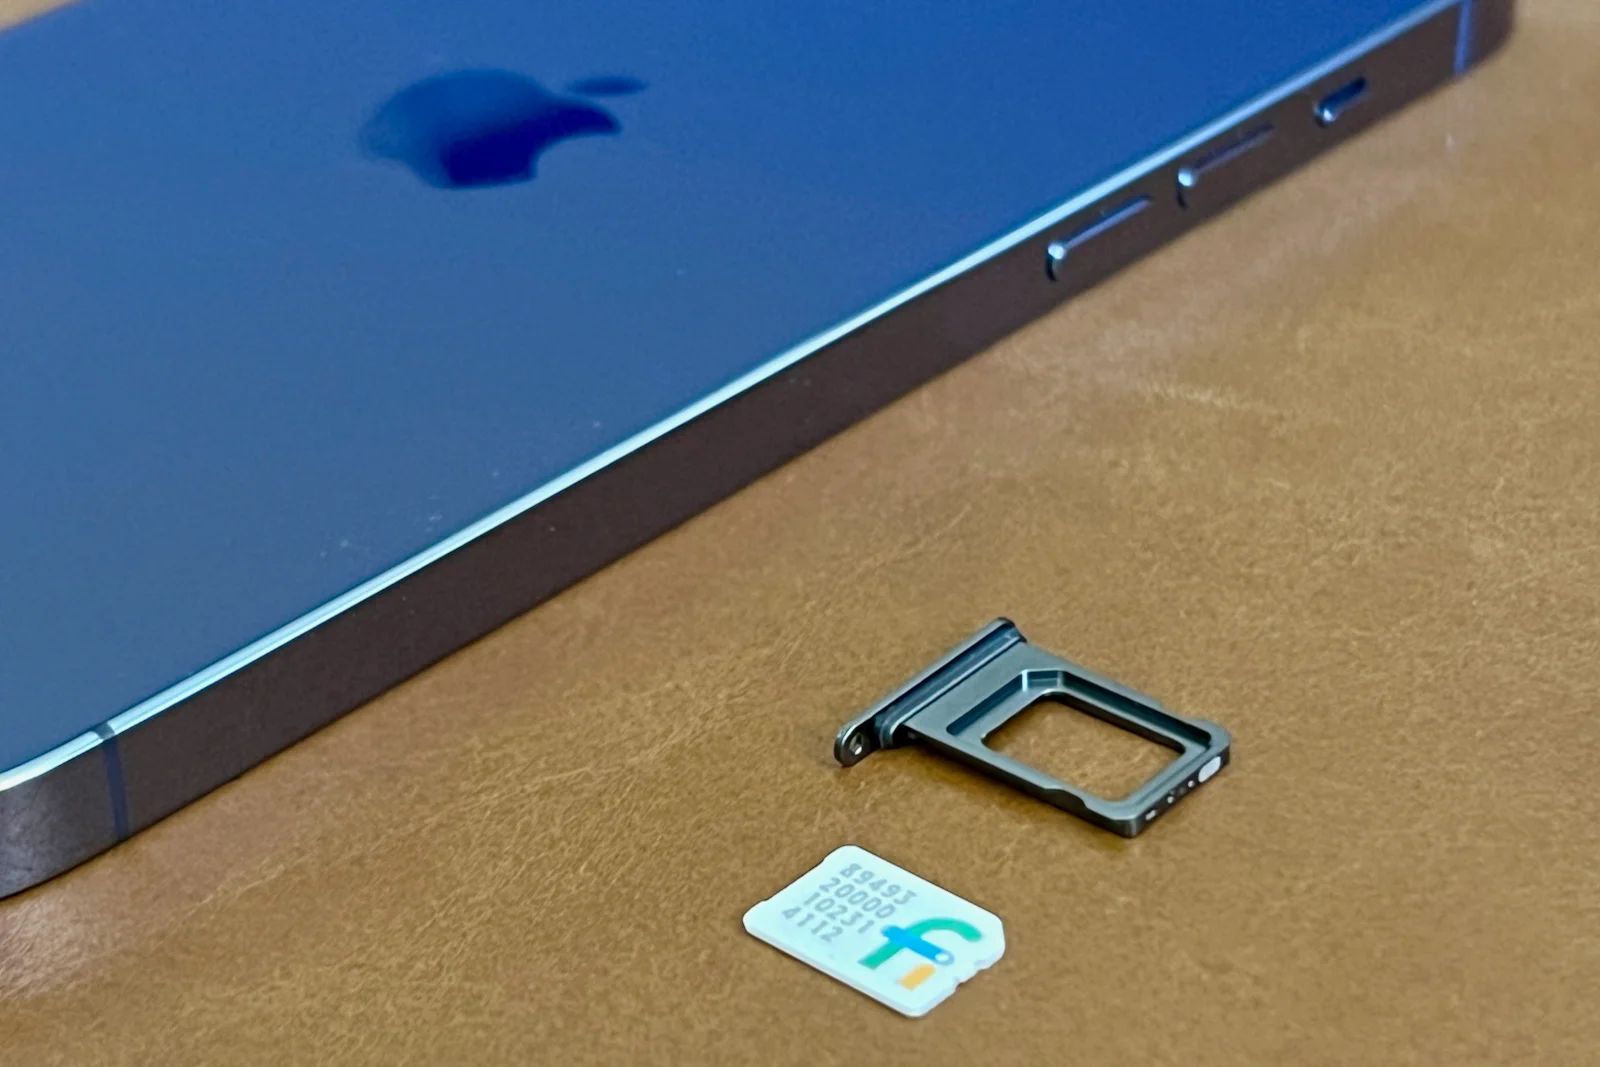
Step 5: Remove the SIM Card
With the SIM card tray successfully removed from your iPhone 11, the next crucial step is to extract the SIM card from the tray. This process requires careful handling to ensure that the SIM card remains undamaged and ready for reinsertion or transfer to another device. Follow these detailed steps to remove the SIM card from the tray with precision and confidence:
-
Inspect the SIM Card: Before proceeding with the removal, take a moment to inspect the SIM card seated within the tray. Ensure that it is positioned correctly and that no visible damage or debris is present on the card. This visual inspection allows you to identify any potential issues with the SIM card before extraction.
-
Gently Dislodge the SIM Card: Using your thumb and index finger, gently press on the exposed edge of the SIM card within the tray. Apply subtle pressure to carefully dislodge the SIM card from its position. It's essential to exercise caution and avoid using excessive force to prevent any damage to the delicate components of the SIM card.
-
Lift the SIM Card: As the SIM card loosens from its position, carefully lift it from the tray using your fingertips. Ensure that you maintain a steady and controlled grip to prevent the SIM card from slipping or dropping during the extraction process. The goal is to remove the SIM card smoothly and without causing any bending or warping.
-
Inspect the SIM Card Again: Once the SIM card is removed from the tray, take a moment to inspect it closely. Check for any signs of damage, such as scratches, bends, or discoloration. Additionally, ensure that the metallic contacts on the SIM card remain clean and free from any debris or residue.
-
Place the SIM Card in a Safe Location: After removing the SIM card from the tray and confirming its condition, place the SIM card in a secure and stable location. This ensures that the SIM card remains protected and ready for reinsertion into your iPhone 11 or transfer to another compatible device.
By following these meticulous steps, you can effectively remove the SIM card from the tray with precision and care. This deliberate approach ensures that the SIM card remains intact and ready for future use, whether it's for reinsertion into your iPhone 11 or for transitioning to another mobile device. With the SIM card successfully removed, you are now prepared to proceed to the final step of reinserting the SIM card tray back into your iPhone 11, completing the SIM card removal process with confidence and expertise.
Step 6: Reinsert the SIM Card Tray
After successfully removing the SIM card from your iPhone 11, the final step is to reinsert the SIM card tray back into the device. This critical step ensures that the SIM card is securely placed within the iPhone 11, allowing you to regain access to essential voice, text, and data services. Follow these detailed steps to reinsert the SIM card tray with precision and confidence:
-
Positioning the iPhone 11: Before reinserting the SIM card tray, ensure that your iPhone 11 is placed on a stable surface with the right-hand side facing upwards. This positioning allows for optimal access to the SIM card tray slot and ensures a seamless reinsertion process.
-
Aligning the SIM Card Tray: Take the SIM card tray and position it carefully, ensuring that the metal contacts on the SIM card align with the corresponding contacts within the tray. Proper alignment is crucial to ensure that the SIM card functions correctly once the tray is reinserted into the device.
-
Inserting the SIM Card Tray: With the SIM card tray positioned correctly, gently slide it back into the SIM card tray slot on the right-hand side of your iPhone 11. Apply steady and even pressure to ensure that the tray fits securely into the slot without any resistance.
-
Verifying the Tray Position: Once the SIM card tray is fully inserted, take a moment to verify that it sits flush with the device's exterior. The tray should be level with the iPhone 11's frame, indicating that it is securely positioned and ready for normal usage.
-
Powering On the Device: After reinserting the SIM card tray, power on your iPhone 11 to ensure that the device recognizes the SIM card and establishes connectivity with the mobile network. Confirm that the device displays the network signal and allows access to voice, text, and data services.
By following these meticulous steps, you can confidently reinsert the SIM card tray back into your iPhone 11, completing the SIM card removal and reinsertion process with precision and care. This final step marks the culmination of the SIM card removal journey, empowering you to manage the SIM card-related tasks with expertise and confidence.
Conclusion
Congratulations! You have successfully navigated the step-by-step process of removing the SIM card from your iPhone 11. By following the detailed instructions outlined in this guide, you have gained valuable insights into the essential aspects of SIM card removal, empowering you to handle the process with confidence and precision.
The ability to remove and reinsert the SIM card in your iPhone 11 is a valuable skill that allows you to troubleshoot network issues, upgrade to a new device, or prepare your device for resale or transfer. By mastering this fundamental task, you have taken a proactive step towards understanding and managing the inner workings of your iPhone 11, enhancing your overall user experience.
Throughout this guide, you have learned the importance of preparation, precision, and gentle handling when it comes to removing and reinserting the SIM card. From gathering the necessary tools to carefully inspecting the SIM card, each step has equipped you with the knowledge and expertise needed to handle the process effectively.
Furthermore, the attention to detail and the deliberate approach to SIM card removal showcased in this guide reflect your commitment to maintaining the integrity and functionality of your iPhone 11. By prioritizing the proper handling of the SIM card and the SIM card tray, you have demonstrated a keen understanding of the importance of device maintenance and care.
As you reflect on your journey through the SIM card removal process, remember that the skills and knowledge you have acquired are not only valuable in the present moment but also in your future interactions with mobile devices. Whether you encounter similar tasks with other devices or assist friends and family with their device maintenance, the expertise you have gained will serve you well.
In conclusion, the successful removal and reinsertion of the SIM card in your iPhone 11 exemplify your dedication to mastering essential mobile device tasks. By following this comprehensive guide, you have embraced the opportunity to enhance your technical proficiency and ensure the optimal functionality of your iPhone 11. Keep exploring and learning, as your journey with mobile devices continues to unfold.