Introduction
The Samsung Galaxy S9 is a remarkable piece of technology that seamlessly integrates into our daily lives, offering a multitude of features and functionalities. One of the essential components of this device is the SIM card, which facilitates communication and connectivity. Whether you need to replace your SIM card or troubleshoot network issues, knowing how to locate and access the SIM card slot is crucial.
In this guide, we will explore three methods to locate the SIM card on the Galaxy S9. Each method offers a straightforward approach, ensuring that you can easily access the SIM card slot without any hassle. By following these steps, you can gain a deeper understanding of your device's hardware and confidently manage your SIM card when necessary.
Let's dive into the details of each method, providing you with the knowledge and skills to handle your Galaxy S9 with confidence and ease. Whether you're a tech enthusiast or a casual user, understanding the intricacies of your device empowers you to make the most of its capabilities. Now, let's embark on this journey to uncover the secrets of the Galaxy S9's SIM card slot.
Method 1: Using the SIM Card Ejection Tool
To begin the process of locating the SIM card on your Galaxy S9, you will need the SIM card ejection tool that was included in the original packaging. This small, metallic tool is specifically designed to facilitate the removal and insertion of the SIM card. Here's a step-by-step guide on how to use the SIM card ejection tool to access the SIM card slot on your Galaxy S9:
-
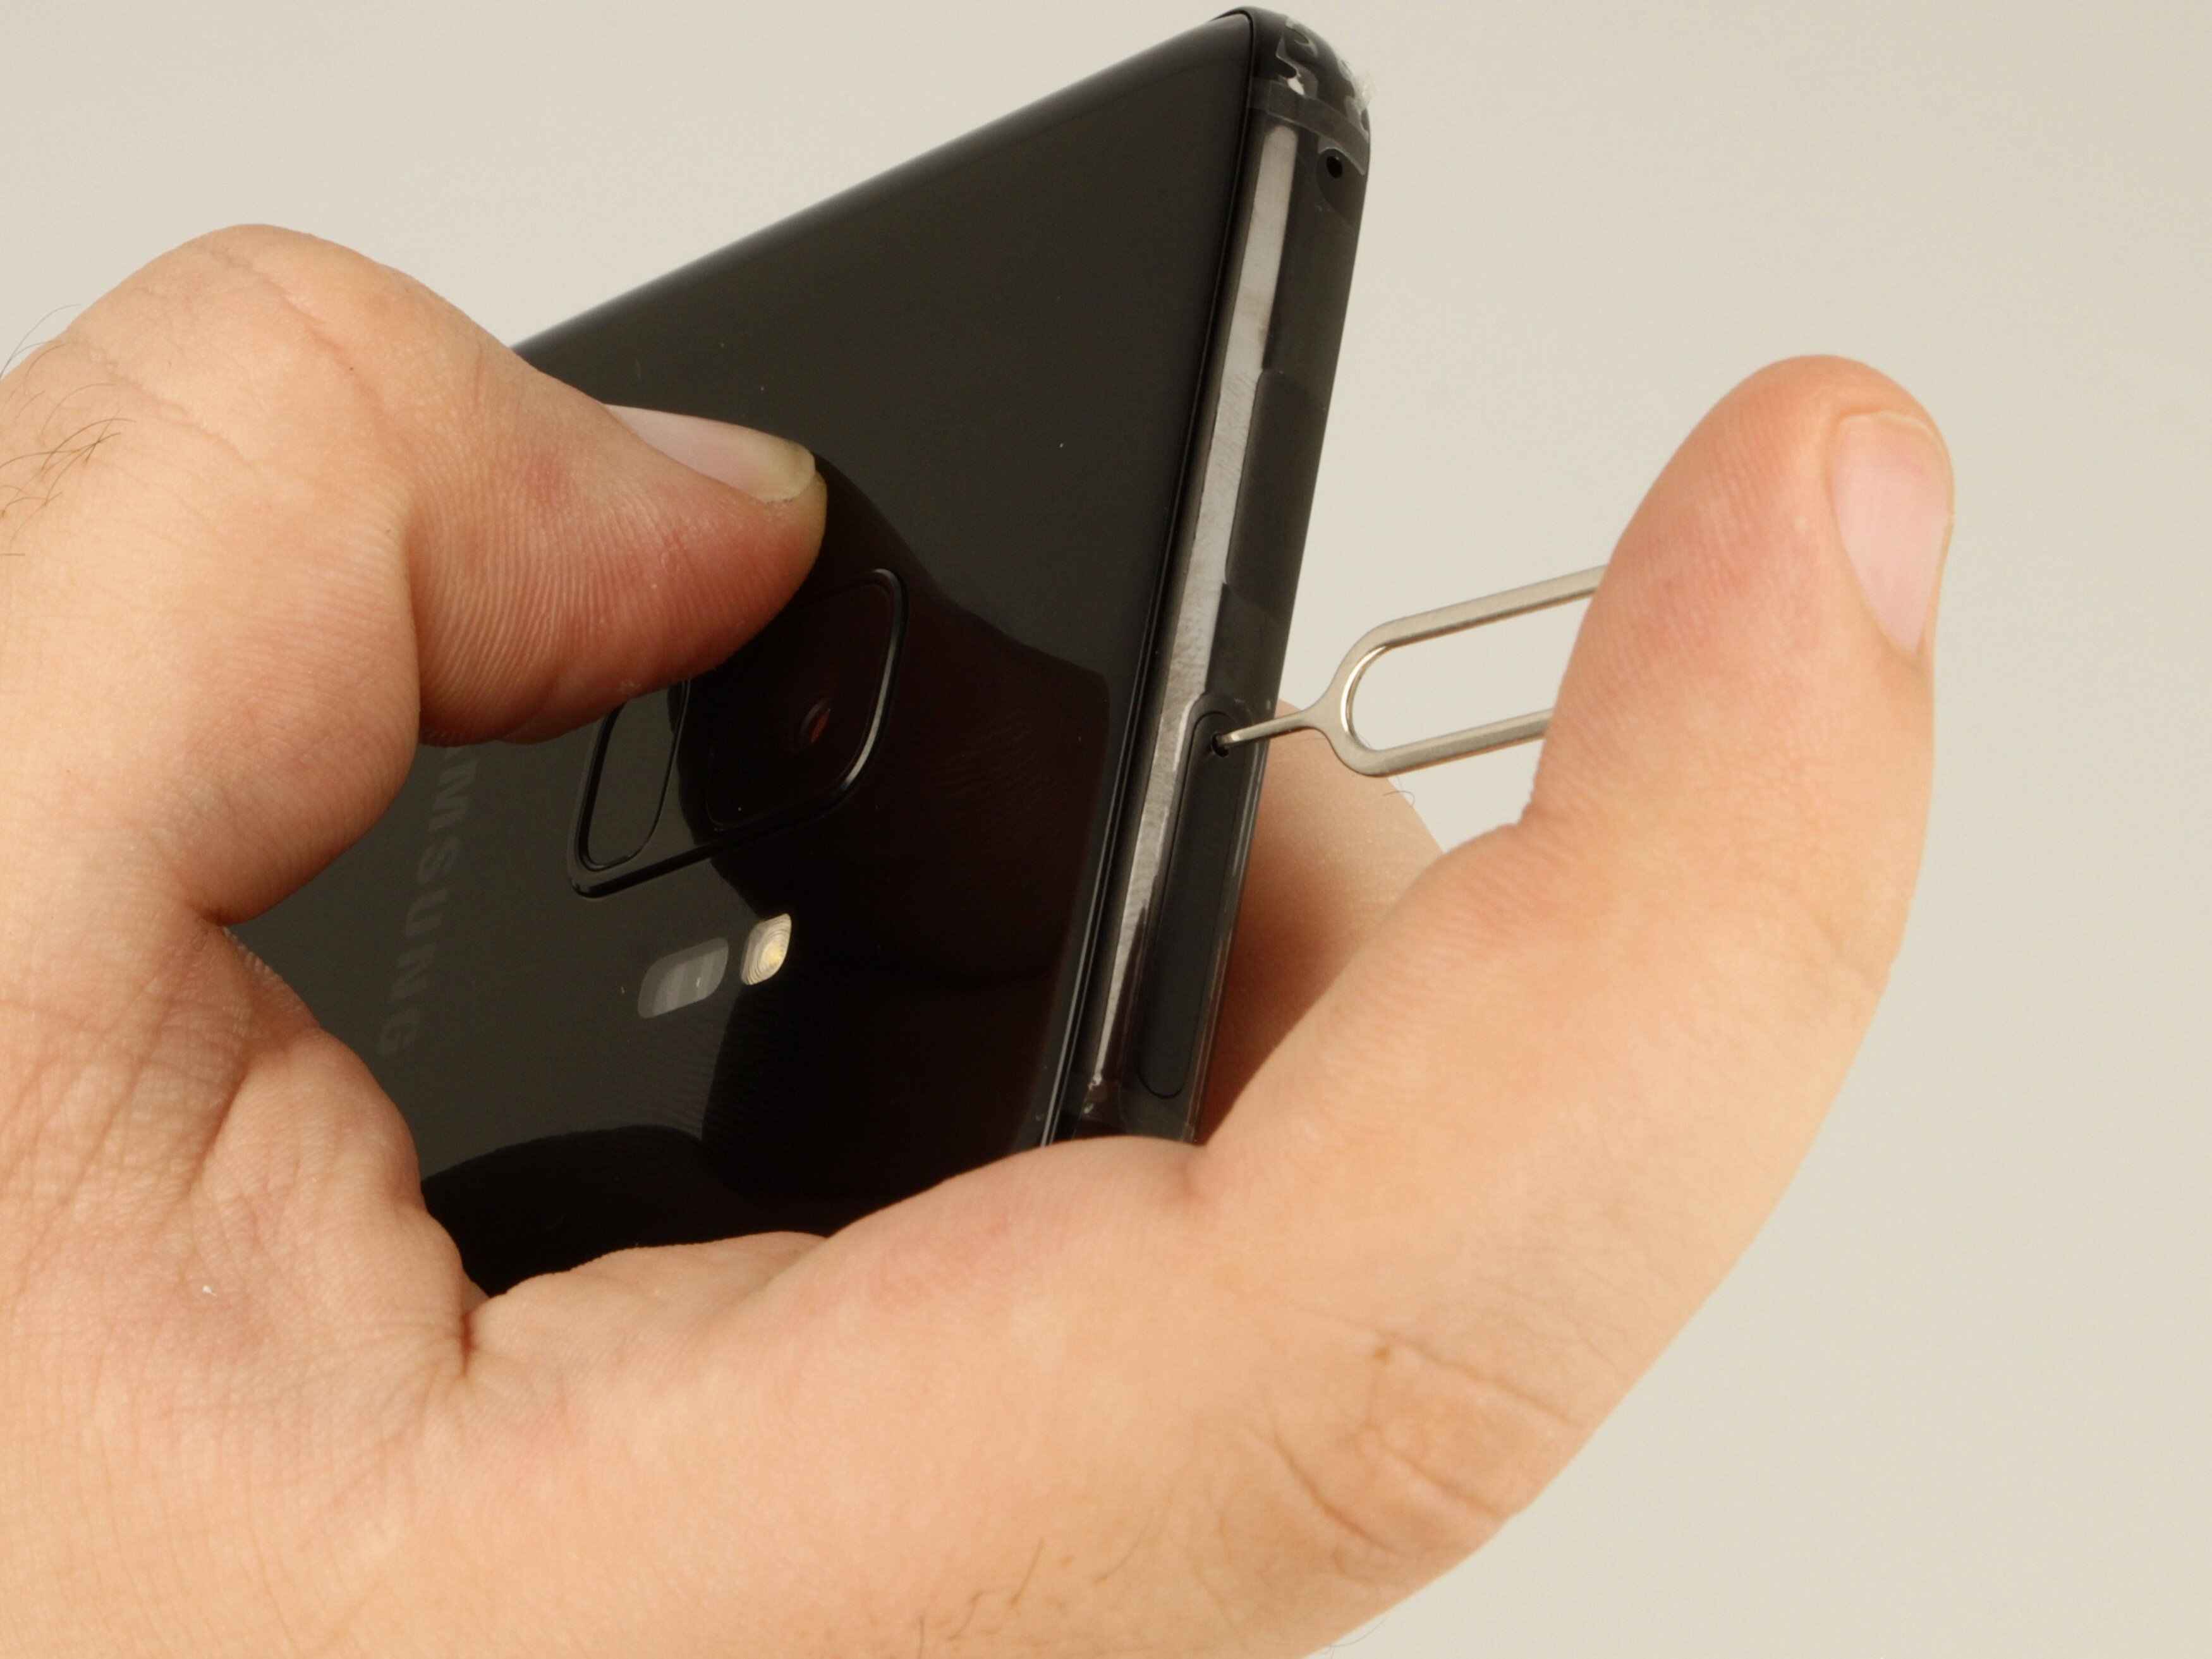
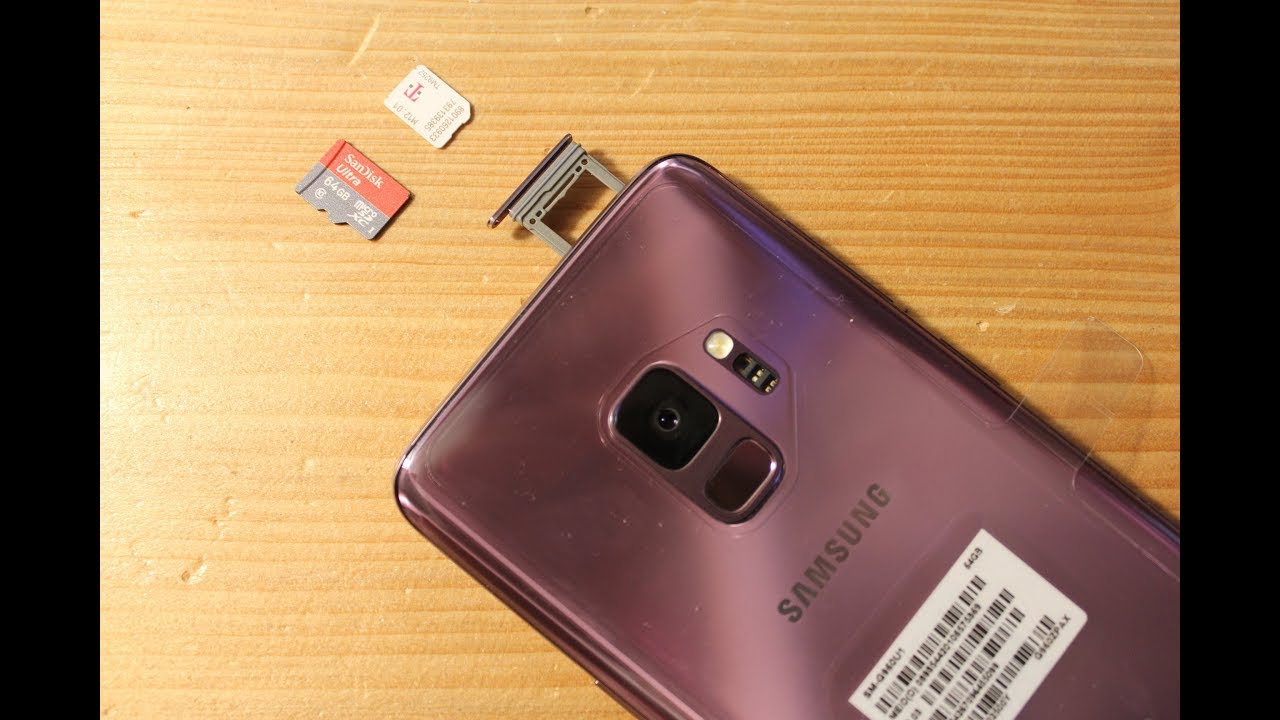
Locate the SIM Tray: Start by identifying the location of the SIM card tray on your device. On the Galaxy S9, the SIM card tray is typically situated on the upper edge of the phone. You will notice a small pinhole next to the tray, indicating the placement of the SIM card slot.
-
Insert the Ejection Tool: Take the SIM card ejection tool and insert its tip into the pinhole next to the SIM tray. Apply gentle pressure until you feel a slight resistance. This action will activate the internal mechanism, causing the SIM tray to partially eject from the device.
-
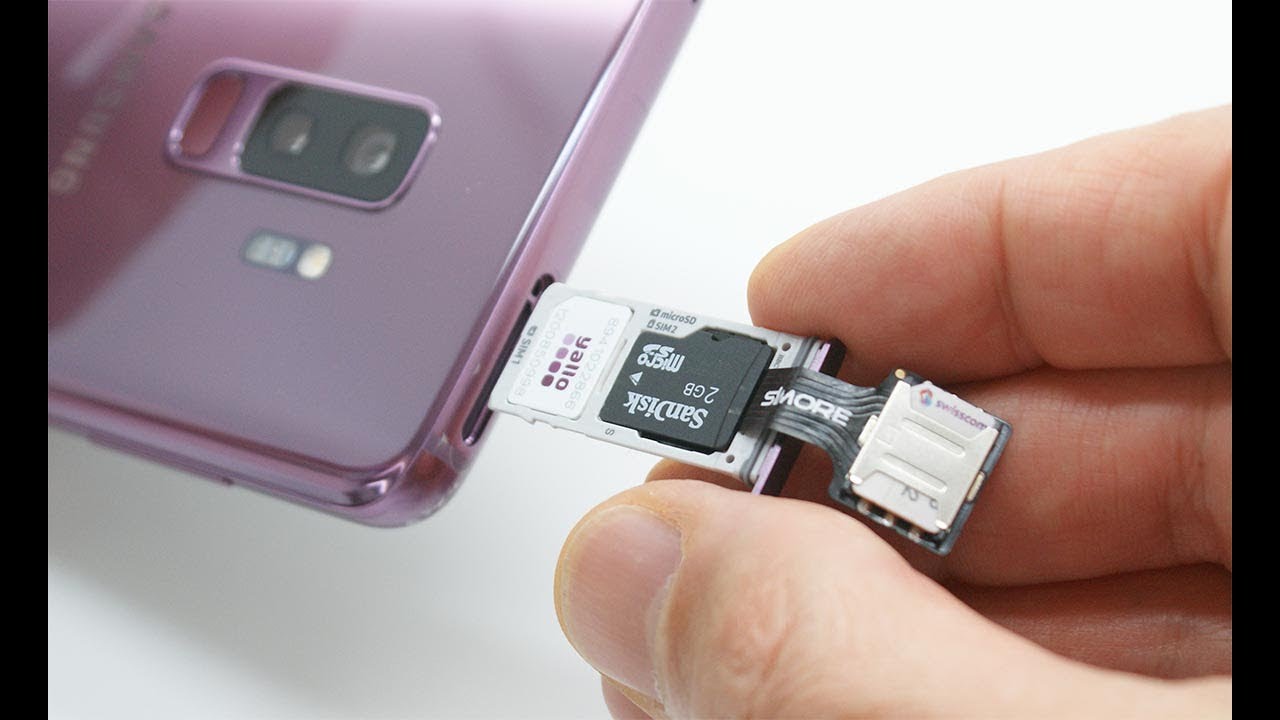
Remove the SIM Tray: Once the SIM tray is partially ejected, carefully pull it out from the device using the ejection tool. The tray will slide out smoothly, revealing the compartment where the SIM card is housed.
-
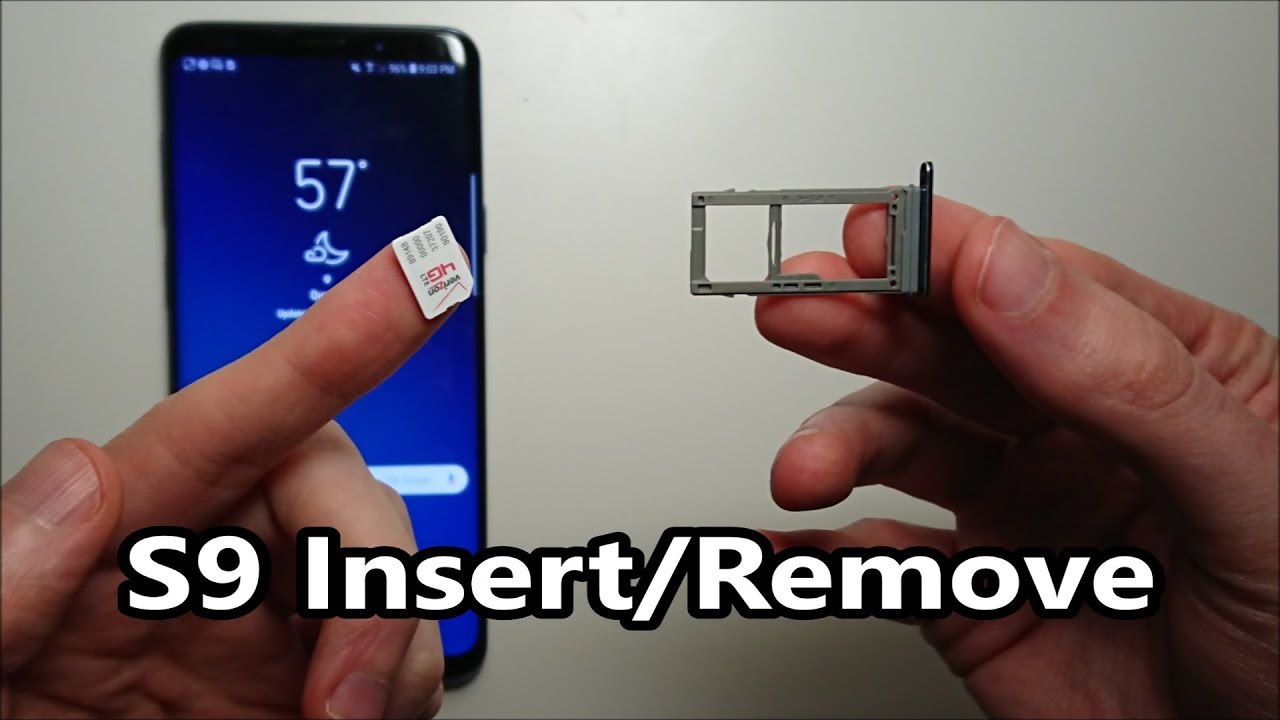
Access the SIM Card: With the SIM tray removed, you can now access the SIM card slot. Take note of the orientation of the SIM card within the tray, ensuring that you align it correctly when inserting or replacing the card.
-
Insert or Remove the SIM Card: If your objective is to replace the SIM card, gently push the existing card to release it from the tray. To insert a new SIM card, place it into the designated slot within the tray, aligning it according to the indicated orientation.
By following these steps, you can effectively utilize the SIM card ejection tool to access the SIM card slot on your Galaxy S9. This method provides a straightforward and efficient approach, allowing you to manage your SIM card with ease whenever the need arises.
Method 2: Using Your Fingernail or a Paperclip
If you find yourself without the SIM card ejection tool, worry not, as there is an alternative method to access the SIM card slot on your Galaxy S9. By using your fingernail or a paperclip, you can effectively navigate the process with ease. Here's a detailed guide on how to utilize this method:
-
Locate the SIM Tray: Begin by identifying the position of the SIM card tray on your Galaxy S9. As mentioned earlier, the tray is typically located on the upper edge of the device, accompanied by a small pinhole adjacent to it.
-
Prepare Your Fingernail or Paperclip: If you opt to use your fingernail, ensure that it is trimmed and free from any sharp edges that may cause damage to the device. Alternatively, if you choose to use a paperclip, straighten it out to create a small, elongated tool that can fit into the pinhole.
-
Insert Your Fingernail or Paperclip: Gently insert your fingernail or the modified paperclip into the pinhole next to the SIM tray. Apply light pressure and ensure that the tool is inserted straight into the hole. This action will trigger the release mechanism, causing the SIM tray to partially eject from the device.
-
Remove the SIM Tray: Once the SIM tray is partially ejected, carefully pull it out from the device using your fingernail or the paperclip. Exercise caution to avoid applying excessive force, as the tray should slide out smoothly, revealing the compartment where the SIM card is housed.
-
Access the SIM Card: With the SIM tray removed, you can now access the SIM card slot. Take note of the orientation of the SIM card within the tray, ensuring that you align it correctly when inserting or replacing the card.
-
Insert or Remove the SIM Card: If your intention is to replace the SIM card, gently push the existing card to release it from the tray. To insert a new SIM card, place it into the designated slot within the tray, aligning it according to the indicated orientation.
By following these steps, you can effectively utilize your fingernail or a paperclip to access the SIM card slot on your Galaxy S9. This method offers a convenient solution, especially when the SIM card ejection tool is not readily available. With a steady hand and careful execution, you can seamlessly manage your SIM card using this alternative approach.
Method 3: Using the SIM Card Tray Slot
When it comes to accessing the SIM card on your Galaxy S9, utilizing the SIM card tray slot directly offers a straightforward and efficient method. This approach eliminates the need for additional tools or implements, providing a convenient way to manage your SIM card with ease. Here's a comprehensive guide on how to utilize the SIM card tray slot to access and handle your SIM card:
-
Locate the SIM Tray:
Begin by identifying the location of the SIM card tray on your Galaxy S9. The tray is typically situated on the upper edge of the device, adjacent to the headphone jack. The small pinhole next to the tray indicates the placement of the SIM card slot. -
Prepare the Device:
Before proceeding, ensure that your device is powered on and accessible. If the screen is locked, unlock the device to access the SIM card tray slot. -
Eject the SIM Tray:
Gently insert your thumb or fingertip into the pinhole next to the SIM tray. Apply light pressure and push inward until the SIM tray partially ejects from the device. Exercise caution to avoid applying excessive force, as the tray should slide out smoothly, allowing access to the SIM card slot. -
Access the SIM Card:
With the SIM tray partially ejected, you can now access the SIM card slot directly. Take note of the orientation of the SIM card within the tray, ensuring that you align it correctly when inserting or replacing the card. -
Insert or Remove the SIM Card:
If your objective is to replace the SIM card, gently push the existing card to release it from the tray. To insert a new SIM card, place it into the designated slot within the tray, aligning it according to the indicated orientation.
By following these steps, you can effectively utilize the SIM card tray slot to access and manage your SIM card on the Galaxy S9. This method offers a convenient and direct approach, allowing you to handle your SIM card with confidence and precision. Whether you're troubleshooting network issues or replacing your SIM card, mastering this method empowers you to seamlessly interact with the essential components of your device.