Introduction
Inserting a SIM card into your Samsung A13 is a fundamental step in setting up your new device. The SIM card serves as the gateway to your mobile network, allowing you to make calls, send messages, and access mobile data. While the process may seem daunting at first, it's actually quite simple and straightforward. In this comprehensive guide, we will walk you through the step-by-step process of inserting a SIM card into your Samsung A13, ensuring that you can seamlessly activate your device and stay connected at all times.
The Samsung A13 is a sleek and powerful smartphone that offers a wide range of features, from its vibrant display to its advanced camera capabilities. However, before you can fully enjoy these features, it's essential to properly install your SIM card. Whether you're upgrading from an older device or setting up a new phone for the first time, understanding how to insert the SIM card correctly is crucial for a smooth and hassle-free experience.
By following the instructions provided in this guide, you will gain the confidence to handle the SIM card installation process with ease. From locating the SIM card tray to securely inserting the SIM card, each step is designed to help you navigate the process effortlessly. With the SIM card in place, you'll be ready to explore the full potential of your Samsung A13 and stay connected with friends, family, and the digital world.
So, let's dive into the step-by-step guide and ensure that your Samsung A13 is equipped with a SIM card, ready to unleash its full potential.
Step 1: Locate the SIM Card Tray
The first step in inserting a SIM card into your Samsung A13 is to locate the SIM card tray. This tray is designed to securely hold the SIM card and ensure that it is properly aligned for seamless connectivity. To begin, you'll need to identify the location of the SIM card tray on your device.
On the Samsung A13, the SIM card tray is typically located on the side of the device. Look for a small pinhole or slot along the edge of the phone. This slot is where the SIM card tray is housed. It's important to handle your device with care and gently inspect the edges to avoid any damage.
Once you've located the slot, you can use the SIM ejector tool that came with your device. This tool is specifically designed to safely remove the SIM card tray without causing any damage to your phone. If the SIM ejector tool is not readily available, you can use a small paperclip or a similar tool with a fine, pointed tip.
By locating the SIM card tray and familiarizing yourself with its position, you are taking the first step towards successfully inserting your SIM card into the Samsung A13. This initial stage sets the foundation for the subsequent steps in the process, ensuring that you can proceed with confidence and precision.
Now that you've identified the location of the SIM card tray, you're ready to move on to the next step in the process. With the SIM card tray in sight, you're one step closer to activating your Samsung A13 and experiencing the full range of features and functionalities that this impressive device has to offer.
Step 2: Insert the SIM Ejector Tool
With the SIM card tray located, the next crucial step in the process of inserting a SIM card into your Samsung A13 is to use the SIM ejector tool. This tool, often provided by the manufacturer along with the device, is specifically designed to facilitate the safe and effortless removal of the SIM card tray.
To begin, take the SIM ejector tool and carefully insert the pointed end into the small pinhole or slot located near the SIM card tray. Apply gentle pressure and ensure that the tool is inserted straight into the hole. It's important to handle the tool with precision to avoid any damage to the device.
As the tool is inserted, you may feel a slight resistance, which is normal. Continue to exert gentle pressure until you feel the SIM card tray being released. Once the tray is partially ejected, carefully pull it out using your fingers, ensuring that it comes out smoothly without any forceful movements.
If the SIM ejector tool provided by the manufacturer is not readily available, you can use a small paperclip or a similar tool with a fine, pointed tip. However, it's essential to exercise caution and avoid using sharp or oversized objects that may cause damage to the SIM card tray or the device itself.
By using the SIM ejector tool, you are taking a crucial step towards preparing the SIM card tray for the insertion of the SIM card. This process sets the stage for securely placing the SIM card into the tray, ensuring that it is properly aligned and ready to establish a connection with the mobile network.
With the SIM ejector tool successfully inserted and the SIM card tray partially ejected, you are now ready to proceed to the next step in the process. This pivotal stage brings you closer to completing the installation of the SIM card into your Samsung A13, setting the foundation for seamless connectivity and uninterrupted access to mobile services.
As you move on to the subsequent steps, remember to handle the SIM ejector tool and the SIM card tray with care, ensuring that each component is managed delicately to avoid any potential damage. With the SIM ejector tool in place, you are poised to advance to the next stage of the process, bringing you closer to activating your Samsung A13 and unlocking its full potential.
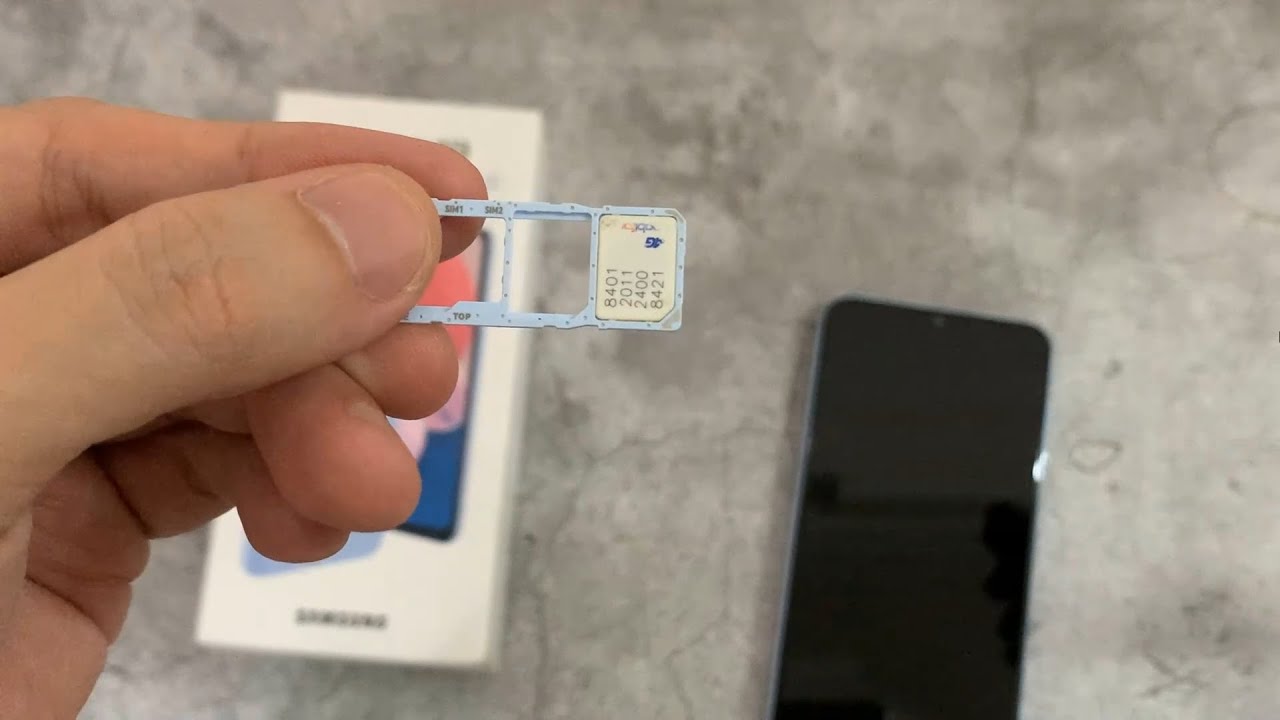
Step 3: Remove the SIM Card Tray
After successfully inserting the SIM ejector tool and partially releasing the SIM card tray, the next vital step is to carefully remove the tray from your Samsung A13. This process requires precision and gentle handling to ensure that the tray is extracted smoothly without causing any damage to the device.
Once the SIM card tray is partially ejected, gently pull it out using your fingers, ensuring that you maintain a steady grip and avoid applying excessive force. It's important to approach this step with caution, as the SIM card tray is a delicate component that must be handled with care.
As you carefully pull out the SIM card tray, take note of its position and orientation within the device. Ensure that you maintain a firm yet gentle grip to prevent any sudden movements that may lead to accidental damage. By handling the tray with care, you can ensure that it remains in pristine condition, ready to securely accommodate the SIM card.
As the SIM card tray is removed, take a moment to inspect it for any signs of damage or obstructions. Ensure that the tray is clean and free from any debris that may hinder the smooth insertion of the SIM card. By maintaining the cleanliness and integrity of the tray, you can guarantee a seamless installation process for the SIM card.
Once the SIM card tray has been safely removed from your Samsung A13, set it aside in a secure location to prevent misplacement or accidental damage. Keeping the tray in a safe and easily accessible spot ensures that it remains readily available for the next stage of the process, allowing you to proceed with confidence and efficiency.
With the SIM card tray successfully removed, you have completed a crucial phase in the process of inserting a SIM card into your Samsung A13. This step sets the stage for securely placing the SIM card into the tray, ensuring that it is aligned correctly and ready to establish a connection with the mobile network.
As you proceed to the subsequent steps, remember to handle the SIM card tray with care, maintaining its pristine condition and safeguarding it from any potential damage. With the tray safely removed, you are now prepared to advance to the next stage of the process, bringing you closer to activating your Samsung A13 and harnessing its full range of capabilities.
Step 4: Insert the SIM Card
With the SIM card tray successfully removed from your Samsung A13, you are now ready to proceed with the pivotal step of inserting the SIM card. The SIM card serves as the gateway to your mobile network, allowing you to make calls, send messages, and access mobile data. Properly inserting the SIM card is essential for establishing seamless connectivity and ensuring that your device is fully operational.
Begin by carefully examining the SIM card tray to identify the specific slot designed to accommodate the SIM card. The tray typically features a designated area where the SIM card can be securely placed. Take a moment to inspect the slot and ensure that it is clean and free from any debris that may hinder the insertion process.
Next, retrieve the SIM card from its packaging, handling it with care to avoid any damage to the delicate components. Examine the SIM card closely to identify the orientation and positioning required for proper insertion. Most SIM cards feature a notched corner, which aligns with a corresponding notch in the slot, ensuring that the card is inserted in the correct orientation.
With the SIM card positioned correctly, gently place it into the designated slot on the SIM card tray, ensuring that it fits securely and aligns with the contours of the slot. Apply gentle pressure to the SIM card to ensure that it is firmly seated within the tray, minimizing any potential movement that may disrupt the connection with the mobile network.
As you insert the SIM card, take note of any resistance or obstructions that may indicate improper alignment. It's essential to handle the SIM card with care and precision, ensuring that it is inserted smoothly and securely. By maintaining a steady hand and a delicate touch, you can ensure that the SIM card is properly positioned within the tray.
Once the SIM card is securely in place, take a moment to verify that it is aligned correctly and sits flush within the designated slot. Ensure that the card is not protruding or misaligned, as this may interfere with the proper functioning of the SIM card and the device's connectivity.
With the SIM card successfully inserted into the tray, you have completed a crucial phase in the process of preparing your Samsung A13 for activation. This step sets the stage for securely reinserting the SIM card tray into the device, ensuring that the SIM card is securely housed and ready to establish a connection with the mobile network.
As you proceed to the subsequent steps, remember to handle the SIM card and tray with care, maintaining their pristine condition and safeguarding them from any potential damage. With the SIM card securely in place, you are now prepared to advance to the next stage of the process, bringing you closer to activating your Samsung A13 and harnessing its full range of capabilities.
Step 5: Reinsert the SIM Card Tray
With the SIM card securely inserted into the designated slot on the SIM card tray, the final step in the process of inserting a SIM card into your Samsung A13 is to reinsert the tray back into the device. This crucial step ensures that the SIM card is securely housed within the device, ready to establish a seamless connection with the mobile network.
Begin by carefully holding the SIM card tray, ensuring that the SIM card remains securely in place within the designated slot. Take note of the orientation of the tray, aligning it with the corresponding slot on the device. It's essential to approach this step with precision, ensuring that the tray is positioned correctly for smooth insertion.
Gently slide the SIM card tray back into the slot on your Samsung A13, applying steady and even pressure to ensure a seamless fit. Take note of any resistance or obstructions, adjusting the positioning of the tray as needed to facilitate smooth reinsertion. It's important to handle the tray with care, avoiding any sudden movements that may disrupt the alignment.
As the SIM card tray is reinserted, listen for a soft click or indication that it has been securely placed within the device. This subtle confirmation signifies that the tray is properly seated, ensuring that the SIM card remains firmly housed and ready to establish a connection with the mobile network.
Once the SIM card tray is securely back in place, take a moment to inspect the device and ensure that the tray sits flush with the edges, indicating a seamless fit. Verify that the tray is fully inserted and that the device's exterior remains smooth and unobstructed.
With the SIM card tray successfully reinserted into your Samsung A13, you have completed the final phase of the process, ensuring that the SIM card is securely housed within the device. This step sets the stage for activating your device and experiencing the full range of features and functionalities that the Samsung A13 has to offer.
As you proceed with the activation of your Samsung A13, remember to power on the device and follow the manufacturer's instructions for initializing the SIM card. With the SIM card tray securely in place, you are now poised to enjoy seamless connectivity and uninterrupted access to mobile services.
By following these step-by-step instructions, you have successfully inserted a SIM card into your Samsung A13, setting the foundation for a smooth and hassle-free activation process. With the SIM card securely housed within the device, you can now embark on your journey with the Samsung A13, staying connected and exploring its full potential.
Conclusion
Congratulations! By following the step-by-step guide provided in this comprehensive tutorial, you have successfully inserted a SIM card into your Samsung A13. This pivotal process ensures that your device is equipped to establish seamless connectivity with the mobile network, allowing you to make calls, send messages, and access mobile data with ease.
The journey of inserting a SIM card into your Samsung A13 begins with the initial step of locating the SIM card tray, followed by the precise insertion of the SIM ejector tool to release the tray. With the tray in hand, the delicate process of inserting the SIM card and securely reinserting the tray back into the device completes the installation.
Properly inserting a SIM card into your Samsung A13 is not only a fundamental step in activating your device but also a gateway to unlocking its full potential. With the SIM card securely housed within the device, you are now poised to explore the myriad features and functionalities offered by the Samsung A13, from its vibrant display to its advanced camera capabilities.
As you power on your device and initialize the SIM card, you can embark on your journey with the Samsung A13, staying connected with friends, family, and the digital world. The seamless installation of the SIM card ensures that you can experience uninterrupted access to mobile services, enabling you to stay connected on the go and make the most of your smartphone experience.
Remember, the process of inserting a SIM card into your Samsung A13 is designed to be straightforward and hassle-free. By handling each step with care and precision, you have successfully prepared your device for seamless activation and connectivity. With the SIM card securely in place, you are now ready to enjoy the full range of capabilities offered by the Samsung A13.
As you continue to explore the features and functionalities of your Samsung A13, you can rest assured that the SIM card is securely housed within the device, ready to facilitate your communication and connectivity needs. Whether you're making calls, sending messages, or accessing mobile data, the properly installed SIM card ensures that your Samsung A13 is fully equipped to meet your mobile requirements.
With the SIM card successfully inserted into your Samsung A13, you have taken a significant step towards fully activating your device and harnessing its complete range of capabilities. Now, armed with the knowledge and confidence gained from this guide, you can embark on your journey with the Samsung A13, staying connected and making the most of your mobile experience.