Introduction
Inserting a SIM card into a Nexus 5 is a fundamental step in setting up the device for optimal functionality. Whether you're activating a new phone or replacing an existing SIM card, understanding the process is essential. This guide provides a comprehensive, step-by-step walkthrough to ensure a seamless experience.
The Nexus 5, known for its sleek design and powerful performance, is a popular choice among mobile device enthusiasts. Its compatibility with various carriers makes it a versatile option for users seeking flexibility in their mobile connectivity. However, to harness the full potential of this device, it is crucial to correctly insert the SIM card.
By following the instructions provided in this guide, you can ensure that the Nexus 5 recognizes your SIM card, allowing you to make calls, send messages, and access mobile data. Whether you are a tech-savvy individual or a newcomer to the world of smartphones, this guide is designed to simplify the process, empowering you to take full advantage of your Nexus 5.
As we delve into the step-by-step process of inserting a SIM card into the Nexus 5, it's important to note that the device's design may vary slightly depending on the model and manufacturing year. However, the fundamental steps remain consistent across these variations. With this guide, you can confidently navigate the process, regardless of the specific Nexus 5 model in your possession.
Now, let's embark on this journey to seamlessly insert a SIM card into your Nexus 5, unlocking its potential for seamless communication and connectivity.
Step 1: Power off the Nexus 5
Before embarking on the process of inserting a SIM card into your Nexus 5, it is imperative to power off the device. This step ensures the safety of both the device and the SIM card during the installation process. By turning off the Nexus 5, you minimize the risk of any potential damage that could occur if the device were to remain powered on.
To power off your Nexus 5, locate the power button, which is typically situated on the right-hand side of the device. Press and hold the power button until the power-off menu appears on the screen. Next, tap the "Power off" option to initiate the shutdown process. As the device powers down, you will notice the screen dimming and eventually turning off, indicating that the Nexus 5 is fully powered off.
By following this simple yet crucial step, you ensure that the device is in a safe state for the subsequent steps of inserting the SIM card. This precautionary measure minimizes the risk of any electrical interference or accidental activation of the device during the SIM card installation process.
Once the Nexus 5 is powered off, you can proceed with confidence, knowing that you have taken the necessary precaution to safeguard both the device and the SIM card. With the device safely powered down, you are now ready to move on to the next step in the process of inserting a SIM card into your Nexus 5.
As we progress through the subsequent steps, it is important to maintain a methodical approach, ensuring that each step is executed with precision. This attention to detail will contribute to a smooth and successful SIM card installation, setting the stage for seamless connectivity and communication on your Nexus 5.
With the Nexus 5 powered off, you are now prepared to advance to the next step, where we will delve into locating the SIM card tray, a pivotal stage in the process of inserting a SIM card into your Nexus 5.
Step 2: Locate the SIM card tray
Locating the SIM card tray is a crucial step in the process of inserting a SIM card into your Nexus 5. The SIM card tray serves as the designated slot for securely housing the SIM card within the device. This step requires a keen eye and attention to detail, as the SIM card tray's precise location may vary slightly depending on the specific model of the Nexus 5.
In most Nexus 5 models, the SIM card tray is positioned on the left-hand side of the device. To locate it, gently examine the left edge of the device, where you will find a small pinhole or a tiny slot. This discreet opening is the access point to the SIM card tray and is designed to accommodate the SIM ejection tool for effortless tray removal.
As you identify the SIM card tray, take note of its size and shape, as it may differ from other ports or buttons on the device. The SIM card tray is typically rectangular and may feature a small indentation or outline, indicating its purpose as the receptacle for the SIM card.
It is essential to handle the Nexus 5 with care during this step, as the SIM card tray is a delicate component that requires gentle manipulation. By locating the SIM card tray with precision, you set the stage for the subsequent steps of the SIM card installation process, ensuring that the SIM card is seamlessly integrated into the device.
With the SIM card tray successfully located, you have achieved a pivotal milestone in the journey to insert a SIM card into your Nexus 5. This accomplishment paves the way for the next steps, where we will delve into the process of utilizing the SIM ejection tool to access the SIM card tray and prepare it for the insertion of the SIM card.
As we progress through this guide, maintaining a focused and meticulous approach will contribute to a successful SIM card installation, setting the stage for uninterrupted connectivity and communication on your Nexus 5. Now that you have successfully located the SIM card tray, you are ready to proceed to the next step, where we will delve into the process of utilizing the SIM ejection tool to access the SIM card tray.
Step 3: Insert the SIM ejection tool
With the SIM card tray located, the next crucial step in the process of inserting a SIM card into your Nexus 5 is to insert the SIM ejection tool. This specialized tool, often provided with the Nexus 5 upon purchase, is designed to facilitate the safe and effortless removal of the SIM card tray.
The SIM ejection tool is a small, slender instrument with a narrow, pointed tip. Its purpose is to engage with the tiny pinhole or slot adjacent to the SIM card tray, initiating the release of the tray from its position within the device. This tool is specifically crafted to fit seamlessly into the designated pinhole, ensuring that the SIM card tray can be accessed without causing damage to the device.
To begin this step, retrieve the SIM ejection tool from its storage location, which may be included in the Nexus 5 packaging or obtained separately. Once in hand, carefully examine the tool, paying attention to its slim profile and the pointed tip that facilitates precise engagement with the SIM card tray's release mechanism.
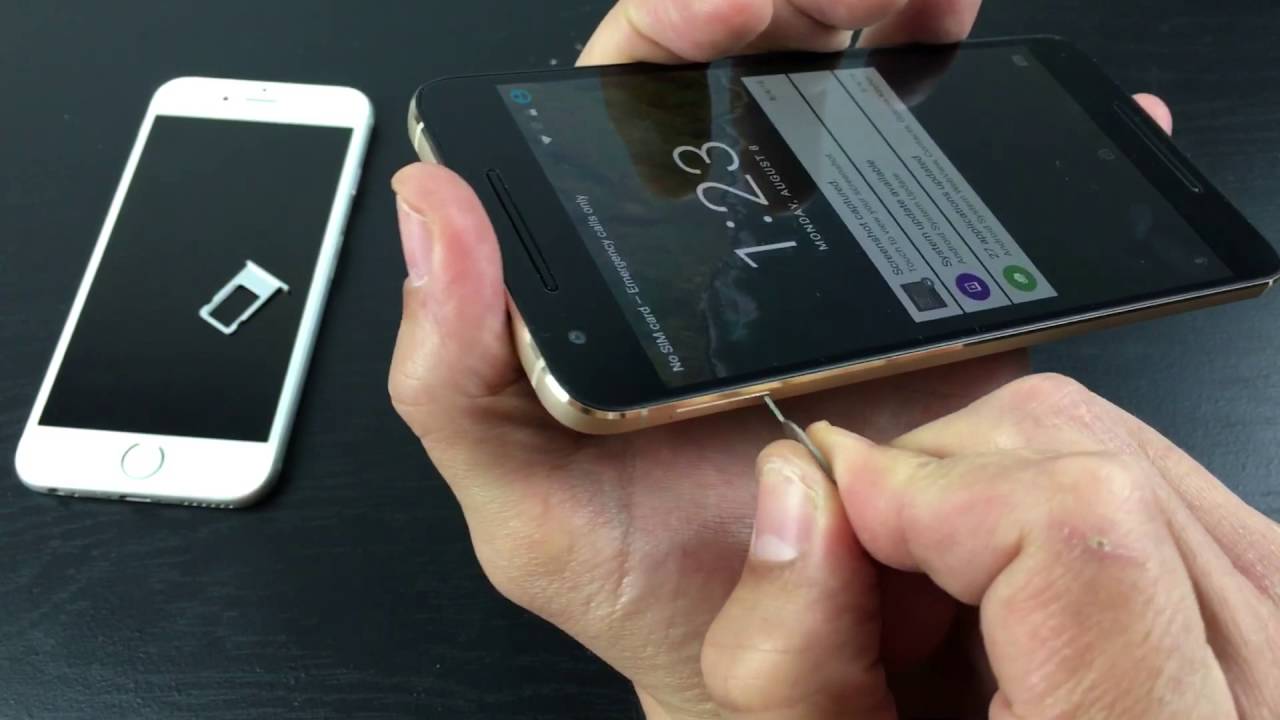
With the SIM ejection tool in hand, position the pointed tip of the tool into the small pinhole or slot located near the SIM card tray. Apply gentle pressure to the tool, ensuring that it is inserted straight and evenly into the designated opening. As the tool engages with the release mechanism, you will feel a slight resistance, indicating that the tool is properly aligned with the tray's release mechanism.
It is essential to exercise caution and precision during this step, as the SIM ejection tool's delicate design demands careful handling. By inserting the tool with care and precision, you ensure that the SIM card tray can be safely and smoothly released from its position within the Nexus 5.
As the SIM ejection tool initiates the release of the SIM card tray, you will sense a subtle give, indicating that the tray is disengaging from its secured position within the device. Once this movement is detected, gently withdraw the SIM ejection tool from the pinhole, preparing to remove the SIM card tray from the Nexus 5.
By successfully inserting the SIM ejection tool and initiating the release of the SIM card tray, you have reached a pivotal stage in the process of inserting a SIM card into your Nexus 5. This accomplishment sets the stage for the subsequent steps, where we will delve into the process of removing the SIM card tray and preparing it for the insertion of the SIM card.
With the SIM ejection tool effectively utilized, you are now prepared to proceed to the next step, where we will guide you through the process of removing the SIM card tray from your Nexus 5, setting the stage for the seamless insertion of the SIM card.
Step 4: Remove the SIM card tray
As the SIM ejection tool initiates the release of the SIM card tray, you will sense a subtle give, indicating that the tray is disengaging from its secured position within the device. Once this movement is detected, gently withdraw the SIM ejection tool from the pinhole, preparing to remove the SIM card tray from the Nexus 5.
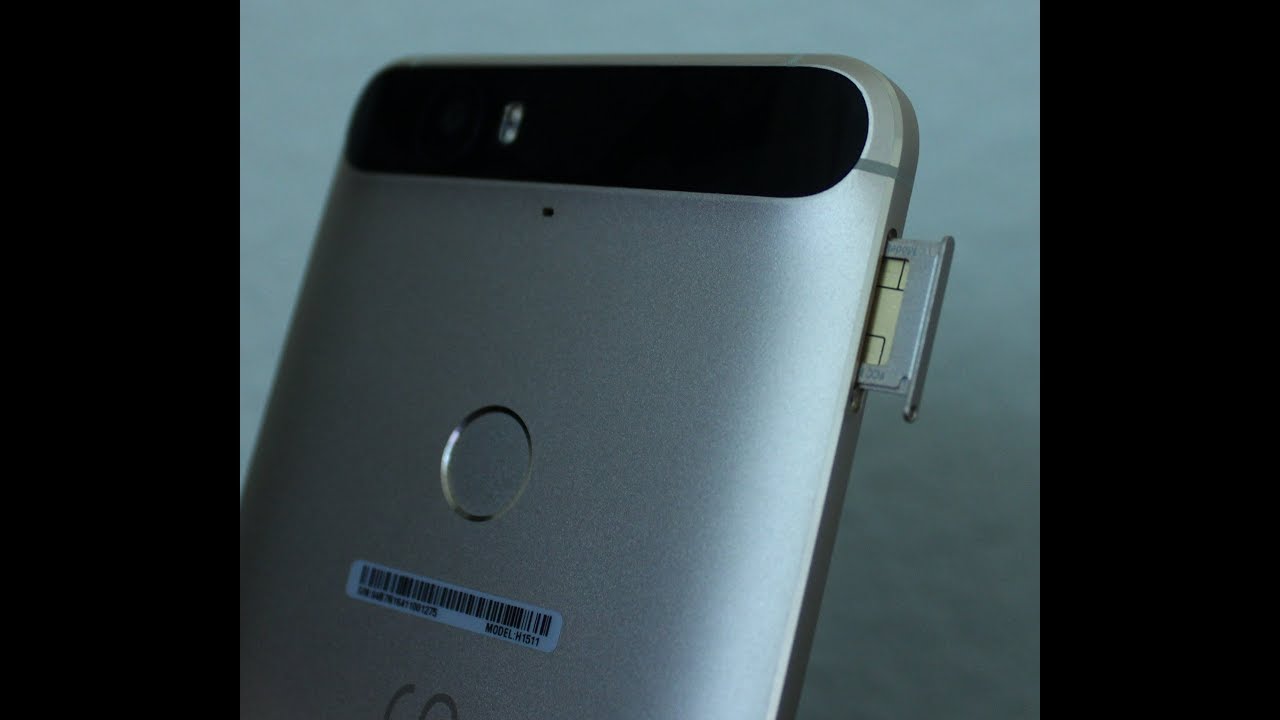
With the SIM card tray now partially released, proceed to carefully grasp the exposed edge of the tray, ensuring a firm yet gentle grip. The tray is designed to slide smoothly out of the device, guided by its designated track within the Nexus 5. Exercise caution and precision as you begin to slide the tray out of its slot, maintaining a steady and even motion to prevent any jarring or tilting that could potentially dislodge the SIM card.
As the SIM card tray emerges from the Nexus 5, take note of its compact size and the precision engineering that enables it to securely house the SIM card. The tray may feature a small indentation or outline that corresponds to the dimensions of the SIM card, ensuring a snug fit that minimizes the risk of movement or dislodgment during device usage.
Once the SIM card tray is fully extracted from the Nexus 5, place it on a stable surface, taking care to position it with the exposed side facing upward. This orientation ensures that the SIM card can be seamlessly placed onto the tray, aligning with the designated area that corresponds to its size and shape.
With the SIM card tray now removed from the Nexus 5 and positioned for the next phase of the installation process, you have achieved a significant milestone in the journey to insert a SIM card into your Nexus 5. This accomplishment sets the stage for the subsequent steps, where we will guide you through the process of placing the SIM card onto the tray, preparing it for seamless integration into the device.
With the SIM card tray successfully removed from the Nexus 5, you are now prepared to advance to the next step, where we will delve into the process of placing the SIM card onto the tray, setting the stage for its secure integration into the device.
Step 5: Place the SIM card on the tray
With the SIM card tray now removed from the Nexus 5 and positioned for the next phase of the installation process, you are ready to proceed with placing the SIM card onto the tray. This step is pivotal in ensuring that the SIM card is seamlessly integrated into the device, setting the stage for uninterrupted connectivity and communication.
Before placing the SIM card onto the tray, take a moment to examine the tray itself. You will notice a designated area that corresponds to the size and shape of the SIM card. This area is precisely engineered to accommodate the SIM card, ensuring a secure and snug fit that minimizes the risk of movement or dislodgment during the device's operation.
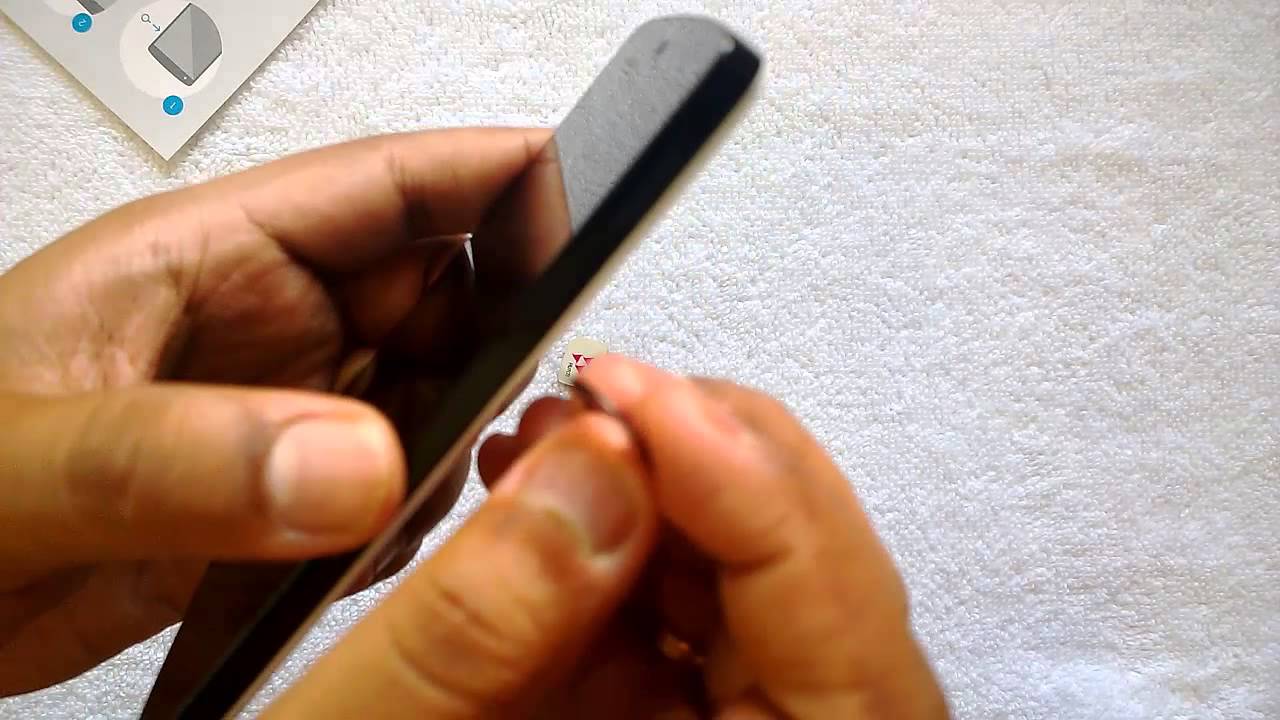
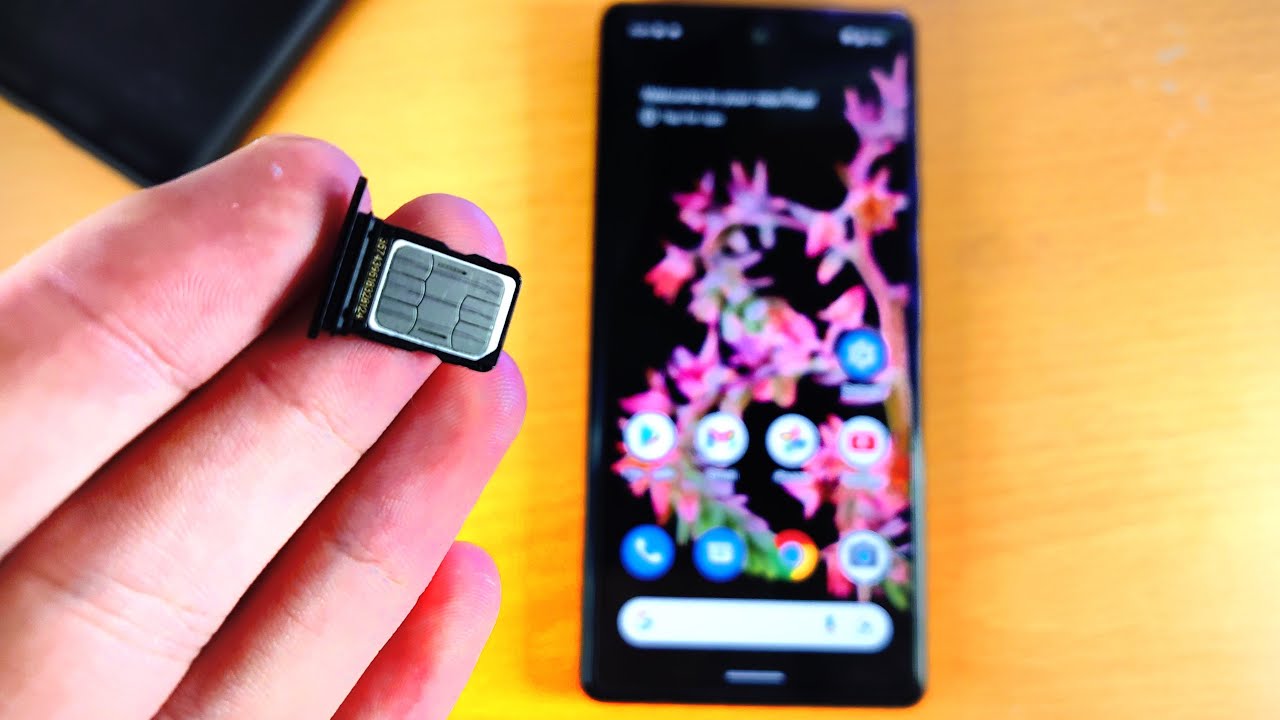
Next, retrieve the SIM card from its storage location, taking care to handle it with delicacy and precision. The SIM card is a small, rectangular chip that contains vital information related to your mobile connectivity. As you hold the SIM card, pay attention to its orientation, noting the positioning of the metallic contacts and any corner indentations that indicate the correct alignment for placement onto the tray.
With the SIM card in hand, align it carefully with the designated area on the SIM card tray, ensuring that it fits snugly within the outlined boundaries. Take note of any notches or grooves on the tray that correspond to the shape of the SIM card, guiding you in achieving the correct alignment.
As you position the SIM card onto the tray, exercise caution and precision, ensuring that it is seated evenly and securely within the designated area. Avoid applying excessive force, as the SIM card's delicate construction requires gentle handling to prevent any damage to its internal components.
Once the SIM card is successfully placed onto the tray, take a moment to verify its positioning, ensuring that it aligns seamlessly with the designated area and that no edges protrude beyond the tray's boundaries. This meticulous attention to detail contributes to the secure integration of the SIM card into the Nexus 5, setting the stage for reliable mobile connectivity.
With the SIM card now securely positioned on the tray, you have accomplished a significant milestone in the process of inserting a SIM card into your Nexus 5. This achievement paves the way for the subsequent step, where we will guide you through the process of reinserting the SIM card tray into the device, setting the stage for seamless connectivity and communication.
Now that the SIM card is securely placed onto the tray, you are prepared to advance to the next step, which will lead you through the process of reinserting the SIM card tray into your Nexus 5, marking a pivotal stage in the completion of the SIM card installation process.
Step 6: Reinsert the SIM card tray
With the SIM card securely placed onto the tray, the next critical step in the process of inserting a SIM card into your Nexus 5 is to reinsert the SIM card tray into the device. This step marks a pivotal stage in the completion of the SIM card installation process, setting the stage for seamless connectivity and communication.
Before reinserting the SIM card tray, take a moment to examine the tray and the slot within the Nexus 5. The tray is designed to slide smoothly back into the device, guided by its designated track. Notice any grooves or notches on the tray that correspond to the internal components of the device, ensuring a precise and secure fit upon reinsertion.
Carefully position the SIM card tray, ensuring that it aligns seamlessly with the slot on the left-hand side of the Nexus 5. The tray should slide in smoothly, guided by its designated track within the device. Exercise caution and precision as you begin to reinsert the tray, maintaining a steady and even motion to prevent any jarring or misalignment that could potentially disrupt the SIM card's positioning.
As the SIM card tray reenters the Nexus 5, you will sense a smooth and secure fit, indicating that the tray is seamlessly integrating back into its position within the device. Ensure that the tray is fully inserted, with no protruding edges or uneven positioning. This meticulous attention to detail contributes to the secure integration of the SIM card tray, ensuring that the SIM card remains firmly in place during the device's operation.
Once the SIM card tray is fully reinserted into the Nexus 5, take a moment to verify its positioning, ensuring that it aligns seamlessly with the slot and that no edges protrude beyond the device's boundaries. This careful verification confirms that the tray is securely integrated into the Nexus 5, setting the stage for uninterrupted mobile connectivity and communication.
With the SIM card tray successfully reinserted into the Nexus 5, you have achieved a significant milestone in the completion of the SIM card installation process. This accomplishment paves the way for the final step, where we will guide you through the process of powering on the Nexus 5, initiating the recognition of the SIM card and unlocking the device's full potential for seamless communication and connectivity.
Now that the SIM card tray is securely reinserted into the Nexus 5, you are prepared to advance to the final step, marking the culmination of the SIM card installation process.
Step 7: Power on the Nexus 5
With the SIM card securely inserted and the tray seamlessly repositioned within the Nexus 5, the final step in the process of inserting a SIM card into your device is to power it on. This pivotal step initiates the device's recognition of the SIM card, setting the stage for seamless connectivity and communication.
To power on the Nexus 5, locate the power button, typically situated on the right-hand side of the device. Press and hold the power button until the device's screen illuminates, indicating that it is booting up. As the Nexus 5 powers on, you will notice the familiar startup sequence, culminating in the display of the device's home screen.
Once the Nexus 5 has fully powered on, observe the screen for any prompts related to the SIM card. Depending on your carrier and the status of the SIM card, the device may display messages indicating the activation or recognition of the SIM card. Pay attention to any on-screen instructions or notifications, as they may provide guidance on additional steps required to complete the SIM card setup.
As the Nexus 5 completes its startup process, navigate to the device's settings to verify the recognition and activation of the SIM card. Access the "Network & Internet" or "Connections" settings, where you can review the status of the SIM card and its associated connectivity. Ensure that the device displays the carrier's name and signal strength, indicating that the SIM card is successfully recognized and operational.
With the Nexus 5 powered on and the SIM card recognized, you have completed the process of inserting a SIM card into your device. This accomplishment marks the seamless integration of the SIM card, unlocking the Nexus 5's full potential for mobile communication and connectivity.
As you proceed to explore the device's features and capabilities, take note of the seamless connectivity enabled by the inserted SIM card. Whether you are making calls, sending messages, or accessing mobile data, the Nexus 5 is now primed to deliver a comprehensive and reliable mobile experience.
By successfully powering on the Nexus 5 and ensuring the recognition of the SIM card, you have set the stage for uninterrupted connectivity and communication. Congratulations on completing the process of inserting a SIM card into your Nexus 5, empowering the device to serve as a versatile and indispensable tool for your mobile communication needs.
Conclusion
In conclusion, the process of inserting a SIM card into your Nexus 5 is a fundamental step that sets the stage for seamless connectivity and communication. By following the comprehensive step-by-step guide outlined in this article, you have successfully navigated the intricacies of integrating a SIM card into your device, empowering the Nexus 5 to serve as a versatile and indispensable tool for your mobile communication needs.
Throughout this guide, you embarked on a journey that encompassed essential tasks, from powering off the device to locating the SIM card tray, utilizing the SIM ejection tool, and carefully placing the SIM card onto the tray. Each step was meticulously crafted to ensure a smooth and successful SIM card installation, setting the stage for uninterrupted mobile connectivity.
As you reinserted the SIM card tray into the Nexus 5 and powered on the device, you initiated the recognition of the SIM card, unlocking the device's full potential for seamless communication and connectivity. The careful attention to detail and precision exhibited throughout the process has culminated in the successful integration of the SIM card, enabling the Nexus 5 to recognize your carrier and provide reliable signal strength.
Moving forward, the Nexus 5 is poised to deliver a comprehensive mobile experience, allowing you to make calls, send messages, and access mobile data with ease. The seamless connectivity enabled by the inserted SIM card ensures that the device serves as a reliable companion for your communication needs, whether in your personal or professional endeavors.
By completing the process of inserting a SIM card into your Nexus 5, you have not only empowered the device to recognize your carrier and provide reliable mobile connectivity but also gained valuable insights into the intricate process of integrating essential components into a modern mobile device. This accomplishment underscores your ability to navigate and optimize the functionality of your Nexus 5, setting the stage for a fulfilling and seamless mobile experience.
As you continue to explore the features and capabilities of the Nexus 5, take pride in the successful completion of the SIM card installation process, knowing that you have equipped the device to fulfill its potential as a versatile tool for your communication needs. Congratulations on successfully integrating a SIM card into your Nexus 5, marking a significant milestone in your journey with this exceptional mobile device.