Introduction
Inserting a SIM card into your iPhone 3GS is a straightforward process that allows you to connect to your cellular network and enjoy the full range of features and services offered by your mobile carrier. Whether you're setting up a new device or replacing an existing SIM card, this step-by-step guide will walk you through the process, ensuring that you can complete the task with ease and confidence.
The iPhone 3GS, known for its sleek design and user-friendly interface, features a dedicated slot for the SIM card. By following the instructions provided in this guide, you'll be able to access this slot and insert your SIM card without any hassle. This essential step is crucial for activating your phone and gaining access to voice calls, text messages, and mobile data services.
As you embark on this journey to insert your SIM card into the iPhone 3GS, it's important to approach the task with patience and precision. While the process is relatively simple, taking the time to familiarize yourself with the steps will ensure a smooth and successful SIM card installation. With the right guidance and a gentle touch, you'll soon have your iPhone 3GS ready to connect with your mobile network and explore the myriad possibilities that the device has to offer.
Now, let's dive into the step-by-step instructions to learn how to locate the SIM card slot, eject the SIM card tray, insert the SIM card, and re-insert the tray, ensuring that you can complete the process with confidence and ease. Let's get started on this exciting journey of setting up your iPhone 3GS for seamless connectivity and communication.
Step 1: Locate the SIM card slot
The first step in inserting a SIM card into your iPhone 3GS is to locate the SIM card slot. This slot is designed to securely house your SIM card, enabling your device to establish a connection with your mobile network. To begin, you'll need to identify the precise location of the SIM card slot on your iPhone 3GS.
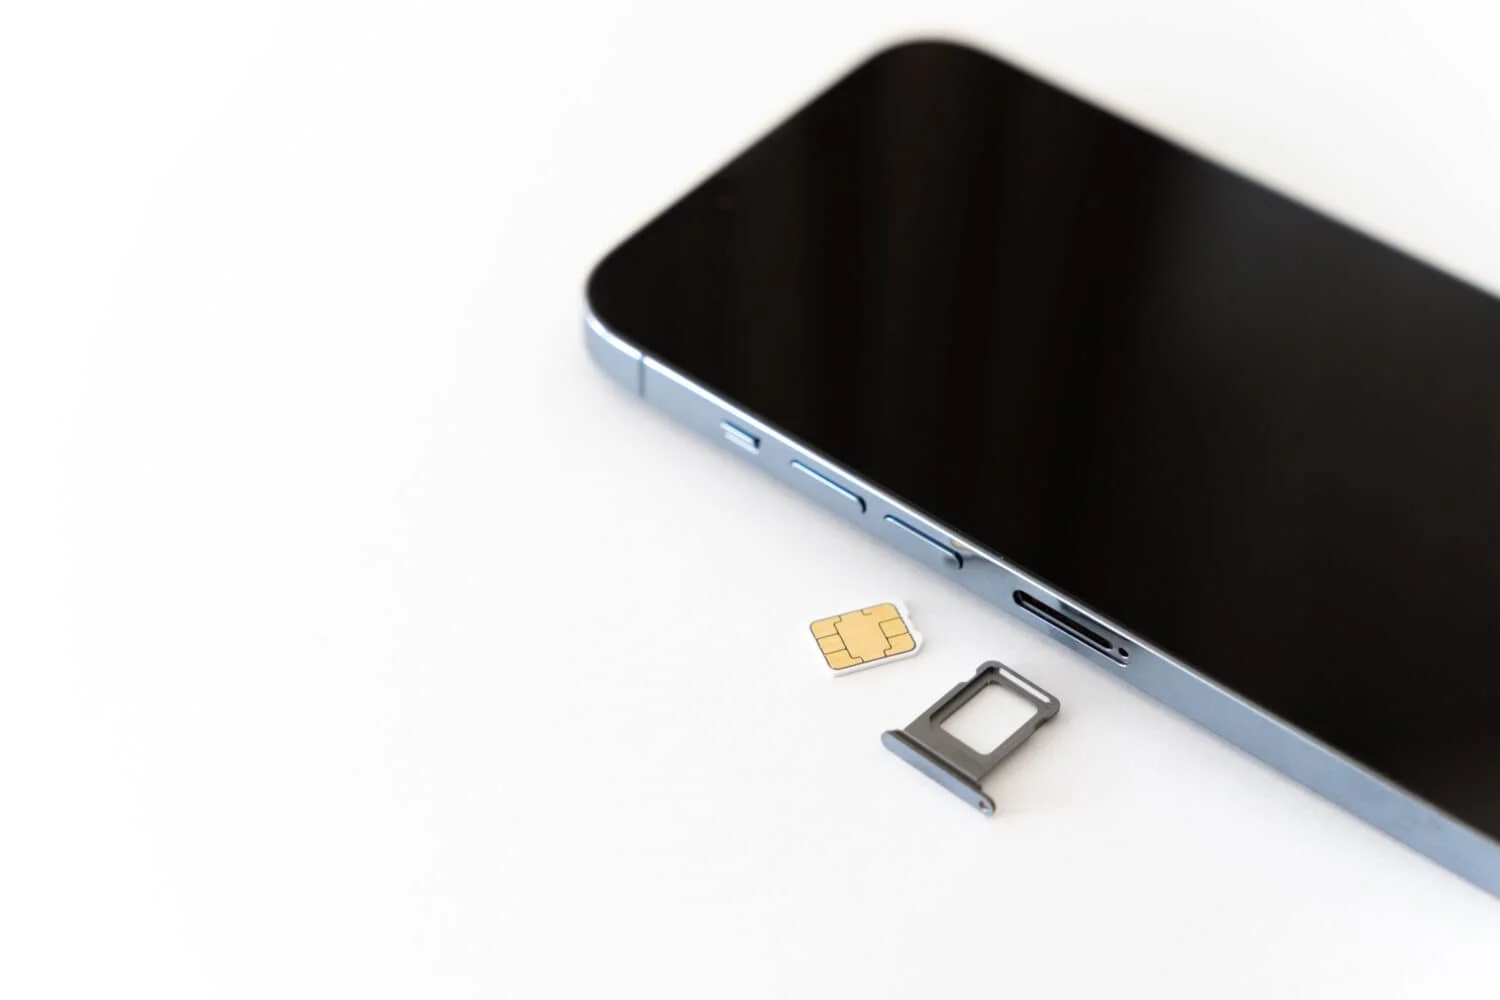
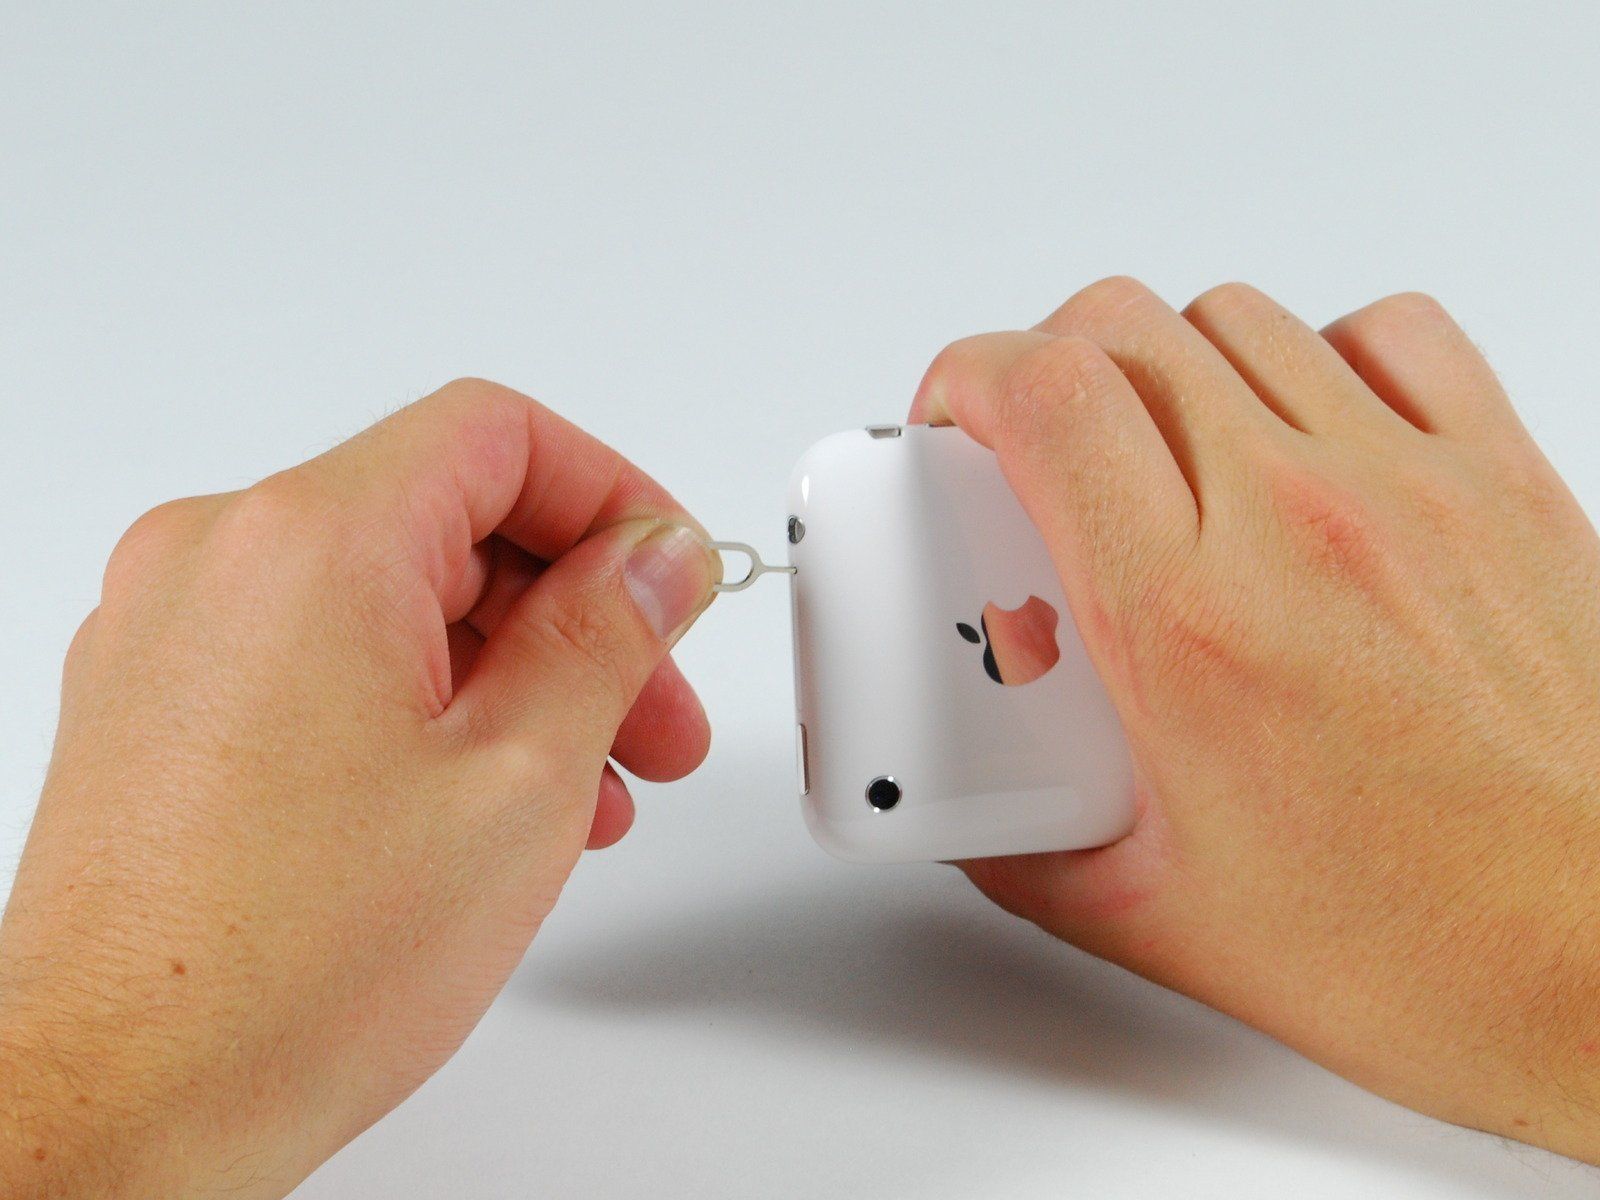
The SIM card slot on the iPhone 3GS is typically situated on the upper edge of the device. It is strategically positioned to provide easy access while ensuring that the SIM card remains securely in place during use. When holding the device in your hand, you'll notice a small, discreet slot on the upper edge. This slot is specifically designed to accommodate the SIM card tray, which holds the SIM card in position within the iPhone 3GS.
To further pinpoint the location of the SIM card slot, look for a tiny pinhole adjacent to the slot. This pinhole serves as the entry point for the SIM card tray ejection tool, allowing you to effortlessly remove the tray and access the SIM card slot. By familiarizing yourself with these key features, you'll be well-equipped to proceed to the next step of the SIM card insertion process.
Locating the SIM card slot is a crucial initial step that sets the stage for a seamless SIM card installation. By identifying the slot's position and understanding its functionality, you'll be prepared to proceed with confidence, knowing that you have successfully completed the first phase of the process.
With the SIM card slot now in sight, you're ready to move on to the next step, where you will learn how to eject the SIM card tray from your iPhone 3GS. This pivotal action will pave the way for the subsequent steps, ultimately leading to the successful insertion of your SIM card into the device. Let's continue our journey toward activating your iPhone 3GS for connectivity and communication by proceeding to the next step in this comprehensive guide.
Step 2: Eject the SIM card tray
Ejecting the SIM card tray from your iPhone 3GS is a pivotal step in the process of inserting a new SIM card or replacing an existing one. This action allows you to access the SIM card slot and prepare it for the subsequent insertion of the SIM card. The iPhone 3GS is engineered with a user-friendly mechanism that facilitates the effortless ejection of the SIM card tray, ensuring a seamless transition as you proceed with the setup process.
To begin, locate the small pinhole adjacent to the SIM card slot on the upper edge of your iPhone 3GS. This pinhole serves as the entry point for the SIM card tray ejection tool, which is included with your device. The ejection tool, typically a slender metal pin, is specifically designed to fit into the pinhole and initiate the release of the SIM card tray.
With the ejection tool in hand, gently insert the pin into the pinhole, applying light pressure to engage the internal mechanism. As you do so, you will feel a slight resistance, indicating that the tool has successfully triggered the release of the SIM card tray. Continuing to apply gentle pressure, the tray will gradually emerge from the slot, allowing you to grasp and fully remove it from the device.
Once the SIM card tray is fully ejected, carefully pull it out of the slot, taking care not to force or tilt it excessively. The tray is designed to slide out smoothly, providing you with easy access to the SIM card slot. As you remove the tray, take note of its orientation, as this will guide you in correctly positioning the SIM card for insertion in the subsequent step.
Ejecting the SIM card tray from your iPhone 3GS is a straightforward process that sets the stage for the seamless insertion of your SIM card. By following these steps with precision and a gentle touch, you can ensure that the tray is safely removed, allowing you to proceed confidently to the next phase of the SIM card installation process.
With the SIM card tray successfully ejected, you are now ready to move on to the next step, where you will learn how to insert the SIM card into the iPhone 3GS. This pivotal action will pave the way for the subsequent steps, ultimately leading to the successful activation of your device for connectivity and communication. Let's proceed with the next step in this comprehensive guide, as we continue our journey toward seamless SIM card installation and device setup.
Step 3: Insert the SIM card
With the SIM card tray successfully ejected from your iPhone 3GS, you are now ready to proceed with the pivotal step of inserting the SIM card into the device. This crucial action will establish the connection between your iPhone 3GS and your mobile network, enabling you to access voice calls, text messages, and mobile data services.
Before proceeding, carefully examine the SIM card tray to identify the correct orientation for placing the SIM card. Note that the tray features a small, designated area that aligns with the size and shape of the SIM card, ensuring a secure fit within the slot. Additionally, the tray may include visual indicators or markings to guide you in positioning the SIM card correctly.
Next, retrieve your SIM card and hold it with gentle precision, taking care to align it with the designated area on the tray. The SIM card is designed to fit securely within the tray, ensuring a stable connection and optimal functionality. Align the notched corner of the SIM card with the corresponding notch on the tray, ensuring a perfect match that facilitates a smooth insertion into the slot.
Once the SIM card is correctly positioned on the tray, gently place it into the SIM card slot on your iPhone 3GS. Exercise caution to ensure that the tray slides smoothly into the slot without any resistance. Applying gentle pressure, carefully push the tray into the slot until it is fully seated, ensuring that the SIM card is securely positioned within the device.
As the SIM card tray is inserted, you may feel a subtle click, indicating that it has been securely placed within the slot. This reassuring confirmation signifies that the SIM card is now successfully installed within your iPhone 3GS, setting the stage for seamless connectivity and communication.
With the SIM card now securely inserted into your iPhone 3GS, you have completed a pivotal phase in the setup process, paving the way for the final step of re-inserting the SIM card tray. This essential action will conclude the SIM card installation process, ensuring that your device is fully prepared to connect with your mobile network and deliver a seamless communication experience.
Now that the SIM card is successfully inserted, you are ready to proceed to the next step, where you will learn how to re-insert the SIM card tray into your iPhone 3GS. This final phase will culminate in the completion of the SIM card installation process, marking a significant milestone in setting up your device for connectivity and communication. Let's move forward with the next step in this comprehensive guide, as we approach the final stage of activating your iPhone 3GS for seamless connectivity and communication.
Step 4: Re-insert the SIM card tray
With the SIM card securely inserted into your iPhone 3GS, the final step in the SIM card installation process involves re-inserting the SIM card tray into the device. This essential action will conclude the setup process, ensuring that your iPhone 3GS is fully prepared to establish a seamless connection with your mobile network and deliver a comprehensive communication experience.
To begin, carefully align the SIM card tray with the slot on the upper edge of your iPhone 3GS, ensuring that it is positioned correctly for re-insertion. Take note of the orientation of the tray, as it should align perfectly with the slot to facilitate a smooth and secure fit.
Gently slide the SIM card tray back into the slot, applying light pressure to guide it into place. As you do so, ensure that the tray moves smoothly and seamlessly, indicating that it is aligning properly with the slot. Exercise caution to avoid any tilting or misalignment during the re-insertion process, as this may hinder the tray from seating securely within the device.
Once the SIM card tray is fully inserted, take a moment to ensure that it is seated securely within the slot. Confirm that the tray sits flush with the edge of the device, indicating that it is properly positioned and ready for regular use. This visual confirmation provides reassurance that the SIM card tray is securely in place, setting the stage for uninterrupted connectivity and communication.
As the SIM card tray is re-inserted into your iPhone 3GS, you may feel a subtle click, signifying that it has been securely positioned within the slot. This reassuring indication serves as confirmation that the setup process has been successfully completed, marking a significant milestone in preparing your device for seamless connectivity and communication.
With the SIM card tray securely re-inserted, you have now completed the final step in the SIM card installation process for your iPhone 3GS. Your device is now fully equipped to connect with your mobile network, allowing you to enjoy voice calls, text messages, and mobile data services without any hindrance.
By following these step-by-step instructions with precision and care, you have successfully completed the process of inserting a SIM card into your iPhone 3GS. Your device is now ready to empower you with seamless connectivity and communication, providing access to a wide range of features and services offered by your mobile carrier.
Conclusion
Congratulations! You have successfully completed the process of inserting a SIM card into your iPhone 3GS. By following the step-by-step instructions outlined in this comprehensive guide, you have equipped your device to establish a seamless connection with your mobile network, enabling you to enjoy a wide range of communication services and mobile capabilities.
The journey of inserting a SIM card into your iPhone 3GS has been a testament to the user-friendly design and intuitive functionality of the device. From locating the SIM card slot to re-inserting the SIM card tray, each step has been meticulously crafted to ensure a smooth and hassle-free experience. With patience and precision, you have navigated through the setup process, demonstrating your commitment to seamlessly activating your device for connectivity and communication.
As you reflect on the completion of this essential task, it's important to recognize the significance of the SIM card in enabling your iPhone 3GS to fulfill its potential as a versatile communication tool. The SIM card serves as the gateway to your mobile network, facilitating voice calls, text messaging, and data connectivity. By inserting the SIM card with care and attention to detail, you have set the stage for uninterrupted access to these essential services, empowering your device to serve as a reliable companion in your daily endeavors.
Furthermore, the successful installation of the SIM card underscores your dedication to maximizing the capabilities of your iPhone 3GS. With the SIM card securely in place, you are poised to explore the myriad features and functionalities offered by your device, leveraging its seamless connectivity to stay connected with friends, family, and the digital world at large.
As you embark on your journey with your newly activated iPhone 3GS, take pride in the accomplishment of completing the SIM card installation process. Your device is now primed to deliver a comprehensive communication experience, seamlessly bridging the gap between you and the vast network of possibilities that await in the digital realm.
With the SIM card securely inserted and the setup process successfully concluded, your iPhone 3GS stands ready to accompany you on your daily adventures, keeping you connected and informed every step of the way. Embrace the boundless potential of your device, and may it serve as a reliable companion in your pursuit of connectivity, communication, and discovery.
As you venture forward with your iPhone 3GS, remember that the successful completion of the SIM card insertion process is a testament to your ability to navigate through essential setup tasks with confidence and precision. Your device is now fully equipped to empower you with seamless connectivity and communication, allowing you to harness its full potential as a versatile and indispensable tool in your modern lifestyle.